
Texture Render Targets
Description
This section explains how to handle Texture Render Targets in 2D and 3D.
Example Solutions
- TextureRenderTargetsSolution in folder cgi_studio_player/content/Tutorials/07_RenderTargetsCameras
- MixedRenderTargetsSolution in folder cgi_studio_player/content/Tutorials/07_RenderTargetsCameras
Define Texture Render Targets
To illustrate the usage of an OffScreenTarget2D, open the solution cgi_studio_player/content/Tutorial/07_RenderTargetCameras/TextureRenderTargetsSolution.
Offscreen Scene Content
First of all, "offscreen" scenes must be defined, which shall later be rendered into textures:
- OffscreenScene2D: This 2D scene contains a white box with the text "2D" in it.
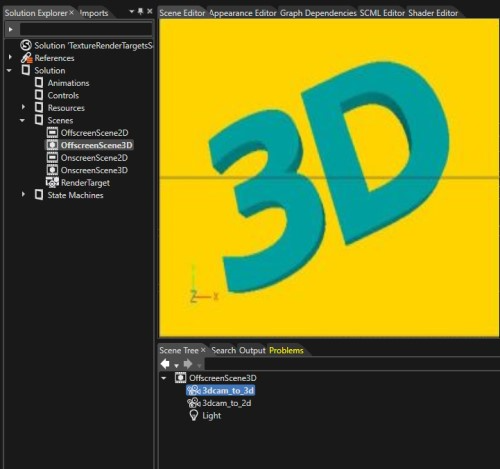
- OffscreenScene3D: This 3D scene contains a Text3DWidget with text "3D" and a light.
Offscreen Scene Cameras
Next, cameras must be defined for rendering the offscreen scenes into textures.
In case of the OffscreenScene2D, two different cameras are defined:
- 2dcam_to_2d: This camera will be linked to a OffscreenRenderTarget2D, for rendering into a 2D texture.
- 2dcam_to_3d: This camera will be linked to a OffscreenRenderTarget2Dto3D, for rendering into a 3D texture.
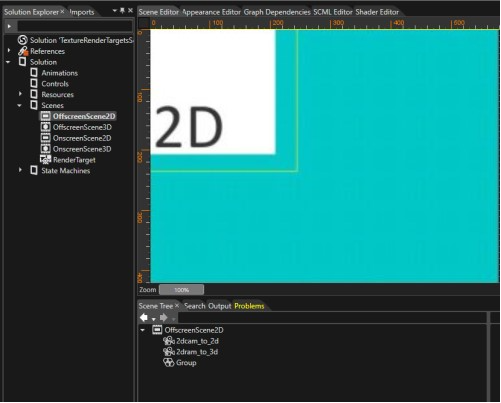
Similarly, the OffscreenScene3D defines following two cameras:
- 3dcam_to_3d: This camera will be linked to a OffscreenRenderTarget3D, for rendering into a 3D texture.
- 3dcam_to_2d: This camera will be linked to a OffscreenRenderTarget3Dto2D, for rendering into a 2D texture.
Define Offscreen Render Targets
Finally, all the cameras from Offscreen scenes must be linked to the related offscreen render targets, for rendering the content of offscreen scenes:
- OffscreenTarget2D: 2D render target for the text "2D"
- OffscreenTarget2Dto3D: 3D render target for the text "2D"
- OffscreenTarget3D: 3D render target for the text "3D"
- OffscreenTarget3Dto2D: 2D render target for the text "3D"
Use Texture Render Targets
Use Texture Render Targets in a 2D Scene
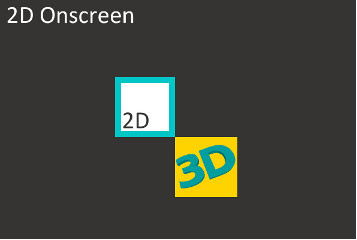
The 2D scene "OnscreenScene2D" is rendered on a DisplayRenderTarget2D and shall include the render outputs from both the 2D and 3D offscreen scenes.
For this, bitmap nodes are defined in this scene which use the following offscreen render targets as textures:
- OffscreenTarget2D
- OffscreenTarget3Dto2D
Use Texture Render Targets in a 3D Scene
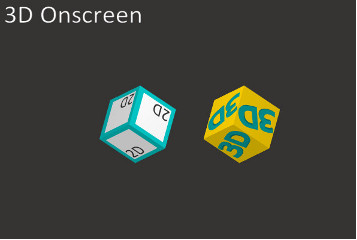
The 3D scene "OnscreenScene3D" is rendered on a DisplayRenderTarget3D and shall include the render outputs from both the 2D and 3D offscreen scenes.
For this, two cubes are defined in this scene which use the following offscreen render targets as textures:
- OffscreenTarget3D
- OffscreenTarget2Dto3D
Composition Camera Property Set
The Composition Camera property of the DisplayRenderTarget3D and DisplayRenderTarget2D render targets must be set to the camera linked with RenderTargetOwner. These is mandatory for rendering the composed contend of the two display render targets.
-
The Layer property must be correctly set for Candera::SoftwareLayer render targets (DisplayRenderTarget3D and DisplayRenderTarget2D). The layers must have different values, with the lowest value for the lowest layer.
Example Solution
Another example of using Texture Render targets can be seen in the tutorial solution cgi_studio_player/content/Tutorials/07_RenderTargetsCameras/MixedRenderTargetsSolution.
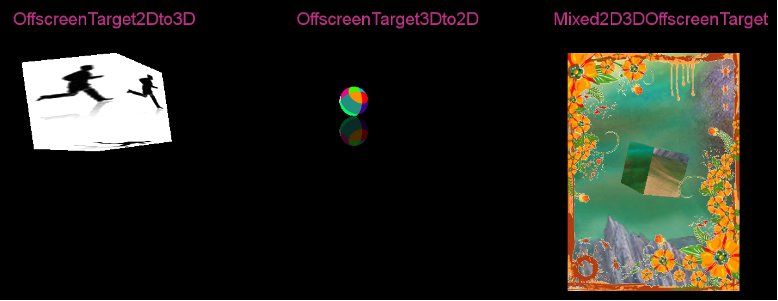
OffscreenTarget2Dto3D, OffscreenTarget3Dto2D and Mixed2D3DOffscreenTarget render targets are used as texture for 3D meshes or as Image for BitmapBrush effects. The Mixed2D3DDisplayTarget is linked to the display and can be used for 2D and/or 3D content. In the tutorial solution MixedRenderTargetsSolution there are two cameras (2D and 3D) attached to the Mixed2D3DDisplayTarget. The resulted image on display shows the content of the both scenes overlapped.
-
Rules to configure multiple cameras attached to a render target
- Camera 2D: Clear Color Buffer = false; Enable Swapping = true
- Camera 3D: Clear Color Buffer = true; Enable Swapping = false
The pictures from this tutorial where obtained from the following sources:
[1] www.shutterstock.com/pic-12442312/stock-vector-a-business-man-runs-amp-power-walks-to-success-in-animation-sequence-frame-loops-with.html