
Multi Pass Effects in Candera > Examples for Local 3D Effect Shaders
Description
This chapter describes special 3D effect shaders techniques supported by Candera.
Fur
Description
This chapter describes how to generate the fur effect using the multipass appearance technique supported by Candera.
Introduction
The fur effect is produce by rendering the node multiple times with different appearances which are blended together. Each appearance will use the same combination of noise and color map textures but with different and specific render states. For each appearance the following uniforms will have to be set specifically: [1]
- u_ColorScale - fur color scale.
- u_Scale - scale factor to manipulate vertices along normals
- u_PassIndex - render pass index
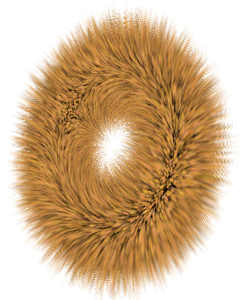
Workflow
Appearances
Because the generation of the fur effect implies that the node has to be rendered multiple times, a special appearance needs to be used: Candera::MultiPassAppearance. The particularity of this appearance is that it keeps a pointer to the next appearance, defining so a sequence of render passes.
-
A nice fur effect is obtained with at least 10 render passes.
    for (int i = 0; i<= 15; i++) {
        m_furAppearances[i] = MultiPassAppearance::Create();
        // Configure the appearances
        // ...
        // End of appearances configuration
        if (i > 0) {
            m_furAppearances[i-1]->SetNextPass(m_furAppearances[i]);
        }
    }
    mesh->SetAppearance(m_furAppearances[0]);
Shader
The table below presents the vertex and fragment shader needed to generate the fur effect:
| Vertex shader | RefTransFur |
| Fragment shader | RefUniColorTexFur |
Set this shader for all the appearances:
m_furAppearances[i]->SetShader(m_furShader);
-
Lighting and material has no influence on the fur effect.
Shader Parameters Setter
Configure the uniforms setter as follows:
        m_furSetter[i] = GenericShaderParamSetter::Create();
        m_furSetter[i]->SetModelViewProjectionMatrix4Enabled(true);
        m_furSetter[i]->SetLightActivationEnabled(true);
        m_furSetter[i]->SetMaterialActivationEnabled(true);
        m_furSetter[i]->SetTextureActivationEnabled(true);
Prepare the uniforms data:
        m_furColorScale[0] = 0.2196f;
        m_furColorScale[1] = 0.2202f;
        m_furColorScale[2] = 0.2202f;
        m_furColorScale[3] = 1.0f;

        if ( i == 0 ) {
            m_furScale = 1.0f;
        }
        else {
            m_furScale = 0.01f;
        }
        m_passIndex[i] = ((Float) i);
Set the uniforms using the shader parameter setter:
        m_furSetter[i]->SetUniform("u_ColorScale",Shader::FloatVec4,m_furColorScale);
        m_furSetter[i]->SetUniform("u_Scale",Shader::Float,&m_furScale);
        m_furSetter[i]->SetUniform("u_PassIndex",Shader::Float,&m_passIndex[i]);
Material Configuration
        if ( i == 0) {
            m_furAppearances[i]->SetMaterial(Material::Create());
        }
        else {
            m_furAppearances[i]->SetMaterial(m_furAppearances[0]->GetMaterial());
        }
Noise texture
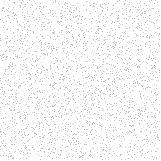
Set the fur appearance noise texture:
m_furAppearances[i]->SetTexture(m_furNoise, 0);
Color map texture
The color map texture is meant to provide a color for the fur.
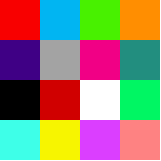
Set the fur appearance color map texture:
m_furAppearances[i]->SetTexture(m_furColor, 1);
Render Mode
Set and configure a Render Mode for all transparency layers (appearances 1 to 15).
    if (i > 0) {
        m_furAppearances[i]->GetRenderMode()->SetBlendingEnabled(true);
        m_furAppearances[i]->GetRenderMode()->SetBlendMode(RenderMode::SourceAlpha, RenderMode::One, RenderMode::Add);
    }
Example
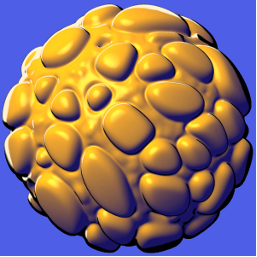
Here is exemplified the fur effect applied on sphere:
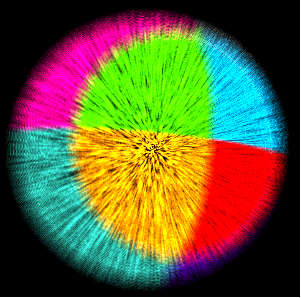
Fur Effect in SceneComposer
To experiment with the fur effect in SceneComposer use solution ShaderExamples from folder cgi_studio_player/content/Tutorials/04_ShaderUsage.
References
[1] Image taken from http://www.xbdev.net/directx3dx/specialX/Fur/index.php
Gooch Effect
Description
This chapter describes how to generate the Gooch effect using the multipass appearance technique supported by Candera.
Introduction
Gooch Effect
The Gooch effect is a non photorealistic technique which simulates the appearance of technical illustration.
The effect is generated in two render passes. In the first pass the object is drawn in warm - cool colors: all surfaces that are facing toward the light source are drawn in warm colors (red, yellow etc), all surfaces away from the light source are drawn in cool colors (blue, violet etc.). The second render pass draws the silhouette of the object with a fixed color (e.g. black). [1]
Workflow
Inventory
In order to generate the Gooch effect on a node you need:
- Two MultiPassAppearances
- Specific shader for each appearance
- Specific shader parameters setter for each appearance
- Material
- Render Modes
Appearances
The Gooch effect is generated in two render passes so we need two MultiPassAppearances:
    m_goochAppearance1 = MultiPassAppearance::Create();
    m_goochAppearance2 = MultiPassAppearance::Create();
    m_goochAppearance1->SetNextPass(m_goochAppearance2);

    m_mesh->SetAppearance(m_goochAppearance1);
Shader
Each appearance need a specific shader, see table below:
| Appearance | Vertex shader | Fragment shader |
|---|---|---|
| m_goochAppearance1 | RefTransLight1Gooch | RefGoochShading |
| m_goochAppearance2 | RefTransScale | RefUniColor |
Set the shader for each appearance:
    m_goochAppearance1->SetShader(m_goochPass1Shader);
    m_goochAppearance2->SetShader(m_goochPass2Shader);
Shader Parameter Setter
The uniform setter will have to be set as follows:
    m_goochUniformSetter1 = GenericShaderParamSetter::Create();
    m_goochUniformSetter1->SetMaterialActivationEnabled(true);
    m_goochUniformSetter1->SetLightActivationEnabled(true);
    m_goochUniformSetter1->SetLightsCoordinateSpace(Light::World);
    m_goochUniformSetter1->SetModelViewProjectionMatrix4Enabled(true);
    m_goochUniformSetter1->SetModelMatrix4Enabled(true);
    m_goochUniformSetter1->SetNormalModelMatrix3Enabled(true);
    m_goochUniformSetter1->SetCameraPositionEnabled(true);
    m_goochAppearance1->SetShaderParamSetter(m_goochUniformSetter1);

    m_goochUniformSetter2 = GenericShaderParamSetter::Create();
    m_goochUniformSetter2->SetModelViewProjectionMatrix4Enabled(true);
    m_goochAppearance2->SetShaderParamSetter(m_goochUniformSetter2);
Prepare uniform data:
    m_coolDiffuseWeight= 0.25f;
    m_warmDiffuseWeight = 0.5f;
    m_goochScale = 0.1f;

    m_coolColor[0] = 0.0f;
    m_coolColor[1] = 0.0f;
    m_coolColor[2] = 0.55f;
    m_coolColor[3] = 1.0f;

    m_warmColor[0] = 0.3f;
    m_warmColor[1] = 0.3f;
    m_warmColor[2] = 0.0f;
    m_warmColor[3] = 1.0f;

    m_silhouetteColor[0] = 0.0f;
    m_silhouetteColor[1] = 0.0f;
    m_silhouetteColor[2] = 0.0f;
    m_silhouetteColor[3] = 1.0f;
Set the uniforms:
    m_goochUniformSetter1->SetUniform("u_CoolDiffuseWeight", Shader::Float, &m_coolDiffuseWeight);
    m_goochUniformSetter1->SetUniform("u_WarmDiffuseWeight", Shader::Float, &m_warmDiffuseWeight);
    m_goochUniformSetter1->SetUniform("u_CoolColor", Shader::FloatVec4, m_coolColor);
    m_goochUniformSetter1->SetUniform("u_WarmColor", Shader::FloatVec4, m_warmColor);

    m_goochUniformSetter2->SetUniform("u_Scale", Shader::Float, &m_goochScale);
    m_goochUniformSetter2->SetUniform("u_Color", Shader::FloatVec4, m_silhouetteColor);
Material Configuration
    m_goochAppearance1->SetMaterial(Material::Create());
    m_goochAppearance1->GetMaterial()->SetDiffuse(Color(0.75f, 0.75f, 0.75f, 1.0f));
    m_goochAppearance1->GetMaterial()->SetAmbient(Color(0.0f, 0.0f, 0.0f, 0.0f));
    m_goochAppearance1->GetMaterial()->SetSpecular(Color(1.0f, 1.0f, 1.0f, 1.0f));
    m_goochAppearance1->GetMaterial()->SetSpecularPower(20.0f);

    m_goochAppearance2->SetMaterial(Material::Create());
Render Mode
    m_goochAppearance1->SetRenderMode(RenderMode::Create());
    m_goochAppearance1->GetRenderMode()->SetCulling(RenderMode::BackFaceCulling);

    m_goochAppearance2->SetRenderMode(RenderMode::Create());
    m_goochAppearance2->GetRenderMode()->SetCulling(RenderMode::FrontFaceCulling);
Example
Here is exemplified the Gooch effect:
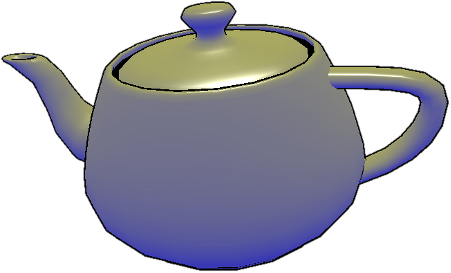
Gooch Effect in SceneComposer
To experiment with the Gooch effect in SceneComposer use solution ShaderExamples from folder cgi_studio_player/content/Tutorials/04_ShaderUsage.