
Advanced Cluster Part 1
This section of the Best Practice describes how to configure the render target for this solution. It shows how to imported images via [Import Resources]. Some of these images will be used in controls later. In order for them to correctly fit e.g. into a Gauge control they need to have their pivot point adjusted. Finally, a Custom Gauge control will be created based on Scene Composer's built-in Gauge control.
Create Solution and Setup Render Target
A new empty solution will be created and the render target configuration is performed.
- Create a new solution using the Empty Solution template and save it as shown in Creating a new Solution.
- A new solution is created and saved.
- A new solution is created and saved.
- In the Solution Explorer panel on the top left select "Scene3D" (under "Solution - Scenes") and delete it either using the <Del> key or via the context menu [Delete] as described in Delete a Scene.
- A [Delete Items] dialog will popup.
- A [Delete Items] dialog will popup.
- Please resolve all dependencies with [Delete Usage Item] (which is the default) and click [OK].
- Scene3D will be deleted.
- Scene3D will be deleted.
- Activate the Render Targets panel on the top right and select [Display (0)]. In the Properties panel below change the display's X and Y Resolution.
- The horizontal and vertical resolution of the display is defined.
- The aspect ratio of the display will be calculated automatically.
Target Item Setting Value X Resolution 1680 Y Resolution 720
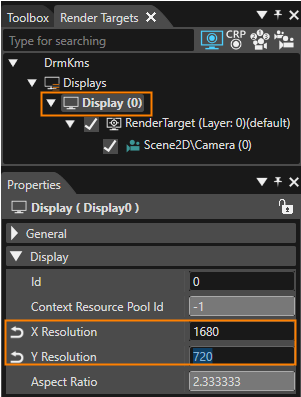
- In the Render Targets panel select Scene2D\Camera (0). In the Properties panel check the checkbox to Enable Swapping.
- Swapping has been enabled for Scene2D's camera.
- The display will be refreshed after each time this scene is rendered.
Camera Enable Swapping Scene2D\Camera(0) TRUE 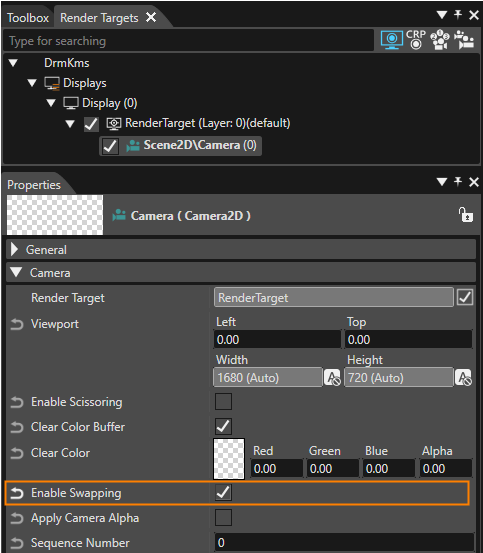
Import Images and Configure Pivot Hints
The images needed for this solution will be imported. They will later be used to build up the gauge control. For correct positioning and alignment inside the control, the Pivot Hints for these images need to be configured. Additionally, the Custom_Gauge control will be created.
- In the menu bar choose [Import] - [Import Resources...] as described in How to Import Resources.
- [Import Resources] dialog will be opened
- [Import Resources] dialog will be opened
- Navigate to the following folder, select all files provided in this folder and press [Open].
<cgi-studio-root>/cgi_studio_content/Resources/AdvancedCustomGauge- [Import Images] dialog will be opened as seen in the image below the next step.
- Use the settings as shown in the screenshot below and press [OK].
- The images have been imported into the solution and are ready to be used.
Select an item in the Solution Explorer panel to access its properties in the Properties panel.
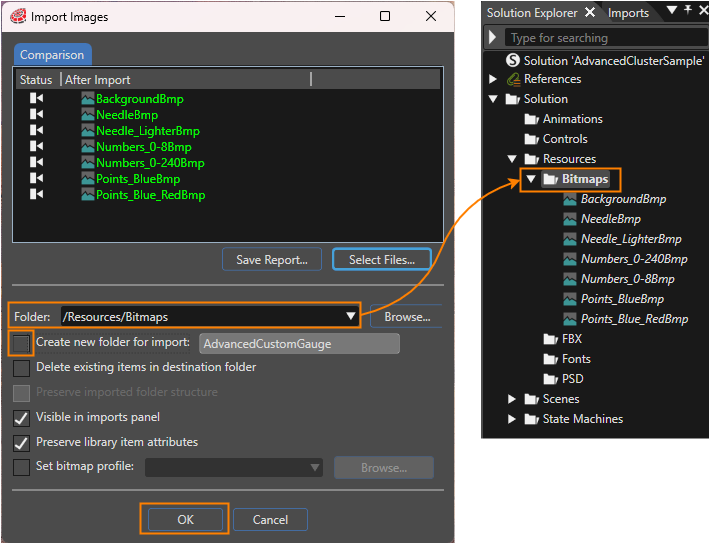
- The images have been imported into the solution and are ready to be used.
- To configure the Pivot Hint, select the image in the Solution Explorer panel. In the Properties panel under [Bitmap] you can adjust the image's Pivot Hint settings. Configure the images with the values given in the table below.
- The images' Pivot Hints are correctly configured to be used in Scene Composer's Gauge Control: The needle images' Pivot Hints are their central point of rotation. The other images' Pivot Hints are configured to align the images correctly in the Gauge Control.
Image Enable Pivot Hint Pivot Hint X Y NeedleBmp TRUE 17.50 250.00 Needle_Lighter TRUE 241.00 245.00 Numbers_0-24Bmp TRUE 325.00 329.00 Numbers_0-8Bmp TRUE 325.00
329.00 Points_BlueBmp TRUE 282.00 282.00 Points_Blue_RedBmp TRUE 282.00 282.00 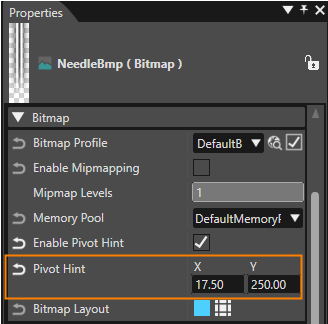
- The images' Pivot Hints are correctly configured to be used in Scene Composer's Gauge Control: The needle images' Pivot Hints are their central point of rotation. The other images' Pivot Hints are configured to align the images correctly in the Gauge Control.
- In the Toolbox panel's [Controls] section under "Common" copy the Gauge Control either via the context menu entry "Copy" or via the keyboard <Ctrl>+C. Paste the Gauge Control into the Solution Explorer's folder "Solution > Controls" either via the context menu entry "Paste" or via the keyboard <Ctrl>+V.
- A copy of the Gauge Control has been created in the Scene Composer solution's Controls folder.
- A copy of the Gauge Control has been created in the Scene Composer solution's Controls folder.
- In the Solution Explorer panel rename the newly copied Gauge to "Custom_Gauge" either via the context menu entry "Rename" or via the keyboard <F2>.
- The copy of the Gauge Control in the Solution Explorer's Controls folder is called "Custom_Gauge".
The image below shows where to copy the Gauge Control from and where to copy it to.
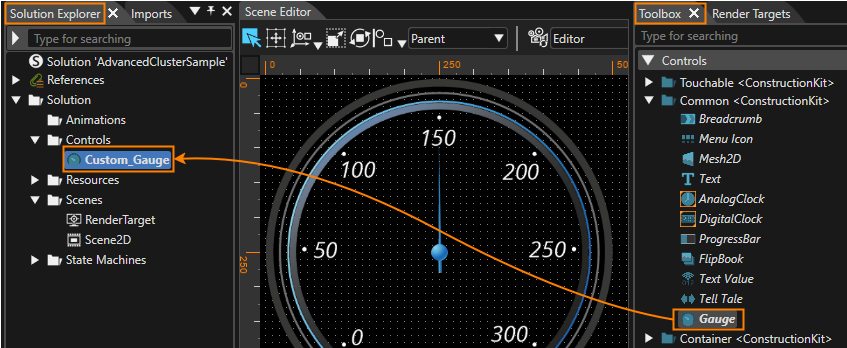
- The copy of the Gauge Control in the Solution Explorer's Controls folder is called "Custom_Gauge".