
2D Scene Editor
The "Scene Editor" is the main panel of the application in which scenes and animations are displayed ("render view"). It is the only panel that cannot be closed.
See Also : 2D Editing Helpers
General
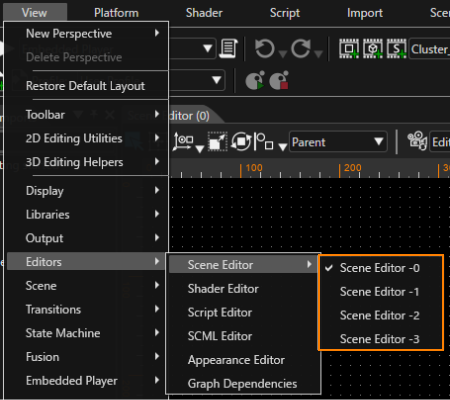
By default, only one Scene Editor is displayed (Scene Editor -0 only). You can display up to four Scene Editors (Scene Editor -0 to -4) as needed. You can show or hide them from the menu bar [ View > Editors > Scene Editor ].
- Scene Editor menu on the Menu Bar
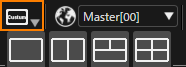
- The [ Display Scene Editor ] icon on the toolbar

When you click the [ Display Scene Editor ] icon, four icons will appear for toggling the visibility of the Scene Editor. Please refer to the table below for details on each icon.
When a display setting not listed in the table above is applied in the Scene Editor menu on the Menu Bar, the [ Display Scene Editor ] icon will display "Custom".
The Scene Editor -0 is displayed. 
The Scene Editors -0 and -1 are displayed. 
Scene Editors -0 through -2 are displayed. 
Scene Editors -0 through -3 are displayed.
Additionally, scene editors (1) to (3) support floating display. By using floating display, you can display any scene editor on a separate display.
If the displayed Scene (or Control) is updated, it will be reflected in all Scene Editors.
The following is an explanation of the scene editor tool icons.
Camera Manipulation
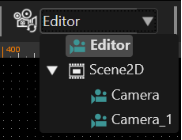
The Camera combo box provides the following camera views for a 2D scene:
- Editor camera: A default camera named "Editor", which can be used to edit the scene including all scene cameras from an outer perspective.
- Scene cameras: Further, each camera part of the scene is listed in the combo box. If a scene camera is selected, the scene is displayed from that camera's perspective. Scene cameras are created by dragging an item of type "Camera" from the Toolbox panel and dropping it into the Scene Tree panel.
-
In scene camera view, the camera properties can only be edited in the "Properties" panel.
Camera Panning and Zooming
The scene content displayed in the Scene Editor can be modified like this when in Editor mode:
- Panning: Move the mouse while holding the middle mouse button down;
or move the mouse while holding the <CTRL> and <SHIFT> keys and the left mouse button - Zooming: Rotate the mouse wheel forward for zooming in and backward for zooming out
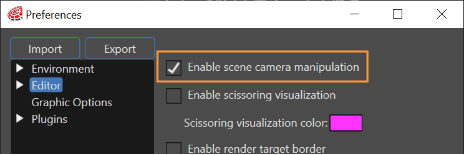
To enable panning and zooming also for scene cameras, a preference option is available:
- Tick "Enable scene camera manipulation" in the "Editor Preferences" dialog opened from File-Preferences menu option.
It is possible to zoom any 2D scene oriented towards a point indicated by the cursor (similar with Google Earth zoom). By placing the cursor on any point in a 2D scene, when zooming operation is doing the whole scene towards that selected point.
Fit to Screen
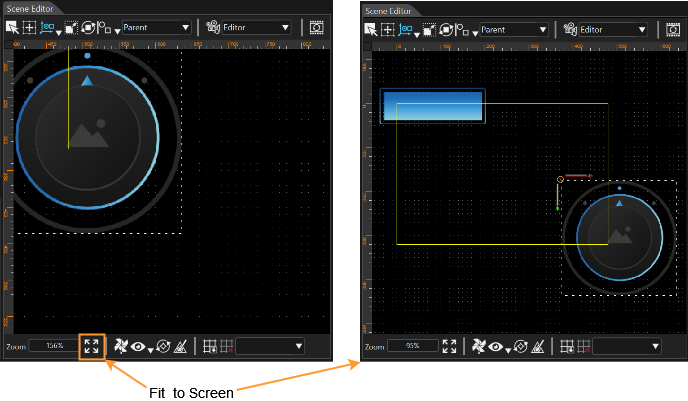
When zooming or panning the editor camera of a 2D scene or a 2D Control, parts of your scene or Control might get out of sight.
To display the entire content of your 2D scene or 2D Control in the Scene Editor window, click the "Fit to Screen" button. All objects of the scene or control will become visible - even those outside the yellow viewport rectangle.
Reset Camera
Use the "Reset Camera" button left to the Camera combo box to reset the selected view to the default location and orientation.
Camera Preview Thumbnail
Even though the current selected camera is the Perspective camera, it is possible to see the content displayed by other camera in the thumbnail available in property grid. If the camera is not associated to a render target, the preview will be done on a fixed size virtual render target surface:
- 512x512px for 2D cameras
If the camera is associated to a render target, the preview will be generated:
- on a surface of the same dimensions and then reduced to a thumbnail image - for 2D cameras
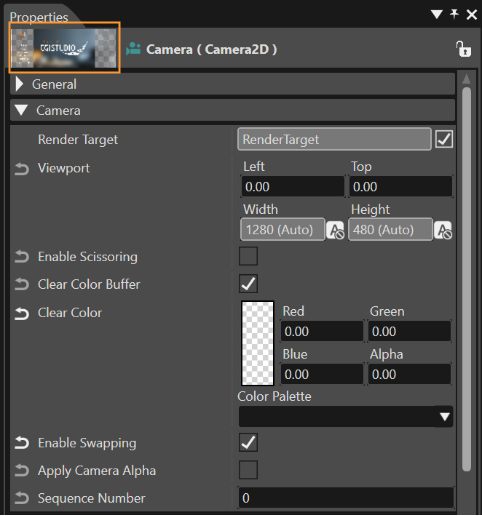
By selecting the camera whose perspective should be viewed in the Scene Tree, the camera preview thumbnail will be displayed in the property grid.
-
The "Alpha Blend Factor" and the "Alpha Destination Blend Factor" in the Default Render Mode Configuration should be set properly. For instance, the former value could be InverseSourceAlpha and the latter value could be DestColor.
Picking and Transforming Items
In the Scene Editor, an item can be picked by clicking on it. After picking, the bounding box of the item is displayed together with the pivot point, and it is selected in the "Scene Tree" panel:

-
Groups cannot be picked in the render view; they need to be selected in the "Scene Tree" panel. The "Scene Editor" and "Scene Tree" panels are synchronized in terms of the selected item.
Interaction Modes: Selection, Edit the margin of objects inside a layout, Translate, Rotate, Scale
In the Toolbar, the following interaction modes are available for 2D scenes:
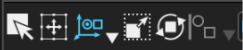
Select
Edit the margin of objects inside a layout
For more information about this, please refer to Adorners.
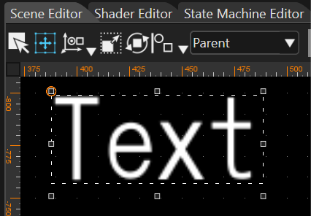
Translate
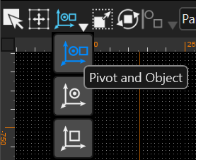
Three options are available for this mode:
- "Pivot and Object" will move the selected object with its pivot
- "Only object" will move only the object selected and
- "Pivot only" will move only the pivot of the selected object.
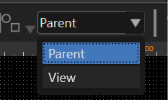
In Translate mode, another feature is the "Translation System" that allows choosing between Parent and View reference system. When Parent system is selected, the reference system is the coordinate system of the scene. Otherwise, the reference system is the coordinate system of the selected object. In both cases the object can be moved by using the arrow keys.
Scale
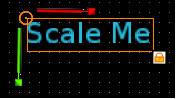
The scale gizmo is represented in a similar way as the translation gizmo:
Move the mouse while pressing left mouse button to translate, rotate or scale the selected object in the render view. The modification of the properties is also reflected in the "Properties" panel for the selected item.
The scale gizmo contains four controllers:
- the object itself
- X axis controller - when dragging the axis, the object will be scaled on the local x axis
- Y axis controller - when dragging the axis, the object will be scaled on the local y axis
- Lock scaling controller - displayed on the lower right corner of the render node. When dragging it, the object will be scaled proportional on each axis.
Rotate
In this mode, a rotation gizmo is represented by a circle:
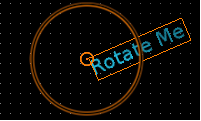
Usually the object is freely rotated except the situations when the rotation angle is close to a fixed angle controlled by a tolerance. The tolerance defines the range between two multiple values where the object can freely rotate without being snapped.
- the fixed angle values shall be multiples of 45
- the angle snapping tolerance shall be 22.5 degrees.
Move Elements with Arrows Keys
Any element can be moved/scaled/rotated by using arrows. After the selection of the object use the Left, Right, Up and Down arrows to get the desired results.
Unselect an Item
The camera cannot be manipulated and vice versa when an item is selected.
Unselect an item by hitting the Esc key.
Please refer to section 2D Editing Helpers for further information.