
Transitions Solution
Summary
This solution showcases Transitions in SceneComposer. Therefore different types of transition are used for replacing a scene with another scene. It shows how using a transition provides continuity so that the scene change is not quite so abrupt. Note that the Player has to be used to run the sample appropriately because only the Player supports Transitions.
Purpose
The user gets an impression of what can be done by using Transitions.
Tutorial
This section explains how to confirm the effect of the transitions set in this solution.
Confirmation and editing the set transitions
Open the Transition Rules Editor via the menu
[ View ] - [ Transitions ] - [ Transition Rules Editor ].
Here you can view and edit the configured transition rules.
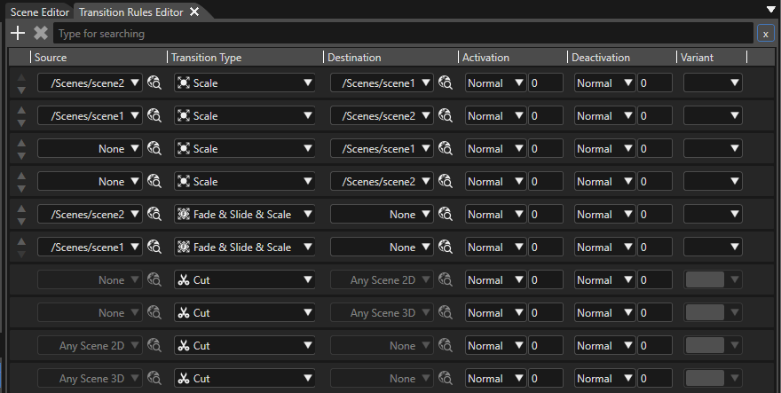
For details on how to use the Transition Rules Editor, please refer to Transition Rules Editor.
How to confirm the transition effects
- Click on the play button to [ Play the scenario... ]
- This will open the CGI Panel.
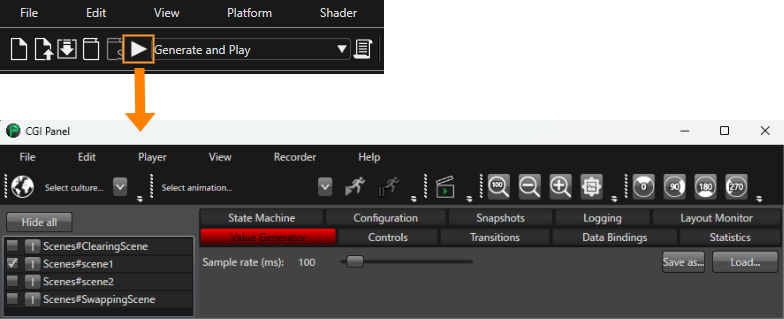
- This will open the CGI Panel.
- In the left panel of the CGI Panel, check "Scene#ClearingScene" and "Scene#SwappingScene"
- "Scene#ClearingScene" and "Scene#SwappingScene" will be enabled.
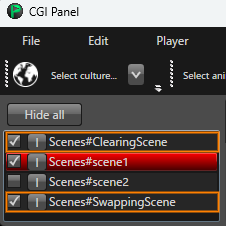
- "Scene#ClearingScene" and "Scene#SwappingScene" will be enabled.
- Open the "Transition" tab and
drag and drop "Scenes#scene1" from the left panel to [ 'deactivation' scenes... ].
Similarly, drag and drop "Scenes#scene2" from the left panel to [ 'activation' scenes... ].
- The source of the transition will be set to "scene1" and the destination to "scene2".
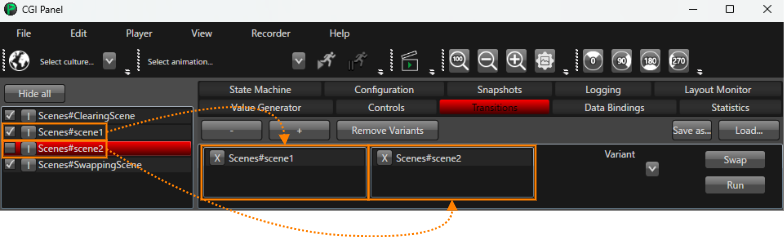
- The source of the transition will be set to "scene1" and the destination to "scene2".
- Click [ Run ].
- You can check the transition from "scene1" to "scene2" in the Player.
- Click [ Swap ].
- The source of the transition will be set to "scene2" and the destination to "scene1".
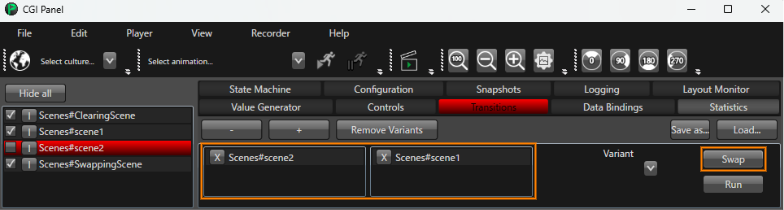
- The source of the transition will be set to "scene2" and the destination to "scene1".
- Click [ Run ] again.
- You can now check the transition from "scene2" to "scene1" in the Player.
Also be sure to check Transitions to get detailed information.