
CGI Studio related Best-Practices
General recommendation
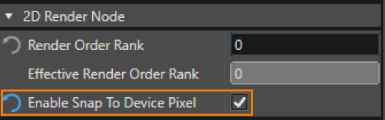
Enable snap to device pixel. This makes sure no filters must be applied that slow down the BLIT operation.
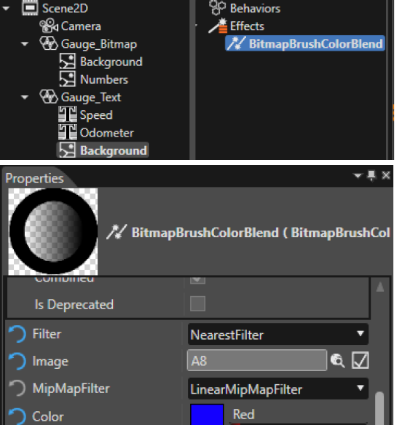
Only use bilinear filter if an image is rotated, scaled, or positioned between two pixels.
If none of the above happens then stick with the “nearest” filter. Be aware that bilinear is the default filter.
Memory pools
Always use CGI Studio MemoryPool feature to be able to get some freedom to shift the Text-memory area (used for Text rendering with e.g., Freetype) and default memory area (for CGI Studio) to the right memory location (internal RAM, VRAM, HyperRAM)
Memory pool mechanism:
Memory Pools, Bins, and Backing Heap:
A memory pool represented by class MemoryPool consists of a configurable number of Bins (MemoryPoolBin). Each Bin has a defined buffer size, maintains its own free list (in debug mode also a list of allocated blocks), and thread synchronization. A Bin manages so called blocks. Each block consists of a header (BlockHeader) and the user buffer (the actual buffer returned to the application).
There are two different types of Bins – small and large block Bins. A small block Bin maintains blocks which user buffer matches exactly the size of the defined Bin buffer size. A large buffer Bin maintains blocks that have at least a user buffer size of the Bin buffer size. Small block Bins are used – as the name already indicates – for small memory allocations. A small buffer Bin has less runtime and memory overhead per allocation than a large block Bin.
Whenever the application requests an allocation of a certain number of bytes, MemoryPool will look up the Bin which buffer size matches best the requested number of bytes. If the selected Bin has entries in its free list, the Bin will best fit select one of the free list nodes.
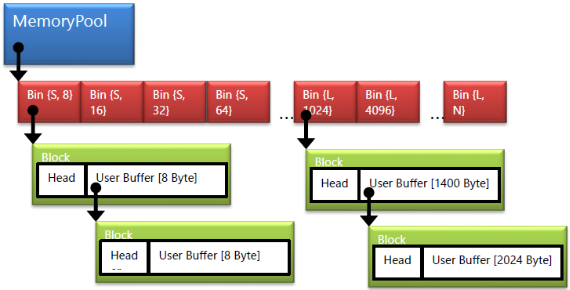
If a Bin free list is empty, the Bin will try to allocate a new block from the backing heap.
Thus, Bins maintain lists of blocks allocated from the backing heap. If an allocation request cannot be fulfilled by the already allocated blocks, the Bin tries to allocate the block in the backing heap.
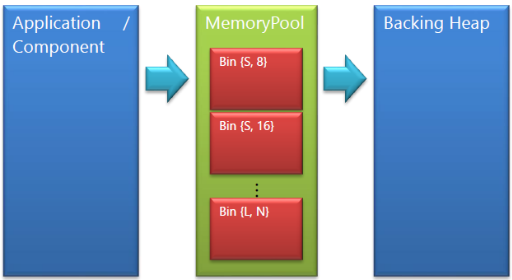
The above figure shows the layered architecture of FeatStd MemoryPool.
- One or more applications may access in parallel a memory pool.
- Multiple memory pools may exist in the system, each configured with its own MemoryPoolConfiguration object.
- Each MemoryPool object is assigned to a backing heap it will allocate memory from.
- Multiple MemoryPool objects may be assigned to a single backing heap.
The whole memory pool configuration is done at compile time. Thus, no runtime overhead is generated.
Sticky vs Dynamic allocation:
A sticky allocation is an allocation that will never return the allocated block to the backing heap. The block will be managed by the associated Bin (Bin free list).
A block allocated dynamically (not sticky) will be immediately returned to the backing heap when the application frees the block.
With the knowledge whether an allocation is sticky or not, the backing heap can execute the allocation from two distinct memory areas – the sticky area which will never fragment and the dynamic area which can fragment.
Backing Heap:
FeatStd MemoryPool implementation does not depend on a specific backing heap. E.g., standard library malloc and free can be used to implement the backing heap. Such a backing heap is not intended for production environment but might be more convenient than a fixed size heap for development.
FeatStd MemoryPool provides an implementation of a backing heap that can be used out of the box.
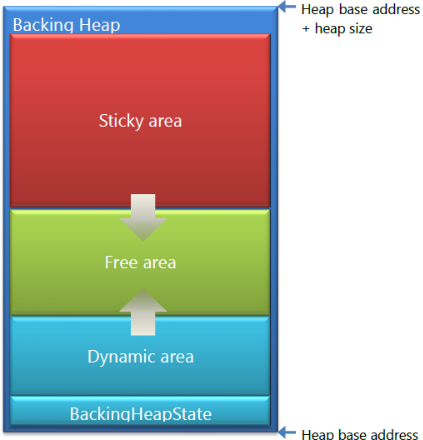
The above figure shows the memory layout of the backing heap. The sticky heap area grows top down, while the dynamic area grows bottom up.
A memory allocation in the sticky area bears no additional overhead. An allocation in the dynamic area has an overhead of 4 bytes required to coalesce consecutive free areas efficiently. Free blocks in the dynamic area are maintained in a free list. On allocation a free list entry will be selected with best fit strategy.
Memory pool Bin-size optimization
Best practice: Do the MemoryPoolBin-optimization to optimize the consumed memory and to achieve a better memory fragmentation while runtime.
To defragment the memory as much as possible and to avoid upcoming “out-of-memory” scenarios you should always do the memory pool optimization on the final application/solution.
Therefor you should perform following steps:
- Create your default memory pool configuration
- Let the application run for a while with the config, preferably run through all use cases.
- Shut down the application and display the statistics on the memory blocks used (e.g., display to console or create a specific text file).
- Create an optimized memory config based on the output statistics and start from the beginning (-> 2).
Layer usage
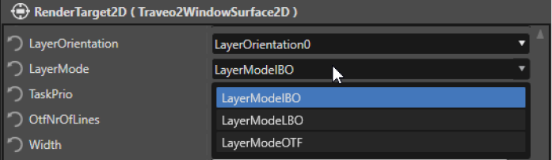
- With CGI Studio the Screen can be partitioned according to the TV-II window/sub-window structure
- Several Render Target Types
- (Sub-) Window Surface → IBO mode
- Double Buffered (Surface Size * Byte/px * 2 buffer count)
- Use images from Hyperflash (Client memory) to save VRAM
- Image (Sub-) Window Surface
- Surface from (compressed) Image in Hyperflash (Client memory) to save VRAM
- LBO (Sub-) Window Surface
- Double Buffered (Surface Size * Byte/px * 2 + 16 lines * Byte/px)
- Bandwidth usage improvement versus higher Memory usage
- Images shall be in VRAM.
- OTF Window
- No Frame Buffer (at least 16 lines (or the next power of 2!) * Byte/px for Scanline)
- Images shall be located VRAM
- (Sub-) Window Surface → IBO mode
- Best practice:
- Set the task priority and task "COPSes" accordingly in the related CMake-settings for the CGI studio build:
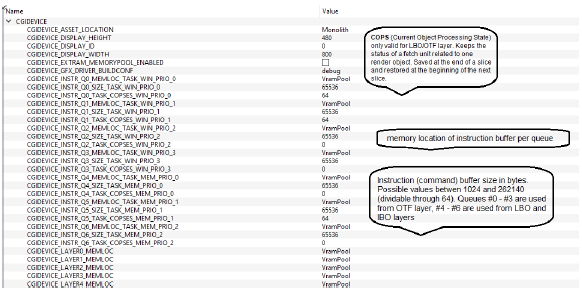
- Set the Line-buffers for OTF layers accordingly to the required solution setup. In general: use as less as number of line buffers (line buffer number needs to be a power of 2) because this will increase the VRAM consumption accordingly. Increase only if you face performance issues (e.g., red flicker on screen)
- Use as less as possible OTF layers. If possible, just use 1 (but keep the limitation with maximum width of 1600 in mind)
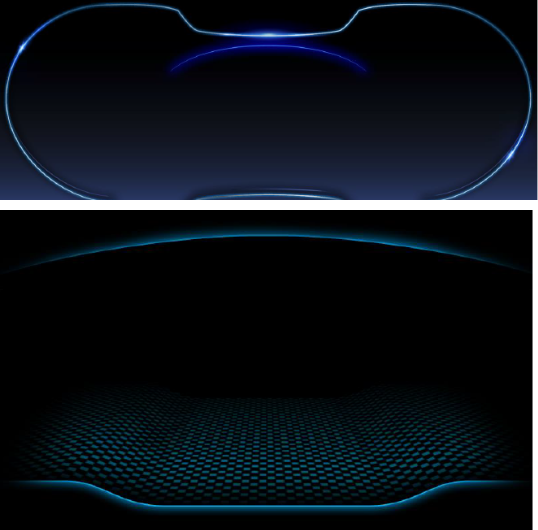
- Try to use an image Layer whenever possible for static background (see following examples)
- Set the task priority and task "COPSes" accordingly in the related CMake-settings for the CGI studio build:
Effects
Best practice:
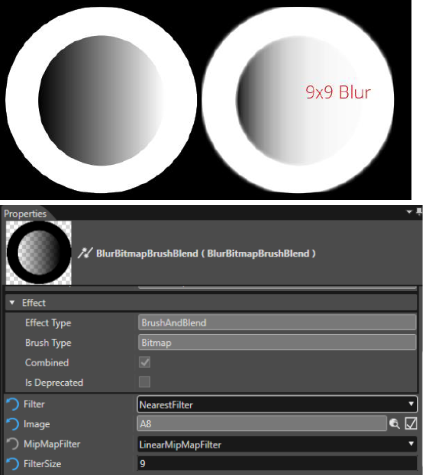
- Use Blur-effect only if not avoidable, Multi pass BLITS like the Blur effect have a huge performance impact because the image must be blitted multiple times for a 9x9 filter!
- All images for bitmap brush perspective warp blend must be in VRAM.