Bitmap Brush Blend Effects
BitmapBrushBlend
With this effect you can configure a RenderNode to display an image.

Image
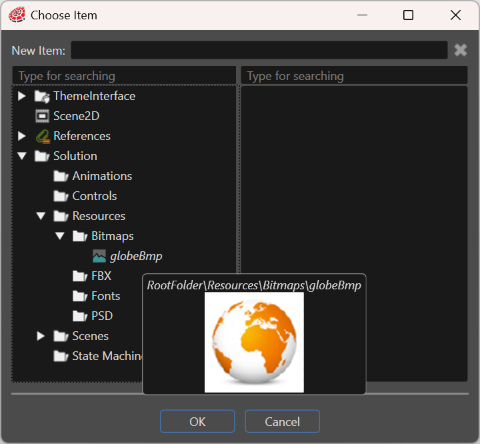
This is the place where you configure the image to be displayed by this RenderNode.

A preview of the image is displayed in a tooltip when moving the mouse over the image’s name.
BitmapBrushColorBlend
BitmapBrushColorBlend is similar to BitmapBrushBlend but it additionally allows to define a color with which the configured image should be blended.

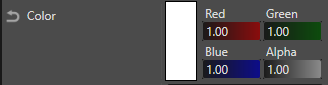
Color
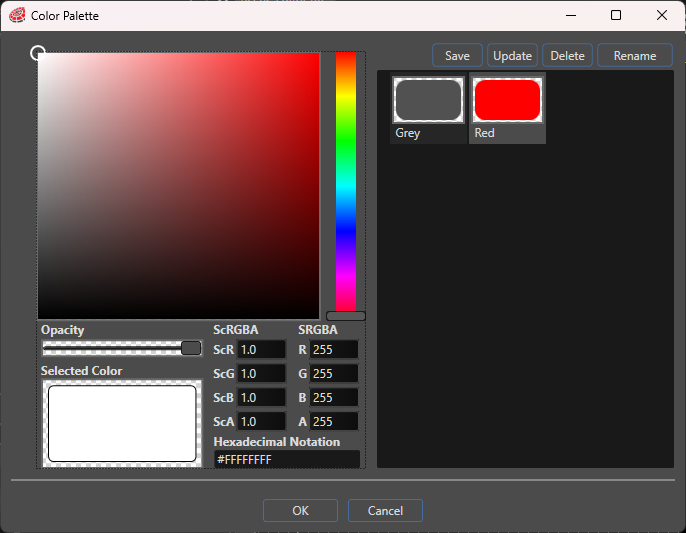
The color can be chosen in the “Color Palette” dialog which opens when clicking on the icon on the right.
This dialog also offers the possibility to define and save custom colors you need for your project. This can be achieved by configuring a color and clicking the “Save” button on the top right, which creates a new rectangle in your configured color and allows you to name it.
The default blending color after applying this effect is white.
BitmapBrushHslBlend
The BitmapBrushHslBlend effect is similar to the BitmapBrushBlend effect, additionally a hue, saturation and lightness correction can be applied according to the following settings. This makes it possible to change defined colors of the image (e.g. change the blue color of the working man to orange as in the picture).

Hue
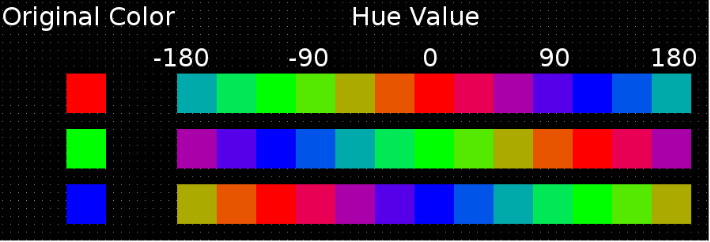
With this property you can alter the color of the image. Increasing the value moves from blue through green, yellow orange, red purple and back to blue. In CGI-Studio the values for hue range from -180 to 180. The value is periodical outside this range.
| Hue Value | Meaning |
| -180 | Color is inverted (the complementary color of the RGB color system is used) |
| 0 | Color is unchanged |
| 180 | Color is inverted (the complementary color of the RGB color system is used) |
Saturation
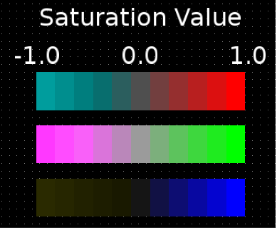
Saturation is the colorfulness of a color relative to its own brightness. This value is used to saturate the color. The values range from -1.0 to 1.0.
| Saturation Value | Meaning |
| -1 | Colors of the image are displayed inverted (with the complementary colors of the RGB color system). |
| 0 | Image is displayed in greyscale. |
| 1 | Image is displayed unchanged. |
Here is an example on various saturation values for red, green and blue in CGI-Studio.
Lightness
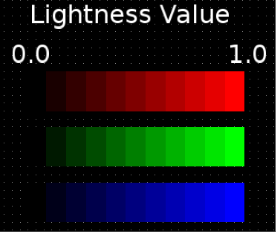
This setting is used to change the brightness of the image’s colors. Its values range from 0.0 to 1.0.
| Lightness Value | Meaning |
| 0.0 | Image is displayed black. |
| 1.0 | Image is displayed unchanged |
Here is an example on various lightness configurations in CGI-Studio for red, green and blue.
BlurBitmapBrushBlend
This effect is similar to BitmpaBrushBlend, where you can display an image with a RenderNode. Additionally, this image can be distorted by a gaussian blur using the filter size setting.

This blurring effect can be used to reduce image noise and reduce detail. The visual effect of this blurring technique is a smooth blur resembling that of viewing the image through a translucent screen.
The default renderer of TextNodes is the Bitmap renderer.
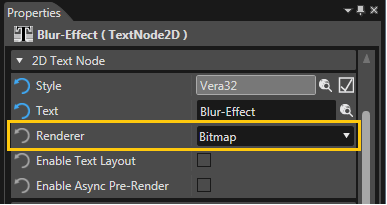
If a TextNode is rendered with the Bitmap renderer, the BlurBitmapBrushBlend effect can also be applied.

Filter Size
The filter size defines the quadratic size of the filter kernel. The bigger the configured filter size, the more the image is blurred. But a bigger filter size also means more complex calculations and hence less performance.
MirrorBitmapBrushBlend
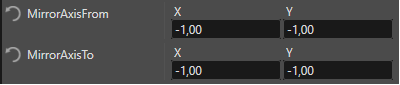
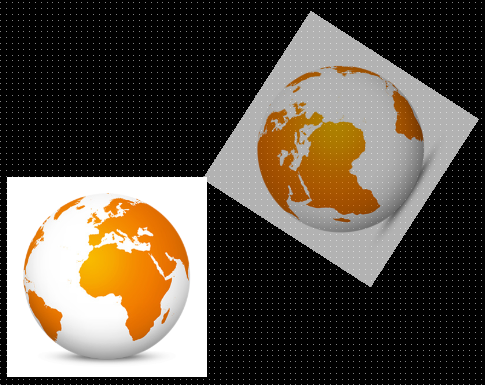
You can define an image to be rendered with a RenderNode. Additionally, with this effect, the RenderNode is enhanced with a mirror image – a reflection that is mirrored across a defined central line, the mirror axis. Every point has the same distance from this mirror axis and the reflection has the same size as the original image. The effect MirrorBitmapBrushBlend has additional properties to define a mirror axis (Mirror Axis From and Mirror Axis To) and another property to configure the alpha value of the mirror image.
Mirror Axis From, Mirror Axis To
The mirror axis is the central line, where every point has the same distance from. It defines, where exactly this effect mirrors the image to. It is configured by these two points: “Mirror Axis From” and “Mirror Axis To”, each of which has to be configured with an X and a Y coordinate.
Alpha
This property defines the opacity of the mirrored image. A value of 1 means the mirror image is opaque, a value of 0 means the mirror image is totally transparent.
If a TextNode is rendered with the Bitmap renderer, which is the default, the MirrorBitmapBrushBlend effect can also be applied.

ShearBitmapBrushBlend
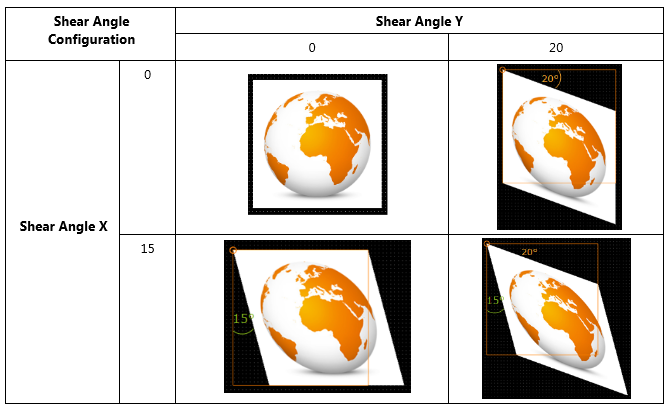
Similar to the BitmapBrushBlend effect, this effect offers the possibility to display an image with a RenderNode. With the ShearBitmapBrushBlend effect you can enter two additional properties Shear Angle X and Shear Angle Y to add a shearing effect.

Shear Angle X, Shear Angle Y
These two properties define the shearing of the image. Shear Angle X defines the horizontal shearing angle, Shear Angle Y defines the vertical shearing angle.
If a TextNode is rendered with the Bitmap renderer, which is the default, the ShearBitmapBrushBlend effect can also be applied.

ShadowBitmapBrushBlend
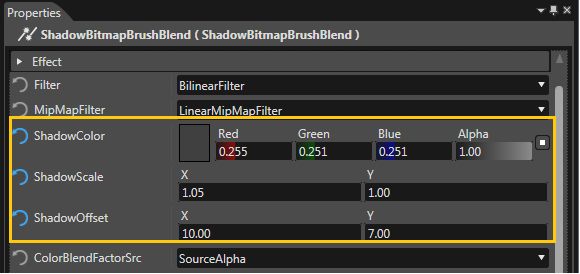
This effect allows to display a Bitmap on a RenderNode and additionally add a shadow in the background of this Bitmap. For proper configuration, 3 parameters for Shadow Color, Shadow Scale and Shadow Offset can be altered.
Shadow Color
With this parameter the color of the shadow can be configured. The color can be chosen in the “Color Palette” dialog, which opens when clicking on the rectangular color preview. The default Shadow Color is white.
Shadow Scale
The property “Shadow Scale” defines the shadow’s size and proportions. With a Shadow Scale of “1;1” the shadow is as big as the displayed Bitmap and is not visible, if the Shadow Offset is set to “0;0”. Setting the X coordinate of the Shadow Scale to 2, makes the shadow twice as wide. When enlarging the Shadow Scale, the center of the shadow remains at the center of the Bitmap.

Shadow Offset
With the Shadow Offset property the horizontal and vertical offset of the shadow’s center to the center of the displayed Bitmap can be configured. The values are given in pixels.

If a TextNode is rendered with the BitmapRenderer, which is the default, the ShadowBitmapBrushBlend effect can also be applied.