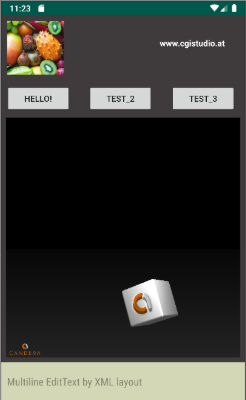
NativeViewLibrary
System Requirements
This document mandates adherence to the Android Application Development Environment
Setup Guide,Guide, as a prerequisite for system compliance.
ByThe followingproject theserequirements steps,
youshould have a consistent and well-configured development environment for yourNativeViewLibrary Android application
on Windows 10/11. Remember to restart your system after making changes related to CMake in Android Studio and after updating Environment Variables.
Project Structure
NativeViewLibrary is usinguses the Android Gradle Plugin Versionversion 7.2.1 and Gradle version 7.3.3.
A custom NDK 26 is required, as described in the Android Native Development Kit (NDK) chapter.
CMake 3.5.322.1 is required as described in the CMake chapter.
Eclipse Temurin JDK 11 is required as described in Java Development Kit (JDK) chapter.
Supported API levels: 23–28 (The application is compatible with
Gradlelater VersionAndroid 5.4.1.versions TheApplicationup is tested with ndk-26 that can be installed from the document in chapter Configuration and System Requirements. The supportedto API
range36 ison 23-28.Android The16).
supportedSupported ABIsABIs: are arm64-v8a, x86_64, x86.x86
The NativeViewLibrary Android
Applicationapplication is usingintegrates the NativeView
librarylibrary, includedwhich inis provided externally from ../libs/nativeview-lib and already imported into the
Androidproject.
Application.
This NativeView Library is moved out of the project directory and will be included from outside of the project as library.
Building and Running the Android Application
To be able to build and run the Android Application,application, perform the following steps must be done.
steps:
1.
SubstSubstitute [the CGI Studio root as described in the windows-commands/subst] thearticle.
root of CGI Studio.
Open a Command Prompt in the root of CGI Studio root directory (e.g., “...\cgistudio”) and type: “
subst
 x: .”
andPress click enter.enter. The CGI root is now available under the subst "x"X: drive in Windows Explorer.
2.
Open the Android ApplicationApplication:
inLaunch Android Studio fromand “open the project located at:
X:\cgi_studio_apps\References\Android\NativeViewLibrary”.
NativeViewLibrary
3. Configure local.properties:
- Open
the “local.properties.sample”sample file and changefrom the “USERNAME”root of the Android application.
Copy the content of the sample to the local.properties file in the root of the Android application.
Update the USERNAME in the SDK and NDK
pathpaths to match
thesystemyour itsystem.
willConfigure befrom used on. Also the path towhere the asset
andshould load under the Asset Configuration block.
Set the ABI
can be set here. This ABI should matchto the target CPU
architecture.architecture under the Target ABI block.
CopySave thelocal.properties contentsand ofsync theproject "local.properties.sample"with toGradle “local.properties”files (Ctrl+Shift+O).
Note
that
if
Note: If the SDK or NDK paths do not exist, Android Studio willmay reset the “local.properties” againproperties after tryingsyncing tothe Sync Projectproject with Gradle Files.files.
Make4. sureCreate an Android asset
Run the JDKfollowing isbatch setfile:
toX:\bin\SceneComposer\SceneComposer_Android_OpenGLES30.bat
11 in [File | Settings | Build, Execution, Deployment | Build Tools | Gradle]like described in chapter Java Development Kit (JDK).
Create
- Choose an asset
withtemplate CGI Studio for Android by running “X:\bin\SceneComposer\SceneComposer_Android_OpenGLES30.bat” and choosing (e.g., “3D Basic”) and save this as Test.bin
into
- If from sdcard: to the /sdcard/ directory of the
target/target or emulator. ForIn theAndroid emulatorStudio, this can be done in the "Device Explorer" of the target or emulator.
If from APK: to the following folder:
X:\cgi_studio_apps\References\Android\NativeViewLibrary\sample\src\main\assets
5. Build variant:
In Android Studio, open [View | Tool Window | Build Variants].
In the Build Variants tool window, select debug or release under Active Build Variant.
6. Run the application:
Select the target device or emulator in Android Studio.
Click Run (the
Applicationplay by selecting the target/emulator and clicking on “run sample”.button)
The first time the Application starts, it will request permissions.
Click acceptAccept and restart the application. The
solution asset should
now be running.
7. APK
After the application is running, the current built APK can be found in the build directory. This can located by opening [Build | Analyze APK]. The usual directory would be:
X:\cgi_studio_apps\References\Android\NativeViewLibrary\sample\build\intermediates\apk\
If the build was for release, the APK will be signed.
Troubleshooting
- If encountering any issues during the setup, refer to the official documentation for Android Studio,
CMake, and NDK for troubleshooting steps.
If
you encounter any issues linked to outdated source code, reach out to the Android developers forassistance in implementing a resolution.
Check for updates regularly and keep your development environment components up to date.
- Google Pixel C, ARM Cortex A57, Android 8.1.0, API 27
- Huawei MediaPad M5, ARM Cortex A73, Android 9, EMUI 9.1.0, API28
- Emulator Pixel 2, x86_64, Android 6, API 23 (Without Play/APIs)
- Emulator Medium Phone, x86_64, Android 9, API 28 (Without Play/APIs)
- Emulator Pixel 2, x86, Android 9, API 28 (Without Play/APIs)
Emulator Google Pixel Tablet, x86_64, Android 14.0, API 34
Emulator Google Pixel Tablet, x86_64, Android 16.0, API 36
Emulator Google Pixel 9 Pro XL, x86_64, Android 16.0, API 36