How to Import Resources
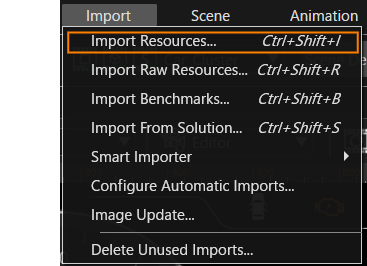
This section describes how to import resources using [ Import Resources... ] from [ Import ] on the menu bar.
Import File Formats
The file formats to be imported when using this menu are as follows
- Image files (
*.bmp, *.jpg, *.jpeg, *.gif, *.tga, *.png, *.dds, *.ktx, *.hdr, *.exr) - Font files (
*.ttf, *.ttc,*.otf, *.fnt, *.fbm, *.*) - Shader files (
*.vert, *.frag) - SVG files (
*.svg) - FBX files (
*.fbx) - glTF files (
*.gltf, *.glb) - Icon files (
*.bmp, *.ico, *.jpg, *.png) - Script files (
*.lua)
In addition to the above, Photoshop file (*.psd), Adobe XD file (*.xd), Axure RP file (*.rp) and Sketch file (*.sketch) can also be imported. For more information on these, please refer to Smart Importer chapter.
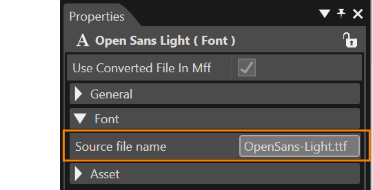
For Font files, by selecting Font files during file selection, they can be imported as fonts regardless of their extension. For more details, please refer to the explanation here.
With CGI 3.14 or later, skinning animations can be played back by importing skinning FBX or glTF files.
glTF file format
SceneComposer supports following glTF file formats when importing:
- glTF: This points to external binary data (geometry, key frames, skins), and images.
- glTF-Embedded: This embeds base64-encoded binary data, and images inline using data URIs.
- glTF-Binary: In Binary glTF, a glTF asset (JSON, .bin, and images) can be stored in a binary blob.
For more detailed information on the file formats, please see the Khronos website: GLB File Format Specification.
About .ktx File Format
The following compressed image formats are supported:
- Etc2CompressedRgbFormat
- Etc2CompressedSrgbFormat
- Etc2Alpha1CompressedRgbaFormat
- Etc2Alpha1CompressedSrgbaFormat
- Etc2EacCompressedRgbaFormat
- Etc2EacCompressedSrgbaFormat
To use this type of format, first of all it is necessary to convert an image with a different format (.tga, .gif, .psd, .bmp, .pgm, .png etc.) in a .ktx file. The next tools support generating KTX files:
- Texgenpack
- Mali Texture Compression tool
- Ericcson Texture Compression Tool
This tool compresses texture images to the Ericsson Texture Compression (ETC/ETC2) and Adaptive Scalable Texture Compression (ASTC). The available output file formats are .pkm - that can contain compressed textures - and .ktx – which allows the compression of a 2D texture with all its mipmap levels.
After the conversion is done, the .ktx resulted file can be imported in SceneComposer by following the same flow as in the case of other image formats.
-
In the case of a converted .ktx file which is imported in the SceneComposer application, the usage of the "DefaultBitmapConverter" property - available for any usual .bmp image - is not possible.
About Bitmap Font
Bitmap fonts are supported by SceneComposer. In order to use bitmap fonts, the SCHost.dll must be compiled using BitmapFont font engine. Only one font engine can be active at a time in an SCHost.dll.
The user can import 2 types of files as bitmap fonts:
- .fnt (windows font files) - are converted to bitmap fonts
- .fbm - already converted bitmap font files
When a font is imported, following specific property will be set:
- Source file names: specifies the name of the file which was imported - helps the user identify a font
On OpenGL ES1.1 platforms, such as Traveo2, it is not possible to perform import operations on shader files, SVG files, FBX files, and glTF files.
Import Operation
You can open the Import Dialog to proceed importing resources in one of the following three ways.
Menu Bar
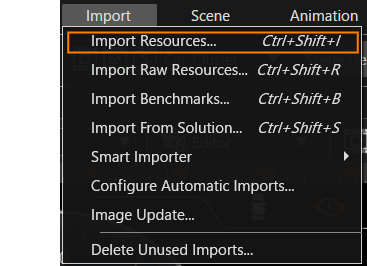
Select [Import] > [Import Resources...] from the menu bar.
Context menu
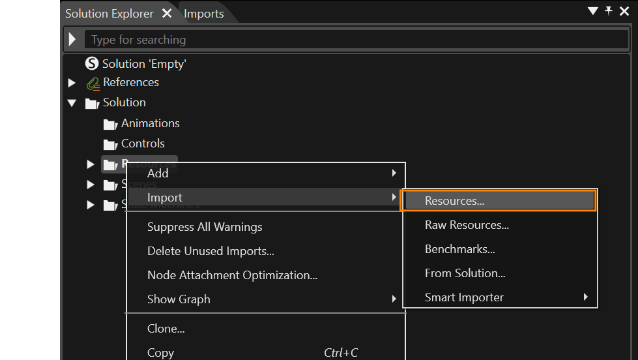
Right-click on any folder in Solution Explorer and select [Import] > [Resource...] from the context menu that appears.
Drag and Drop
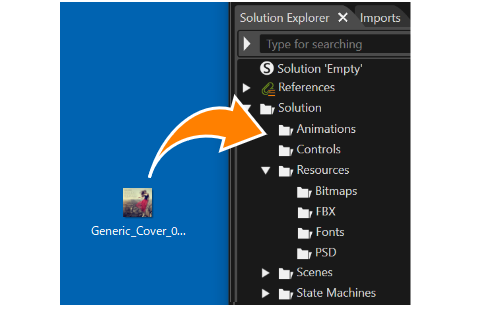
Drag and drop the target file to be imported into any folder under Solution in Solution Explorer.
-
- glTF file can also be imported by drag-and-drop to any folder under Solution in Solution Explorer.
- Note that under OpenGLES1.1 environment, shader files (*.vert, *.frag), SVG files (*.svg), FBX files, and glTF files cannot be imported by drag-and-drop operation.
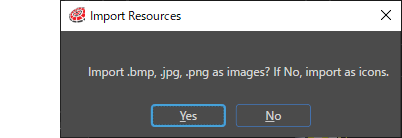
- When an image file format (*.bmp, *.jpg, *.png) that can be imported as an icon is dragged and dropped into any folder under Solution in Solution Explorer, the dialog box will appear as shown below, allowing you to select whether to import it as an image or icon resource. You can choose whether to import it as an image or an icon.
- glTF file can also be imported by drag-and-drop to any folder under Solution in Solution Explorer.
Import operations by file format
After selecting a file, operations will vary depending on the file format. Please refer to the following links for detailed operation procedures.
Image, font, shader, FBX, and script files
For importing FBX files contains skinning, see here.
When an image file is imported, the original image file is retained along with the bitmap information file (*.bin file) used on Scene Composer. See here for details.
-
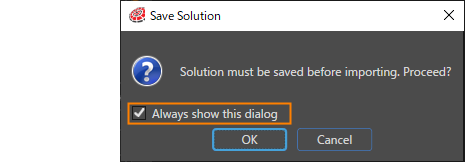
When the import process is executed, Scene Composer will display a message to save any unsaved changes in the solution. Press OK to proceed. If you do not want this dialog to appear during the import process, uncheck the "Always show this dialog" checkbox.
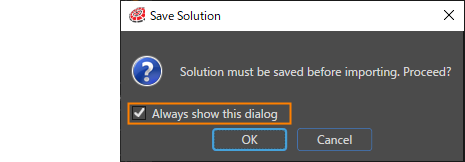
-
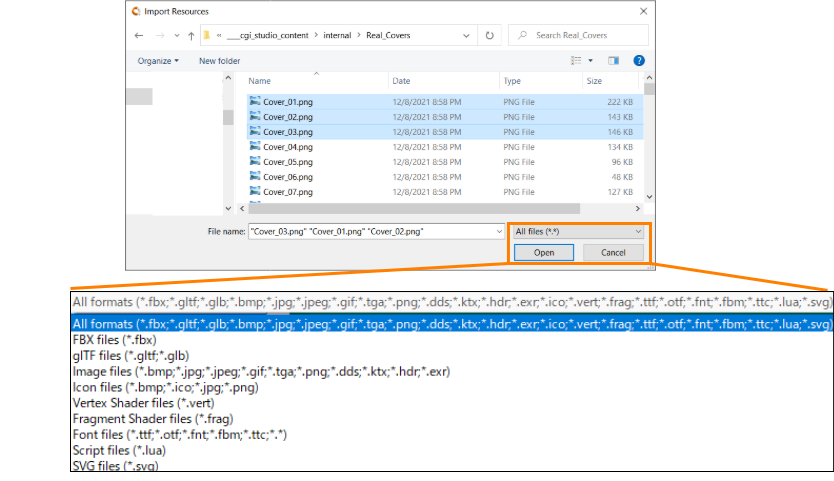
After saving the solution, the Import Resources dialog is opened, where you can select one or more resource files to be imported. Select your files to import and press OK.
- You can search for supported file formats by selecting them in the drop-down menu at the bottom right of the Import Resources dialog.
- You can import multiple files at once as long as their file format belong to the same category, such as an Image file or a Font file.
- By selecting Font files from the pull-down menu below, you can import any file as a font file, regardless of its extension.
-
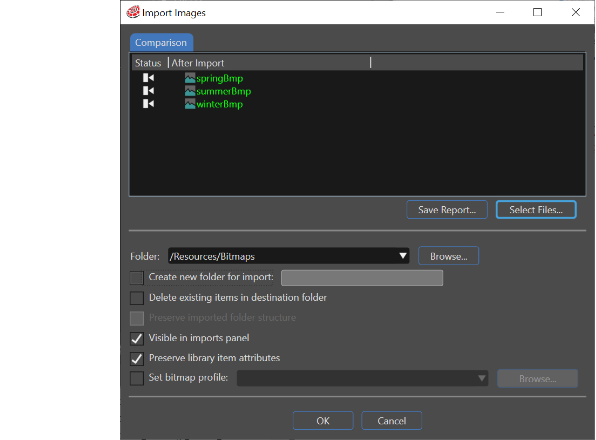
After choosing your files to import, an Import dialog will be displayed depending on the file types you are importing (Image, Font, FBX, Shader…).
-
See Import Dialog Options for a description of the settings on the dialog screen.
-
Select [ Import as wireframe ] check box to import the wireframe vertex buffer when importing an FBX file.
-
-
Configure import settings to your needs and click "OK" button.
-
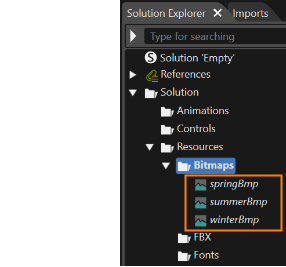
The file will be imported as a resource in the Solution Explorer in the location corresponding to the settings on the dialog screen.
-
Wireframe Related Properties
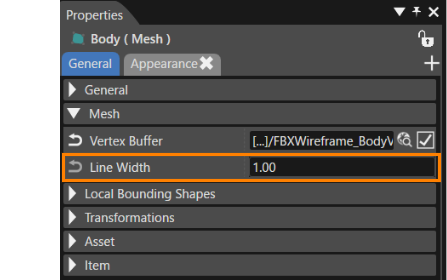
When importing an FBX file with the [ Import as Wireframe ] option enabled, a [ Line Width ] will be added to the property item ”mesh” of the target node. This specifies the line width of the mesh when it is rendered as wire.
- The actual line width is determined by rounding the specified width to the nearest integer.
- If the setting is less than “1”, it is always set to “1”.
FBX files with multiple animations
Scene Composer supports the import of FBX files that contain multiple animation tracks. The names of the imported animation tracks are automatically created from each animation track contained in the FBX file.
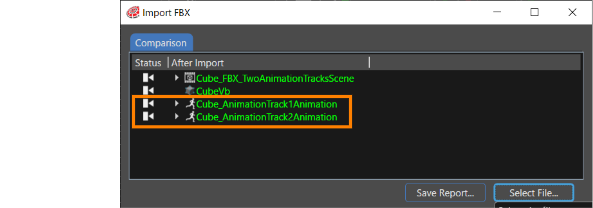
The animations that can be imported from FBX files are as follows.
- Translation
- Rotation
- Scaling
Icon files
See Icon Picker for information on how to use imported icon resources.
-
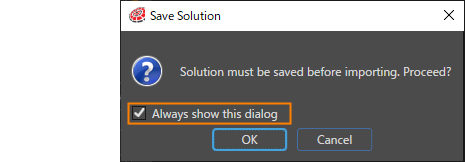
When the import process is executed, Scene Composer will display a message to save any unsaved changes in the solution. Press OK to proceed. If you do not want this dialog to appear during the import process, uncheck the "Always show this dialog" checkbox.
-
After saving the solution, the Import Resources dialog will open. Select the target file and press OK. If the selected file format is "*.ico", the [ Import Icons ] dialog will appear as shown below.
- The path of the selected file is displayed in the [ Selected files ] field. To re-select a file, press the [ Select File... ] button.
- In [ Destination folder ], specify the location where the file will be imported as a resource.
- As explained in the Drag and Drop section, if you drag and drop an image file format that can be imported as an icon (*.bmp, *jpg, *.png), the above dialog will appear and you can import it as an icon.
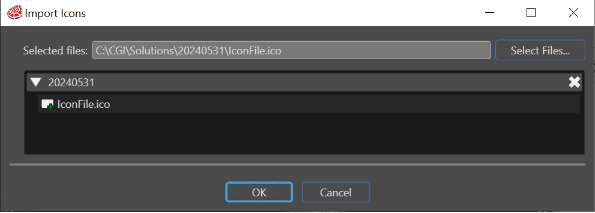
- The path of the selected file is displayed in the [ Selected files ] field. To re-select a file, press the [ Select File... ] button.
-
Click "OK" button to complete the import operation.
SVG files
-
When the import process is executed, Scene Composer will display a message to save any unsaved changes in the solution. Press OK to proceed. If you do not want this dialog to appear during the import process, uncheck the "Always show this dialog" checkbox.
-
After saving the solution, the Import Resources dialog is opened, where you can select one or more SVG files to be imported. Select your files to import and press OK.
- You can import multiple files at once.
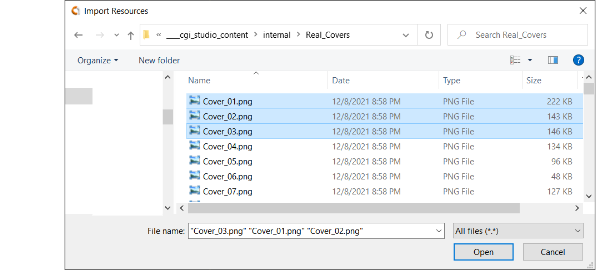
- You can import multiple files at once.
-
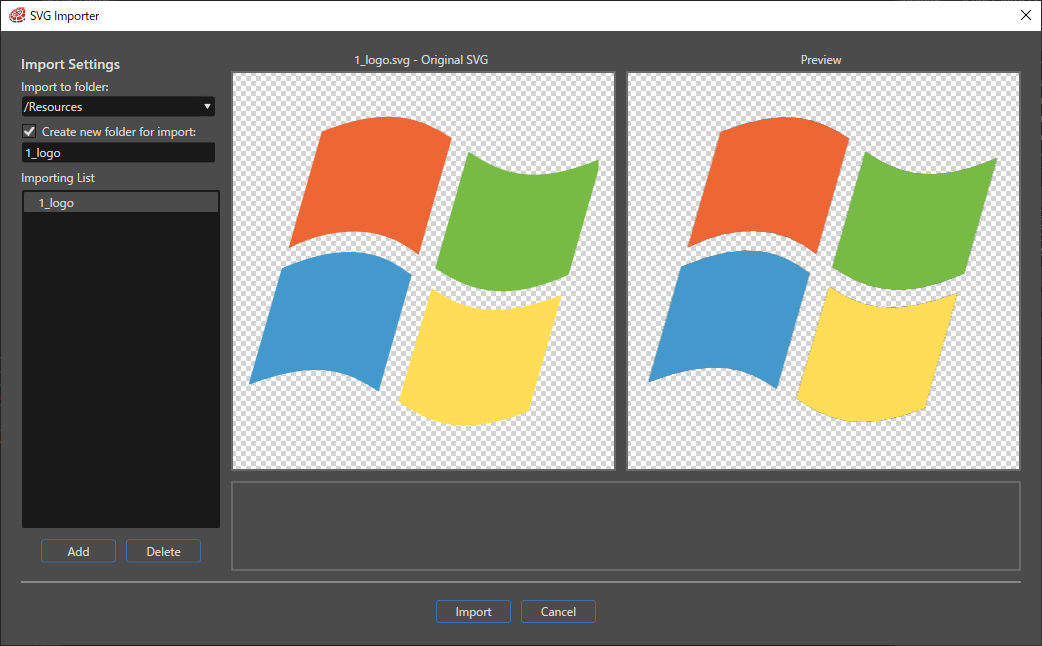
After choosing your files to import, an SVG Importer dialog will be displayed.
-
See SVG Importer Dialog for a description of the settings on the dialog screen.
-
-
Configure import settings to your needs and click "Import" button.
-
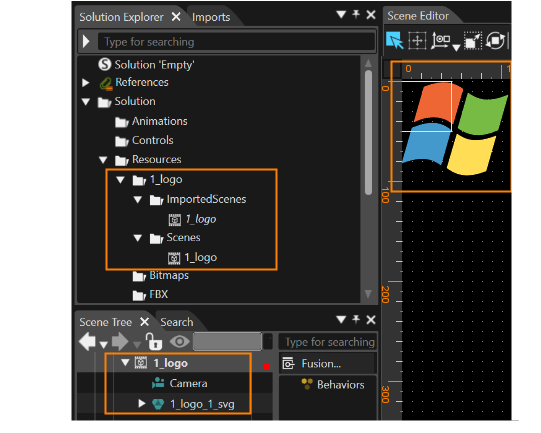
"ImportedScenes" and "Scenes" folders have been created at the destination folder chosen in "Solution Explorer". The former holds data imported as template scenes, while the latter holds data imported as actual scenes.
-
If multiple SVG files have been imported, the Scene Editor will display the actual scene for what was the topmost SVG file in the SVG Importer.
-
Transform > Position > X = 0, Y = 0 will be the item's initial position.
-
-
Copy group nodes within imported scenes into the desired scene and use them.
-
glTF files
The CGI Studio glTF Importer does not support the following features:
- Morping
- Vertex Buffer Streams
- Sparse Accessors
- Multiple UV Maps
There is a supplement on the handling of glTF files. Please check this page as well.
For importing glTF files contains skinning, see here.
-
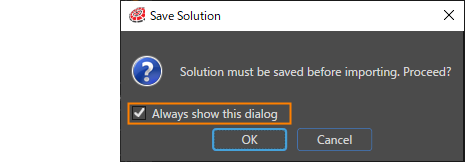
When the import process is executed, Scene Composer will display a message to save any unsaved changes in the solution. Press OK to proceed. If you do not want this dialog to appear during the import process, uncheck the "Always show this dialog" checkbox.
-
After saving the solution, the Import Resources dialog is opened, where you can select one or more resource files to be imported. Select your files to import and press OK.
- You can import multiple files at once.
- You can import multiple files at once.
-
After choosing your files to import, an Import dialog will be displayed.
- Use the import dialog to configure Image-Based Lighting (IBL). You cannot change these settings after the import.
- If you do not want to use IBL, clear the Use Image Based Lighting (IBL) checkbox.
- During glTF import, the Engine automatically generates the IBL from a single HDR panorama (latlong) image, so you do not need to set the radiance, irradiance, or BRDF integration textures manually.
- When necessary, set the HDR panorama (latlong) image and IBL texture size in the import dialog.
- The default IBL texture size is 256. On
theES2.0platform,, set at least 64 and use a power-of-two value. YouOncan also setES3.0, theHDRminimumpanoramasizeimage inisSolution Options64.- You can also set IBL in Solution Options. For details about these settings, see IBL HDR.
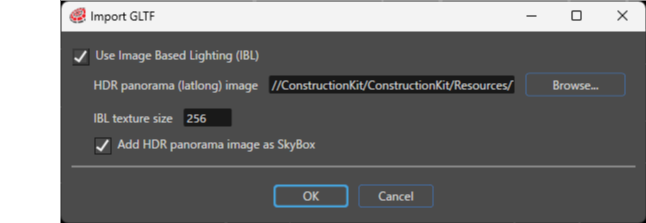
- Use the import dialog to configure Image-Based Lighting (IBL). You cannot change these settings after the import.
- Then, "Import GLTF" dialog will be displayed.
- You can’t change IBL settings in the import dialog (red box below).
- When you specify an HDR panorama image and run the import, the Engine automatically assigns the generated shared IBL textures to each mesh (orange box below).
- The Engine generates the following textures: LambertianTexture (Diffuse/Irradiance), GGXTexture (Specular/Radiance), GGXLutTexture (BRDF 2D LUT), and SkyBoxTexture (Skybox).
- For other settings on the dialog, please refer to Import Dialog Options.
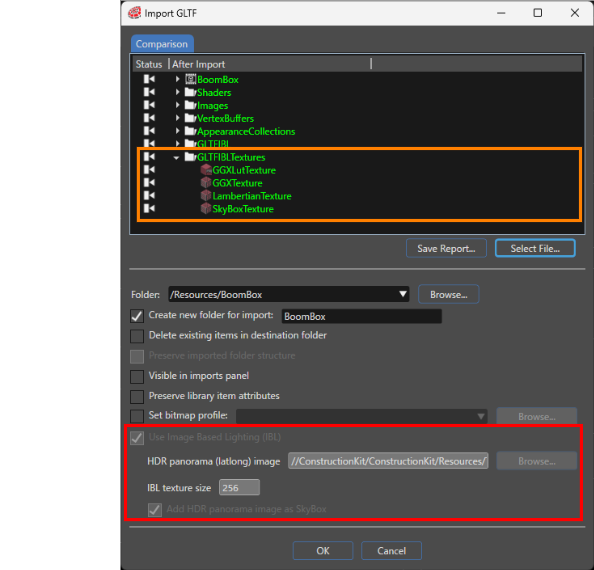
- You can’t change IBL settings in the import dialog (red box below).
-
Configure import settings to your needs and click "OK" button.
-
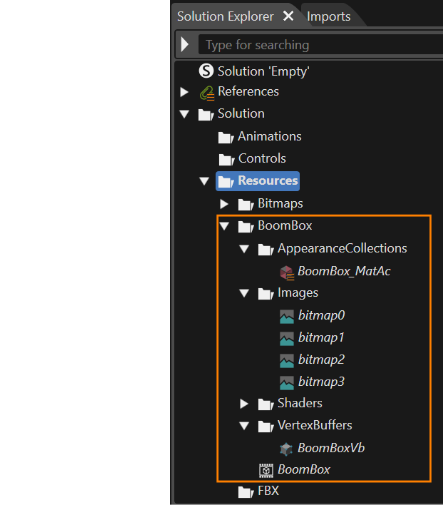
The file will be imported as a resource in the Solution Explorer in the location corresponding to the settings on the dialog screen.
-
Shared IBL textures
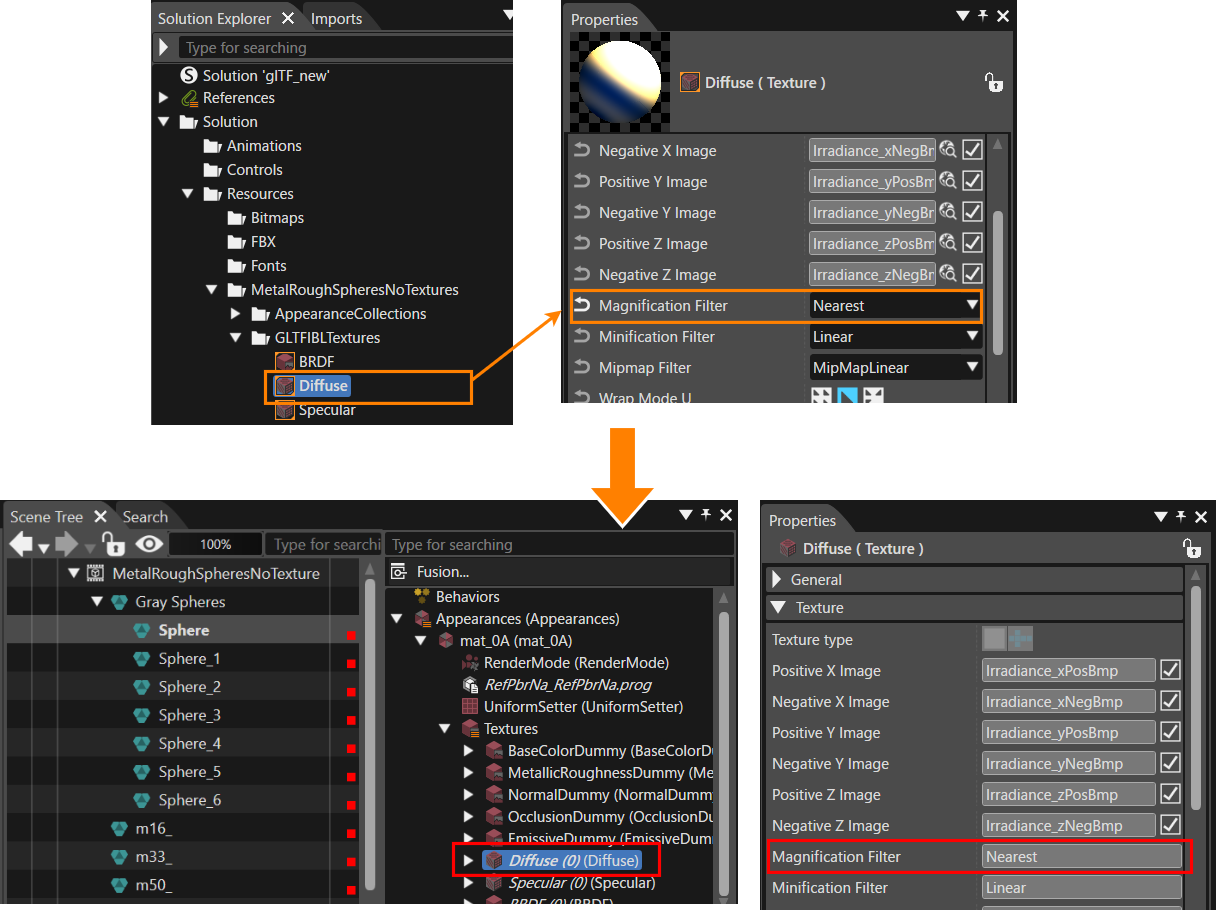
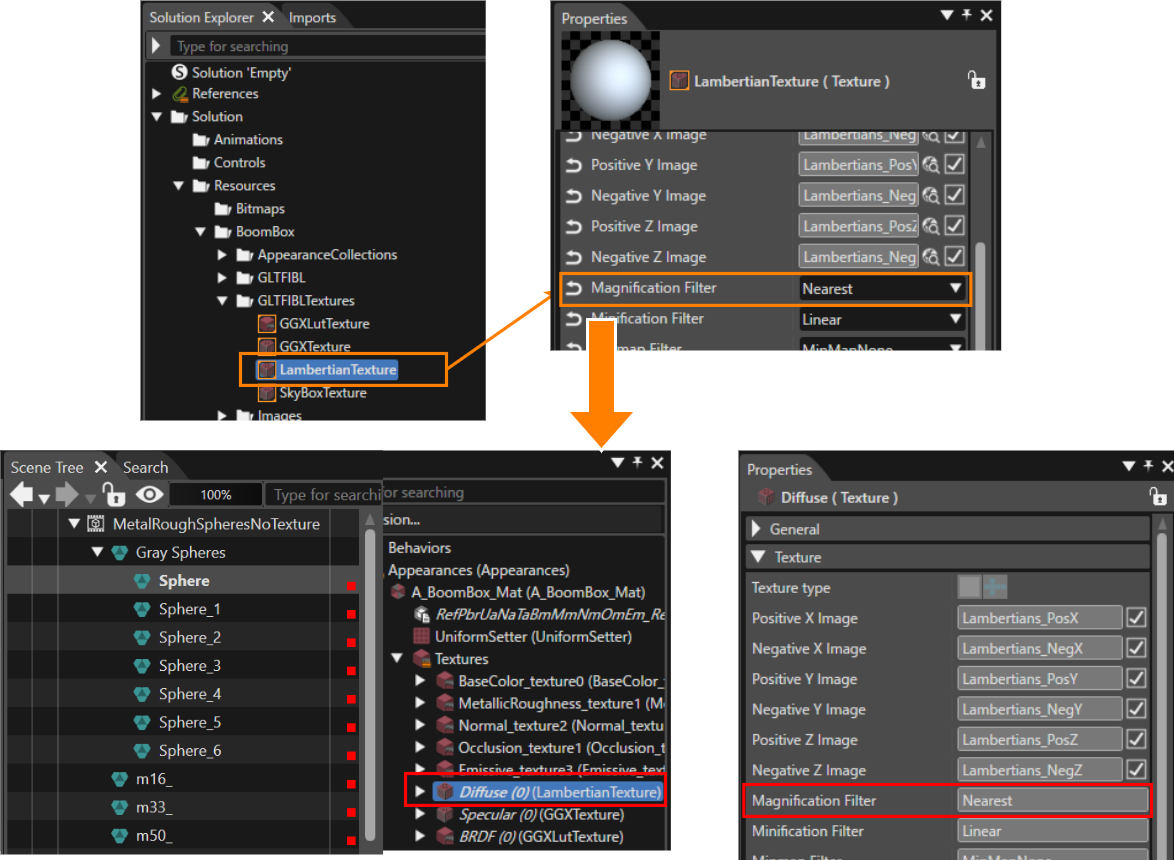
When you import a glTF fileand withgenerate IBL texturesfrom isan imported,HDR panorama (lat/long), the IBLimporter texturesautomatically that are enabled for sharing are set for each mesh. Any changes made by the user to the settings ofassigns the shared IBL textures are(LambertianTexture/GGXTexture/GGXLutTexture/SkyBoxTexture) reflected into each mesh. When you change a shared IBL texture, the importer propagates the change to all meshes that reference it.
As shown inIn the imageexample below, select theLambertianTexture shared IBL texture "Diffuse"(Diffuse/Irradiance) in the Solution Explorer,Explorer and changeset the [ Magnification Filter ]to Nearest in the Properties panelpanel; the importer applies the same setting to [every Nearestmesh/material ]that references LambertianTexture (irradiance/diffuse slot). In this case, the [ Magnification Filter ] property of the "Diffuse texture" in the scene tree will also be set to [ Nearest ].