Part 5: Configure State Machine
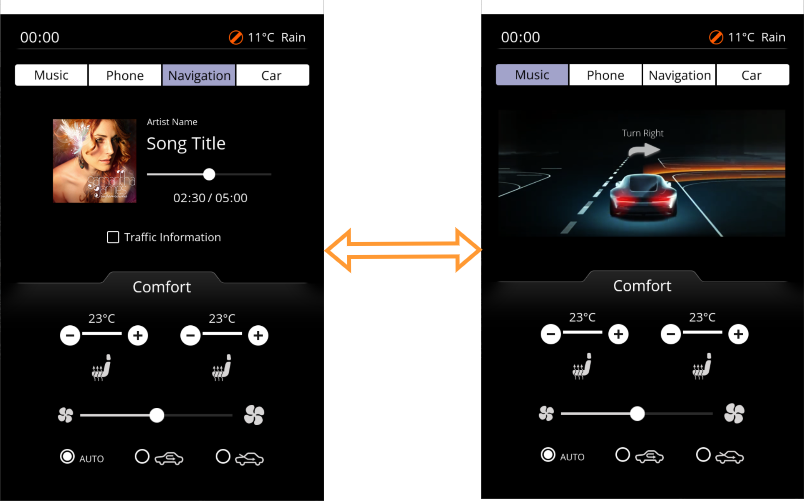
State Machine feature is used for transitioning from one state to another. In our example, we will have a Music state and a Navigation state. The transitions between these two are triggered by pressing the Music and Navigation buttons in the Menu section.
To
Solution > State Machines

TheIn State Machine Editorisaddshown.
State Machine

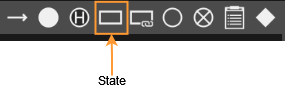
Selectbelow the already existing state.

Whenever
Create a new "OnEntry" action by pressing the "+" sign next to OnEntry. Configure an "Enable Rendering" action, where the TargetNode is the IVI_Sample scene's "Music" GroupNode. Check the "Visible" checkbox to configure that the "Music" GroupNode shall be set to visible when executing the action.
To choose the TargetNode, press the magnifying glass icon. Then select the "Music" GroupNode in the Choose Item dialog and press "OK".

Create a new "OnExit" action by pressing the "+" sign next to OnExit similar to the OnEntry action you have just configured. This time, the "Visible" checkbox should be unchecked. This way the "Music" GroupNode will be set to invisible when executing the action.

Add a "Handle Control State" Behavior to TextButton_Music and TextButton_Navigation node (which are in the Menu_button group). This can be done by draging-and-dropping the behavior from the Toolbox Behaviors panel

Return to the

Select that State in the State Machine Editor, and change its name"State" to "Navigation" in the Properties panel.
Whenever this state is entered, the Navigation GroupNode shall be visibleState_1" and wheneveranother thistransition statefrom is exited, the Navigation GroupNode shall get invisible.
Therefore, select the Navigation state and add an OnEnter and an OnExit action similar"State_1" to what"State". weTo diddo for the Music state.

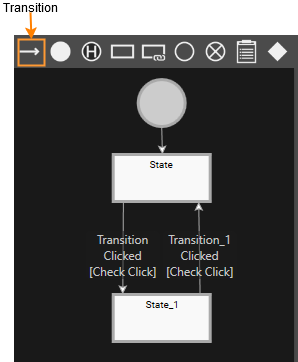
Connect the two States in both directions with Transitions. Justthis drag a Transition from the toolbar onto the outgoing state (e.g. Music)State) then click onto the second state (e.g. Navigation)State_1).
Music
Navigation
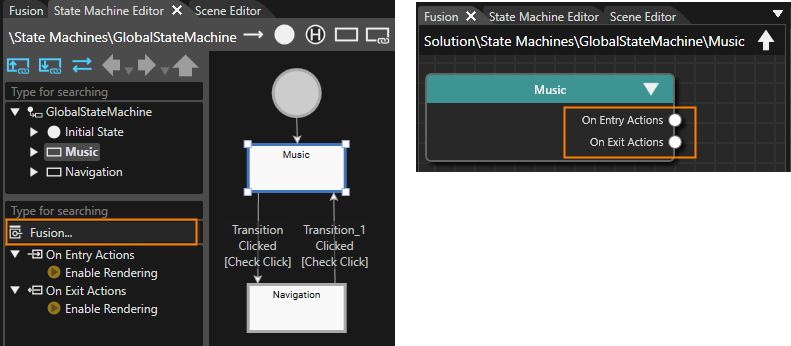
While the state "Music" is selected in the State Machine Editor click on the [Fusion...] button on the bottom left.
In the Select Behavior dialogue find the "Enable Rendering" behavior and double-click it.
Use the dialogue's input field and start typing "Enable Rendering". While you are typing, the list of behaviors decreases as the content of the input field serves as a filter.
In Fusion configure the [Enable Rendering] node according to the table below.
On Entry Actions > EnableRendering
TargetNode
IVI_Sample > IVI_Sample > Music
Visible
TRUE
Repeat similar steps to create an [EnableRendering] Fusion Node for the [Music] node's [On Exit Action] connector. Configure this new [EnableRendering] node according to the table below.
On Exit Actions > EnableRendering
TargetNode
IVI_Sample > IVI_Sample > Music
Visible
FALSE
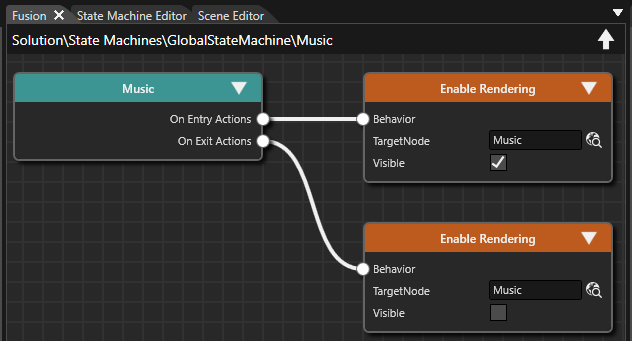
On Enter Actions > EnableRendering
TargetNode
IVI_Sample > IVI_Sample > Navigation
Visible
FALSE
On Exit Actions > EnableRendering
TargetNode
IVI_Sample > IVI_Sample > Navigation
Visible
FALSE
IVI_Sample > IVI_Sample > Menu_button > TextButton_Music
Drag the Behaviors connector to the right and release the mouse button.
Find the "Handle Control State" behavior and double-click it.
Repeat these steps for TextButton_Navigation which can be found following the path below.
IVI_Sample > IVI_Sample > Menu_button > TextButton_Navigation

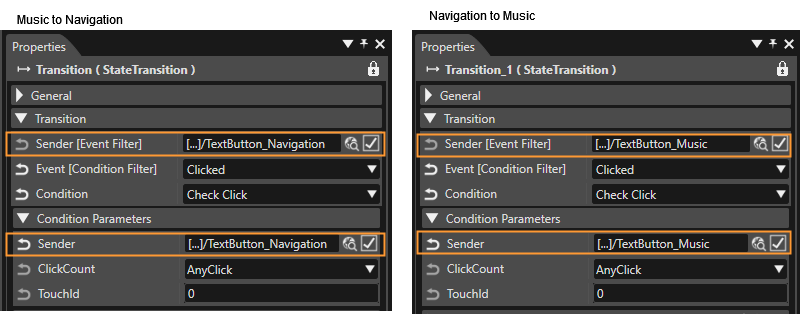
Next, we will configure how these transition are triggered. Select each Transition and set the displayed Properties as shown below.


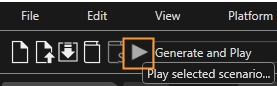
The Player starts displaying the Music screen (and we are in Music state). Use the menu buttons "Navigation" and "Music" to switch between Navigation and Music.