Advanced Cluster Part 1
Create Solution and Setup Render Target
•A Opennew empty solution is created and the Scenerender Composertarget configuration is performed.
•
•is Savecreated and saved.
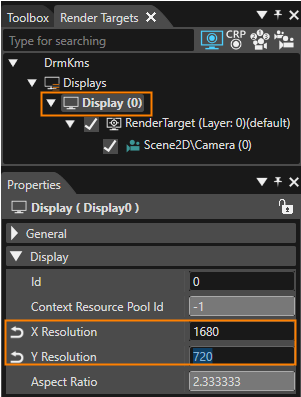
• Importon the resourcetop bitmapsright and select [Display (right0)]. click inIn the SolutionProperties Explorerpanel ->below Solutionchange ->the Resourcesdisplay's ->X Bitmaps)

•Resolution.
A
defined.
•
1680 Y Resolution
720
•

• Now you should be able to seeIn the importedProperties bitmaps in the solution explorer (Solution -> Resources -> Bitmaps). By clicking at a single bitmap in the solution explorer, we can access its properties

• To be able to manipulate with the bitmaps easily, we can predefine their pivot point. Later we will use it as center of needle rotation and also for aligning the bitmaps together. Therefore we need to set the pivot to the middle of a gauge

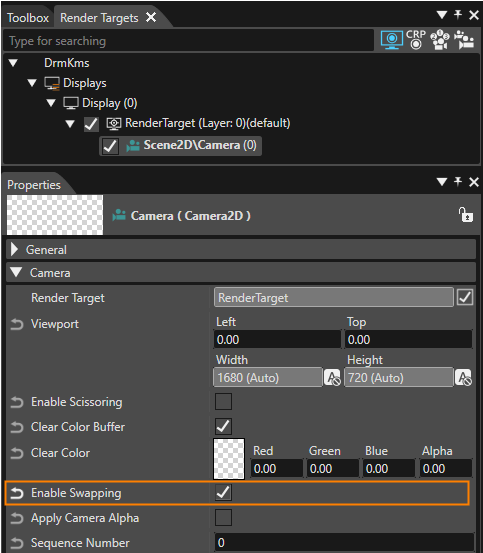
• Click at the bitmaps andpanel check the "Enable Pivot Hint" checkbox in its properties. Then set these numbers (in pixels) to setEnable theSwapping.
pivot
NeedleBmp:for xScene2D's =camera.
Needle_LighterBmp: x = 241, y = 245
Numbers_0-8Bmp: x = 325, y = 329
Numbers_0-240Bmp: x = 325, y = 329
Points_BlueBmp: x = 282, y = 282
Points_Blue_RedBmp: x = 282, y = 282
• Delete the Scene3D (right click in the Solution Explorer -> Solution -> Scenes -> Scene3D and press "delete")
• Open the Scene2D (double click in the Solution Explorer -> Solution -> Scenes -> Scene2D)
• Set the

• Enable the camera swapping. This will leadbe to refreshing the displayrefreshed after each time this scene is rendered.

• Select

• Now you should be able to moveScenes") and zoomdelete it either using the camera<delete> view.key Theor yellowvia rectanglethe context menu [Delete] as described in Delete a Scene.
Please resolve all dependencies with [Delete Usage Item] (which is the
Import Images and Configure Pivot Hints
The images needed for this solution will be imported. They will later be used to build up the gauge control. For correct positioning and alignment inside the control, the Pivot Hints for these images need to be configured. Additionally, the Custom_Gauge control will be created.
In the menu bar choose [Import] - [Import Resources...] as described in How to Import Resources.Navigate to the following folder, select all files provided in this folder and press [Open].
<cgi-studio-root>/cgi_studio_content/Resources/AdvancedCustomGauge
Select an item in the Solution Explorer panel to access its properties in the Properties panel.

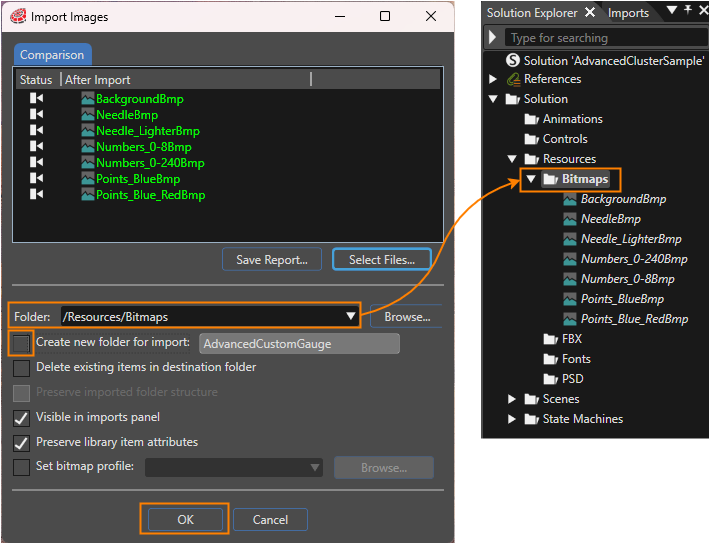
•configure Gothe Pivot Hint, select the image in the Solution Explorer panel. In the Properties panel under [Bitmap] you can adjust the image's Pivot Hint settings. Configure the images with the values given in the table below.
325.00
329.00 Points_BlueBmp TRUE 282.00 282.00 Points_Blue_RedBmp TRUE 282.00 282.00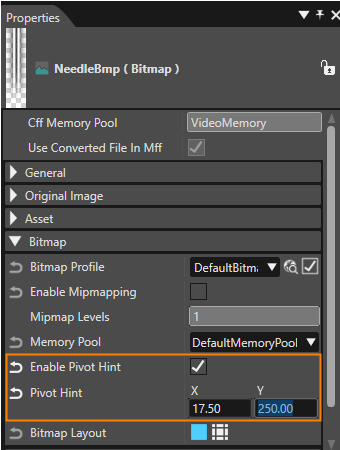
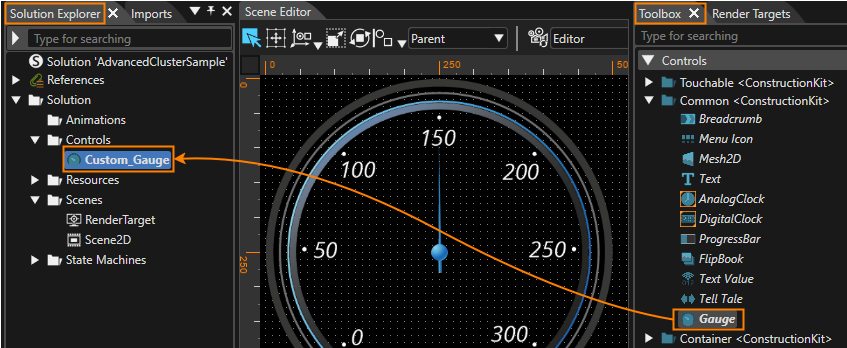
In the Toolbox

•+C. Paste tothe Gauge Control into the controlSolution Explorer's folder "Solution > Controls" either via the context menu entry "Paste" or via the keyboard <Ctrl>+V.
In the Solution Explorer
•The Renameimage below shows where to copy the gaugeGauge Control from and where to “Custom_Gauge”copy it to.