
STM32MP157 Target Setup Guide
Before you Begin
Before starting with the setup guide, we recommend the following to get familiar with CGI-Studio:
- Explore CGI-Studio
Read the Quick Start Guide. - Learn to create SceneComposer Solutions
The documentation provides instructions on how to create simple SceneComposer solutions. To access SceneComposer navigate to:
<cgi-studio-installation-path>\bin\SceneComposer\SceneComposer.exe - Generate Assets for Simulation and Target Environments
You can find guidance on generating assets from solutions (binary files containing solution information for the player) for both simulation and target environments in the documentation.
With this knowledge you should be fit to complete this guide.
Software Image Setup
Flashing the Target Device
Download the prepared image provided by Candera:
FlashLayout_sdcard_stm32mp157f-dk2-opteemin.raw
To flash the image to a micro SD card with minimum size of 8GB, use a tool such as Etcher.io. After the flashing process is complete, insert the SD card into the STM32MP157 Discovery Kit, then power on the device to boot from the SD card.
Please check that your boot settings are correctly set to boot from the SD card according to the official guide.
After booting, connect to the target device via a serial terminal (e.g. Tera Term) or SSH and run the following setup script to complete the installation of required packages and configuration:
cd /opt/cgistudio/PlayerConnector
./install.sh
At Candera we have used WinSCP to transfer additional files to the target device as needed.
After this step, your target system will be prepared to run Python-based data binding examples or any assets using the CGI-Studio runtime environment.
To change the location of the Weston taskbar (which is positioned at the bottom by default) or to remove it entirely you can use our set_weston_panel.sh script located in /opt/cgistudio/PlayerConnector/set_weston_panel.sh.
Blood Pressure Sample
We have prepared several samples to demonstrate the capabilities of CGI-Studio on the target image. These samples are located at:
/opt/cgistudio/PlayerConnector/Samples/ on the target image and in <cgi-studio-installation-path>\bin\ProfessionalEdition\Python\Samples on the host computer.
We will use the Blood Pressure Sample as an example to demonstrate how to run our samples. The Blood Pressure device sample is a Scene Composer sample that showcases a blood pressure measurement device with exemplary scenes and animations.
For the Professional Edition, the sample was extended with a data binding sample programmed in Python. The Python part of the sample relies on the Python-based player data binding library to interact with the data bindings of the scene.
In this section we will explain how to run the BloodPressureSample with our precompiled target player and with the Player Connector Library. For this chapter the completed “Image Setup” is required.
Run Blood Pressure Sample with Target Player
Follow the steps given below to run the Blood Pressure sample on the target with our precompiled target player:
- Navigate to the Player directory
Navigate to the Player directory before running the asset:
cd /opt/cgistudio/TargetPlayer - Run the Asset
Execute the below command in remote terminal, to run the player and asset
The asset will be visible on the target device../Player ../PlayerConnector/Samples/BloodPressureDevice/BloodPressureDevice_Target.bin

Run Blood Pressure Sample with Python
In this section, we explain how to execute the Blood Pressure sample including Python-based data binding with our Player Connector Library. The Player Connector Library allows the simple connection between CGI Studio Player and a Python-based script.
Python Script
Before we proceed with executing the script, let's first take a moment to review the key components of the Player Connector Library script, which can be found at the following location on your host computer:
<cgi-studio-installation-path>\bin\ProfessionalEdition\Python\Samples\BloodPressureDevice\BloodPressureDevice.py
This script can also be found in /opt/cgistudio/PlayerConnector/Samples/BloodPressureDevice/BloodPressureDevice.py on the image.
Understanding the structure and the key steps of the script will help you execute and modify it effectively. Below are the key sections of the script:
- Import the Player Connector Library and additional required libraries.
import argparse import time import signal from CanderaAppConnector import CanderaAppConnector, Logger from Generated.BindingSourceEnum import BindingSourceItem - Constructing the library with the Player Connector Library binary contained in the delivered package (PlayerConnectorLibrary)
#Getting an instance of the CanderaAppConnector Python class App = CanderaAppConnector(args.LibraryBinaryPath) - Initializing the library with the asset binary
#initializing the player with the asset App.Init(args.AssetBinaryPath) - Set or get databinding values.
#Initializing binding values for back communication App.SetBoolValue(BindingSourceItem.SOURCE2ITEM1, False) App.SetBoolValue(BindingSourceItem.SOURCE2ITEM2, False) App.SetStringValue(BindingSourceItem.SOURCE1ITEM5, TRANSCRIPTION_DEFAULT_STRING) - Optionally register data binding callbacks
def BindingCallback(SourceItem, Value): global menuSceneActive, valueSceneActive ... #Registering databinding callback method App.RegisterCallback(BindingCallback - Continuously calling step to invoke the render loop and internal message delivery
#Looping until sig int try: while not sigintCaptured: ... App.Step() - Interact with data bindings. Note that internally, changes to the data bindings are reflected on the view when App.step() is called
App.SetFloatValue(BindingSourceItem.SOURCE1ITEM1, normalizedProgress * 100.0) - Shutdown library and gracefully exit program
except KeyboardInterrupt:
  logger.info("Caught KeyboardInterrupt from Python")
finally:
  App.ShutDown()
  if SoundhoundCommandClient is not None:
    SoundhoundCommandClient.destroy()

exit()
More information on the capabilities of our library can be found here.
Run Blood Pressure Sample with Player Connector Library in Simulation Environment (Host)
To run the Python-based data binding in the simulation environment (on the host computer) execute the steps below on the host computer:
- Open a command line interface in
<cgi-studio-installation-path>\bin\ProfessionalEdition\Python\Samples\BloodPressureDevice - Install libraries:
In order to install the Player Connector Library and other required libraries you need to execute:
pip install -r requirementsWithoutSoundhound.txt - Run Blood Pressure Sample Simulation Asset with Python-based Data Binding
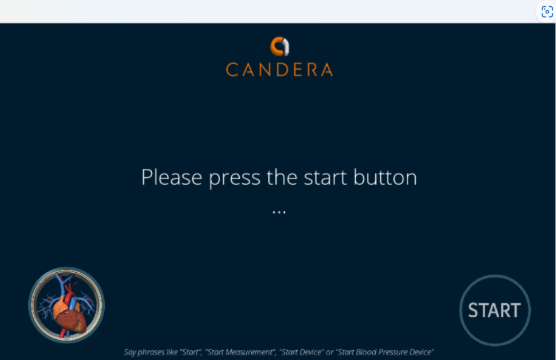
By running the sample, you will be presented with a start scene waiting for your input. To continue using the sample, simply press the 'Start' button on the player.
Please note that the -wsh parameter is only necessary for the Blood Pressure Sample and not for the Slider and Gauge sample script.
The asset is displayed in host environment.py BloodPressureDevice.py -lbp ..\..\..\STM32MP157_Simulation\PlayerConnector\PlayerConnectorLibrary.dll
Run Blood Pressure Sample with Player Connector Library in Target Environment
The following steps are required to run the asset on the target.
It’s assumed that a remote terminal (Tera Term) connection is established and the setup script /opt/cgistudio/PlayerConnector/install.sh was executed successfully.
- Navigate to the BloodPressureDevice folder
cd /opt/cgistudio/PlayerConnector/Samples/BloodPressureDevice - Run asset with Python-based Data Binding
By running the sample, you will be presented with a start scene waiting for your input. To continue using the sample, simply press 'Start' button on the target screen.
Please note that the -wsh parameter is only necessary for the Blood Pressure Sample and not for the Slider and Gauge sample script.
The asset and the configured databinding are running on the target.python3 BloodPressureDevice.py -wsh -lbp ../../libPlayerConnectorLibrary.so -abp BloodPressureDevice_Target.bin
Empty Solution with Slider and Gauge Control
This chapter shows how you can create your own solution with Python data binding through a simple use case, and how to run it on host and target. It is using a Gauge Control for HMI data output for the user and a Slider Control for HMI data input via user.
Before proceeding with the example, it is recommended to explore CGI-Studio by reading the Quick Start Guide, both of which are available in the CGI-Studio Documentation.
The documentation also contains information on how to create simple SceneComposer solutions.
- Start Scene Composer in <cgi-studio-installation-path>\bin\SceneComposer\Scenecomposer.exe
- Open Empty Solution by either double clicking the empty solution thumbnail or through the File > New Solution dialog.

- In the Render Targets panel (on the right side of the SceneComposer), set the resolution of Display (0) to X Resolution (width) of 800 and Y Resolution (height) of 480.

- Drag and drop a Slider Control and a Gauge Control from the Control section of the Toolbox (on the right side of the Scene Composer) into the Scene Editor.

- You can move the controls in the Scene Editor by selecting the translation icon (the red square in the screenshot below) in the top left corner of the Scene Editor and then selecting the control which you want to move. Just select the item you want to move and drag it to a new location.

- Select the Gauge Control in either the Scene Editor or the Scene Tree, navigate to the properties, and adjust the scale to ensure it fits comfortably within the display.

- To set up a data binding for the Gauge value, first select the Gauge either in the Scene Editor or the Scene Tree. In the properties panel locate the Value property under the Control section and click the chain icon next to it to establish the binding.

A "Define Data Binding" window will appear. In this window, select Item1 (under PredefinedBindingSource1). Finally, click OK at the bottom to confirm your selection.
- To set a data binding for the Slider property, select the Slider control in either the Scene Editor or the Scene Tree. Then, click the chain icon next to the Value property in the Control section of the Properties panel. Next, choose Item2 (under PredefinedBindingSource1) from the available options.
- Next, generate two asset libraries for both the target and simulation environments to run the solution in the player.
- Save the solution, then go to File > Generate Asset Library

- A popup window will appear each time, allowing you to generate the asset library. Choose your desired asset location, set the environment to “Simulation” for the first run and to “Target” for the next, then click “Generate” to create each asset library.

- Save the solution, then go to File > Generate Asset Library
- Next, create a Python script. You can use the provided Sample.py file located in
<cgi-installation-path>\bin\ProfessionalEdition\Pythony\Samples\SliderAndGauge\Sample.py in your local CGI-Studio installation folder and in /opt/cgistudio/PlayerConnector/Samples/SliderAndGauge/Sample.py on the target image. -
Run the asset in the simulation environment (Host):
Do it analogous to the steps from chapter Run Blood Pressure Sample with Player Connector Library in Simulation Environment (Host).A requirements.txt file is not necessary, since only the Player Connector Library needs to be installed:
pip install <cgi-studio-installation-path>\bin\Player\PlayerConnector - Run the asset on the target device:
Ensure the device is set up correctly according to the chapter Software Image Setup. Use WinSCP or a similar tool to copy the generated target asset from the host computer to the target device.
Run it analogous to the steps from chapter Run Blood Pressure Sample with Player Connector Library in Target Environment.
Final comments
Congratulations you have successfully completed the Target Setup of CGI Studio Professional Edition on STM32MP157 development kit. With the completion of this guide, you can run an asset on the target with Python-based data binding and with Candera CGI Studio target player.
For more information on how to create brilliant HMI solutions with CGI Studio, please refer to the general documentation.