
Coffee Machine
Overview
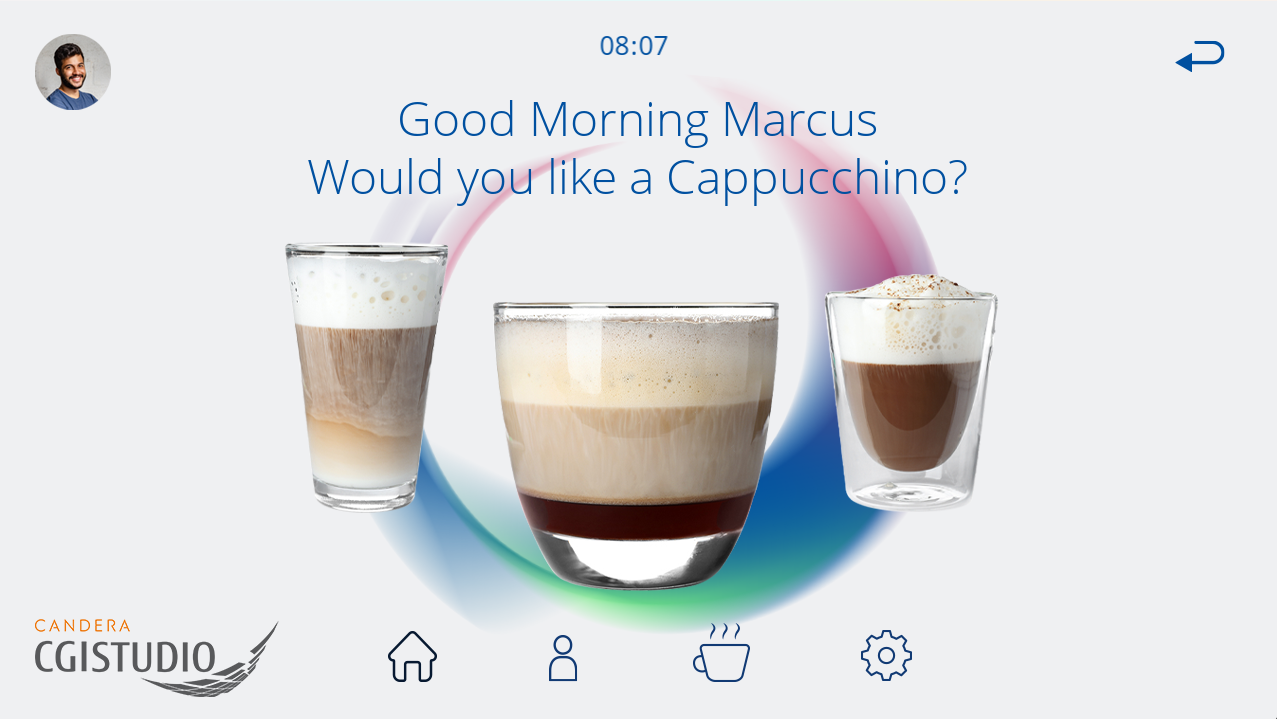
This solution shows our Candera demo for a Coffee Machine screen. It demonstrates a wide range of coffee machine functionalities and also introduces new ideas like the implementation of profiles.
Feature Description
Scene
| No. | Scene Name | Description |
| (1) | Coffee Clock | Initial scene with animated clock as a placeholder until the screen is touched. Upon touch the main page will be shown. |
| (2) | Scene_Welcome | The main screen upon starting the demo. The screen features a "Good Morning" message that is addressed to the selected profile. This scene features three pre-selected coffee types. More coffee variants are available in the Scene_Selection. |
| (3) | Scene_Profiles | This screen allows the selection of pre-defined profiles (Marcus, Alice). A "New Profile" button is available, however, non-functional in this demo. The changed profile is also reflected on the other scenes. |
| (4) | Scene_Selection | This menu shows all available coffee variants. The selection is implemented via a horizontal scrolling list that can be navigated either by the press of the navigation buttons or by swiping. |
| (5) | ||
| (6) | ||
| (7) |
Control
ADAS controls that is used in this solution is same as the one which is added under 3d-adas-control-solution under sample solutions. For details, please refer to 3D ADAS Control Solution.
All ADAS features added when toggle buttons in ADAS scene are enabled.
Transition
Transition rules were used with animation as transition type for respective tiles movement and it is cyclic.
For example:
State Machine
GlobalStateMachine activates common scenes that are used by all the other scenes such as background scene, cluster scene and 3D-ADAS scene. Few animations are configured that needs to be activated during startup like range display in cluster which indicates battery that decreases as per efficiency.
MainCarPositionStateMachine handles direction of central car movements. Left and Right arrow keys are used for this action.
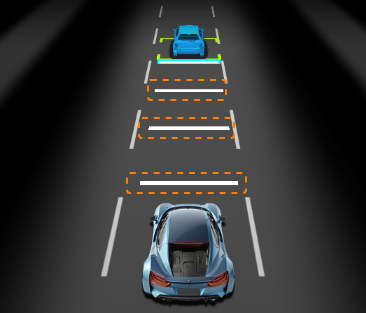
SetDistanceStateMachine gets activated when ADAS tiles toggle button is enabled and the lines between central car and another object shows up as shown in below image. Plus and Minus keys are used for this action.
SetSpeedStateMachine specifies speed range on which car must be, as per user settings. If set speed initially 80 and when user sets for 90, then speed ranges from 0-90.
TileStateMachine handles tiles movement with up and down arrow keys among Music player, Contacts, ADAS and Navigation tiles.
Play/Operation using Player
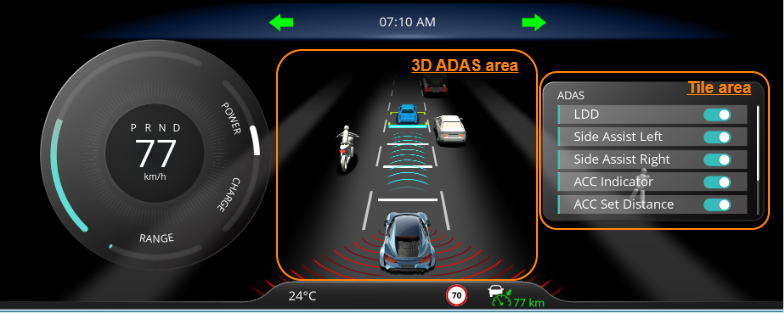
3D ADAS area
- You can control the position of the main car horizontally by pressing the Left Key and Right Key.
- The status of LDD (Lane Departure Detection) set in the Tile area is displayed.
- The status of ACC (Adaptive Cruise Control) set in the Tile area is displayed.
Tile area
- The tiles switch by pressing the Up Arrow Key or Down Arrow Key. When the Down Arrow Key is pressed, the tiles switch in the following order:
AdasScene2D→NavigationScene2D→MusicScene2D→PhoneScene2D - The Add Key ($+$) and Subtract Key ($-$) inputs can be used to set the ACC distance in the AdasScene2D.
- In the ADAS 2D scene, the Add and Subtract Keys are used to set the ACC speed.