Advanced Cluster Part 2
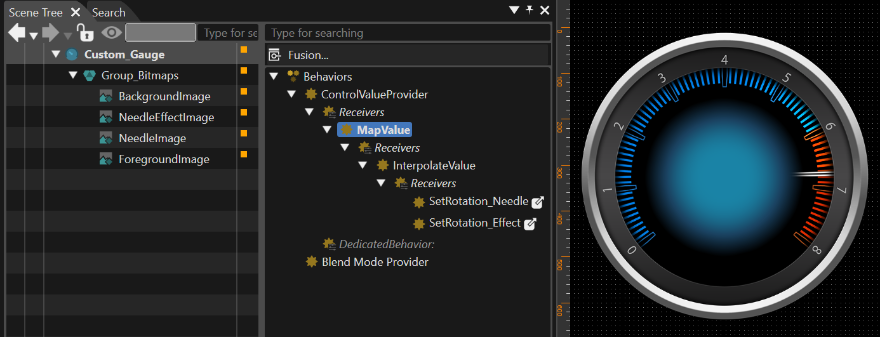
In this part of the Advanced Cluster Best Practice the Custom_Gauge control will be extended with a ForegroundImage and a NeedleEffectImage and new images will be configured to change the control's appearance completely.
Restructuring Custom_Gauge Control
- In the Solution Explorer double-click the "
Custom_Gauge"Custom_Gauge".- The control "
Custom_Gauge"Custom_Gauge" will be opened in the Scene Editor, ready to be edited. - Scene Tree will display the tree of nodes the control is composed of.
- The control "
- In the Scene Tree panel rename the "Group" node to "
Group_Bitmaps"Group_Bitmaps".- In the Scene Tree panel the Group node has been renamed.
Rename from Rename to Group Group_Bitmaps
- In the Scene Tree panel the Group node has been renamed.
- In the Scene Tree panel select the root node Custom_Gauge. In the Properties panel's [Layouter] section change the Layout type from "Overlay" to "None".
- The Layout Type has been changed.
- The Layout Type has been changed.
- In the Scene Tree panel
cloneright-click on the "BackgroundImage"usingand choose [Clone...] from the contextmenu's [Clone...].menu. In the opening "Clone Item" dialog enter "ForegroundImage" asname.name and press [OK].- A clone of "BackgroundImage" has been created. Its name is "ForegroundImage". The Scene Tree now looks as in the image below.
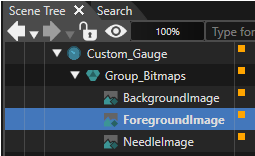
- A clone of "BackgroundImage" has been created. Its name is "ForegroundImage". The Scene Tree now looks as in the image below.
Let'
Exchanging Custom_Gauge Control's changeImages
In steps 1 - 3 of this section the Custom_Gauge new images for the ForegroundImage and BackgroundImage nodes will be configured. These steps need to be performed for the BackgroundImage node as well as for the Foreground Image node.
In steps 4 - 5 of this section the NeedleImage will be cloned and the images displayedof by BackgroundImageNeedleImage and ForegroundImage:NeedleEffectImage will be exchanged.
- Fusion will be opened, displaying the Fusion diagram for the image.
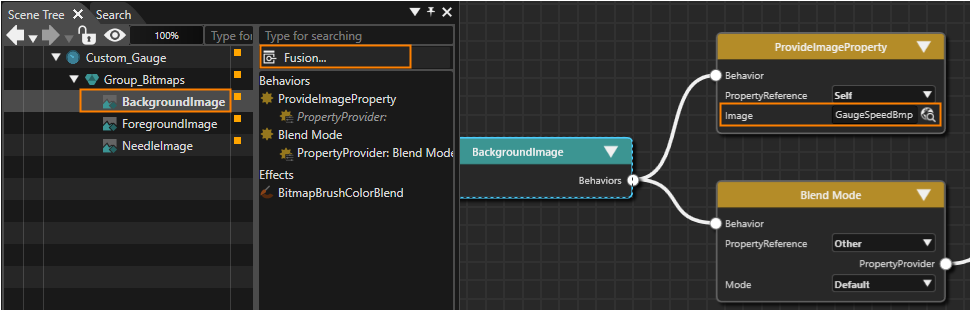
- The [Choose Item] dialog will be displayed.
- The images displayed by the BackgroundImage and ForegroundImage nodes have been changed.
- When activating the Scene Editor the Custom_Gauge with new Foreground and Background image can be viewed. It should look like the image below.
To switch to the Fusion diagram of the second image simply double click it in the Scene Tree panel.
Node ProvideImageProperty'snew ProvideImageProperty imageBackgroundImage Solution > Resources > Bitmaps > Points_Blue_RedBmp ForegroundImage Solution > Resources > Bitmaps > Numbers_0-8Bmp 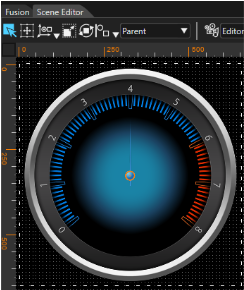
- A clone of "NeedleImage" has been created. Its name is "NeedleEffectImage". The Scene tree looks as in the image below.
Please follow the order of the nodes in the scene tree to ensure their proper visibility.
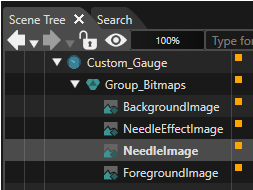
- The images displayed by the NeedleImage and NeedleEffectImage nodes have been changed.
- When activating the Scene Editor the Custom_Gauge with new Needle and NeedleEffect image can be viewed. It should look like the image below (the needle is pointing to 3 o'clock).
Node ProvideImageProperty's image NeedleImage Solution > Resources > Bitmaps > NeedleBmp NeedleEffectImage Solution > Resources > Bitmaps > Needle_LighterBmp 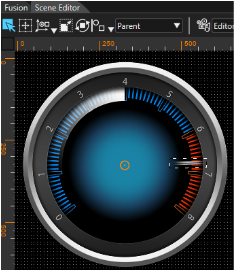
Configuring
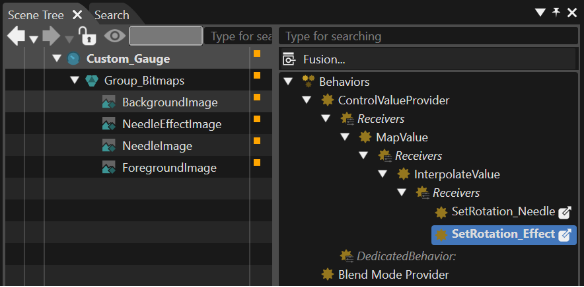
•select Clickthe NeedleImage.NeedleImage Renamenode. In the Scene Tree panel's right side rename the existing SetRotation behavior according to "SetRotation_Needle"
• Click NeedleEffectImage. Rename the existingtable below. Repeat the same steps for the NeedleEffectImage node.
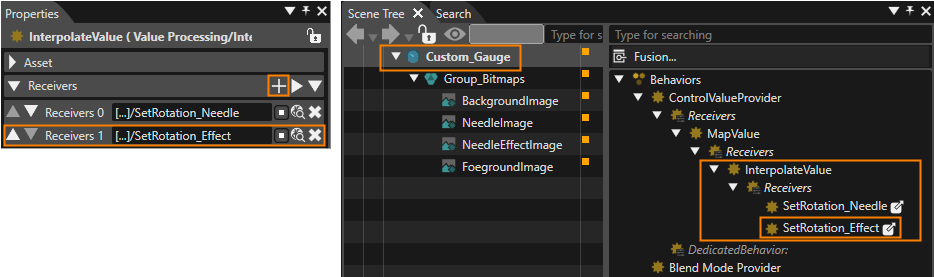
•This Click[+] Custom_Gauge.button Dragis marked in orange in the image of step 4.
Press the magnifying glass icon next to the new Receivers 1 entry.
Select the behavior SetRotation_Effect, which can be found under the path given below, and click [OK].
•
Custom_Gauge > Group_Bitmaps > NeedleEffectImage > SetRotation_Effect
Configuring Effects and MapValue Behavior's Limits
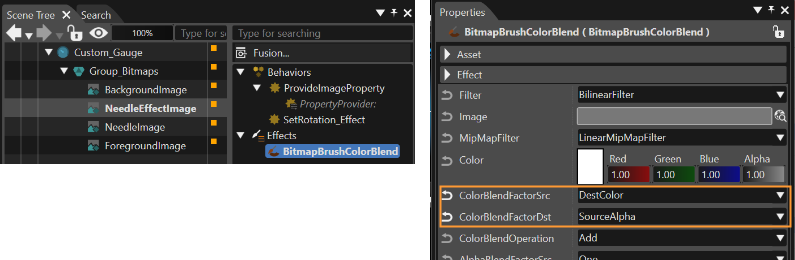
While NeedleEffectImage is selected in the Scene
BitmapBrushColorBlend
Property
Value ColorBlendFactorSrc DestColor ColorBlendFactorDst SourceAlpha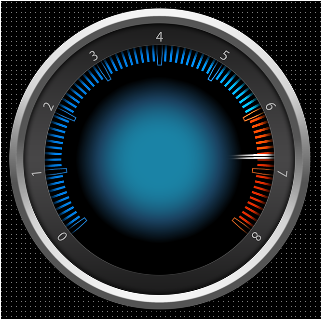
In the
•Tree Gopanel's right side select the MapValue behavior. In the Properties panel configure its properties according to the “NeedleEffectImage”table below.
MapValue Properties
•
• Go to the “Custom_Gauge” behavior “MapValue” and set these properties:OutputMin = -128.5, OutputMax = 128.5