# Target setup guide for the ESP32S3 (ESP32S3-Touch-LCD-2.8C)
#### Before you Begin
Before starting with the setup guide, we recommend the following to get familiar with CGI-Studio:
- Explore CGI-Studio
Read the [Quick Start Guide](https://doc316en.candera.eu/books/getting-started/chapter/quick-start-guide).
- Learn to create SceneComposer Solutions
The documentation provides instructions on how to create simple SceneComposer solutions. To access SceneComposer navigate to:
*<cgi-studio-installation-path>\\bin\\SceneComposer\\SceneComposer.exe*
- Generate Assets for Simulation and Target Environments
You can find guidance on generating assets from solutions (binary files containing solution information for the player) for both simulation and target environments in the [documentation](https://doc316en.candera.eu/books/asset-library-generation).
With this knowledge you should be fit to complete this guide.
#### Setup
##### Template Scenes
When using a template scene as the base for development, the surfaceFormat inside the RenderTarget needs to be set to SurfaceFormatRGB565.
##### IDE
To compile a CourierSampleApp Example for the target ESP IDF needs to be installed within Visual Studio Code: [Getting Started with VS Code IDE - ESP32 - — ESP-IDF Programming Guide v4.3.1 documentation](https://docs.espressif.com/projects/esp-idf/en/v4.3.1/esp32/get-started/vscode-setup.html)
##### Device Connection to host PC
The ESP32S3-Touch-LCD-2.8C target from waveshare has two USB-C ports. For flashing connect the one labled "UART" to the host PC.
##### Compile and flash
Inside *cgi\_studio\_apps\\References\\ESP-IDF* a example project can be found. Open this project within Visual Studio code
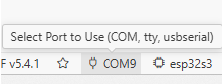
It might be necessary to adjust the selected COM port. For this click the *COM<current port number>* on the bottom task bar and select one of the available com ports:
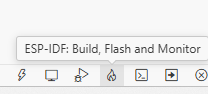
To compile and flash the target press the *ESP-IDF: Build, Flash and Monitor* on the bottom Task bar.
After compilation and flashing an example project can be seen on the display of the ESP32S3.
#### Replacing the Asset File
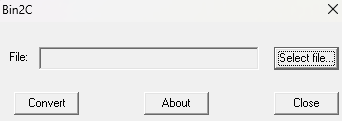
The current setup requires the Asset binary file to be converted to a C Array that can be placed directly within the code. For converting the binaries bin2c from segger can be used:
This program generates a file with a C array inside. This array needs to be copied into the following file: *cgi\_studio\_courier\_apps\\src\\CourierSampleAppLight\\AppPlatform\\Target\_FreeRTOS\_XTENSA\\Solution.c*
The array needs to look like the following: *const unsigned char \_ac2D\_Basic*. Inside the AppEnvironment.cpp file of the same directory this array is referenced:
extern const unsigned char \_ac2D\_Basic\[1130352UL + 1\];
\#define ASSET\_START \_ac2D\_Basic
When updating the Solution.c make sure that the size of the array is the same inside Solution.c and in AppEnvironment.cpp
After the array has been replaced the project can be recompiled and flashed like described in the previous step.