# Android Application Development Environment Setup Guide
To ensure that the system is setup properly to build and run the Android Demo Applications provided, this guide has been created.
# Configuration and System Requirements
By following these steps, you should have a consistent and well-configured development environment for your
Android application on Windows 10/11. Remember to restart your system after making changes related to CMake
in Android Studio and after updating Environment Variables.
#### Operating System
Ensure that your development machine is running Windows 10/11. This guide has been refined to work on Windows 10/11. Other Operating Systems might work, but are not supported.
#### Android Studio
Android Studio Jellyfish (2023.3.1) through Android Studio Meerkat (2024.3.2) have been tested and confirmed to work. Android Studio can be downloaded from the official Android Studio archive: [https://developer.android.com/studio/archive](https://developer.android.com/studio/archive).
##### Android Studio Emulator
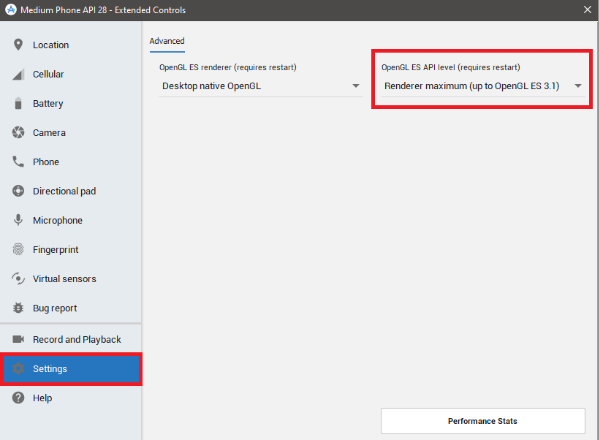
When using the Android Studio Emulator for testing, ensure that the Android version and ABI match those of the Android application. Additionally, make sure that, for the emulator, the OpenGL ES API level (requires a restart) is set to "Renderer maximum (up to OpenGL ES 3.1)." This OpenGL ES API level can be configured in the Android Studio Emulator's Extended Controls.
#### Android Software Development Kit (SDK)
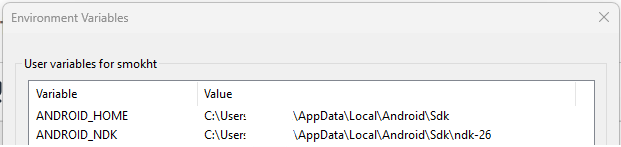
After installing and setting up Android Studio, the SDK path has to be added to the System Environment Variables under the User Variables. After saving make sure to restart the system to apply the changes correctly.
- **Variable Name:** ANDROID\_HOME
- **Variable Value:** %LOCALAPPDATA%\\Android\\Sdk
#### Android Native Development Kit (NDK)
To make use of NDK 26, we need to manually install this. We would also require some files from the NDK 17 release for the build in this release. Download both NDK 26 [https://dl.google.com/android/repository/android-ndk-r26b-windows.zip](https://dl.google.com/android/repository/android-ndk-r26b-windows.zip) and NDK 17 [https://dl.google.com/android/repository/android-ndk-r17c-windows-x86\_64.zip](https://dl.google.com/android/repository/android-ndk-r17c-windows-x86_64.zip) from the official download pages.
1. Navigate to %LOCALAPPDATA%\\Android\\Sdk in Windows File Explorer.
2. Create a new directory named ndk-26.
3. Unzip the contents of android-ndk-r26b-windows.zip into the newly created %LOCALAPPDATA%\\Android\\Sdk\\ndk-26 directory.
4. Unzip the contents (**except llvm)** from android-ndk-r17c-windows-x86\_64.zip\\android-ndk-r17c\\toolchains\\ to %LOCALAPPDATA%\\Android\\Sdk\\ndk-26\\toolchains.
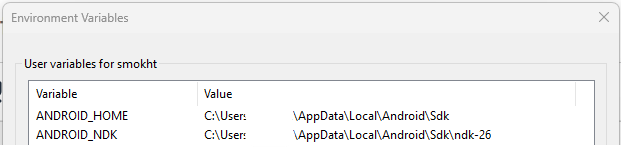
5. After installing and setting up the NDK, the NDK path has to be added to the System Environment Variables under the User Variables. After saving make sure to restart the system to apply the changes correctly.
- **Variable Name:** ANDROID\_NDK
- **Variable Value:** %LOCALAPPDATA%\\Android\\Sdk\\ndk-26
#### Java Development Kit (JDK)
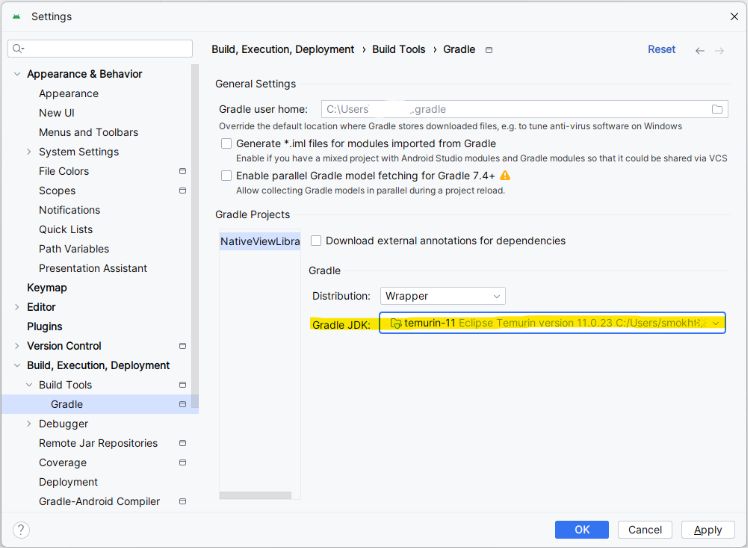
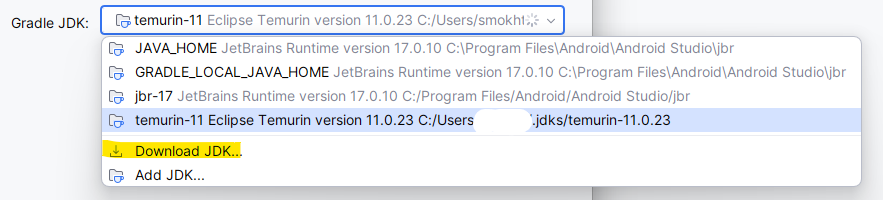
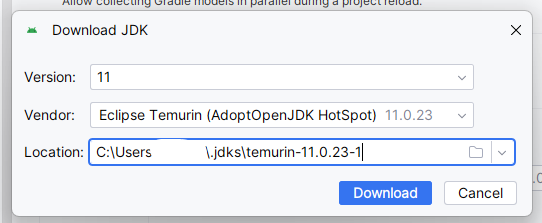
The JDK can be downloaded and used within Android Studio directly. For Android Applications we make use of the Eclipse Temurin 11. When the Android Demo Application has been opened with Android Studio, the Android JDK should be set. On the specific Android Application wiki page the used JDK version is written down.
1. In Android Studio, open \[File | Settings | Build, Execution, Deployment | Build Tools | Gradle\].
2. Choose Gradle JDK: Temurin-11 Eclipse Temurin Version 11.
If this version is not available in the dropdown, download it by clicking on “Download JDK…” in the dropdown of Gradle JDK.
#### Ninja
The "ninja" version used is 1.10.2 and can be downloaded from [https://github.com/ninja-build/ninja/releases/download/v1.10.2/ninja-win.zip](https://github.com/ninja-build/ninja/releases/download/v1.10.2/ninja-win.zip). Copy "ninja.exe" to "C:\\Programs\\" and add this path "C:\\Programs\\" to the Environment Variables -> System Variables -> Path.
#### CMake
For the current Android demo applications that use the NativeView approach (e.g., NativeViewLibrary and AndroidCgiPlayerLauncher), we rely on specific CMake versions.
- **Up to CGI 3.14 -> CMake 3.10.2 is used**
- **From CGI 3.15 -> CMake 3.22.1 is used**
- **The supported CMake version can be also found in the Android application module (app) build.gradle.**
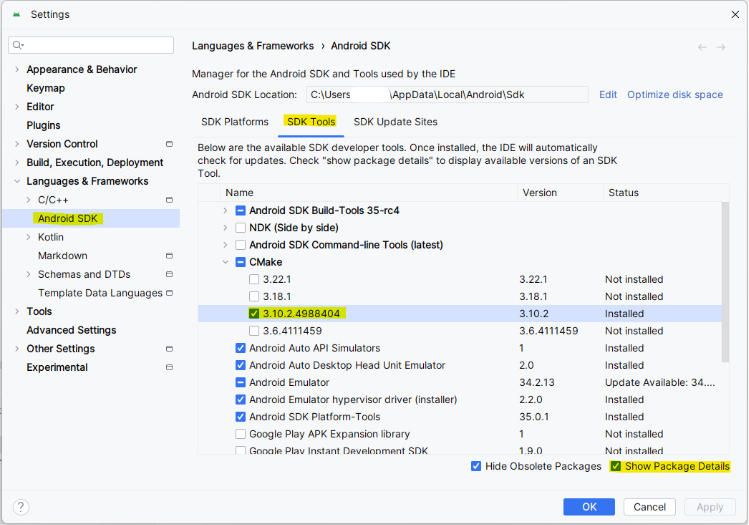
These CMake versions can be installed directly through the Android Studio SDK Manager.
1. In Android Studio, open \[File | Settings | Languages & Frameworks | Android SDK\] and navigate to the SDK Tools tab.
2. Click on Show Package Details on the bottom right of the page.
3. In the list, make sure only CMake 3.10.2 is selected and installed.
4. After installing and closing the settings page, make sure to restart the system to apply the changes correctly.
##### Alternative CMake Approach
For applications other than the NativeView Library approach, (e.g. SampleApp) the '.so' library must be configured and generated with CMake outside of Android Studio. It should be built using 'ninja' with Windows CMD. We recommend using **CMake 3.24.2**, which can be installed through the CMake installer executable available for download on the official CMake website: [https://cmake.org/download/](https://cmake.org/download/). Once the build is complete, manually copy the '.so' library to the corresponding ABI directory in the project. Detailed configuration and build steps will be provided in the respective Android Application Wiki page.
#### Other Dependencies
Depending on your project, additional dependencies might be required (e.g., specific libraries, tools).
Document and install these as needed.
#### Troubleshooting
- If encountering any issues during the setup, refer to the official documentation for Android Studio,
CMake, and NDK for troubleshooting steps.
#### Environment tested with Android Applications
- NativeViewLibrary
- AndroidCgiPlayerLauncher
- SampleApp (Previously known as CourierSampleApp)