Target setup Community Edition Raspberry Pi
This is a setup guide for the CGI Studio Community Edition on the Raspberry Pi 4 or Raspberry Pi 5 with a Wayland display server. It covers the preparation of the target image and environment, the installation of the CGI Studio Debian package and the creation of a simple solution including a data binding script.
This target setup guide does not cover the optional SoundHound integration, which is used by the BloodPressureSample for voice interaction. Please check the Blood Pressure Sample for further information about it.
Target Setup and First Steps
Before You Begin
Before starting with the setup guide, we recommend the following steps to get familiar with Candera CGI Studio:
- Explore CGI Studio
Read the Quick Start Guide. - Learn to create SceneComposer Solutions
The documentation provides instructions on how to create simple SceneComposer solutions. To access SceneComposer navigate to:
<cgi-studio-installation-path>\bin\SceneComposer\SceneComposer.exe - Generate Assets for Simulation and Target Environments
You can find guidance on generating assets from solutions (binary files containing solution information for the player) for both simulation and target environments in the documentation.
With this knowledge you should be fit to complete this guide.
Software Image Setup
The Candera CGI Studio Community Edition supports both Raspberry Pi 4 and Raspberry Pi 5. The following section describes how you can install the Community Edition on your Raspberry Pi device. Additional information about the proper setup and configuration of a Raspberry Pi device can be found in the official Raspberry Pi documentation. It also contains information on how to get started with your Raspberry Pi device. Complete the following steps to prepare your Raspberry Pi for the installation of the CGI Studio Community Edition.
- Download and install the Raspberry Pi Imager from this link: Raspberry Pi software – Raspberry Pi.
- Insert a compatible SD card into your computer for flashing the image.
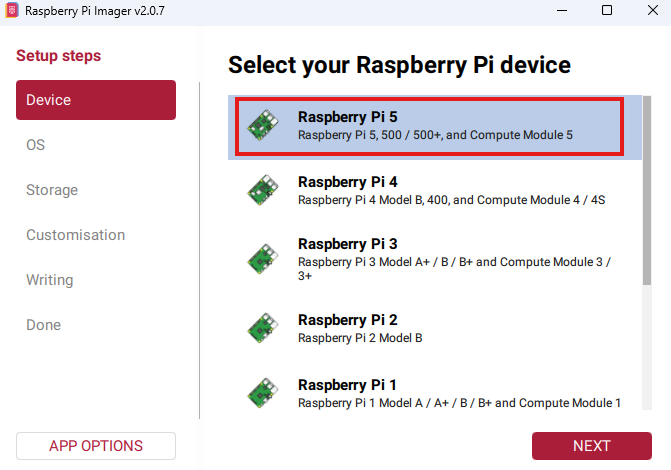
- Open Raspberry Pi Imager and in the Device section select Raspberry Pi 4 or Raspberry Pi 5, depending on your model. Afterwards click "Next".

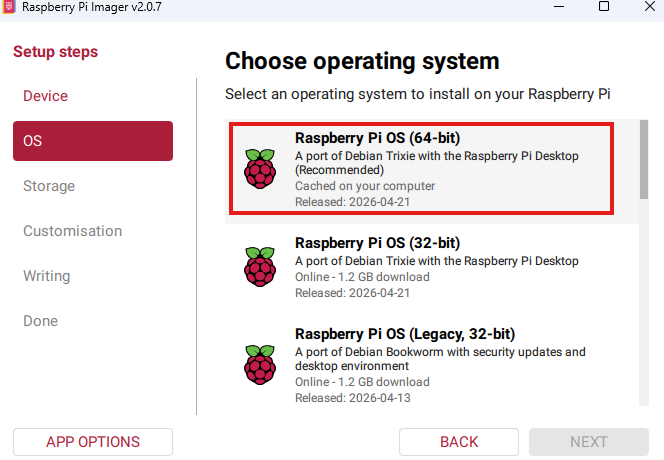
- In the menu Choose operating system select "Raspberry Pi OS (64-bit)". Then click "Next".

Make sure to select the 64-bit version, since lower versions are not supported!
- In the storage section, select the inserted SD card, and click "Next".
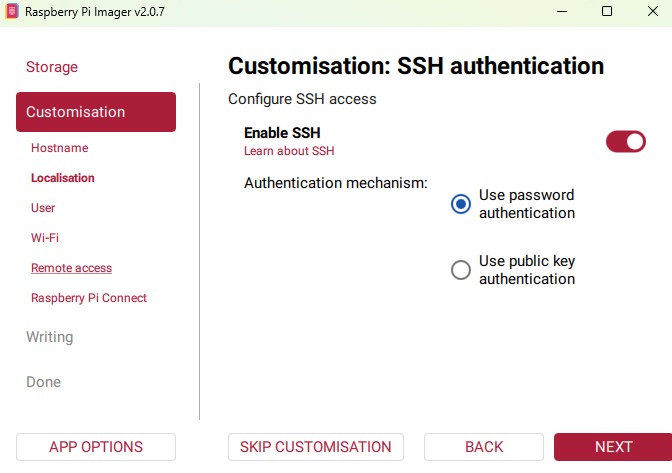
- In the Customisation step click "Next" till the "Customisation: SSH authentication" configuration occurs. Make sure that SSH is enabled.

- Click "Next" and write the image to the SD card. This may take some time.
- Finally eject the SD card from your PC.
Raspberry Pi Startup
This section outlines the initial hardware setup, booting, and first-time configuration process for setting up the operating system on a Raspberry Pi 4 or a Raspberry Pi 5.
- Insert the SD Card: Insert the flashed microSD card securely into the dedicated card slot on your Raspberry Pi board.
-
Connect Hardware: Connect your Raspberry Pi to an external display (using a micro-HDMI to HDMI cable), plug in your USB touch interface/peripherals or connect to DSI cable, and connect the official USB-C power supply to power it on.
- Initial Boot & Setup: The OS will automatically begin its initial boot diagnostics. Follow the on-screen configuration wizard to set up your region, connect via WLAN or LAN, and establish your core username and password.
- Boot to Desktop: Once you complete the wizard, the system will finalize its settings and boot directly into the desktop user interface.
- Once installed, the OS UI will appear on the display.
Connecting to the Raspberry Pi using SSH (WinSCP)
After booting, connect to the target device via SSH or a serial terminal (e.g., Tera Term). This connection is required to transfer files and execute commands. Additional information on how to connect can be found here.
At Candera we use WinSCP to transfer additional files to the device.
Install Debian package on the Raspberry Pi
Installing the Community Edition Debian (.deb) package, which is delivered with the installer, configures the native CGI Studio Player application and the CGI Studio Player Connector on your Raspberry Pi. This chapter outlines the process of transferring and installing the CGI Studio Community package onto a Raspberry Pi 4 or Raspberry Pi 5 using WinSCP and a terminal connection.
- Transfer the File: Use WinSCP or SSH to transfer the downloaded
.debfile to your Raspberry Pi (e.g.,/home/username/). - Navigate to the Directory: Use
cdand verify withls. - Install the Package:
sudo apt update sudo apt install ./cgi-studio-community-rpi5_1.0.0-arm64.deb - The Player can now be executed using:
/opt/candera/bin/Player
If you want to run the Player using the command Player instead of /opt/candera/bin/Player you have to copy it from /opt/candera/bin/Player to /bin/Player
Activate License
Our target player is restricted by a license which is required for running our assets on the Raspberry Pi. If the license is not activated the Player will display a watermark. There is also a 60-minutes time runtime restriction for running the asset on the target.
A description on how to obtain your license file (*.lic) can be found here.
After obtaining your license, please copy the license file to the following location, next to the Player, on the target:
/opt/candera/bin/License.licIf the license file is not named License.lic, please rename it. CGI Studio is now activated on your target device.
If you don't have permission to copy the license file, grant it by running sudo chmod 777 /opt/candera/bin on the device.
Run Blood Pressure Sample with Target Player
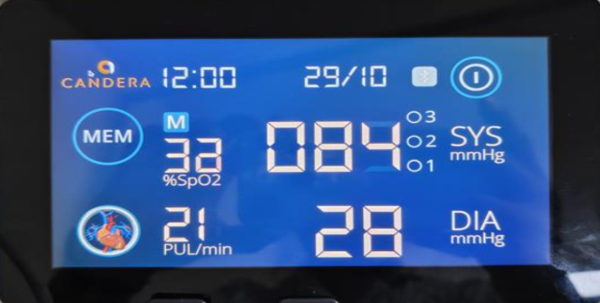
The Blood Pressure Device sample is a Scene Composer sample that demonstrates a blood pressure measurement device with exemplary scenes and animations. General information on this sample can be found in the Blood Pressure Solution documentation.
Execute the following command on the Raspberry Pi device to run the sample using our target player.
/opt/candera/bin/Player /opt/candera/Python/Samples/BloodPressureDevice/BloodPressureDevice.binThe asset will be visible on the target device.
Run Blood Pressure Sample with Player Connector Library
The Blood Pressure Sample sample is extended with a data binding programmed in Python. The Python part of the sample relies on the Python-Based Player Data Binding Library to interact with the data bindings of the scene. Once the hardware is set up, follow these steps to configure the Python environment and execute the sample.
The Python code for the blood pressure device sample can be found under:
<cgi-studio-installation-path>\bin\CommunityEdition\Python\Samples\BloodPressureDevice on the host computer and in /opt/candera/Python/Samples/BloodPressureDevice on the target, after successful installation of the debian package.
Follow the steps below to run the Blood Pressure Sample with player connector library.
- Move to the directory: Open the terminal on your Raspberry Pi and move to the sample directory.
cd /opt/candera/Python/Samples/BloodPressureDevice - Grant write permissions to the folder opt/candera/Python
sudo chmod 777 -R /opt/candera/Python - Configure and activate the Python Virtual Environment:
Creating a virtual environment ensures that the dependencies for the Candera sample do not conflict with other system libraries.python -m venv . source bin/activate - Install Dependencies:
Install the required Python packages defined in the project's requirements file.
pip install -r ./requirementsWithoutSoundhound.txt -
Run the Sample:
Execute the Blood Pressure Device python script using the following flags.
- -wsh : Disable SoundHound integration
- -lbp : Library binary path
- -abp : Asset binary path
python BloodPressureDevice.py -lbp /opt/candera/lib/libPlayerConnectorLibrary.so \
-abp /opt/candera/Python/Samples/BloodPressureDevice/BloodPressureDevice.bin -wsh
The -wsh parameter is only necessary for the BloodPressureDevice sample not for the Slider and Gauge sample
- Verification: Upon execution, the Blood Pressure Device UI should initialize and appear on your connected Raspberry Pi display.
If the display is portrait mode it can be rotated to landscape mode.
wlr-randr --output DSI-2 --transform 90
Empty Solution with Slider and Gauge Control
This chapter shows how you can create your own solution with Python data binding through a simple use case, and how to run it on host and target. It is using a Gauge Control for HMI data output for the user and a Slider Control for HMI data input via user.
Before proceeding with the example, it is recommended to explore Candera CGI Studio by reading the Quick Start Guide, which is available in the CGI Studio documentation.
The documentation also contains information on how to create simple SceneComposer solutions.
- Start Scene Composer in <cgi-studio-installation-path>\bin\SceneComposer\Scenecomposer.exe
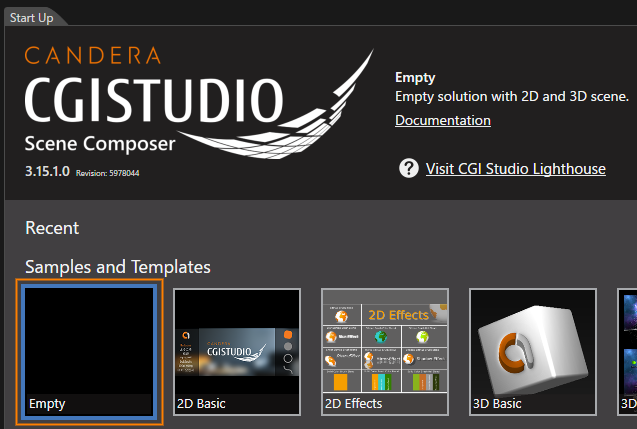
- Open Empty Solution by either double clicking the empty solution thumbnail or through the File > New Solution dialog.

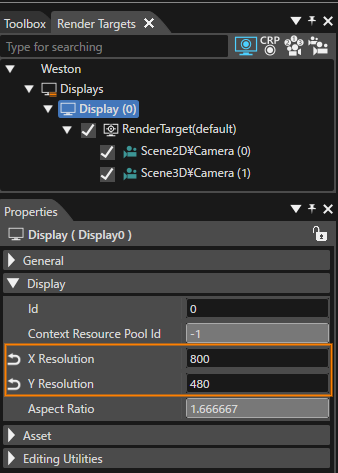
- In the Render Targets panel (on the right side of the SceneComposer), set the resolution of Display (0) to X Resolution (width) of 800 and Y Resolution (height) of 480.

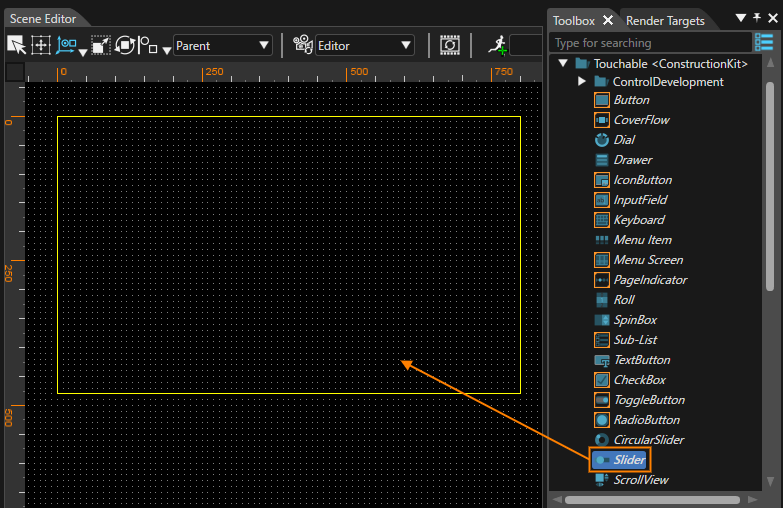
- Drag and drop a Slider Control and a Gauge Control from the Control section of the Toolbox (on the right side of the Scene Composer) into the Scene Editor.

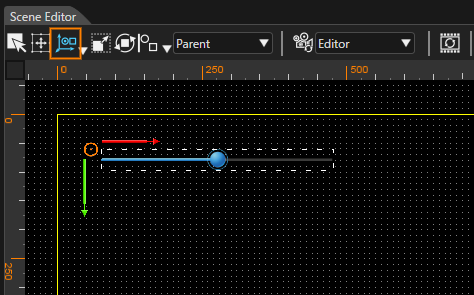
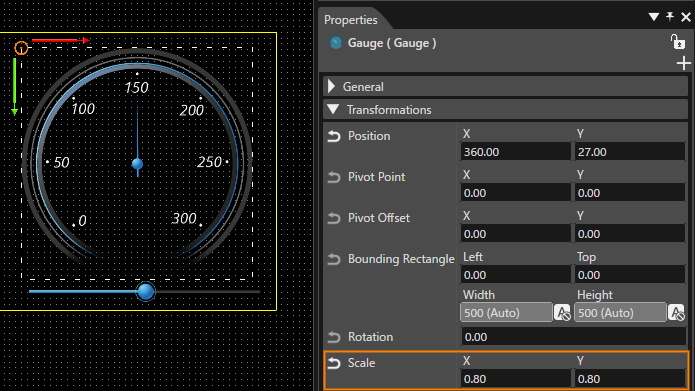
- You can move the controls in the Scene Editor by selecting the translation icon (the red square in the screenshot below) in the top left corner of the Scene Editor and then selecting the control which you want to move. Just select the item you want to move and drag it to a new location.

- Select the Gauge Control in either the Scene Editor or the Scene Tree, navigate to the properties, and adjust the scale to ensure it fits comfortably within the display.

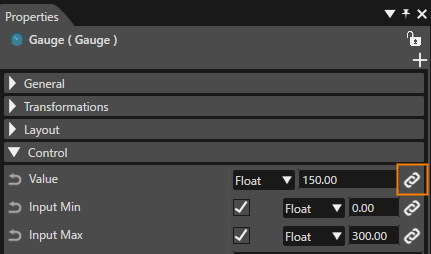
- To set up a data binding for the Gauge value, first select the Gauge either in the Scene Editor or the Scene Tree. In the properties panel locate the Value property under the Control section and click the chain icon next to it to establish the binding.

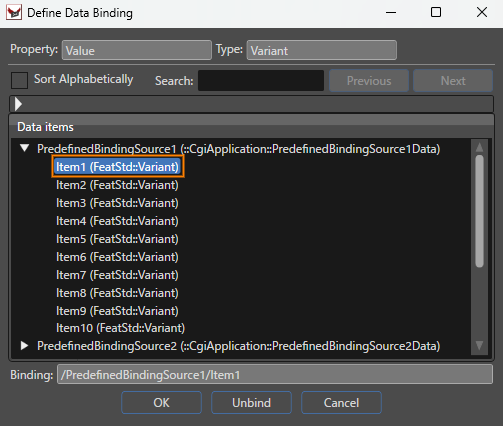
A "Define Data Binding" window will appear. In this window, select Item1 (under PredefinedBindingSource1). Finally, click OK at the bottom to confirm your selection.

- To set a data binding for the Slider property, select the Slider control in either the Scene Editor or the Scene Tree. Then, click the chain icon next to the Value property in the Control section of the Properties panel. Next, choose Item2 (under PredefinedBindingSource1) from the available options.
- Next, generate an asset library for the target environment to run the solution in the player.
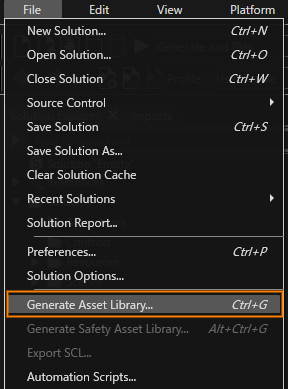
- Save the solution, then go to File > Generate Asset Library

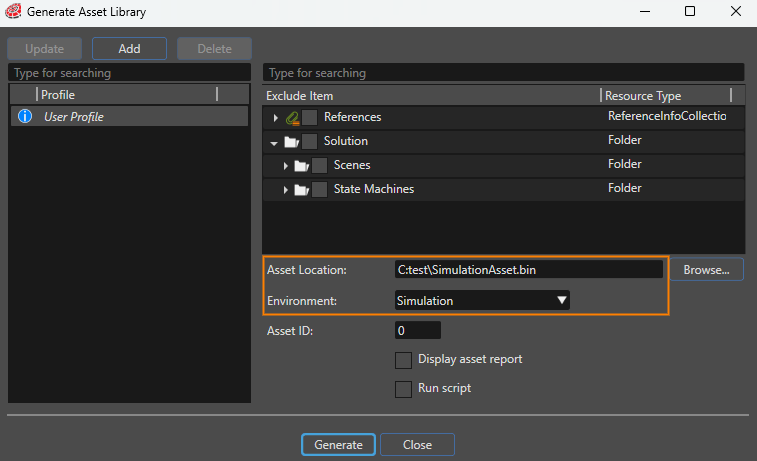
- A popup window will appear, allowing you to generate the asset library. Choose your desired asset location, set the environment to “Target”, then click “Generate” to create each asset library.

- Save the solution, then go to File > Generate Asset Library
- Next, create a Python script. You can use the provided Sample.py file located in
<cgi-installation-path>\bin\CommunityEdition\Python\Samples\SliderAndGauge\Sample.py in your local CGI-Studio installation folder and in /opt/candera/Python/Samples/SliderAndGauge/Sample.py on the target. - Run the asset on the target device:
Ensure the device is set up correctly according to the chapter Software Image Setup. Use WinSCP or a similar tool to copy the generated target asset from the host computer to the target device.
Run it analogous to the steps from chapter Run Blood Pressure Sample with Player Connector Library.