# Starting SceneComposer
# Starting SceneComposer
#### Starting SceneComposer
Start SceneComposer by calling SceneComposer.exe from folder cgi\_studio\_root/bin/SceneComposer.
Like any other application, SceneComposer has the ability to be pinned/unpinned to Windows taskbar or to Start Menu (right click on SceneComposer.exe and from the context menu select "Pin to Taskbar" or/and "Pin to Start Menu").
#####
Checking Compatibility of Environment
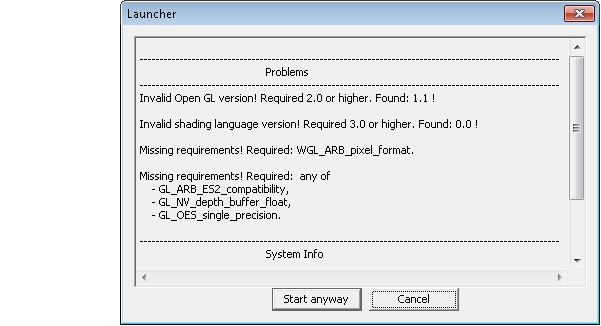
When SceneComposer.exe is started the launcher is automatically called. It checks if all the needed system environment requirements are available before starting SceneComposer.

| /schost | To create SceneComposer solutions for a specific device platform, a corresponding SCHost.dll (which includes that platform) must be used by SceneComposer. This dynamic link library is loaded by SceneComposer during startup. By default, SceneComposer loads the file "SCHost.dll". To start SceneComposer with a different dll file, the command line argument "/schost" is available.
To start SceneComposer for a certain platform run
- "SceneComposer.exe /schost SCHost\_<DEVICE>.dll".
|
| /solution | To open a specific solution, a command line argument is available:
- "SceneComposer.exe /solution/..."
(e.g.: SceneComposer.exe /solution "C:\\Documents and Settings\\...\\...\\SceneComposerSolution.scs")
Another possibility to open a solution is without using the /solution argument: e.g.: SceneComposer.exe "C:\\Documents and Settings\\...\\...\\Solution\\Solution.scs"
|
| /metaInfoDebug | To display in the Output panel debug informations related with widgets, effects and render targets, a command line argument for starting SceneComposer is available:
- "SceneComposer /metainfodebug"
|
| /useAllEffects | To enable all the available effects instead of only combined effects in the Toolbox of a 2D scene, a command line argument for starting SceneComposer is available:
- "SceneComposer.exe /useAllEffects"
Refer also to [Effects](https://doc316en.candera.eu/books/scene-design/page/effects).
|
| /nowelcome | To start SceneComposer without a welcome screen, a command line argument is available:
- "SceneComposer.exe /nowelcome"
|
---
#### SceneComposer Names Validation Rules
Allowed characters are:
Letters and digits (including special characters like German ones), any of the following:
$ ' () + , - . = @ ^ \_ ` {} ~ and space
If a character which is not allowed (for example "#") is used in the name of any imported item it will be changed with "\_". If the user try to use a character which is not allowed inside a SceneComposer solution, the operation will not be possible and the user will be asked to use an allowed character.
---
#### Plugins Configuration
Now it is possible to use a configuration file APPLICATION\_FOLDER\\Plugins\\Plugins.xml. During the start-up SceneComposer will try to process this file. If it does not exist, the MFF native importers (old importer SDK) will be loaded from the folder "Importers" and the managed / C# plugins will be loaded from the folder "Plugins". If the configuration file is present, only the specified plugins will be loaded. A sample configuration file is delivered with the SceneComposer.
Refer also to [Plugins Configuration](https://doc316en.candera.eu/books/extending-scenecomposer/page/plugins-configuration).
---
#### Customizing SceneComposer
To configure SceneComposer Preferences go to menu "File" > "Preferences".
For further information refer to section [Preferences](https://doc316en.candera.eu/books/preferences).
# Scene Composer GUI
[Startup Panel](https://doc316en.candera.eu/link/9#bkmrk-startup-panel)
[SceneComposer GUI](https://doc316en.candera.eu/link/9#bkmrk-scenecomposer-gui)
[Left Side Panels ](https://doc316en.candera.eu/link/9#bkmrk-left-side-panels)
[Center Panels ](https://doc316en.candera.eu/link/9#bkmrk-center-panel)
[Right Side Panels](https://doc316en.candera.eu/link/9#bkmrk-right-side-panels)
[Perspective Support ](https://doc316en.candera.eu/link/9#bkmrk-perspective-support)
[Hints on Input Devices for Scene Editor](https://doc316en.candera.eu/link/9#bkmrk-hints-on-input-devic)
---
#### Startup Panel
The Startup panel gets opened first when the application is launched and allows the user to:
- See information about the current platform
- See the list of Recent solutions and to allow loading them
- Allow the creation of a new solution based on a template
The user is presented with the list of recent solutions and a list of samples and templates. By single clicking on a recent solution or a sample or template, information about that solution is shown. When right clicking on a recent solution the context menu will be opened offering the following options:
- Open: Opens this recent solution
- Remove from here: Removes the solution from the list of recent solutions. The solution itself will not get deleted.
- Remove all: Empties the list of recent solutions. The solutions themselves won't get deleted.
When double clicking on a recent solution, that solution will be opened. When double clicking on one of the samples or templates, a new un-named solution will be created, containing the elements from the template. This new solution can saved to a new location.
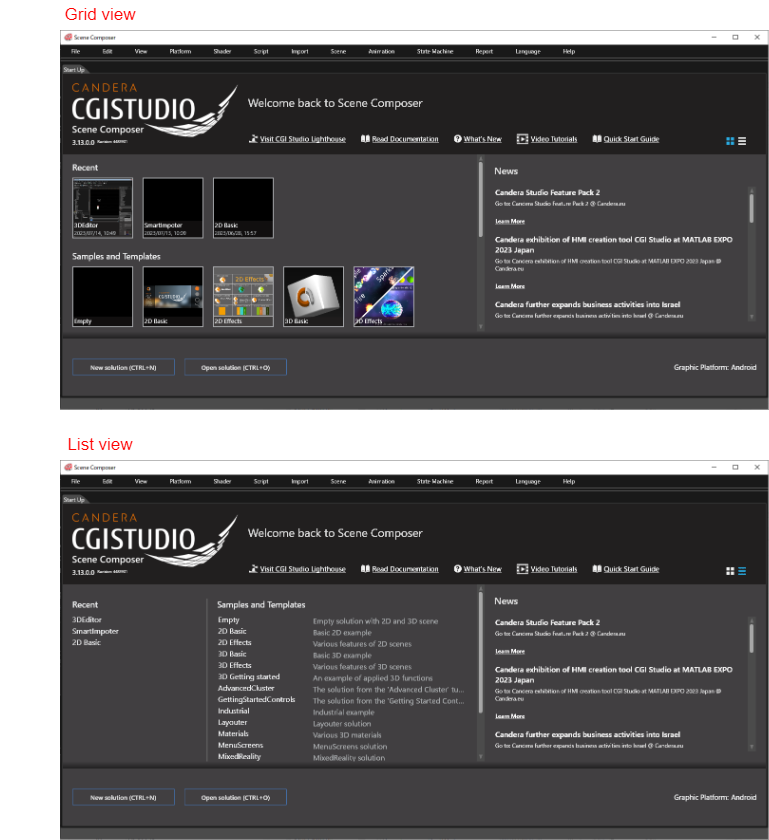
The information from the Start Screen can be presented in two ways: show as grid / show as list (see the images below).
In the upper part of the page there are three available links:
- Visit CGI Studio Lighthouse - redirects the user to a specialized support/forum page
- Read Documentation - opens the help file
- What's new - opens the help file to the latest release notes
- Video Tutorials - redirects to a page with video tutorials that will teach users the basics of the tool and how to use CGI Studio
If you have questions or would like to browse through our FAQ ("Frequently Asked Questions") section please visit the CGI Studio Lighthouse. The support team will also take care of advanced topics whenever help is needed.
In the lower part of the page there are two available buttons:
- New Solution - opens a wizard which helps the user to create a new solution
- Open Solution - opens an existing solution
---
#### SceneComposer GUI
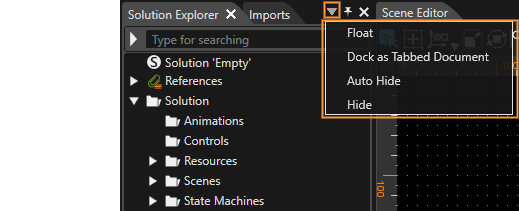
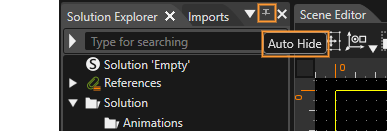
Starting the SceneComposer for the first time, all the panels are provided by default. Some of them are active (i.e. visible) while others are inactive (i.e. invisible). Auto-hide is offered in selected panels, similar to VisualStudio. Click on the pin icon in the top right corner of the panel to activate Auto-hide. Also available are the following options when clicking on the triangle icon on the left of the pin:
- Float
- Dock as Tabbed Document
- Hide
- Close
Every inactive panel can be made active by clicking the tab with its proper name.
---
#### Left Side Panels
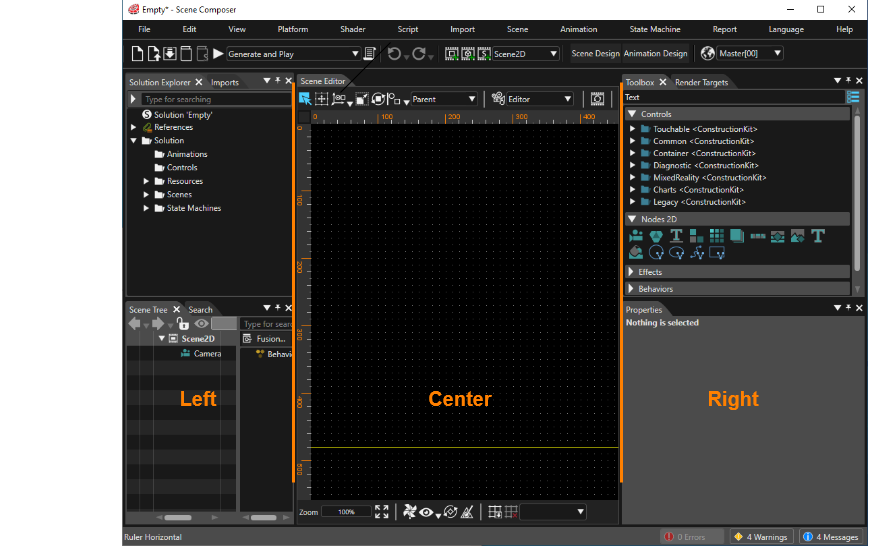
The left side of SceneComposer is divided into a top and a bottom part.
**TOP**
- **Solution Explorer**: this panel gives the user the possibility to see and manipulate all elements of any created/opened solution.
- **Imports**: in this panel all imported objects are visible.
**BOTTOM**
- **Scene Tree**: in this panel all the nodes and sub-nodes of a given scene are displayed in a tree structure.
- **Search**: this panel is used to search for different objects in a solution.
---
#### Center Panel
By default, the most important editor of SceneComposer can be found in the center.
**Scene Editor**
The Scene Editor is the editor where the scene will be composed. Imported objects, nodes or controls can be dragged into the scene and manipulated using the tools from above the Scene Editor: translate, scale, rotate etc.
**Available Editors**
More editors can be opened using the menu View - Editors:
- Shader Editors
- Script Editor
- SCML Editor
- Appearance Editor
- Graph Dependencies
When choosing one of these editors, it will be opened in the center, next to the Scene Editor. Activate the editor you need by clicking on the respective tab.
Clicking the small triangle button at the rightmost end of the tab row opens a drop-down menu, so you can easily access the available tabs.
---
#### Right Side Panels
The default panels are the following:
**TOP**
- **Toolbox**: This panel contains items like controls, nodes, effects, behaviors or scripts. These items can be used to create content or add functionality to the scene or improve the visual appearance of objects.
- **Render Targets**: in this panel new render targets (i.e. Display Render Targets & Texture Render Targets) can be added and configured.
**BOTTOM**
- **Properties**: for any selected scene or node all the available properties are displayed in this panel.
---
#### Perspective Support
The user has the possibility to customize, which editors or panels are visible and even manage these perspectives. All panels can be set to active or inactive using the sub-menus of the View menu. When restarting SceneComposer, it will always restore its panels the way they had been configured when closing SceneComposer. The user is able to save, delete, export or import a desired perspective layout.
There are three basic perspectives - "Startup", "Scene Design" and "Animation design" - that can not be deleted. Another configuration possibility is to hide some panels by using the small button available in the upper right corner.
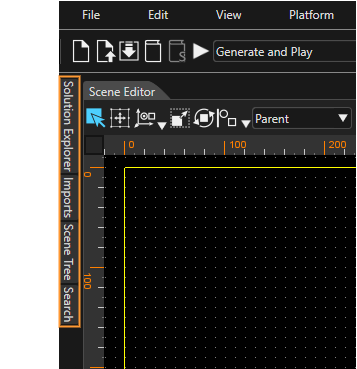
All the hidden panels will be available on the workspace sides of SceneComposer. They can be made visible/active instantly as soon as you hover the mouse pointer over them.
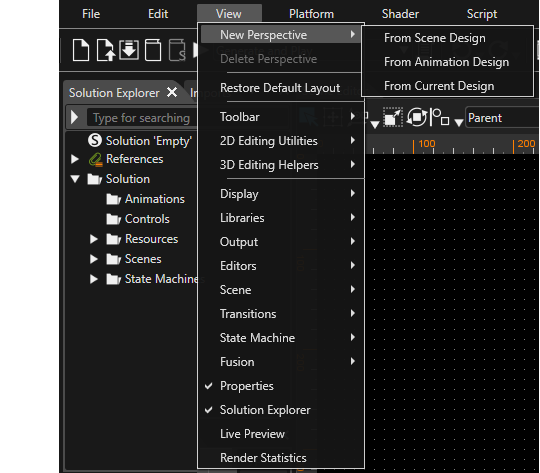
A perspective layout can be saved via "View" > "New Perspective" menu. Three different options are available:
- "From Scene Design": Creates a new the perspective layout based on the Scene Design perspective.
- "From Animation Design": Creates a new perspective layout based on the Animation Design perspective.
- "From Current Design": Creates a new perspective layout based on the current configuration of the perspective.
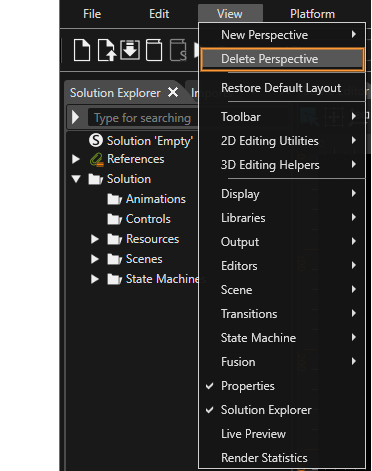
The option "Delete Current Perspective" inside "View->New Perspective" is available when a user defined perspective is selected. Choosing Delete Current Perspective will delete the currently active user defined perspective.
Any saved perspective can be exported in order to use it any time when necessary. Choose "File" > "Preferences" in the menu to open the Preferences dialog. On the left side, under "Environment" select item "Perspectives". Two buttons will be provided: "Import perspectives" and "Export perspectives" to import or export perspective configuration XML files.
---
#### Hints on Input Devices for Scene Editor
The most convenient way to work with the Scene Editor is the mouse.
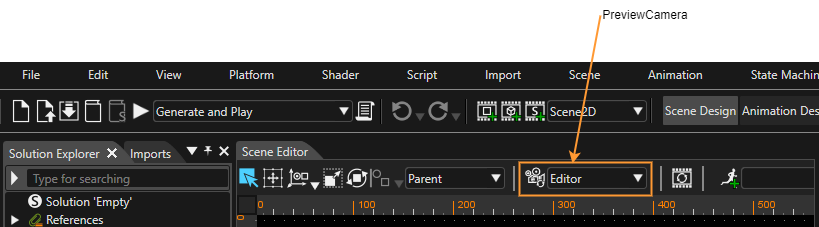
Having selected "Editor" as PreviewCamera, it is possible to
- move/pan the view by pressing the middle mouse button
- to zoom in/out with the mouse wheel.
The same features can be performed with a touch pad, in case the touch pad vendor provides proper windows drivers and mappings to the input devices. The available short cut for e.g. pan is <ctrl+shift+leftbutton>.
# Using Licenses
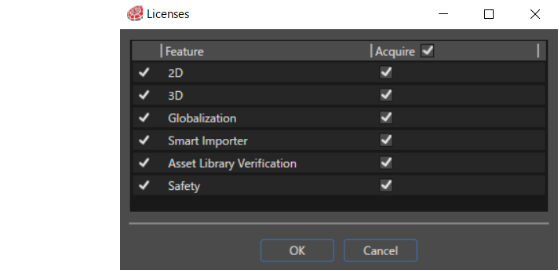
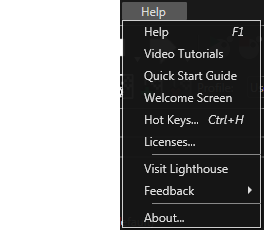
Licenses will allow you to decide which features to use within Scene Composer. This includes 2D, 3D, and any other features from the feature list (primarily plugin related features). You can access Licenses by going to Help > Licenses within the menu bar.
Licenses that are available by default are shown below,
- **2D** : Candera 2D (Allows you to create and use 2D content.)
- **3D** : Candera 3D (Allows you to create and use 3D content.)
- **Globalization** : Translator plugin.
- **Smart Importer** : Reference the Smart Importer article for more information.
- **Asset Library Verification** : Allows you to very that assets are current and up to date.
- **Safety** : Allows you to create Safety scenes to support functional safety for your solution.
To activate a feature, select the check box corresponding to the desired feature, then restart Scene Composer for changes to take effect.
For more information about the Safety function, please contact our representative.
# Help File
The Help File can be opened via menu "Help" > "Help" or by pressing the "F1" key.