# Create Nodes

#### <a class="anchor" id="bkmrk--6"></a>Create Nodes from Toolbox

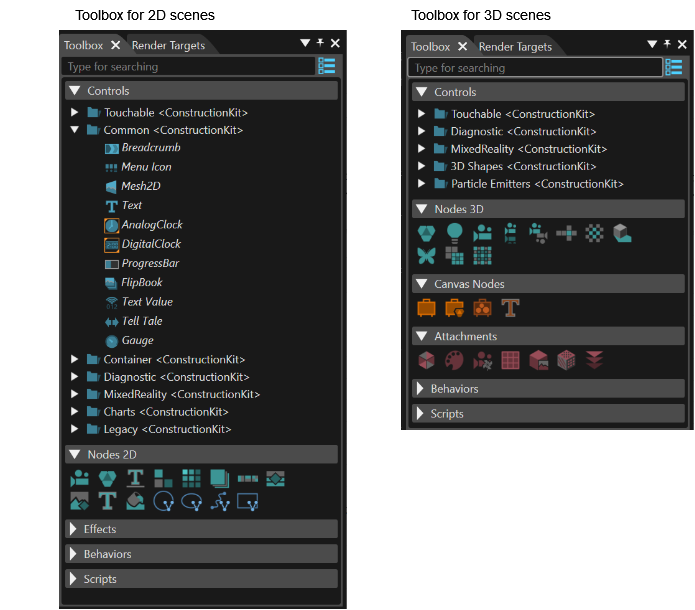
Drag an item from the Toolbox and drop it

<div class="contents" id="bkmrk-either-into-the-scen"><div class="contents"><div class="contents"><div class="textblock">- either into the Scene Tree to sort the node properly into the scene graph
- or directly into the render view of the Scene Editor to create the node on a specific display coordinate.

</div></div></div></div><div drawio-diagram="6013"><img src="https://doc316en.candera.eu/uploads/images/drawio/2024-06/drawing-5-1717750498.png" alt=""/></div>

<div class="contents" id="bkmrk--0"><div class="contents"><div class="textblock">  
</div></div></div>When adding a node to the scene tree, note the following:

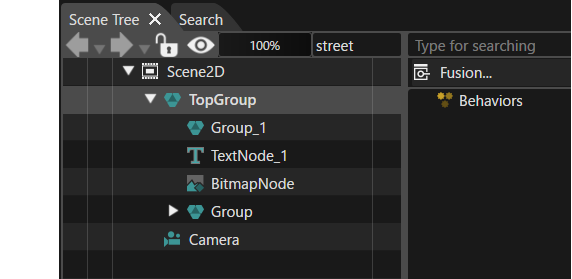
<div class="contents" id="bkmrk-the-new-node-will-be"><div class="contents"><div class="contents"><div class="textblock">1. The new node will be created as the last child of the node on which the node is dropped.
2. To modify the scene tree structure, hold the "Ctrl" key while moving the node along the scene tree to the desired position. The dragged node will be positioned below the node it was dropped on.
3. Moving a node along the scene tree without keeping the "Ctrl" key pressed will move the selected node inside the node it was dropped on.
</div></div></div></div>---

#### <a class="anchor" id="bkmrk--8"></a>Create Nodes from Imports

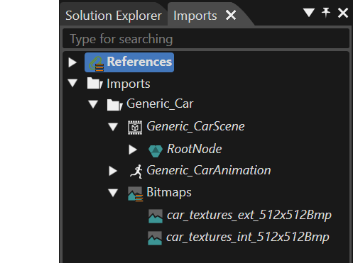
Drag an item from a user-defined import (a template scene node) and drop it to Scene Editor or Scene Tree.

<div drawio-diagram="6014"><img src="https://doc316en.candera.eu/uploads/images/drawio/2024-06/drawing-5-1717751024.png" alt=""/></div>

<div class="contents" id="bkmrk--3"><div class="contents"><div class="textblock">  
</div></div></div>**Scene Editor:** Drop the template scene node in the Scene Editor to create an instance of this node at the given location. The new scene node will be created at the top level of the scene graph.

**Scene Tree:** As an alternative, the template scene node from Imports can also be dropped to the Scene Tree. This way it is possible to hierarchically sort the new node into the scene graph.

<div class="contents" id="bkmrk-bitmaps-from-imports"><div class="contents"><div class="textblock"><dl class="note"><dd></dd><dd></dd><dd><p class="callout info">Bitmaps from Imports can only be dropped on an already existing RenderNode or BitmapNode. In this case, a BitmapBrushAlphaBlend effect will be created on that node referencing the given bitmap.</p>

</dd></dl></div></div></div>When adding a node to the scene tree, note the following:

<div class="contents" id="bkmrk-the-new-node-will-be-0"><div class="contents"><div class="contents"><div class="textblock">1. The new node will be created as the last child of the node on which the node is dropped.
2. To modify the scene tree structure, hold the "Ctrl" key while moving the node along the scene tree to the desired position.
3. Moving a node along the scene tree without keeping the "Ctrl" key pressed will move the selected node inside the node it was dropped on.
</div></div></div></div><div drawio-diagram="7193"><img src="https://doc316en.candera.eu/uploads/images/drawio/2024-10/drawing-4-1730102263.png" alt=""/></div>

<div class="contents" id="bkmrk--5"><div class="contents"><div class="contents"><div class="textblock">  
</div></div></div></div>##### <a class="anchor" id="bkmrk--11"></a>Properties of Nodes Created from Imports

All node properties of a selected node are displayed in "Properties" panel.

For nodes created from imports, additional properties are available:

<div class="contents" id="bkmrk-import-path%3A-specifi"><div class="textblock">- Import Path: Specifies the path to the imported artifact that serves as the source
- Status:   
    &gt; OK: Template exists and type matches   
    &gt; New: Parent instance item is linked to a template which was modified by adding new children   
    &gt; Missing: Template item cannot be found

</div></div>