# Manage Scenes

# Create a New Scene

#### <a class="anchor" id="bkmrk--15"></a>Create a New Scene

There are several options how to create a scene:

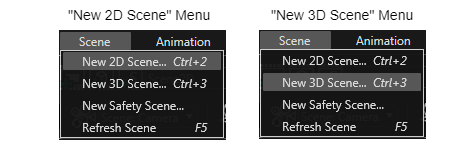
Use the menu item "New Scene" from the "Scene" menu:

<div drawio-diagram="607"><img src="https://doc316en.candera.eu/uploads/images/drawio/2023-02/drawing-4-1676364261.png" alt=""/></div>

<div class="contents" id="bkmrk--0"><div class="contents"><div class="textblock">  
</div></div></div>Use the toolbar button "Add a new scene":

<div drawio-diagram="5998"><img src="https://doc316en.candera.eu/uploads/images/drawio/2024-06/drawing-5-1717746216.png" alt=""/></div>

<div class="contents" id="bkmrk--2"></div>Add a new scene via shortcut:   
&gt; Use "Ctrl+2" for a new 2D scene.   
&gt; Use "Ctrl+3" for a new 3D scene.

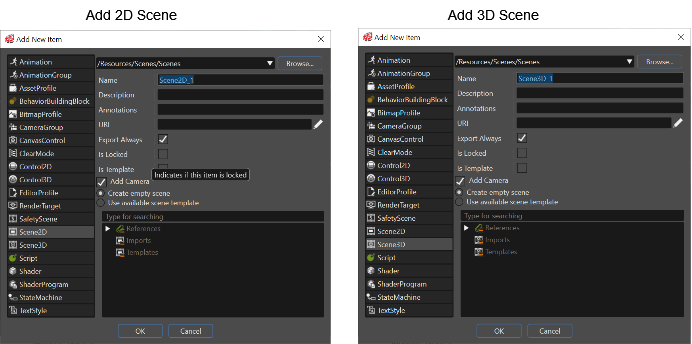
Left click in the Solution Explorer and use the context menu: Select "Add" &gt; "New Item".

<div drawio-diagram="5999"><img src="https://doc316en.candera.eu/uploads/images/drawio/2024-06/drawing-5-1717746350.png" alt=""/></div>

<div class="contents" id="bkmrk--4"><div class="contents"><div class="textblock">  
</div></div></div>---

#### <a class="anchor" id="bkmrk--19"></a>Scene Templates

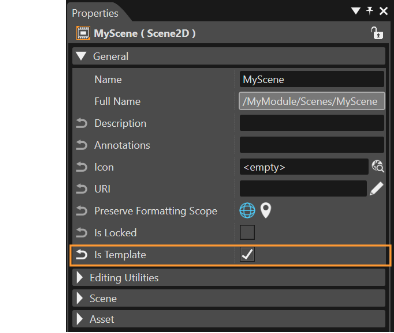
Scene templates are supported in SceneComposer. A scene created by the user can be made template by checking its IsTemplate property. This property is available as a check-box in the Properties panel. The dialogue used to create new scenes allows the user to select an existing template or import.

<div drawio-diagram="6003"><img src="https://doc316en.candera.eu/uploads/images/drawio/2024-06/drawing-5-1717746711.png" alt=""/></div>

<div class="contents" id="bkmrk--7"><div class="contents"><div class="textblock">  
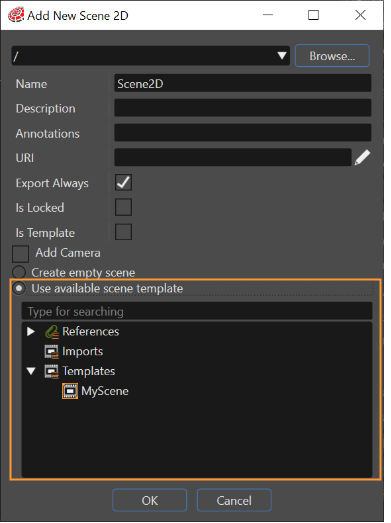
</div></div></div>The dialogue used to create new scenes allows the user to select an existing template or import. If there are many scenes - 2D or 3D - created as templates, any of them can be selected and used as a template.

<div drawio-diagram="6004"><img src="https://doc316en.candera.eu/uploads/images/drawio/2024-06/drawing-5-1717746798.png" alt=""/></div>

<div class="contents" id="bkmrk--9"><div class="contents"><div class="textblock">  
</div></div></div>If necessary, it is possible to save a new perspective layout, which will be based on the current perspective. Also the possibility to delete a perspective was added.

##### <a class="anchor" id="bkmrk--22"></a>Scene Properties

Following properties must be specified for a new Scene:

<div class="contents" id="bkmrk-%22location%22%3A-the-fold"><div class="contents"><div class="textblock">- **"Location":** The folder which will contain the new scene within the solution.
- **"Name":** Scene name
- **"Export Always":** If this option is ticked, the scene will always be exported to the asset during asset generation.

</div></div></div>These properties can be modified in the Properties panel, when the scene is selected in the Solution Explorer or in the Scene Tree.

##### <a class="anchor" id="bkmrk--23"></a>Create a Scene from Template

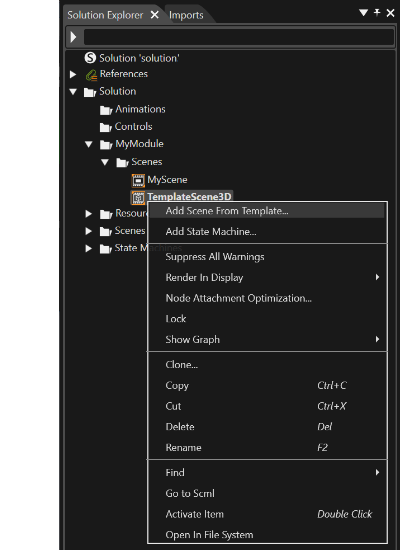
A new **3D Scene** can also be created from template via the "Add Scene From Template" context menu of the imported scene from the "Imports" panel or in the Solution Explorer:

<div drawio-diagram="6008"><img src="https://doc316en.candera.eu/uploads/images/drawio/2024-06/drawing-5-1717747033.png" alt=""/></div>

<div class="contents" id="bkmrk--11"><div class="contents"><div class="textblock">  
</div></div></div>A new scene named after the template scene is created, which can be edited as a user-defined scene.

---

#### <a class="anchor" id="bkmrk--25"></a>Scenes List

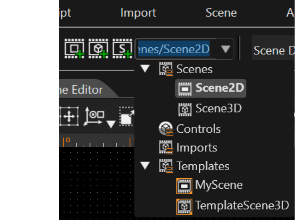
All the scenes part of a solution are listed in the Scenes List.

<div drawio-diagram="6009"><img src="https://doc316en.candera.eu/uploads/images/drawio/2024-06/drawing-5-1717749257.png" alt=""/></div>

<div class="contents" id="bkmrk--14"><div class="contents"><div class="textblock">  
</div></div></div>Select a scene from this list to open the scene in the Scene Editor.

<div class="contents" id="bkmrk-template-scenes-are-"><div class="textblock">- Template scenes are listed in the Imports category
- And user defined scenes in the Scenes category.

</div></div><div class="contents" id="bkmrk-only-user-defined-sc"><div class="textblock"><dl class="note"><dd><p class="callout info">Only user-defined scenes can be edited in SceneComposer.</p>

</dd></dl></div></div>

# Delete a Scene

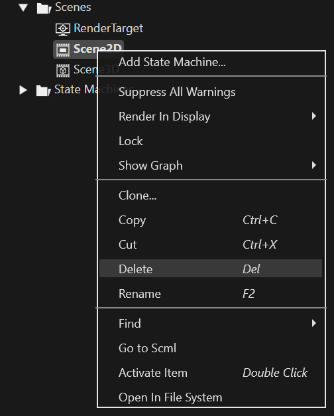
Right click on a scene in the Solution Explorer or in Scene Tree panel and select "Delete" from the context menu.

<div drawio-diagram="6016"><img src="https://doc316en.candera.eu/uploads/images/drawio/2024-06/drawing-5-1717751351.png" alt=""/></div>

<div class="contents" id="bkmrk--0"><div class="contents"><div class="textblock">  
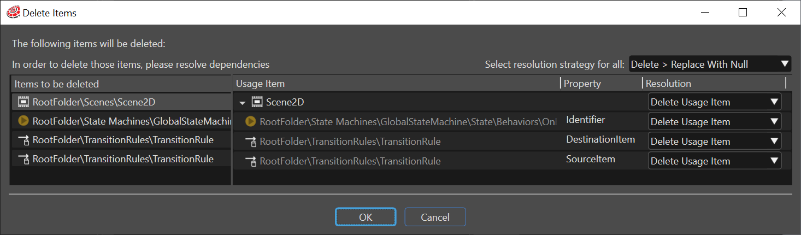
</div></div></div>If some items part of the scene are used in an animation, the "Delete Items" dialog will list the paths of all animations using items from the given scene, and the user will have the possibility to select a resolution strategy for all of them or just for some specific usage item(s).

<div drawio-diagram="6010"><img src="https://doc316en.candera.eu/uploads/images/drawio/2024-06/drawing-5-1717749423.png" alt=""/></div>

<div class="contents" id="bkmrk--2"><div class="textblock">  
</div></div>

# Refresh a Scene

After certain modifications, it might be required to refresh a scene explicitly to be rendered with updated properties.

For refreshing a scene press F5 or use the menu item "Refresh Scene" from the "Scene" menu or the Toolbar button "Refresh scene".

<div drawio-diagram="6011"><img src="https://doc316en.candera.eu/uploads/images/drawio/2024-06/drawing-5-1717749543.png" alt=""/></div>

<div class="contents" id="bkmrk--0"><div class="textblock">  
</div></div>