# Panel

# Overview

#### <a class="anchor" id="bkmrk--0"></a>Description

The Panel is a control tool for the Player application. It visualizes all the mentioned feature blocks in the Features section.

#### <a class="anchor" id="bkmrk--1"></a>Hotkeys

Following shortcuts are available for CGI Panel:

<div class="contents" id="bkmrk-hotkeys-description-"><div class="contents"><div class="contents"><div class="textblock"><table border="1" cellpadding="5" cellspacing="0"><tbody><tr bgcolor="#d4d4d4"><th>**Hotkeys**</th><th>**Description**</th></tr><tr><td>Ctrl+O</td><td>Open asset</td></tr><tr><td>Ctrl+S</td><td>Capture screenshot</td></tr><tr><td>Ctrl+Shift+S</td><td>Capture screenshot (select file)</td></tr><tr><td>Ctrl+P</td><td>Open settings</td></tr><tr><td>Ctrl+I</td><td>Single invalidation</td></tr><tr><td>F1</td><td>Documentation</td></tr></tbody></table>

</div></div></div></div>#### <a class="anchor" id="bkmrk--2"></a>Interface

<div drawio-diagram="7783"><img src="https://doc316en.candera.eu/uploads/images/drawio/2025-01/drawing-4-1736921677.png" alt=""/></div>

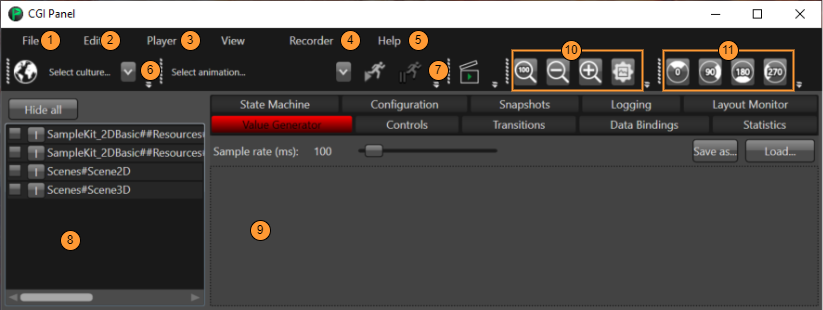
<div class="contents" id="bkmrk-file-menu-allows-use"><div class="textblock">1. <span style="color: rgb(230, 126, 35);">[File menu](https://doc316en.candera.eu/books/player/page/file-menu "File Menu")</span> allows user to run and configure the application.
2. <span style="color: rgb(230, 126, 35);">[Edit menu](https://doc316en.candera.eu/books/player/page/edit-menu "Edit Menu")</span> offers access to editing operations and undo-redo actions.
3. <span style="color: rgb(230, 126, 35);">[Player menu](https://doc316en.candera.eu/books/player/page/player-menu "Player Menu")</span> allows to control the rendering and scripting system.
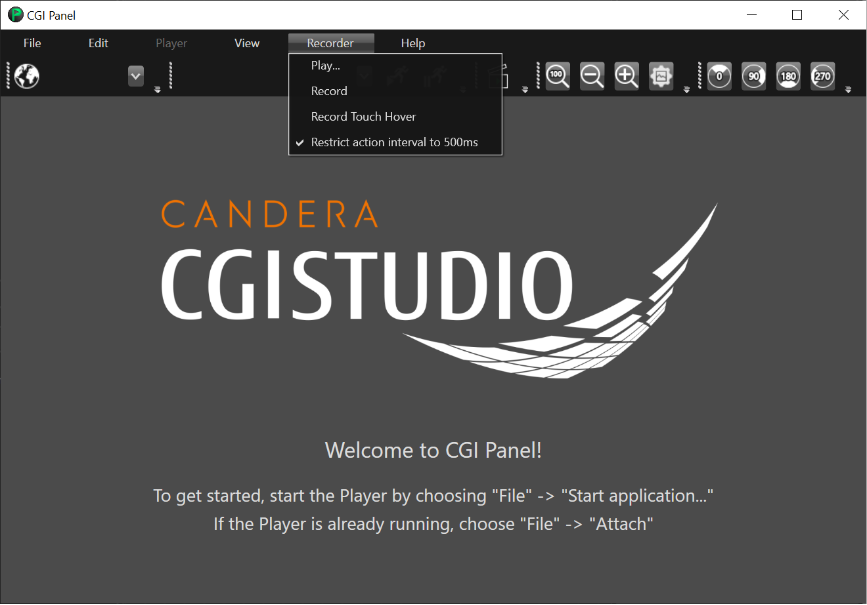
4. <span style="color: rgb(230, 126, 35);">[Recorder menu](https://doc316en.candera.eu/books/player/page/recorder-menu "Recorder Menu")</span> gives control to the recording of application handling.
5. <span style="color: rgb(230, 126, 35);">[Help menu](https://doc316en.candera.eu/books/player/page/help-menu "Help Menu")</span> offers information about CGI Panel.
6. <span style="color: rgb(230, 126, 35);">Culture toolbar </span>allows to switch between languages. In order to use this, "Globalization" needs to be enabled.
7. <span style="color: rgb(230, 126, 35);">Animation toolbar </span>shows a list of all animations available. Select an animation from dropdown box and press Start to run it.
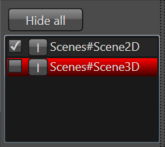
8. <span style="color: rgb(230, 126, 35);">[Scene View](https://doc316en.candera.eu/books/player/page/scene-view "Scene View")</span> panel shows a list of all scenes. In order to activate one scene, click the corresponding checkbox.
9. Miscellaneous Panel embeds the following views: 
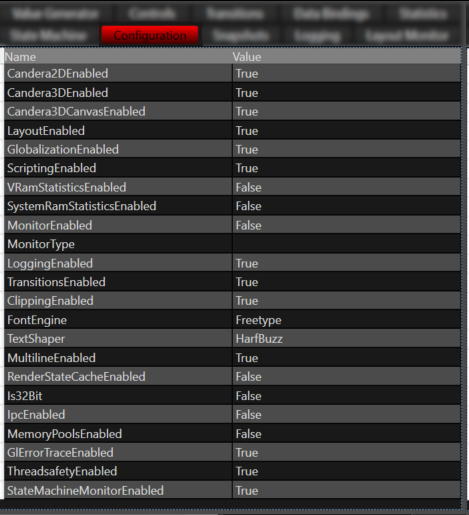
    - <span style="color: rgb(230, 126, 35);">[Configuration](https://doc316en.candera.eu/books/player/page/configuration-view)</span> view presents information about the features enabled in the Player.
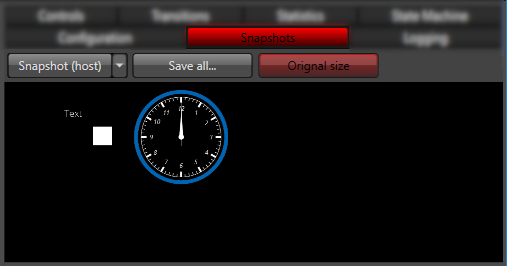
    - <span style="color: rgb(230, 126, 35);">[Snapshots](https://doc316en.candera.eu/books/player/page/snapshots-view "Snapshots View")</span> view allows to take snapshots (on host) and shows the last snapshots taken.
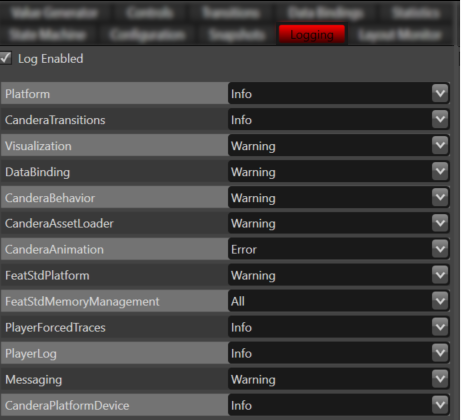
    - <span style="color: rgb(230, 126, 35);">[Logging](https://doc316en.candera.eu/books/player/page/logging-view "Logging View")</span> view allows to enable or disable the logging and also to set the log level for the main realms.
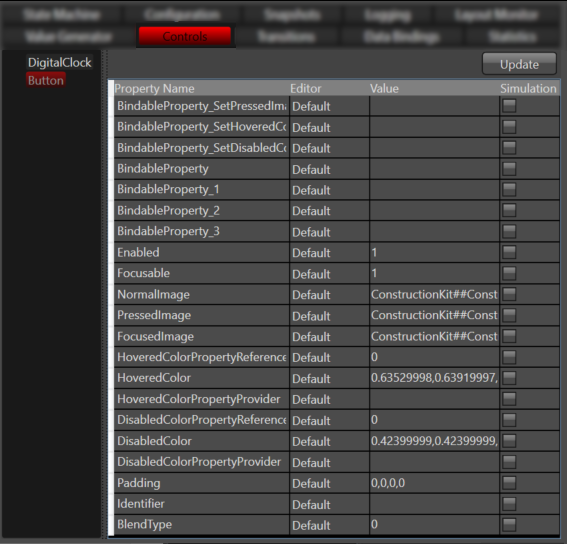
    - <span style="color: rgb(230, 126, 35);">[Controls](https://doc316en.candera.eu/books/player/page/controls-view)</span> view shows all controls of a selected scene.
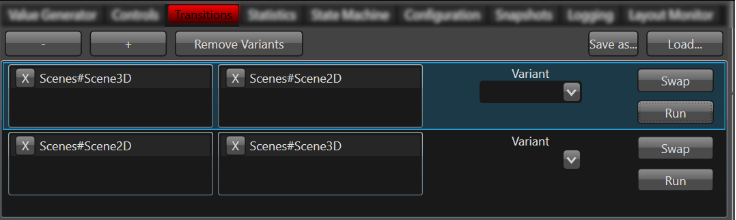
    - <span style="color: rgb(230, 126, 35);">[Transitions](https://doc316en.candera.eu/books/player/page/transitions-view)</span> view is available to trigger transitions.
    - <span style="color: rgb(230, 126, 35);">[Statistics](https://doc316en.candera.eu/books/player/page/statistics-view)</span> view shows memory consumption statistics.
    - <span style="color: rgb(230, 126, 35);">[State Machine](https://doc316en.candera.eu/books/player/page/state-machine-view)</span> view shows the state for all state machines.
    - <span style="color: rgb(230, 126, 35);">[Value Generator](https://doc316en.candera.eu/books/player/page/value-generator)</span> provides the possibility to simulate the change of values on view elements.
10. <span style="color: rgb(230, 126, 35);">[Zooming](https://doc316en.candera.eu/link/1076#bkmrk-page-title) </span>toolbar
11. <span style="color: rgb(230, 126, 35);">[Rotate](https://doc316en.candera.eu/link/1077#bkmrk-page-title) </span>display toolbar

</div></div><div class="contents" id="bkmrk-player-will-freeze-i"><div class="textblock"><dl class="note"><dd>  
</dd></dl></div></div>

# File Menu

offer commands that allows to control how the application runs.

<div drawio-diagram="5310"><img src="https://doc316en.candera.eu/uploads/images/drawio/2024-02/drawing-5-1708680121.png" alt=""/></div>

<div class="contents" id="bkmrk--0"><div class="contents"><div class="textblock">  
</div></div></div>Options:

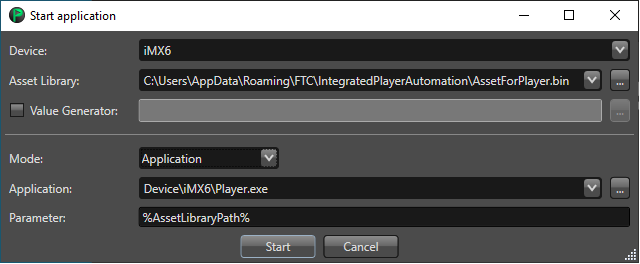
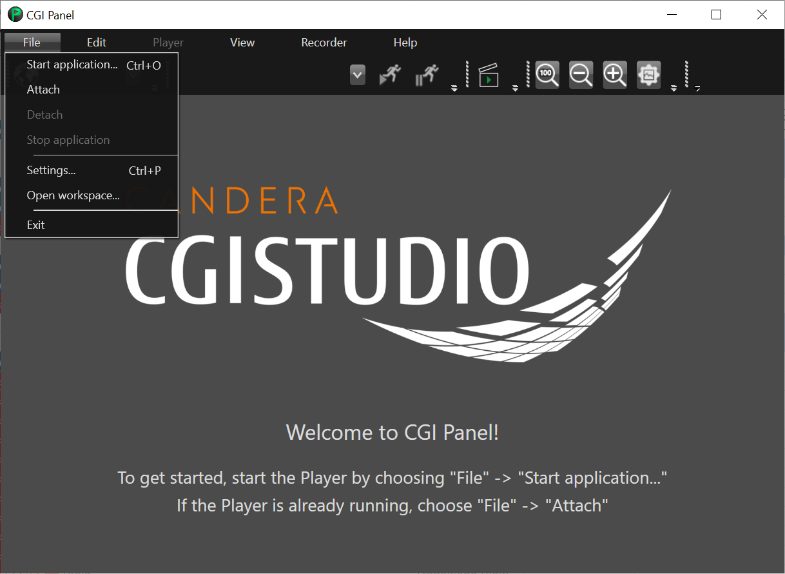
<div class="contents" id="bkmrk-start-application-.."><div class="textblock">- **Start application ...** - opens a dialog window which allows to configure and start the application.  
    <div drawio-diagram="3434"><img src="https://doc316en.candera.eu/uploads/images/drawio/2023-04/drawing-4-1682660418.png" alt=""/></div>

- The configuration options are: 
    - *Device*: allows to choose the device from a dropdown list.
    - *Asset Library Path*: allows to set the full path to the asset.
    - *Mode*: allows to decide if the Player will be started as an application or by a script.
    - Application Mode 
        - *Application*: allows to set the path to the Player executable.
        - *Parameter*: allows to set a parameter which shall be passed to the application.
    - Script Mode 
        - *Script*: allows to set the path to the script.
        - *Parameter*: allows to set a parameter which shall be passed to the script.
        - *Wait for script to finish*: configures whether the panel should wait or not until the script has finished.
- **Attach** - attaches the panel to a running Player.
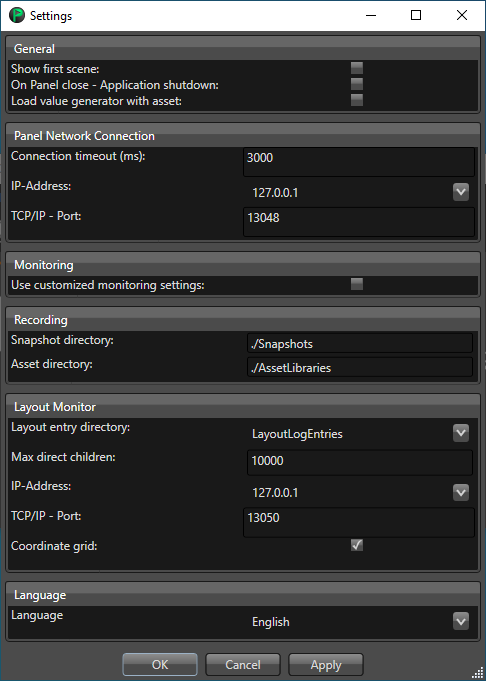
- **Settings...** - opens a dialog window which allows to configure the Cgi Panel.  
    <div drawio-diagram="3435"><img src="https://doc316en.candera.eu/uploads/images/drawio/2023-04/drawing-4-1682660430.png" alt=""/></div>


    The configuration options are: 
    - General 
        - *Show first scene*: enables that the first scene is automatically loaded at start time.
        - *On Panel close - Application shutdown*: if enabled the applications started by the Player will be shutdown automatically.
    - Panel Network Connection 
        - *Connection timeout (ms)*: sets a timeout for network connection.
        - *IP-Address*: sets a custom IP address of the network control.
        - *TCP/IP - Port*: sets a custom TCP/IP port of the network control.
    - Monitoring 
        - *Use customized monitoring settings*: allows to set custom setting for the monitoring (*TCP/IP-Port*, *Serial-Port* and *Serial-Baudrate*).
    - Recording 
        - *Snapshot directory*: defines the location where the snapshots shall be stored.
        - *Asset directory*: defines the location of assets which will be loaded.
- **Open workspace**: opens in File Explorer the directory were the CGIPanel.exe resides.
- **Exit**: closes CGI Panel.

</div></div>

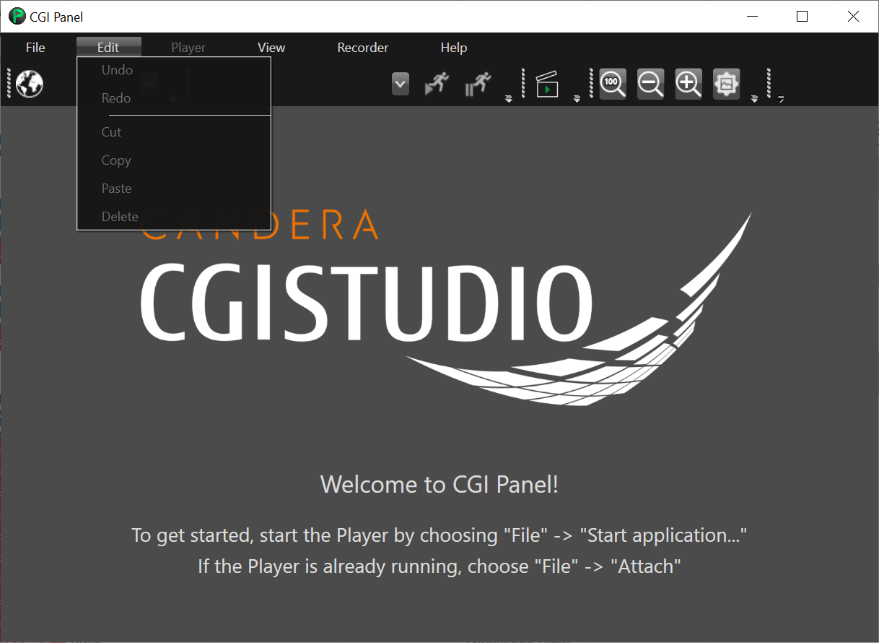
# Edit Menu

Edit menu offers access to editing operations and undo-redo actions.

<div drawio-diagram="5311"><img src="https://doc316en.candera.eu/uploads/images/drawio/2024-02/drawing-5-1708680229.png" alt=""/></div>

<div class="contents" id="bkmrk--0"><div class="contents"><div class="textblock">  
</div></div></div>Options:

<div class="contents" id="bkmrk-undo%3A-undo-last-acti"><div class="textblock">- *Undo*: undo last action.
- *Redo*: redo last undone action.
- *Cut*: cut text.
- *Copy*: copy text.
- *Paste*: paste text.
- *Delete*: delete text.

</div></div>

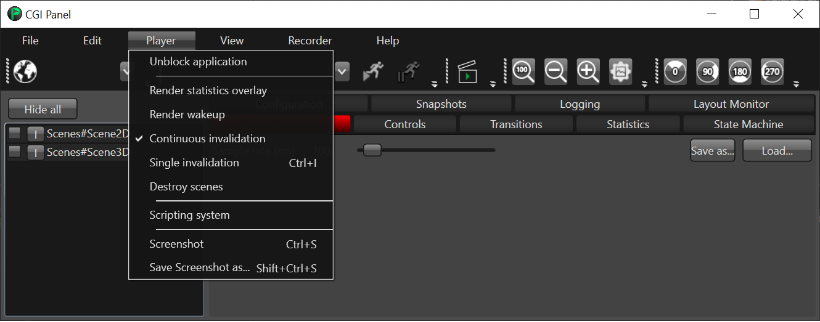
# Player Menu

Player menu allows to control the rendering and scripting system

<div drawio-diagram="5312"><img src="https://doc316en.candera.eu/uploads/images/drawio/2024-02/drawing-5-1708680306.png" alt=""/></div>

<div class="contents" id="bkmrk--0"><div class="contents"><div class="textblock">  
</div></div></div>Options:

<div class="contents" id="bkmrk-unblock-application%3A"><div class="textblock">- *Unblock application*: unblocks an application which is currently in the waiting state.
- *Render statistics overlay*: enables or disables the render statistics overlay within the scene.
- *Render wakeup*: enables or disables the render wake up mechanism.
- *Continuous invalidation*: enables or disables continuous invalidation. (Please note that it should be disabled when [Dirty Area Management](https://doc316en.candera.eu/books/courier/page/dirty-area-management "Dirty Area Management") feature is used)
- *Single invalidation*: sends a single 'invalidate all' message.
- *Destroy scenes*: enables or disables the destroying of the scenes as soon they are hidden.
- *Scripting system*: enables or disables the script system.
- *Screenshot*: saves a PNG file for each display in the folder of the loaded asset.
- *Save Screenshot as...*: saves a PNG file for each display but the location can be set via "Save as ..." dialog.

</div></div>

# Recorder Menu

Recorder menu gives control to the recording of application handling.

<div drawio-diagram="5313"><img src="https://doc316en.candera.eu/uploads/images/drawio/2024-02/drawing-5-1708680438.png" alt=""/></div>

<div class="contents" id="bkmrk--0"><div class="contents"><div class="textblock">  
</div></div></div>Options

<div class="contents" id="bkmrk-play...%3A-shows-the-o"><div class="textblock">- *Play...*: shows the Open dialog to give the path to a recorded file that will be played.
- *Record*: enables or disables the recording of application handling.
- *Record Touch Hover*: enables or disables the recording of touch hover messages.
- *Restrict action interval to 500ms*: restricts the action interval to 500 ms.

</div></div><div class="contents" id="bkmrk-for-more-information"><div class="textblock"><dl class="note"></dl></div></div>

# Help Menu

Help menu offers information about the application.

<div drawio-diagram="5314"><img src="https://doc316en.candera.eu/uploads/images/drawio/2024-02/drawing-5-1708680523.png" alt=""/></div>

<div class="contents" id="bkmrk--0"><div class="contents"><div class="textblock">  
</div></div></div>Options:

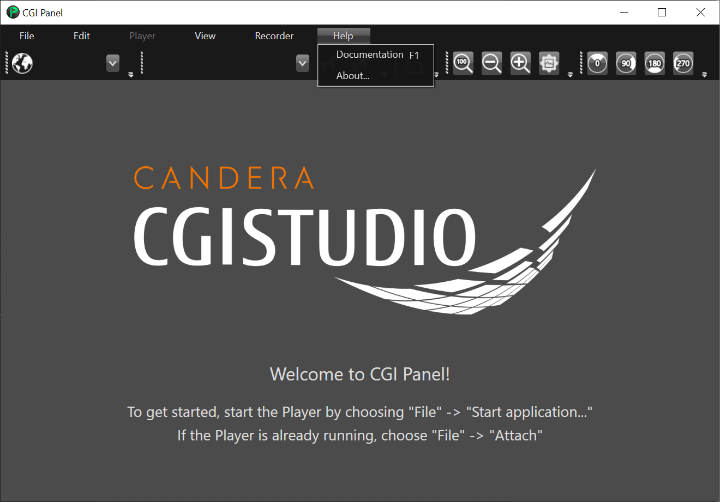
<div class="contents" id="bkmrk-about...%3A-opens-a-wi"><div class="textblock">- *Documentation:* opens the CGI Studio Documentation
- *About...*: opens a window which shows information about the application.

</div></div>

# Scene View

The scene view is a central component of the CGI Panel. A scene can be shown or hidden by checking or unchecking the checkbox of a scene. Based on the selected most of functionality chooses its content. This includes for example animations and controls.

<div drawio-diagram="7784"><img src="https://doc316en.candera.eu/uploads/images/drawio/2025-01/drawing-4-1736921727.png" alt=""/></div>

<div class="contents" id="bkmrk--0"><div class="textblock">  
</div></div>

# Configuration View

The Configuration view presents information about the features enabled in the Player.

<div drawio-diagram="7785"><img src="https://doc316en.candera.eu/uploads/images/drawio/2025-01/drawing-4-1736921771.png" alt=""/></div>

<div class="contents" id="bkmrk--0"><div class="textblock">  
</div></div>

# Snapshots View

The Snapshots view allows to take snapshots and also shows the last snapshots taken.

<div drawio-diagram="1726"><img src="https://doc316en.candera.eu/uploads/images/drawio/2023-02/drawing-4-1676616678.png" alt=""/></div>

<div class="contents" id="bkmrk--0"><div class="textblock">  
</div></div>

# Logging View

The Logging view allows to enable or disable the logging and also to set the log level for the main realms.

<div drawio-diagram="7786"><img src="https://doc316en.candera.eu/uploads/images/drawio/2025-01/drawing-4-1736921822.png" alt=""/></div>

<div class="contents" id="bkmrk--0"><div class="textblock">  
</div></div>

# Controls View

The controls view shows all controls of a selected scene. Selecting a control opens a table of all the properties and its values. Changing the value will also change the value in the application.

<div drawio-diagram="7787"><img src="https://doc316en.candera.eu/uploads/images/drawio/2025-01/drawing-4-1736921875.png" alt=""/></div>

<div class="contents" id="bkmrk--0"><div class="textblock">  
</div></div>

# Transitions View

The transitions view is available to trigger transitions. This happens by drag and drop from the scene list into the deactivation or activation area. A deactivation scene will be hidden and an activation scene will be shown at the end of a transition. More than a single scene can be added to the lists. The transition will be executed by pressing the Run button. The swap button swaps the list. So it will revert the execution. More of the transition instances can be created to keep one but create a second one. These transitions are kept only for a single session.

<div drawio-diagram="5319"><img src="https://doc316en.candera.eu/uploads/images/drawio/2024-02/drawing-5-1708687007.png" alt=""/></div>

<div class="contents" id="bkmrk--0"><div class="textblock">  
</div></div>

# Statistics View

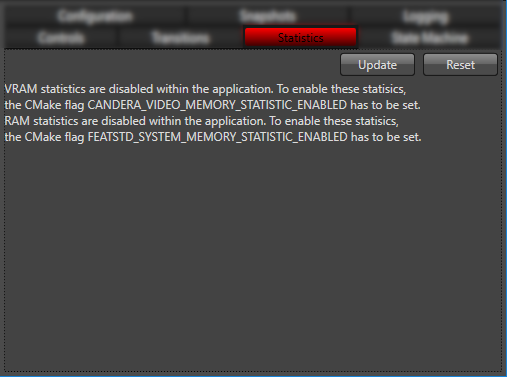
The statistics view shows memory consumption statistics and it is only available when the CMake flag "CANDERA\_VIDEO\_MEMORY\_STATISTIC\_ENABLED" is set.

<div drawio-diagram="3445"><img src="https://doc316en.candera.eu/uploads/images/drawio/2023-04/drawing-4-1682660910.png" alt=""/></div>

<div class="contents" id="bkmrk--0"><div class="textblock">  
</div></div>

# State Machine View

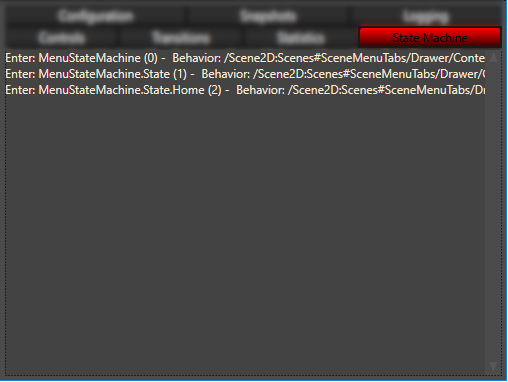
This view shows a log which describes the states for all state machines.

<div drawio-diagram="3446"><img src="https://doc316en.candera.eu/uploads/images/drawio/2023-04/drawing-4-1682660933.png" alt=""/></div>

<div class="contents" id="bkmrk--0"><div class="textblock">  
</div></div>

# Value Generator

This feature provides the possibility to simulate the change of values on view elements. With this, view elements can be simulated without logic implementation.

#### <a class="anchor" id="bkmrk--6"></a>Selecting a property to simulate

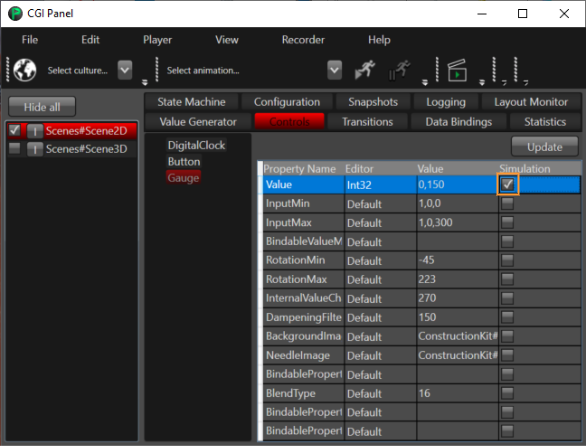
In the CGI Panel, select a scene and click on the Controls tab. This will display all controls and their properties.   
Checking the Simulation checkbox of a property will create a simulation entry inside the Value Generator tab.   
The Editor column defines the type for the property. Based on the Editor, the simulated value will be calculated.

<div drawio-diagram="7788"><img src="https://doc316en.candera.eu/uploads/images/drawio/2025-01/drawing-4-1736921957.png" alt=""/></div>

<div class="contents" id="bkmrk--0"><div class="contents">  
</div></div>#### <a class="anchor" id="bkmrk--8"></a>Modifying simulation properties (of a selected property)

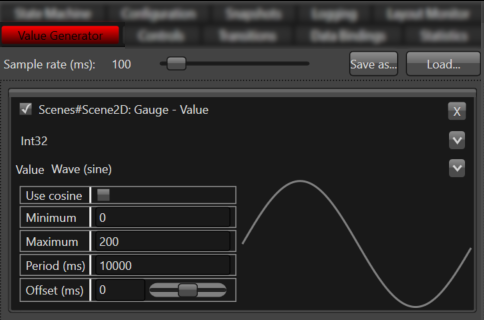
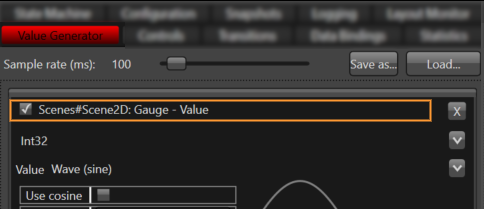
The properties which have been selected in the Controls tab, are created in the Value Generator tab.

<div class="contents" id="bkmrk-the-value-generator-"><div class="contents"><div class="contents"><div class="textblock">- The Value Generator tab contains general configurations, serialization and the configuration of all simulated properties.  
    <div drawio-diagram="7789"><img src="https://doc316en.candera.eu/uploads/images/drawio/2025-01/drawing-4-1736921998.png" alt=""/></div>


    - The **Sample Rate** defines the update rate of the simulated properties. This sample rate is applied to all simulated property entries.
    - Each simulated property entry has a predefined set of configurations.   
          
        
        - **Data type**   
            The simulation supports different datatypes. This includes double, float, all int types and special datatypes like size/coordinates and color.  
            If default editor is selected, it will try to guess the datatype based on the property name. Each value of a complex datatype can be set individually.  
              
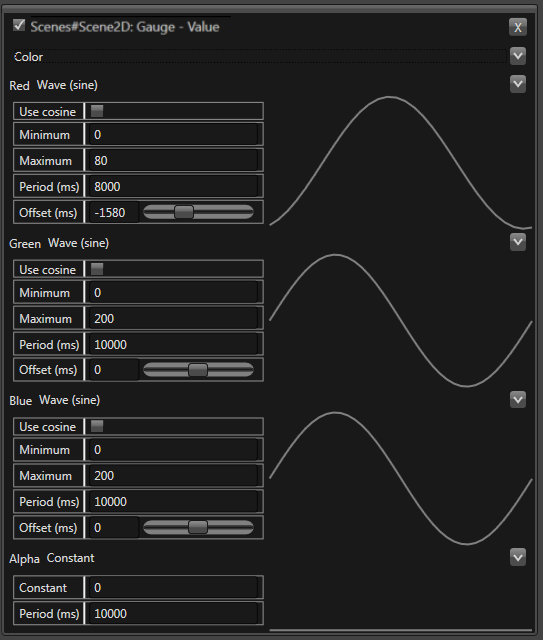
            The sample below simulates a color:  
            <div drawio-diagram="7790"><img src="https://doc316en.candera.eu/uploads/images/drawio/2025-01/drawing-4-1736922036.png" alt=""/></div>
        - **Value Simulation**   
              
            This represents the simulation algorithm that will be used to calculate the value.   
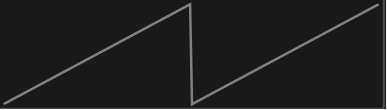
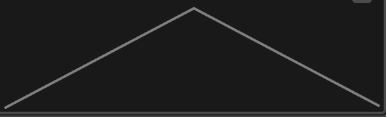
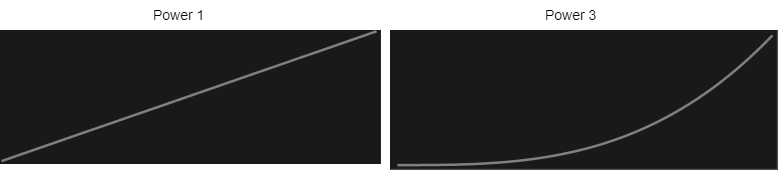
            The following list shows the different graph types and and some variants when modifying its configurations.  
              
            
            1. **Constant (Updates the value with the same value)**
            2. ****Saw Wave**** <div drawio-diagram="3450"><img src="https://doc316en.candera.eu/uploads/images/drawio/2023-04/drawing-4-1682661015.png" alt=""/></div>
            3. ****Triangle**** <div drawio-diagram="3451"><img src="https://doc316en.candera.eu/uploads/images/drawio/2023-04/drawing-4-1682661027.png" alt=""/></div>
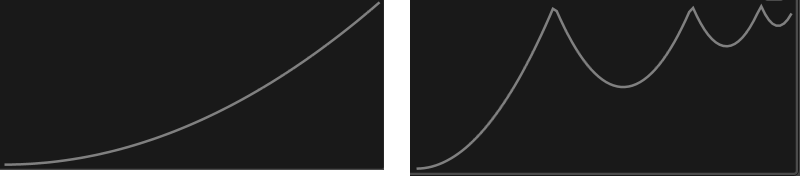
            4. ******Power (Power of 1 - linear, Power of 3)****** <div drawio-diagram="3452"><img src="https://doc316en.candera.eu/uploads/images/drawio/2023-04/drawing-4-1682661058.png" alt=""/></div>
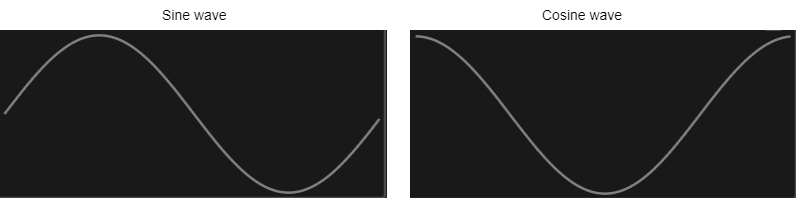
            5. ******Sine Wave (Sine, Cosine)****** <div drawio-diagram="3454"><img src="https://doc316en.candera.eu/uploads/images/drawio/2023-04/drawing-4-1682661103.png" alt=""/></div>
            6. **Random (No Visualization available)**
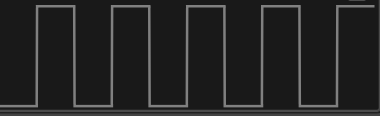
            7. ****Toggle (Toggles between 0 and 1)**** <div drawio-diagram="3455"><img src="https://doc316en.candera.eu/uploads/images/drawio/2023-04/drawing-4-1682661143.png" alt=""/></div>
            8. ****Bounce (Bounces 0, Bounciness 0.5; Bounces 3, Bounciness 0.20)**** <div drawio-diagram="1710"><img src="https://doc316en.candera.eu/uploads/images/drawio/2023-02/drawing-4-1676616314.png" alt=""/></div>
        - **Minimum and Maximum range**   
              
            The minimum and maximum range of values.
        - **Period and Offset (ms)**   
              
            The x value into the function is shifted by the offset. It shifts the graph, therefore the output value is also shifted. However, currently, offset is only supported in Sine wave. (limitation)
</div></div></div></div>#### <a class="anchor" id="bkmrk--17"></a>Starting the Value Generator simulation

Pressing the clapperboard icon will start and stop the simulation.

<div drawio-diagram="5321"><img src="https://doc316en.candera.eu/uploads/images/drawio/2024-02/drawing-5-1708689850.png" alt=""/></div>

<div class="contents" id="bkmrk--13"><div class="contents"><div class="textblock">  
</div></div></div>The simulation of a single property can be paused by the checkbox next to the property name.   
It can be completely removed by pressing the X button on the right side of the name.

<div drawio-diagram="7791"><img src="https://doc316en.candera.eu/uploads/images/drawio/2025-01/drawing-4-1736922074.png" alt=""/></div>

#### <a class="anchor" id="bkmrk--20"></a>Serialization

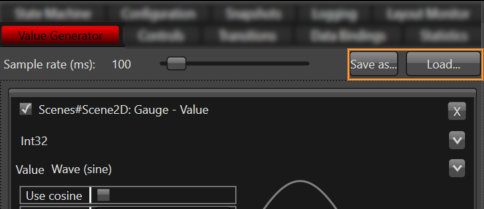
The simulation configuration can be saved as an xml file and loaded again.   
It is possible to load a simulation file when loading an asset.

<div drawio-diagram="7792"><img src="https://doc316en.candera.eu/uploads/images/drawio/2025-01/drawing-4-1736922098.png" alt=""/></div>

<div class="contents" id="bkmrk--23"><div class="contents"><div class="textblock">  
</div></div></div>It can also be loaded at Panel startup by using the command line:   
`--sim <filename>`   
In this case, the simulation will be directly started.

# Zooming

This feature was created to assist in developing high- or low-resolution HMIs. Developers of low-resolution HMIs can zoom in, developers of high-resolution HMIs can zoom out.

It may also be convenient if you want to take a closer look and examine the HMI in detail.

<div drawio-diagram="3891"><img src="https://doc316en.candera.eu/uploads/images/drawio/2023-06/drawing-7-1686373418.png" alt=""/></div>

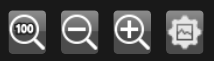
- The first icon of the toolbar resets the zoom level of every host application display.
- The second and third icon are for zooming out and zooming in. The zoom level is adjusted by 5% on every button click.
- The fourth option of the zooming toolbar is a filter that can be enabled to improve the visual output when zoomed in.

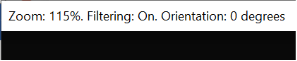
The current zoom factor and whether the filter is enabled is displayed in the Player's titlebar.

<div drawio-diagram="3893"><img src="https://doc316en.candera.eu/uploads/images/drawio/2023-06/drawing-7-1686373471.png" alt=""/></div>

<p class="callout info"><span lang="EN-US">Please be aware, that while using zoom, the output is not pixel exact anymore.</span></p>

# Rotate

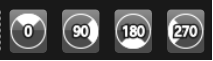
This feature simulates a physical rotation of the display. The toolbar allows to rotate the Player's display clockwise. You can choose to rotate it by 0° (default), 90°, 180°, or 270°.

<div drawio-diagram="3894"><img src="https://doc316en.candera.eu/uploads/images/drawio/2023-06/drawing-7-1686373516.png" alt=""/></div>

# Data Bindings

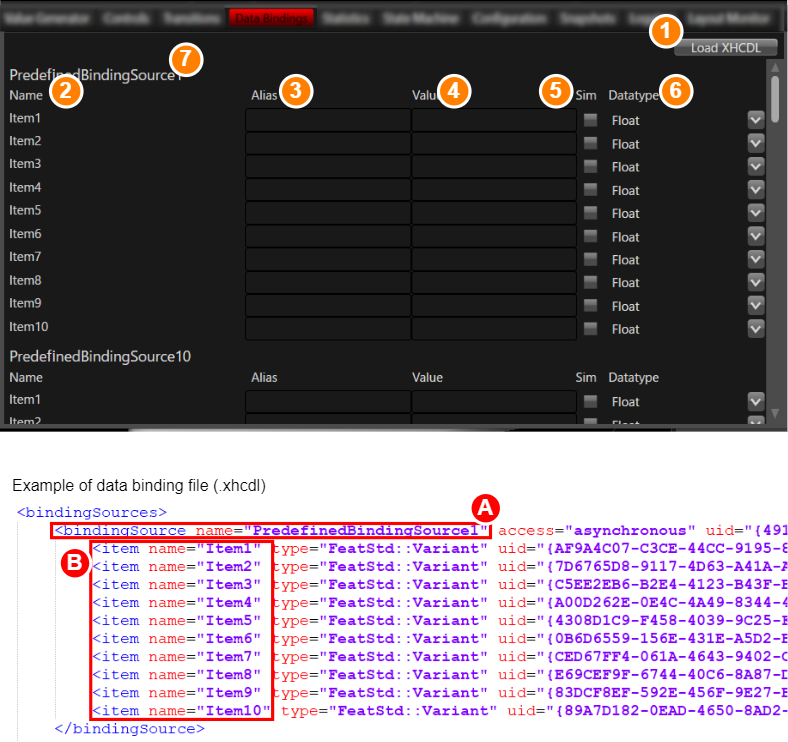
In Data Bindings tab, you can load a predefined data binding file and perform various customisations and simulations using the <span style="color: rgb(230, 126, 35);">[Value Generator](https://doc316en.candera.eu/books/player/page/value-generator)</span>.

<div drawio-diagram="7780"><img src="https://doc316en.candera.eu/uploads/images/drawio/2025-01/drawing-4-1736921512.png" alt=""/></div>

<table border="1" id="bkmrk-1-load-xhcdl-button-" style="border-collapse: collapse; width: 801px; border-width: 1px; height: 353.375px;"><colgroup><col style="width: 42px;"></col><col style="width: 180px;"></col><col style="width: 578px;"></col></colgroup><tbody><tr style="height: 114.812px;"><td class="align-center" style="border-width: 1px; height: 114.812px;">1</td><td style="border-width: 1px; height: 114.812px;">Load XHCDL button</td><td style="border-width: 1px; height: 114.812px;">Use this button to load an xml file containing predefined data bindings. The file format is **\*.xhcdl** and files created with the following structure in the file can be loaded. The following naming convention inside of the xhcdl is required:

- bindingSource name: \[any name\]+BindingSource+\[number\]   
    **See Section A in the above image**
- item name: Item+\[number\]  
    **See section B in the above image**

</td></tr><tr style="height: 63.3906px;"><td class="align-center" style="border-width: 1px; height: 63.3906px;">2</td><td style="border-width: 1px; height: 63.3906px;">Name</td><td style="border-width: 1px; height: 63.3906px;">The data binding item name specified by “item name” in the loaded xhcdl file is displayed.  
The names specified as “bindingSource name” in the xhcdl file that has been loaded are displayed in the above image in section 7.  
</td></tr><tr style="height: 46.5938px;"><td class="align-center" style="border-width: 1px; height: 46.5938px;">3</td><td style="border-width: 1px; height: 46.5938px;">Alias name</td><td style="border-width: 1px; height: 46.5938px;">You can set a custom name for the data binding item name. This name will persist on Panel closing. </td></tr><tr style="height: 46.5938px;"><td class="align-center" style="border-width: 1px; height: 46.5938px;">4</td><td style="border-width: 1px; height: 46.5938px;">Value</td><td style="border-width: 1px; height: 46.5938px;">Set the data binding value. After entering the value, a request to update the data binding value will be sent to the player.</td></tr><tr style="height: 35.3906px;"><td class="align-center" style="border-width: 1px; height: 35.3906px;">5</td><td style="border-width: 1px; height: 35.3906px;">Sim</td><td style="border-width: 1px; height: 35.3906px;">Items with this checkbox checked can be simulated on the <span style="color: rgb(230, 126, 35);">[Value Generator](https://doc316en.candera.eu/books/player/page/value-generator)</span> tab.</td></tr><tr style="height: 46.5938px;"><td class="align-center" style="border-width: 1px; height: 46.5938px;">6</td><td style="border-width: 1px; height: 46.5938px;">Datatype</td><td style="border-width: 1px; height: 46.5938px;">Change the data type. Select the any data type from the pull-down menu. After setting the data type, a request to update the data binding datatype will be sent to the player.</td></tr></tbody></table>