# Getting Started on Android
# Introduction
This manual gives brief instructions to get the Matlab-Connector sample applications built and deployed on Android. Namely, those are MLC-Cluster and MLC-Signals.
This Guide addresses the experienced user, therefore the obvious points will not be explained here. Topic are only the essential steps, but not things like the usage of the build tool CMake.
#### Abbreviations / Terminology
| **Abbreviation** | **Terminology** |
| CANDERA | CANDERA GmbH |
| ADB | Android Debug Bridge, an important management tool |
# Prerequisites
#### CMake GUI
For building, the tool cmake-gui is needed. Navigate to [https://cmake.org/download/](https://cmake.org/download/) and download the latest stable version for your PC, 64bit etition and install it.
#### Ninja build tool
For building android applications, yet another build tool is required.
- Navigate to [https://ninja-build.org/](https://ninja-build.org/) and download the ninja binary (yes, it’s only **ninja.exe**)
- Save it at **C:\\Programs\\Ninja\\** and add this path to your **PATH** environment variable.
#### Android Studio
- Download the latest stable version of Android-Studio from Google and install it.
- Next, a special version of the Android-NDK is required because the newer ones are broken:
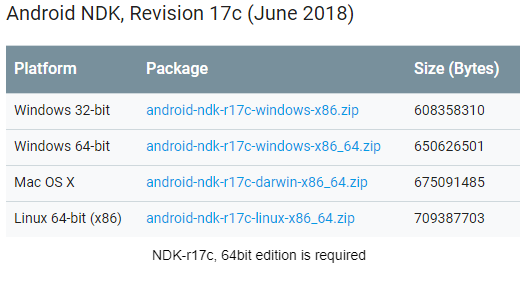
Navigate to: [https://developer.android.com/ndk/downloads/older\_releases ](https://developer.android.com/ndk/downloads/older_releases)and download the android-NDK-r17c as shown below.
- Extract the downloaded zip file, rename the unpacked folder to **ndk-r17c** and move it to:
**%USERPROFILE%\\AppData\\Local\\Android\\Sdk\\**
This way, the NDK-r17c exists in parallel to the delivered one and will not be affected by updates.
- Set the environment variable **ANDROID\_NDK** to the path where you saved ndk-r17c:
here it is: **%USERPROFILE%\\AppData\\Local\\Android\\Sdk\\ndk-r17c\\**
This is mandatory for the toolchain file.
- Finally extend the **PATH** environment variable to the **platform tools directory**:
Here, this is **%USERPROFILE% \\AppData\\Local\\Android\\Sdk\\platform-tools\\**
This makes tools like **adb** available on **CMD**, which makes live a lot easier.
# Building an Application Library
- Open CMake Gui, fill in source and build directory and click Configure.
- A Dialog opens: Select “Ninja” as build system and check “Select toolchain file”
- Select: **cgi\_studio\_devices\\src\\Android\\ToolchainFiles\\GCC-toolchain-x86\_64-Android.cmake**
or **cgi\_studio\_devices\\src\\Android\\ToolchainFiles\\GCC-toolchain-ARM64-Android.cmake**
depending what you need.
- After first configure run, perform following cmake configurations:
**MLC\_SIMULATION**:=OFF (This is only relevant in case of an MLC application)
**ANDROID\_PLATFORM\_LEVEL**:=<number between 21 and 28, which is the android api level>
This should be **smaller or equal** the android version of your device.
(If you don’t select a level, the toolchain file decides. This might then not be what you want)
- Finally click “Configure” once more, then “Generate” afterwards.
If you created the corresponding Asset-Libraries within the designated “Assets” directory before, the platform-specific one gets also copied to the build folder, which is very handy for deploying (see next section).
- In a CMD window navigate to you build folder and type ninja.
- This builds the application and should deliver you a **libApplicationLib.so** file, which we’ll need for the next steps.
# Deploying the Asset Library
Before an android application can be launched, the asset library has to be deployed on the Android device. Now the tool ADB (Android Debug Bridge) comes into play, which is part of the sdk-platform tools. It is a command line tool which has to be called e.g. within a Windows CMD. ADB is a general device management tool for Android.
The most important tasks are:
- Pushing and pulling files between the host computer and the android device
- Installing/uninstalling android apps on the device
- Viewing the logcat
- It even provides a bash terminal access (yes, even root user) to the android device
The most important commands for this work are:
- adb help
Show help and description of supported commands
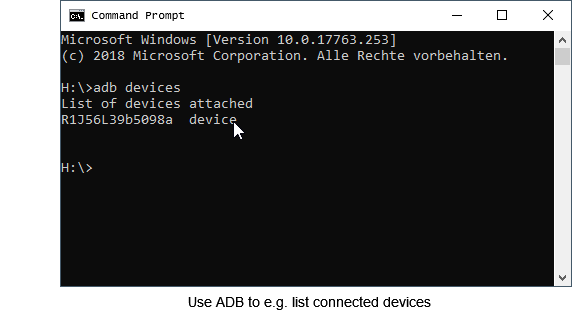
- adb devices
List all connected android devices
- adb push <source-file> <target-file or target-folder>
Push a local file to the android device
- adb shell
Open a bash terminal session on the android device – this is the god-mode, so be careful!
Steps for deploying the AssetLib on the Android device:
- Open a Windows CMD and navigate to the build folder (or where you generated the asset library)
- Type e.g.: adb push AssetLibCff\_Android\_Target.bin /sdcard/AssetLibCff.bin
/sdcard is the internal or external storage on Android. That’s the location, where the app expects the asset library.
# Generating and deploying an Android-App
Now an android studio project skeleton is needed for constructing a so-called apk file, which is the format of android app packages, like those on Google AppStore.
- Navigate to cgi\_studio\_apps/references/Android/ and copy the MlcSample project to a location you like
- From your build directory, copy the file libApplicationLib.so to following location of your project skeleton:
<MlcProject>/app/native-libs/<architecture>/
- Open Android-Studio and open your MlcSample project. This wil take a few seconds, wait till everything is ready.
- Click at “Syncronise Project” like shown below and wait again till everything is ready:
(This is only needed when the project is opened the first time)
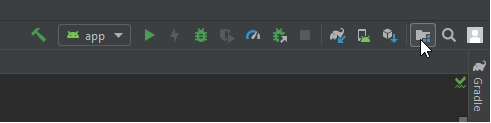
- Next click at “Show Project-Structure” like shown below:
(This is only needed when the project is opened the first time)
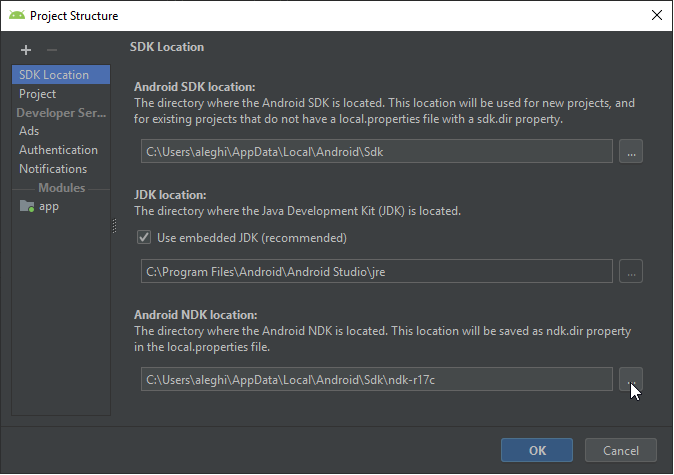
- A dialog opens. Select the tab “SDK Location” and there ensure that the field “Android NDK location” (the bottom-most one) is set to the ndk-r17c, which you installed previously:
- Click OK and you’re ready to build and deploy.
- Ensure that you connected your android device to an USB port and enabled “USB debugging” on that device.
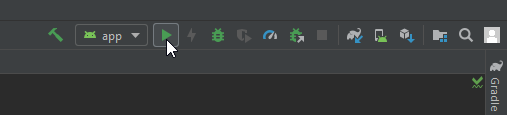
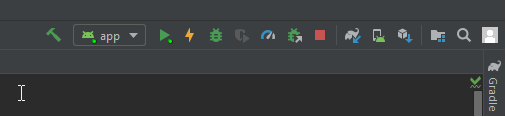
- Finally klick the “Run-Button”, like shown below and await what will happen:
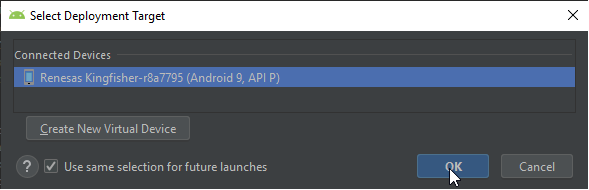
- Sometimes Android Studio asks for device selection – do so and proceed…
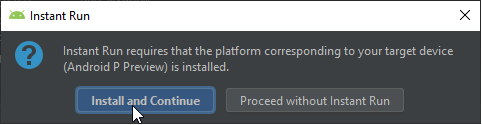
- Sometimes Android Studio asks to install missing platforms. Simply do so and proceed…
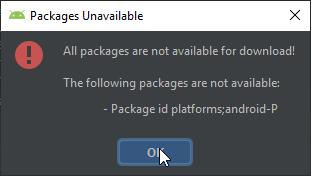
- And if you’re using an absolutely new platform like shown in the dialog above, Android-Studio still cries around: Simply klick OK to proceed and forget about that:
- Finally if the application is deployed and running, Android Studio should look like this:
# Trouble-Shooting
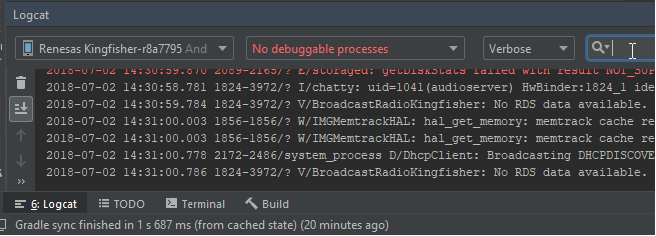
- If you experience Problems, sometimes the so called “Log Cat” is quite helpful, which also allows live filtering by keywords like e.g. “myappname” or “failed” and thelike.
- Depending on the kind of your Android OS, sometimes the Permissions-Dialog is not displayed.
In such a case, the user has no chance to grant the needed permissions, when the app is installed the first time. That’s how to solve this problem:
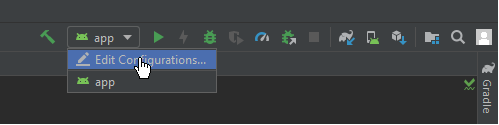
Click “app->Edit Configurations”, like shown below:
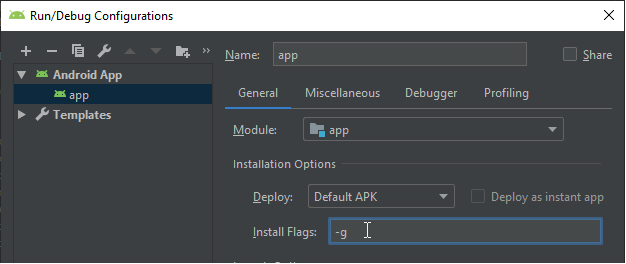
A dialog opens; In the field “Install Flags” input “-g” which pre-grants all permissions on installing.
After saving this configuration, clicking at the Build-Button should do it’s job.
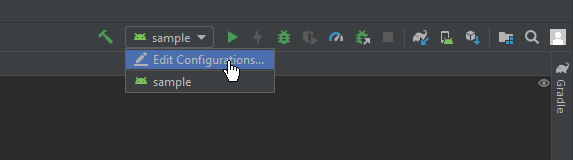
- When you want to debug your application and encounter that your breakpoints are ignored, you can try following: go to the run-configurations at the top right toolbar of android studio as shown below.
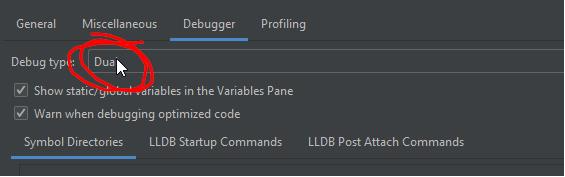
A Popup appears, navigate do “Debugger” and ensure that “Dual” is set for the field: Debug types: