# Examples of using Data binding
This page shows how to create a data binding source using Courier Editor and how to configure data binding using Scene Composer. This tutorial will be based on an [Industrial solution](https://doc316en.candera.eu/books/sample-solutions/page/industrial-solution) template.
---
#### Creating a Data binding source
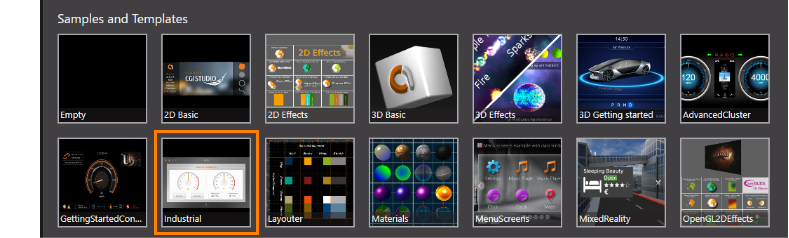
1. Open Scene Composer and choose to open the Industrial solution from the Samples and Templates section of Scene Composer's Startup panel by double clicking.
- The solution will be loaded, which may take some time
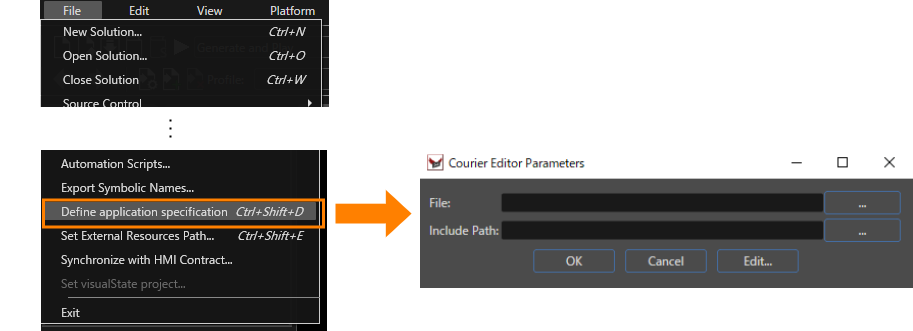
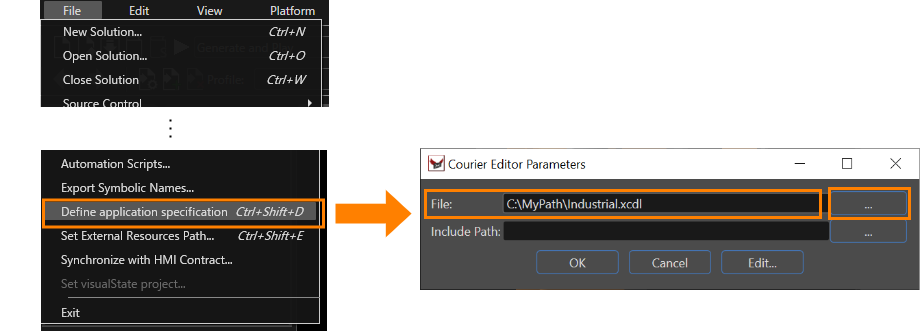
2. In the Scene Composer menu bar click \[ File > Define application specification \] to open the "Courier Editor Parameters" dialog.
- "Courier Editor Parameters" dialog will be opened.
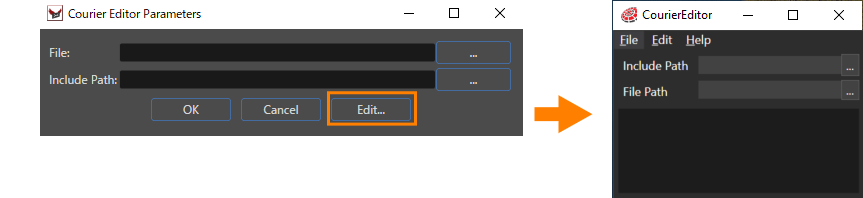
3. In the "Courier Editor Parameters" select \[ Edit... \] to start CourierEditor.
- CourierEditor window will be opened.
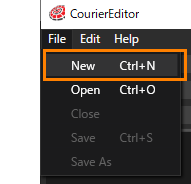
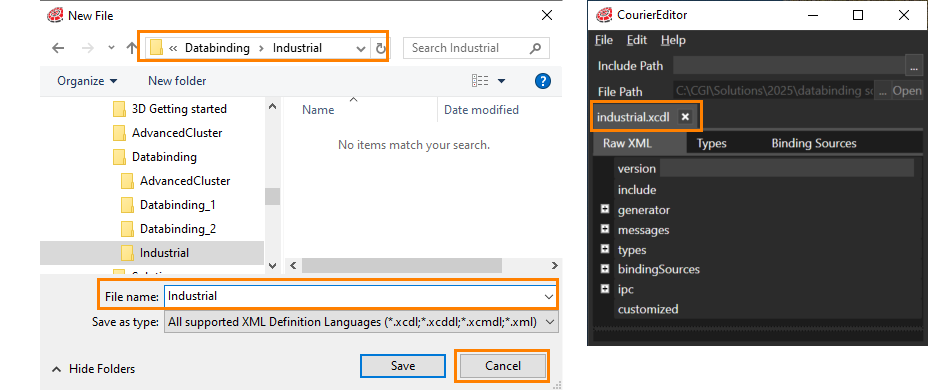
4. In CourierEditor menu bar, click \[ File > New \].
- The "New File" dialog box will be opened.
5. Set the destination folder and filename for the new data binding source and click \[ Save \].
- The data binding source file "Industrial.xcdl" will be saved to the specified location.
- The data binding source file is now ready to be configured with data binding items.
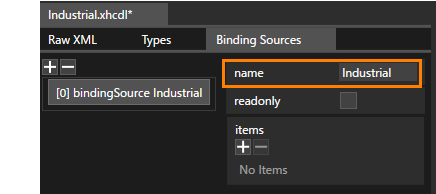
6. Add Data binding items (data name/type) to the created Data binding source. To do so, switch to the Binding Sources tab and click the \[ + \] button on the top left to add a binding source.
- "\[0\] bindingSource" is added
7. Click on "\[0\] bindingSource" to view its details on the right side and set the name to "Industrial".
- The name of "\[0\] bindingSource" will be set to "Industrial"
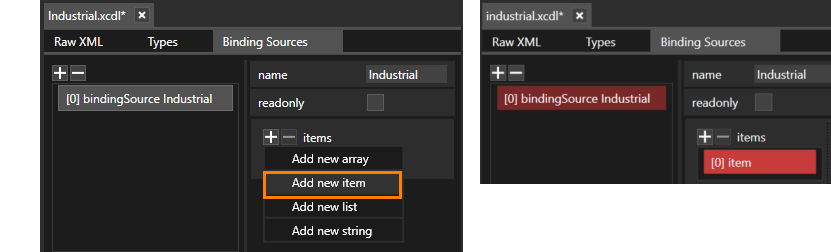
8. Click the \[ + \] button next to "items" and click \[ Add new item \] in the context menu.
- "\[0\] item" is added.
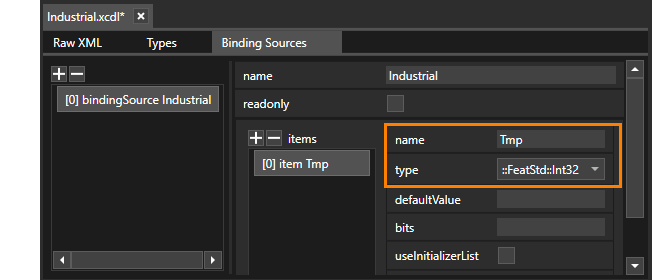
9. Select data binding item "\[0\] item" view its details on the right side and configure the following name and type:
name = Temp
type = ::FeatStd::Int32
- Data binding item will be configured accordingly.
10. In the menu bar of the CourierEditor select \[ File > Save \] to save the data binding source file.
- The data binding source file will be saved.
- The creation of the data binding source is now complete.
- The CourierEditor can be closed.
Please refer to [Courier Editor](https://doc316en.candera.eu/books/courier/page/courier-editor) for more information on how to create data binding sources.
---
#### Linking Data binding source to Scene Composer
1. In the Scene Composer menu bar choose \[ File > Define Application Specification \] to open the "Courier Editor Parameters" dialog.
- The Courier Editor Parameters dialog will be opened.
2. In the Courier Editor Parameters dialog click the \[ ... \] button to select the path to the data binding source file "Industrial.xcdl" file.
- The file which you have just created using CourierEditor in the steps above is configured.
3. Finish your configuration by clicking \[ OK \].
- The Data binding source is now linked to Scene Composer.
---
#### Configuring Data binding using the Scene Composer
In Scene Composer, many Control properties can be configured for data binding. Each property on which data binding can be performed offers a bind button on the right side in the Properties panel.
For more information about data binding, please refer to [Data Binding](https://doc316en.candera.eu/books/scene-design/page/databinding-ui).
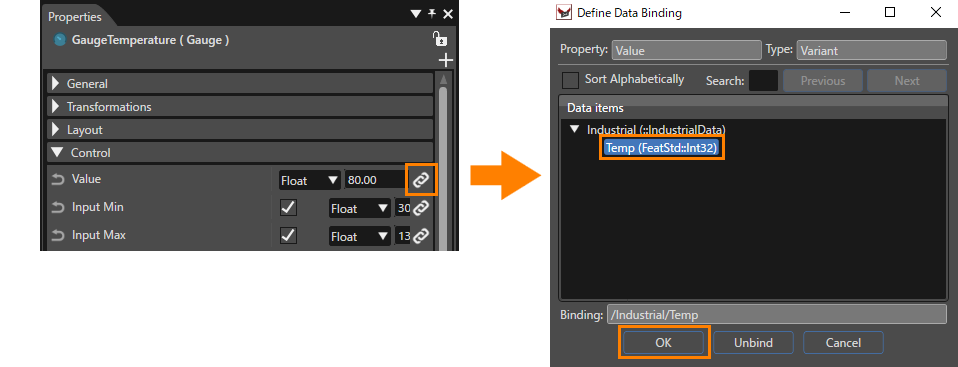
1. In the scene tree of the Scene1\_Main scene, select \[ GaugeTemperature \], and in the properties panel, click the \[ Control > Value \] bind button.
- The Define Data Binding dialog will be opened.
2. Select "Industrial > Temp (FeatStd::Int32)" from the data item and click \[ OK \].
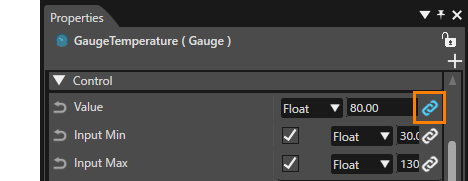
- When data binding is set, the color of the bind button changes to blue.
---
#### Operation confirmation using Live Preview panel
You can check the operation of data binding settings in the live preview panel.
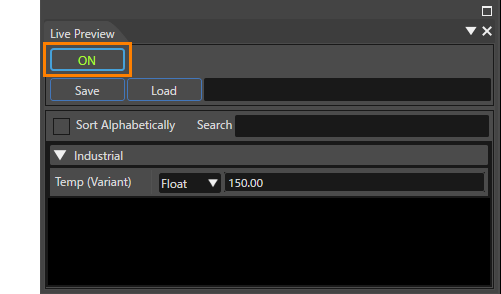
1. In Scene Composer menu bar choose \[ View > Live Preview \] to display the live preview panel. Set the \[ On/Off \] button at the top right of the panel to "On".
- The Live Preview window will be opened.
- After turning the live preview on, the button will display in green font \[ ON \].
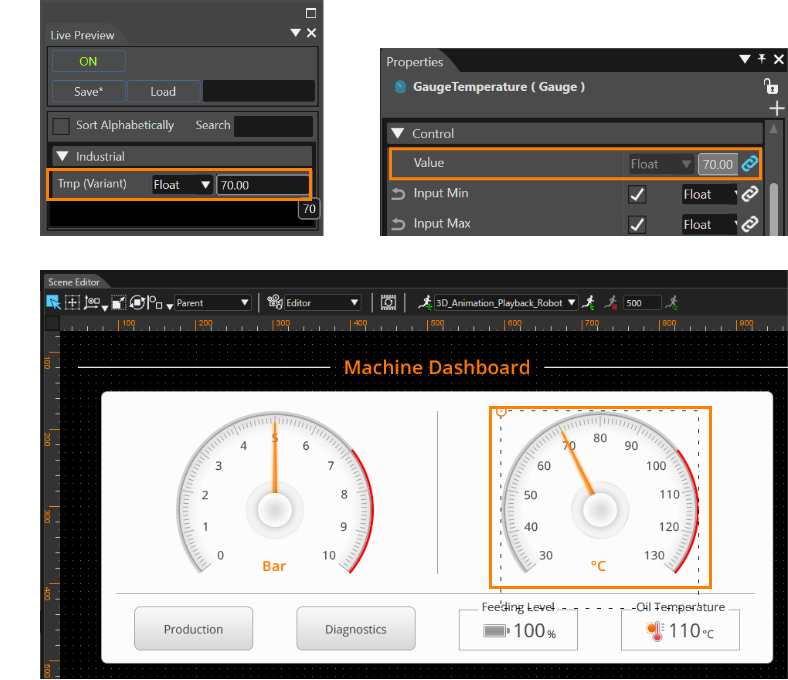
2. Set the "Tmp (Variant)" value to your desired value.
- The position of the thermometer needle displayed in the Scene Editor changes to match the value you have set.
- The value of the Control property "Value" will be updated to the value entered in the "Live Preview"
---