# Breadcrumb - StateMachine Workflow

Breadcrumb is not a standalone control, it does not trigger internally any scene transitions so it should be always connected with external state machine. For that purpose, breadcrumb property *State Machine Node* should be set to a node that contains a *State Machine* behavior.

Data flow for *SetPath*:

<div class="contents" id="bkmrk-scene-element-%28for-e"><div class="contents"><div class="textblock">- Scene element (for example, button).
- State machine has a defined transition that reacts to the click of a button that was defined in the previous point.
- State machine has defined states that contain actions for entry (e.g. request for scene transition, breadcrumb action with 'SetPath' option).
- After click, State machine transitions to defined state which triggers breadcrumb action.
- Breadcrumb control visualizes proper data which received from path.
</div></div></div>Data flow for *BackToPrevious* action:

<div class="contents" id="bkmrk-scene-element-%28for-e-0"><div class="contents"><div class="textblock">- Scene element (for example, button). It cannot be a breadcrumb node as a child.
- User defines how the action will be called e.g. OnClick
- User connects breadcrumb action to action slot.
- After calling this action, breadcrumb sends a new path to state machine node.

</div></div></div>Data flow for *BackToElement* action:

<div class="contents" id="bkmrk-same-as-above-but-th"><div class="contents"><div class="textblock">- Same as above but the state machine should contain the related transitions.

</div></div></div>#### State Machine Example

1\) Create a new state machine in *Solution explorer* tab as explained in the <span style="color: rgb(230, 126, 35);">[State Machine Basic Operation](https://doc316en.candera.eu/books/state-machine/page/basic-operation)</span> documentation.

2\) Open the newly created state machine.

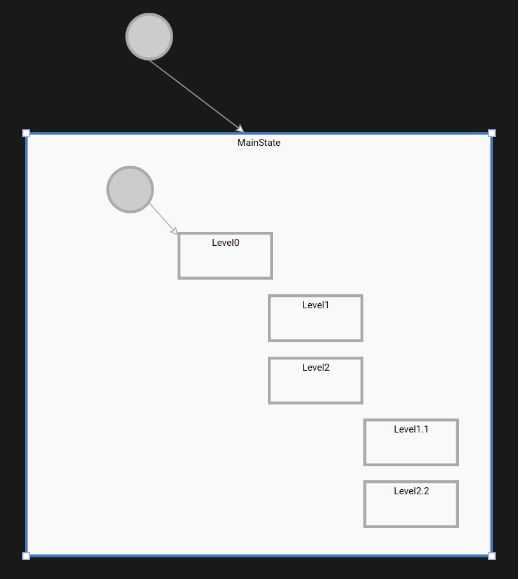
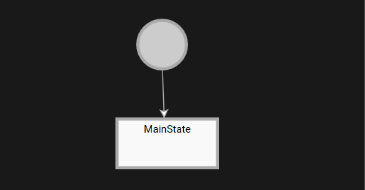
3\) Create an Initial State and a State and connect them, it will be the main state that manages other states.

<div drawio-diagram="5584"><img src="https://doc316en.candera.eu/uploads/images/drawio/2024-04/drawing-5-1712928418.png" alt=""/></div>

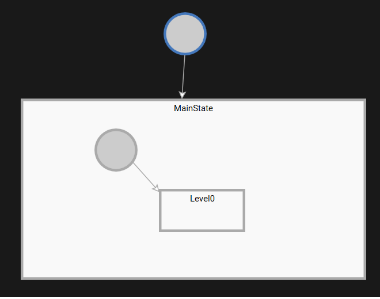
4\) Create the Initial State and a State again but this time inside the MainState.

<div drawio-diagram="5588"><img src="https://doc316en.candera.eu/uploads/images/drawio/2024-04/drawing-5-1712929060.png" alt=""/></div>

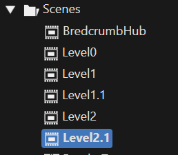
5\) Create several sample scenes. On the *BreadcrumbHub* scene add a Breadcrumb control.

<div drawio-diagram="5587"><img src="https://doc316en.candera.eu/uploads/images/drawio/2024-04/drawing-5-1712928963.png" alt=""/></div>

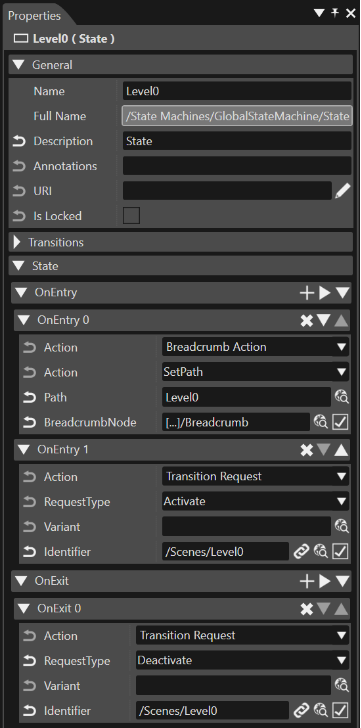
6\) In the state machine editor and select the state called "Level0". Set the actions to be called on entry and on exit. At this moment, the path will be set. That scene is first so we only send the name without any separators via Breadcrumb action. Set BreadcrumbNode on BreadcrumbHub scene. Set active / deactivate transition request for selected scene.

<div drawio-diagram="5590"><img src="https://doc316en.candera.eu/uploads/images/drawio/2024-04/drawing-5-1712929711.png" alt=""/></div>

7\) Create the next states similarly.

<div drawio-diagram="5591"><img src="https://doc316en.candera.eu/uploads/images/drawio/2024-04/drawing-5-1712929899.png" alt=""/></div>

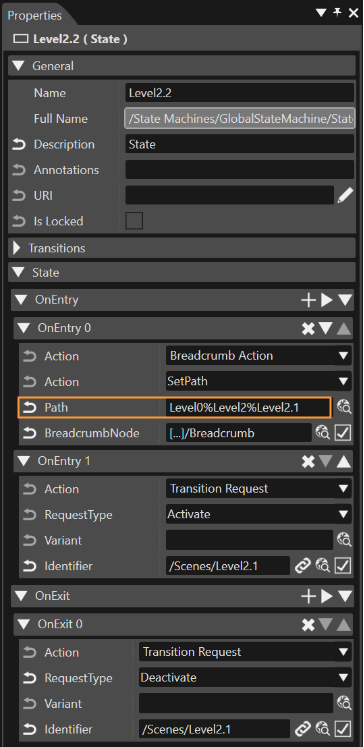
8\) Fill each state with actions that are to be called. Below is an example of how to pass nested path with several levels.

<div drawio-diagram="5593"><img src="https://doc316en.candera.eu/uploads/images/drawio/2024-04/drawing-5-1712930219.png" alt=""/></div>

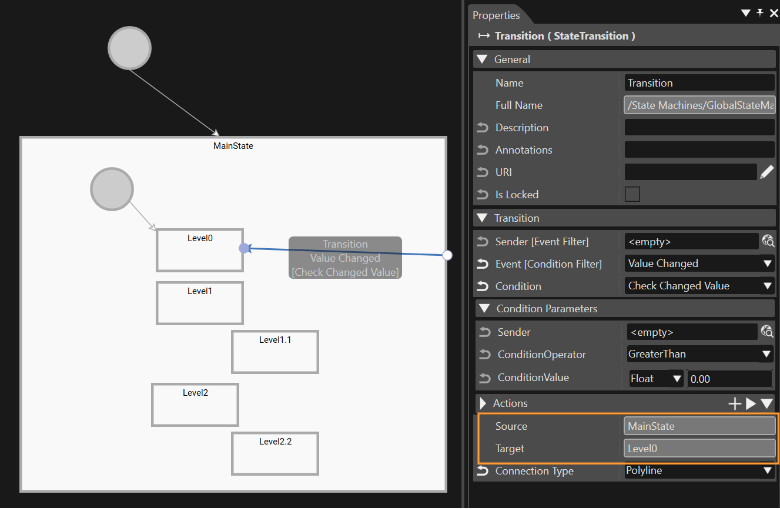
9\) After completing all actions for entry and exit in states, we can create transitions when the user clicks on the breadcrumb element. It is a dragging line from the main state to the state we want go back. It should be remembered that we will never go to the final states so Level 1.1 and Level 2.1 will be omitted. On every transition we create a condition. Behavior sends the path from the root to the selected element using ValueChangedEvent.

<div drawio-diagram="5594"><img src="https://doc316en.candera.eu/uploads/images/drawio/2024-04/drawing-5-1712930489.png" alt=""/></div>

Create similar transition for Level1 and Level2. Don't forget to set the Condition Value to *Level1* and respectively *Level2*.

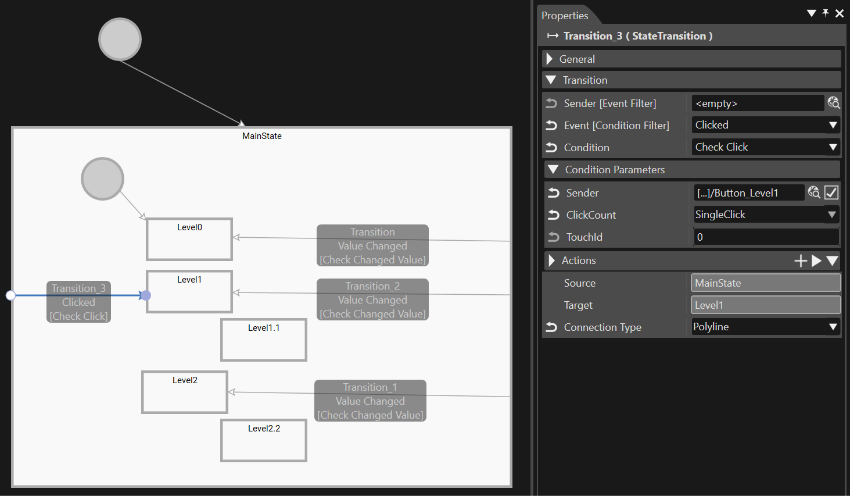
10\) **\[optional\]** After all transitions with the paths from breadcrumb are defined, you can create transitions that can be used to change the active scene to the next scene by clicking the button on the active scene.

<div drawio-diagram="5596"><img src="https://doc316en.candera.eu/uploads/images/drawio/2024-04/drawing-5-1712930871.png" alt=""/></div>

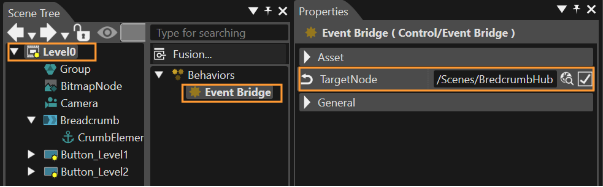
11\) The state machine is on the BreadcrumbHub scene so if we want to receive click events in our state machine, we had to add event bridge to other scenes and set target node property to node with state machine.

<div drawio-diagram="5601"><img src="https://doc316en.candera.eu/uploads/images/drawio/2024-04/drawing-5-1712931393.png" alt=""/></div>

#### Sample Solution

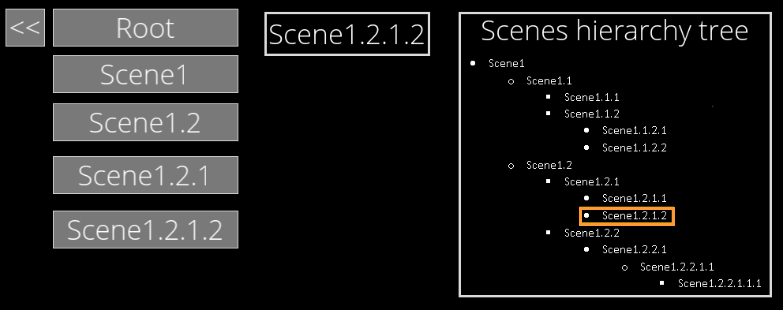
<div drawio-diagram="5599"><img src="https://doc316en.candera.eu/uploads/images/drawio/2024-04/drawing-5-1712931338.png" alt=""/></div>