# Control Center - General Settings

After opening a solution, the following pages are available:  
  
・Dashboard  
・General &amp; CGI Studio  
・Scene Composer

# Dashboard

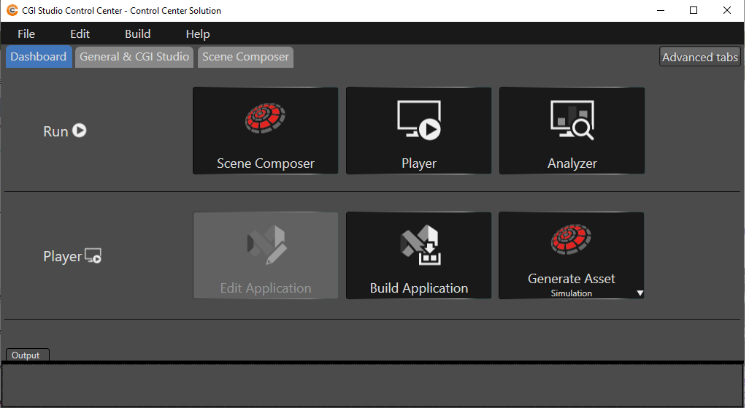
The Control Center Dashboard is the first page opened when opening a solution. If you close the solution using the menu "File - Close solution", you will come back to the <span style="color: rgb(230, 126, 35);">[Control Center Welcome Screen](https://doc316en.candera.eu/link/349#bkmrk-page-title)</span>.

<div drawio-diagram="7759"><img src="https://doc316en.candera.eu/uploads/images/drawio/2025-01/drawing-4-1736920085.png" alt=""/></div>

<div class="contents" id="bkmrk--0"><div class="contents"><div class="textblock">---

</div></div></div>
#### "Run" Section

Below the ribbon you can find buttons to run SceneComposer, the Player, and CGI Studio Analyzer with your open Solution.

<div drawio-diagram="7760"><img src="https://doc316en.candera.eu/uploads/images/drawio/2025-01/drawing-4-1736920112.png" alt=""/></div>

<table border="1" class="align-left" id="bkmrk-clicking-on-this-but" style="border-collapse: collapse; width: 96.5432%; border-width: 1px;"><colgroup><col style="width: 2.8157%;"></col><col style="width: 17.5325%;"></col><col style="width: 79.6091%;"></col></colgroup><tbody><tr><td style="border-width: 1px; vertical-align: top;"><span style="color: rgb(0, 0, 0);">1</span>

</td><td style="border-width: 1px; vertical-align: top;">**<span style="color: rgb(0, 0, 0);">Scene Composer  
</span>**

</td><td style="border-width: 1px; vertical-align: top;">Clicking on this button opens the selected solution in Scene Composer for the selected platform.  
More info can be found in the [<span style="color: rgb(230, 126, 35);">Scene Composer</span>](https://doc316en.candera.eu/shelves/3-scene-composer) chapter.</td></tr><tr><td style="border-width: 1px; vertical-align: top;"><span style="color: rgb(0, 0, 0);">2</span>

</td><td style="border-width: 1px; vertical-align: top;">**<span style="color: rgb(0, 0, 0);">Player  
</span>**

</td><td style="border-width: 1px; vertical-align: top;">This button opens the CGI Player. Before the CGI Player is opened, a Windows Security Alert will prompt you for access. In the CGI Player you can select via checkboxes which scene will be rendered in the CGI Player Window.   
More info can be found in the <span style="color: rgb(230, 126, 35);">[Player](https://doc316en.candera.eu/books/player) </span>chapter.  
</td></tr><tr><td style="border-width: 1px; vertical-align: top;"><span style="color: rgb(0, 0, 0);">3</span>

</td><td style="border-width: 1px; vertical-align: top;">**<span style="color: rgb(0, 0, 0);">Analyzer  
</span>**

</td><td style="border-width: 1px; vertical-align: top;">The Analyzer button opens the CGI Studio Analyzer.  
More info can be found in the <span style="color: rgb(230, 126, 35);">[Analyzer](https://doc316en.candera.eu/books/performance-optimization/chapter/cgi-analyzer)</span> chapter.  
</td></tr></tbody></table>

<div class="contents" id="bkmrk--4"><div class="contents"><div class="contents">  
</div></div></div><div class="contents" id="bkmrk--5"><div class="contents"><div class="textblock">---

</div></div></div>#### "Player" Section

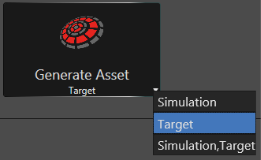
In this section you can edit or build your application and you can generate your assets for Simulation, Target or for Simulation and Target.

##### Edit Application

<div drawio-diagram="7761"><img src="https://doc316en.candera.eu/uploads/images/drawio/2025-01/drawing-4-1736920423.png" alt=""/></div>

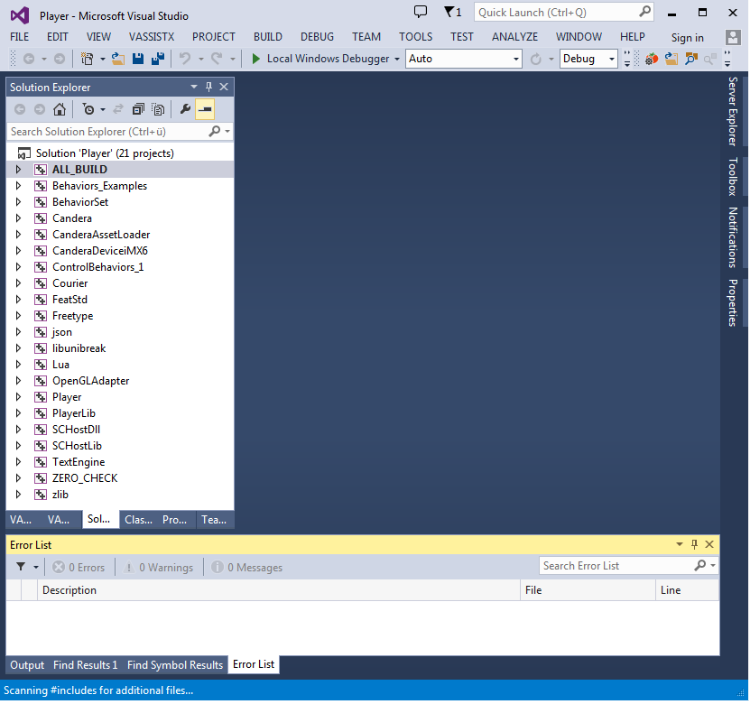
Click on this button in order to edit your application. As the icon suggests, clicking "Edit Application" opens Visual Studio with the selected sample.  
This button may be disabled in a new solution. After building the application using <span style="color: rgb(230, 126, 35);">[Build Application](https://doc316en.candera.eu/link/1117#bkmrk-build-application)</span>, this button is enabled.

<div drawio-diagram="4668"><img src="https://doc316en.candera.eu/uploads/images/drawio/2023-10/drawing-7-1698644126.png" alt=""/></div>

<div class="contents" id="bkmrk--10"><div class="contents">  
</div></div>##### Build Application

<div drawio-diagram="7762"><img src="https://doc316en.candera.eu/uploads/images/drawio/2025-01/drawing-4-1736920451.png" alt=""/></div>

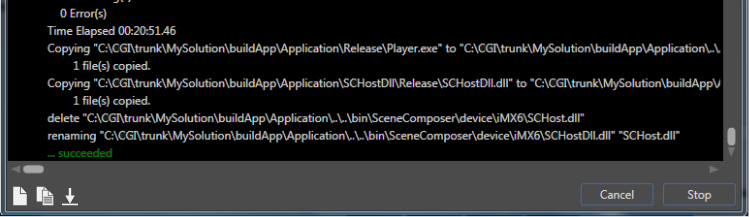
Click here to build your application. This will open the <span style="color: rgb(230, 126, 35);">[CGI Studio Control Center - Build Window](https://doc316en.candera.eu/link/1117#bkmrk-cgi-studio-control-c)</span> and start the build process, which may take some time.

A successful build completion is signaled by "... succeeded"

<div drawio-diagram="7763"><img src="https://doc316en.candera.eu/uploads/images/drawio/2025-01/drawing-4-1736920482.png" alt=""/></div>

##### Generate Asset

<div drawio-diagram="4673"><img src="https://doc316en.candera.eu/uploads/images/drawio/2023-10/drawing-7-1698644631.png" alt=""/></div>

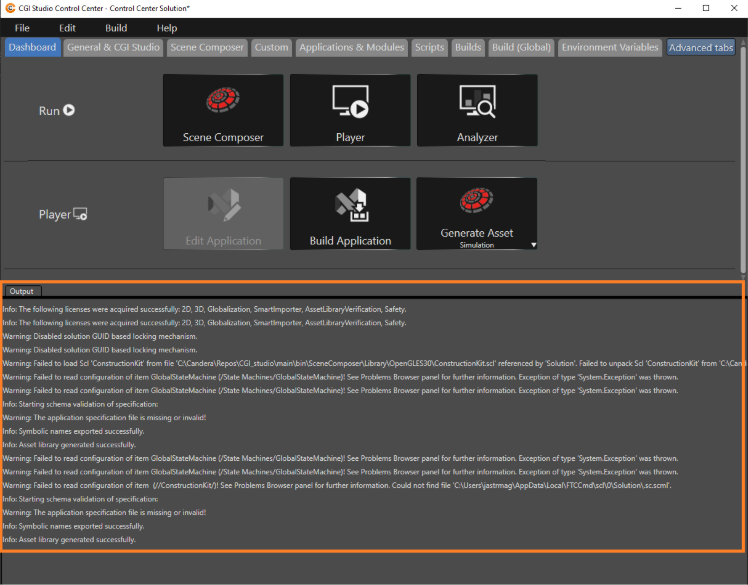
To generate assets select Simulation, Target, or Simulation and Target as desired and press the "Generate Target" button. Log output during asset generation is displayed directly in the lower part of the Control Center Window.

<div drawio-diagram="7764"><img src="https://doc316en.candera.eu/uploads/images/drawio/2025-01/drawing-4-1736920521.png" alt=""/></div>

##### CGI Studio Control Center - Build Window

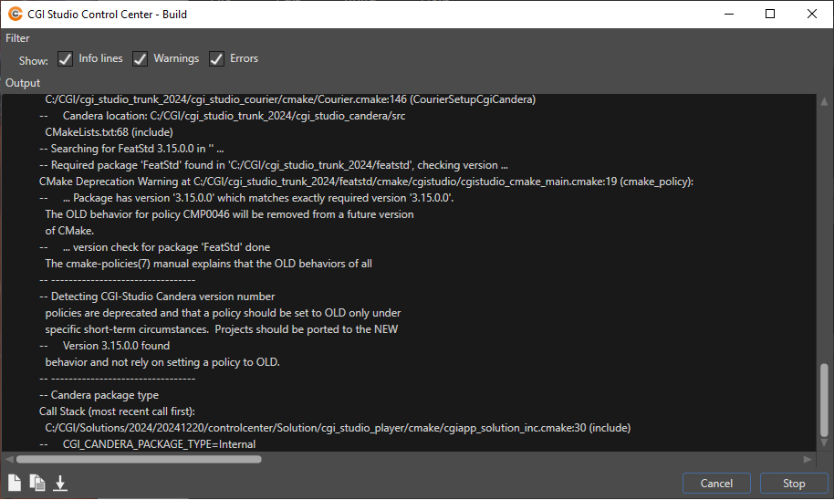
Whenever a build process is started in the CGI Studio Control Center (e.g. <span style="color: rgb(230, 126, 35);">[Build Application](https://doc316en.candera.eu/link/1117#bkmrk-build-application)</span> and [<span style="color: rgb(230, 126, 35);">Build Panel</span>](https://doc316en.candera.eu/link/1121#bkmrk-build-panel)) the build window is opened. This window displays the build output.

<div drawio-diagram="7765"><img src="https://doc316en.candera.eu/uploads/images/drawio/2025-01/drawing-4-1736920557.png" alt=""/></div>

<div class="contents" id="bkmrk--21"><div class="contents">  
</div></div>You can scroll through the build output. You can filter the output lines for Info lines, Warnings and Errors using the Checkboxes in the top of the window. You can cancel or stop the build with the buttons on the bottom right.  
The buttons on the left have the following functionality:

<div drawio-diagram="7766"><img src="https://doc316en.candera.eu/uploads/images/drawio/2025-01/drawing-4-1736920586.png" alt=""/></div>

<div class="contents" id="bkmrk-open-the-build-log-f"><div class="contents"><div class="textblock"><table border="0"><tbody><tr><td>1

</td><td style="vertical-align: top;">Open the Build-Log file.</td></tr><tr><td>2

</td><td style="vertical-align: top;">Copy the Build-Log to Clipboard.</td></tr><tr><td>3

</td><td style="vertical-align: top;">Automatically scrolls to the bottom of the log output. (If you have scrolled up in the output)</td></tr></tbody></table>

---

</div></div></div>

# General & CGI Studio

<div drawio-diagram="5342"><img src="https://doc316en.candera.eu/uploads/images/drawio/2024-03/drawing-5-1709284521.png" alt=""/></div>

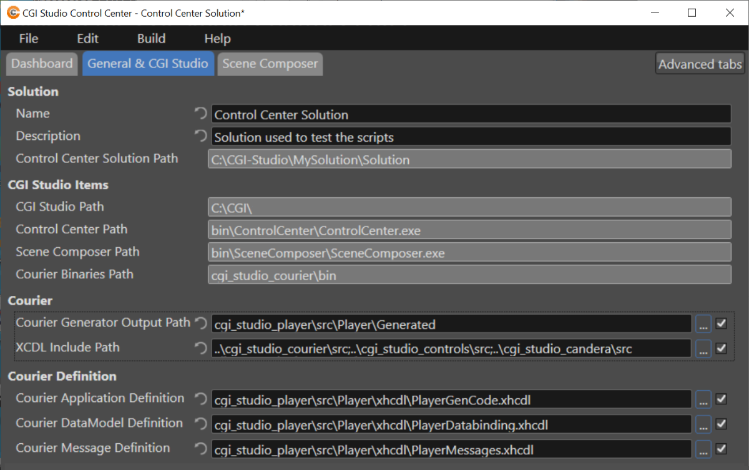
Via the General &amp; CGI Studio tab it is possible to edit solution details and various reference paths. Items that are greyed out cannot be edited. Use the checkboxes on the right to toggle between relative paths and absolute paths. Use a semicolon to list up multiple files.

##### Solution

- **Name:** Name of the solution
- **Description:** Description of the solution
- **Control Center Solution Path:** The path to the current control center solution

##### CGI Studio Items

- **CGI Studio Path:** The root folder for all CGI Studio components (this folder should contain all CGI Studio libraries like cgi\_studio\_candera, cgi\_studio\_courier, bin/SceneComposer, etc).
- **Control Center Path:** The path to the Control Center executable
- **Scene Composer Path:** The path to the Scene Composer executable
- **Courier Binaries Path:** The path to the Courier binaries (CourierEditor.exe and CourierGenerator.exe)

##### Courier  


- **Courier Generator Output Path:** The folder in which CourierGenerator should generator all the code
- **XCDL Include Path:** The list of paths in which CourierGenerator and CourierEditor will search for the definition files.

##### Courier Definition

- **Courier Application Definition:** The main Courier definition file that will be used by CourierGenerator.
- **Courier DataModel Definition:** The path to the file that contains the definition of the data binding items
- **Courier Message Definition:** The path to the file that contains the definition of the messages that are used in the application

---

# Scene Composer

<div drawio-diagram="5343"><img src="https://doc316en.candera.eu/uploads/images/drawio/2024-03/drawing-5-1709284693.png" alt=""/></div>

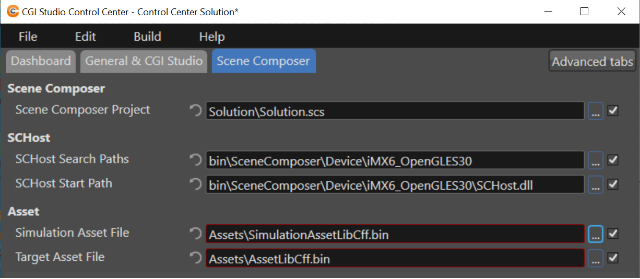
Via the Scene Composer tab it is possible to edit project details and various reference paths. Use the checkboxes on the right to toggle between relative paths and absolute paths.

##### Scene Composer

- **Scene Composer Project:** The path to the Scene Composer project

##### SCHost  


- **SCHost Search Paths:** Paths here are used to find the SCHost.dll when starting Scene Composer. The first found SCHost.dll will be used.
- **SCHost Start Path:** The SCHost.dll that is found will be copied to this location and Scene Composer will be started using this copy.

##### Asset  


- **Simulation Asset File:** The path to the simulation asset file
- **Target Asset File:** The path to the target asset file

---