# Blood Pressure Sample
The blood pressure device sample is a Scene Composer sample that demonstrates a blood pressure measurement device with exemplary scenes and animations. For the Community Edition, the sample was extended with a voice activation feature and a data binding sample programmed in Python. The Python part of the sample relies on the [Python-Based Player Data Binding Library](https://doc316en.candera.eu/books/cgi-studio-professional-edition/page/python-based-data-binding "Python-Based Player Data Binding Library") to interact with the data bindings of the scene.
General information on this sample can be found in the [Blood Pressure Solution](https://doc316en.candera.eu/books/sample-solutions/page/blood-pressure-solution "Blood Pressure Sample") documentation. This book goes over the sample Python extension, namely the voice activation feature and the integrated data binding.
The Python code for the blood pressure device sample can be found under:
*\\bin\\CommunityEdition\\Python\\Samples\\BloodPressureDevice*.
The voice activation feature only works if the sample is started from Python using the Player Connector Library with the provided Python sample program. The feature doesn't work if the sample is started from the scene composer or directly with the player. Also, for enterprise edition users, if the Player Connector Library binary is built from source, it must be built with CMake flag `CGIAPP_SAMPLE_SOUNDHOUND_ENABLED` set to `ON`.
#### Python Environment Setup
To play the sample, a minimal Python setup is required. Verify that Python 3.x is installed on the system and either the `py` or the `python` command is on the path. Afterwards, create a virtual environment like below.
1. Navigate to *\\bin\\CommunityEdition\\Python\\Samples\\BloodPressureDevice*
2. Create a virtual environment in that location with
`py -m venv .`
3. Activate the virtual environment by running
`.\Scripts\activate`
4. Install the dependencies from `requirements.txt` with
`pip install -r .\requirements.txt`
The `CanderaAppConnector` and other required types are an installable Python package under \\*bin\\Player\\PlayerConnector*. Although, the package is listed in `requirements.txt` and installed by default. For more information refer to the [Python-based Data Binding](https://doc316en.candera.eu/books/cgi-studio-professional-edition/page/python-based-data-binding "Python-based Data Binding") documentation.
#### Soundhound API Setup
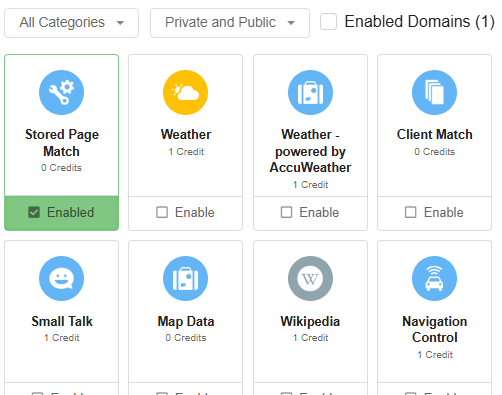
The voice to text/command transcription is realized with Soundhound. To use the Soundhound Api in the blood pressure sample, a free account must be created under [https://www.houndify.com/login](https://www.houndify.com/login). Afterwards, a new client must created in the dashboard. In this client, all domains may be deactivated, apart from the "Stored Page Match" domain.
As custom commands on Soundhound are only available in English language, the voice activation feature only support English language.
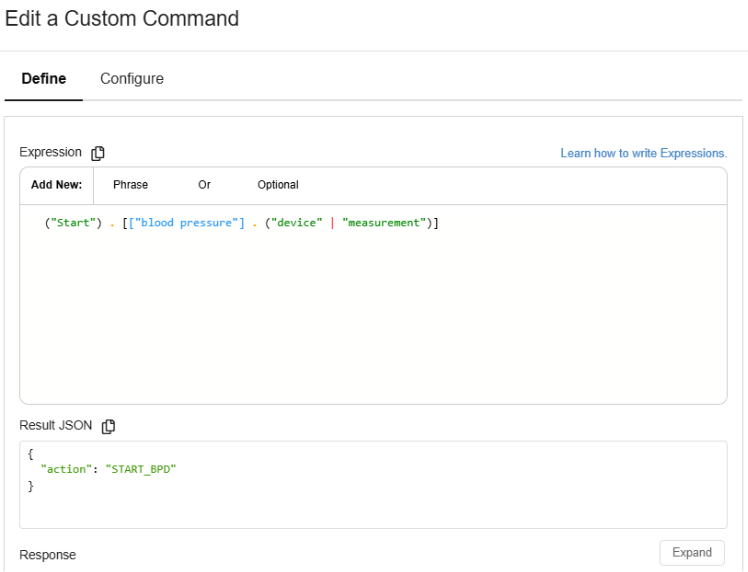
Now, a new custom can be created by navigating to the section "Custom Commands" in the menu on the left side. Enable the custom commands and click "New Page". After entering an arbitrary name for the command like "BloodPressureDevice", a modal window for configuring the command, opens. In der "Expression" input field enter the string
```json
("Start") . [["blood pressure"] . ("device" | "measurement")]
```
and in the "Result JSON" input field the JSON
```json
{
"action": "START_BPD"
}
```
like in the image below
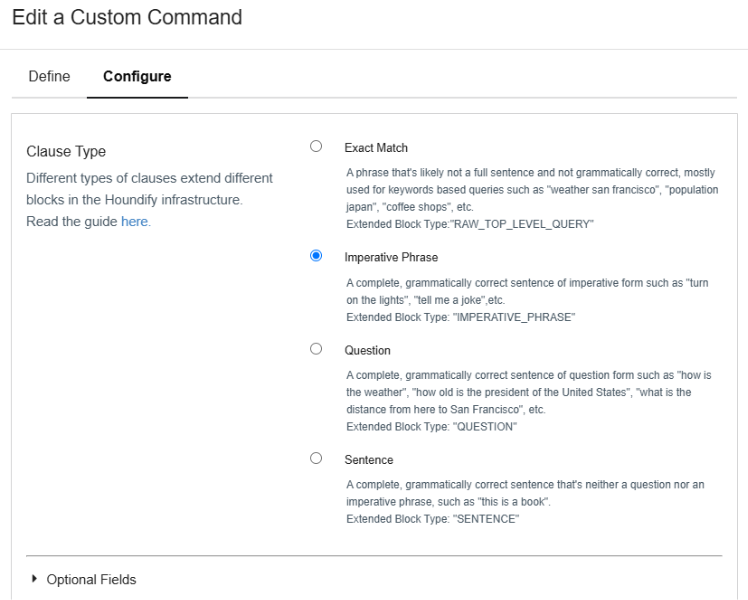
In the header/tab "Configure", select the "Imperative Phrase" radio button
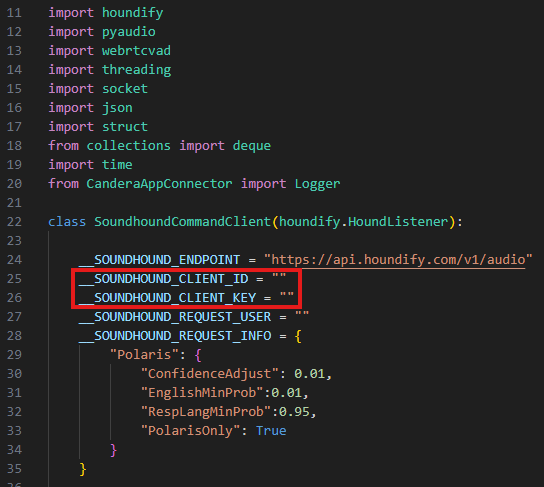
The Soundhound service is now configured and the client credentials must be copied to the Python source files. Navigate to "Overview & API Key" and copy the credentials to the corresponding fields in the Python source file under:
*\\bin\\Player\\PlayerConnector\\Samples\\BloodPressureDevice\\SoundhoundCommandClient.py*
**Note**: The field \_\_SOUNDHOUND\_REQUEST\_USER may be an arbitrary string value
#### Creating and running the asset
The binary asset can be created by opening the scene composer and opening the blood pressure device sample from the sample list. Save the solution on your file system and generate the asset by clicking on the "Generate Asset" button in the toolbar of the Scene Composer. Afterwards save the asset to the file system.
The sample can be started by executing the python blood pressure device sample program (*\\bin\\CommunityEdition\\Python\\Samples\\BloodPressureDevice\\BloodPressureDevice.py*) with the Python interpreter of the virtual environment. Note that the Python interpreter of the virtual environment is automatically used when the environment is activated. If the environment is activated, the terminal should have "`(BloodPressureDevice)`" written near the command input area.
```
py BloodPressureDevice.py -lbp "path/to/the/connector/library/binary" -abp "path/to/the/asset/binary"
```
- "-lbp" is the path to the Player Connector Library binary. Either under \\*bin\\CommunityEdition\\<device>\_Simulation\\PlayerConnector\\PlayerConnectorLibrary\*.dll* or where it was built
- "-abp" is the path to the asset binary
#### Blood Pressure Device Sample
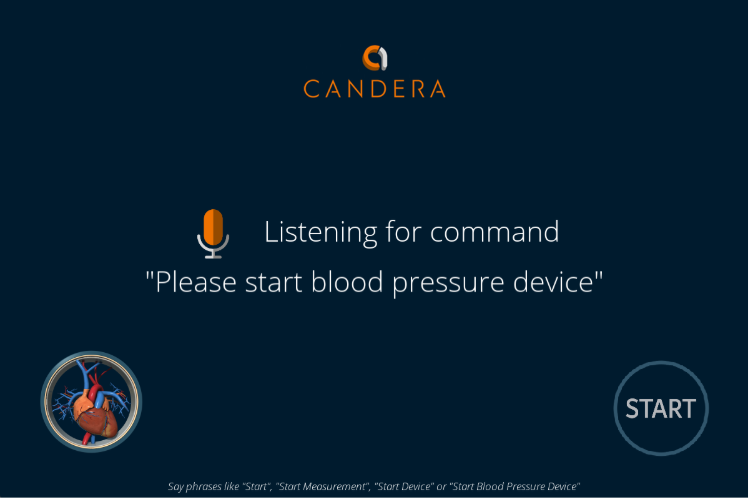
When the sample starts, it plays an intro animation and activates the menu scene. The menu scene is active until an according voice command like "Start", "Start measurement", "Start blood pressure device", ... was recorded. A live transcription of the voice input is displayed in the menu scene.
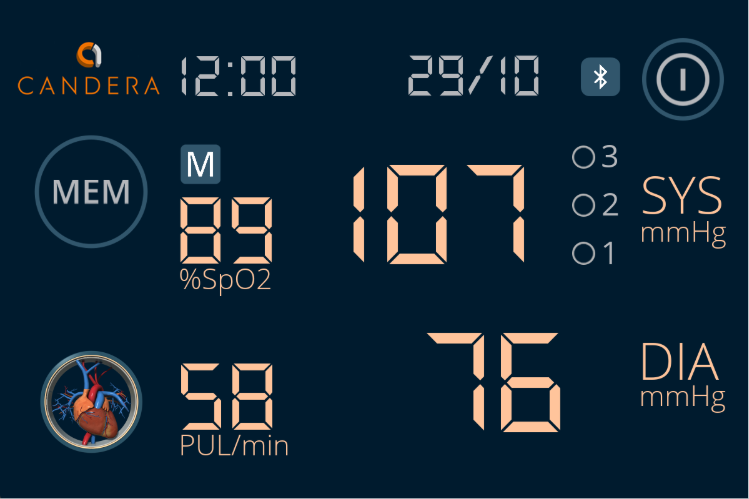
When the according voice command was received or the start button was pressed, the sample transitions to the blood pressure measurement scene. The measurement scene animates measurement values like oxygen saturation or heart rate gradually. An exemplary MEM button demonstrates a potential saving function of last measurements.
The values that can be seen in the above picture are set via Python by using the data binding library. A timer defined in the global state machine transitions back to the menu scene after 20 seconds.