# Candera

Candera Graphic Engine enables embedded applications to render and control externally designed content, especially 3D content.

# Candera Architecture Overview

#### <a class="anchor" id="bkmrk--0"></a>Introduction

[Candera](http://dev.doc.cgistudio.at/APILINK/namespace_candera.html "[DataBinding_RefTypeSample]") Graphic Engine enables embedded applications to render and control externally designed content, especially 3D content. Applications typically do not manipulate content directly but provide widgets which basically translate high-level events into graphical representation by e.g. moving or rotate visual objects.

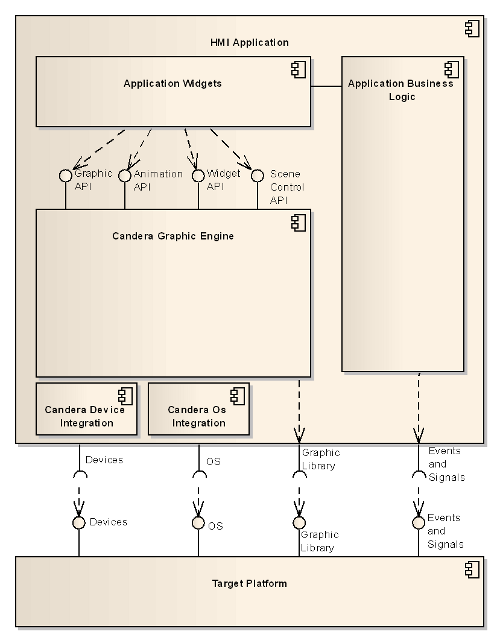
The figure below shows a typical architecture of a Candera-based HMI application:

<div drawio-diagram="1963"><img src="https://doc316en.candera.eu/uploads/images/drawio/2023-02/drawing-4-1676875296.png" alt="drawing-4-1676875296.png"/></div>

Such an application consists of a 'Business Logic' component which communicates with the system environment, e.g. via field buses such as CAN, processes the signals and forwards them to application widgets on a high abstraction level (e.g. current speed in km/h). The application specific widgets visualize this information by manipulating content that is rendered via [Candera](http://dev.doc.cgistudio.at/APILINK/namespace_candera.html "[DataBinding_RefTypeSample]").

<div class="contents" id="bkmrk-candera-requires-sma"><div class="contents"><div class="textblock">- [Candera](http://dev.doc.cgistudio.at/APILINK/namespace_candera.html "[DataBinding_RefTypeSample]") requires small integration layers for graphical output devices, hardware accelerated or software realised basic mathematical functions, access to system memory and other platform related functionality which is typically implemented in scope of the hosting application.
- [Candera](http://dev.doc.cgistudio.at/APILINK/namespace_candera.html "[DataBinding_RefTypeSample]") provides a set of interfaces which need to be connected with platform functionality for this purpose.
- [Candera](http://dev.doc.cgistudio.at/APILINK/namespace_candera.html "[DataBinding_RefTypeSample]") is intended to drive different graphic systems, such as OpenGL ES 2.0 which are also required to be provided by the hosting platform.

</div></div></div>Candera-based HMI applications typically define a run-time environment potentially including thread contexts and signal paths in which [Candera](http://dev.doc.cgistudio.at/APILINK/namespace_candera.html "[DataBinding_RefTypeSample]") is embedded. [Candera](http://dev.doc.cgistudio.at/APILINK/namespace_candera.html "[DataBinding_RefTypeSample]") does not define its own execution container to avoid threading and timing issues that are not transparent to the application and to provide the degree of freedom to design the application fitting best into the overall system. [Candera](http://dev.doc.cgistudio.at/APILINK/namespace_candera.html "[DataBinding_RefTypeSample]") Graphic Engine only supports single-thread. Therefore, [Candera](http://dev.doc.cgistudio.at/APILINK/namespace_candera.html "[DataBinding_RefTypeSample]") implementation is not thread-safe to avoid potential unnecessary overhead in execution time and code-size. Hence the hosting application is required to execute any functionality on [Candera](http://dev.doc.cgistudio.at/APILINK/namespace_candera.html "[DataBinding_RefTypeSample]") from within the same thread.

# Interfaces & Namespaces

#### <a class="anchor" id="bkmrk-"></a>Interfaces

The [Candera](http://dev.doc.cgistudio.at/APILINK/namespace_candera.html "[DataBinding_RefTypeSample]") public interfaces are covered by the namespaces [Candera](http://dev.doc.cgistudio.at/APILINK/namespace_candera.html "[DataBinding_RefTypeSample]") and various subnamespaces of namespace [Candera](http://dev.doc.cgistudio.at/APILINK/namespace_candera.html "[DataBinding_RefTypeSample]").

<div class="contents" id="bkmrk-note%3A-all-namespaces"><div class="contents"><div class="textblock"><dl class="note"><dt></dt><dd><p class="callout info">All namespaces containing either **Internal** or **Private** in the name cover private namespaces, which are not recommended to be used in any application, as it is not guaranteed that these interfaces remain stable respectively exist in any future release. Changes in any of these private namespaces can be applied without any (prior) notifications.</p>

</dd></dl></div></div></div>#### <a class="anchor" id="bkmrk--0"></a>Namespace Candera

<div class="contents" id="bkmrk-candera-graphic-engi"><div class="contents"><div class="textblock">- [Candera Graphic Engine](http://dev.doc.cgistudio.at/APILINK/group___candera_engine.html)
- [MetaInfo](http://dev.doc.cgistudio.at/APILINK/group___meta_info.html)
- [Runtime Type Information](http://dev.doc.cgistudio.at/APILINK/group___rtti.html)
- [Candera Asset Loader](http://dev.doc.cgistudio.at/APILINK/group___candera_asset_loader.html)
- [Candera Widgets](http://dev.doc.cgistudio.at/APILINK/group___candera_widget.html)

</div></div></div>#### <a class="anchor" id="bkmrk--1"></a>Namespace Candera::Animation

<div class="contents" id="bkmrk-animation-2d-animati"><div class="contents"><div class="textblock">- [Animation](http://dev.doc.cgistudio.at/APILINK/group___animation_base.html)
- [2D Animation Property Setters](http://dev.doc.cgistudio.at/APILINK/group___animation_property_setters2_d.html)
- [3D Animation Property Setters](http://dev.doc.cgistudio.at/APILINK/group___animation_property_setters3_d.html)

</div></div></div>#### <a class="anchor" id="bkmrk--2"></a>Namespace Candera::Diagnostics

<div class="contents" id="bkmrk-diagnostics"><div class="contents"><div class="textblock">- [Diagnostics](http://dev.doc.cgistudio.at/APILINK/group___diagnostics_system.html)

</div></div></div>#### <a class="anchor" id="bkmrk--3"></a>Namespace Candera::DynamicProperties

<div class="contents" id="bkmrk-dynamic-properties"><div class="contents"><div class="textblock">- [Dynamic Properties](http://dev.doc.cgistudio.at/APILINK/group___dynamic_properties_base.html)

</div></div></div>#### <a class="anchor" id="bkmrk--4"></a>Namespace Candera::Globalization

<div class="contents" id="bkmrk-candera-globalizatio"><div class="contents"><div class="textblock">- [Candera Globalization](http://dev.doc.cgistudio.at/APILINK/group___candera_globalization.html)
- [Culture](http://dev.doc.cgistudio.at/APILINK/group___candera_globalization_culture.html)
- [Localizable](http://dev.doc.cgistudio.at/APILINK/group___candera_globalization_localizable.html)

</div></div></div>#### <a class="anchor" id="bkmrk--5"></a>Namespace Candera::Monitor

<div class="contents" id="bkmrk-candera-monitor"><div class="contents"><div class="textblock">- [Candera Monitor](http://dev.doc.cgistudio.at/APILINK/group___candera_monitor.html)

</div></div></div>#### <a class="anchor" id="bkmrk--6"></a>Namespace Candera::TextRendering

<div class="contents" id="bkmrk-candera-text-engine"><div class="textblock">- [Candera Text Engine](http://dev.doc.cgistudio.at/APILINK/group___candera_text_engine.html)

</div></div>

# Candera MISRA Compliance

[Candera](http://dev.doc.cgistudio.at/APILINK/namespace_candera.html "[DataBinding_RefTypeSample]") tries to be MISRA compliant as much as possible. For checking MISRA compliance, Coverity® Static Analysis together with the supported MISRA rule set is used. For some reasons we cannot fulfil all MISRA rules, a set of <span style="color:rgb(230,126,35);">[Candera MISRA Rules for Coverity® Static Analysis](#bkmrk-candera-misra-rules-)</span> is disabled due to specified reasons.

#### <a class="anchor" id="bkmrk-"></a>Candera MISRA Rules for Coverity® Static Analysis

The following file is taken from the Coverity® Static Analysis distribution and is modified for the needs of [Candera](http://dev.doc.cgistudio.at/APILINK/namespace_candera.html "[DataBinding_RefTypeSample]"). Reasons are given for deviations.

```
//########################################################################
// (C) Candera GmbH
// All rights reserved.
// -----------------------------------------------------
// This document contains proprietary information belonging to
// Candera GmbH.
// Passing on and copying of this document, use and communication
// of its contents is not permitted without prior written authorization.
//########################################################################
//
// The following configuration is based on MISRA 2008 required rules.
// Any further deviation is added here with proper explanation and justification.
//
//########################################################################

// Configuration for MISRA C++-2008, rule categories: Required
{   "version": "2.0",
    "standard": "misrac++2008",
    "title": "CGI Studio - MISRA C++-2008 Project Specific",
    "deviations": [

// Project-specific suppressions defined
        //0-x-x
        { "deviation": "Rule 0-1-5", "reason": "Suppressed based on MISRA C++ 2008 Chapter 3.5, Library issues." },
        { "deviation": "Rule 0-1-10", "reason": "Suppressed based on MISRA C++ 2008 Chapter 3.5, Library issues." },
        { "deviation": "Rule 0-1-12", "reason": "Override of virtual functions may be in customer code, CGI Studio provides the API"},
        //2-x-x
        { "deviation": "Rule 2-10-1", "reason": "Temporary disabled, justification needed." },
        { "deviation": "Rule 2-10-3", "reason": "Typedefs with same name are used in different scopes. Typedef is not a unique declarator." },
        { "deviation": "Rule 2-10-4", "reason": "Type names are used twice in different namespaces." },
        { "deviation": "Rule 2-10-6", "reason": "Too many false positives by interpreting the rule also for forward declarations and different scopes." },
        //3-x-x
        { "deviation": "Rule 3-1-1", "reason": "object/function definitions in header files" },
        { "deviation": "Rule 3-2-3", "reason": "Too many false positives by interpreting the rule also for forward declarations." },
        { "deviation": "Rule 3-9-1", "reason": "Token-for-token compliance means that even a typedef of the same type breaks compliance. CGI Studio requires such typedefs in Meta Information and for SharedPointer." },
        //4-x-x
        { "deviation": "Rule 4-5-3", "reason": "Char used as 8 bit integer also for operations" },
        { "deviation": "Rule 4-10-2", "reason": "Deliberately use 0. See Scott Myers Effective C++, Item 25" },
        //5-x-x
        { "deviation": "Rule 5-0-15", "reason": "Pointer arithmetic is used by CGI Studio where address computation is required e.g. as part of device abstraction." },
        { "deviation": "Rule 5-0-21", "reason": "Bitwise operator applied to signed underlying type" },
        { "deviation": "Rule 5-2-5", "reason": "Attempt to cast away const/volatile from a pointer or reference" },
        { "deviation": "Rule 5-2-7", "reason": "Pointer cast deliberately not prohibited" },
        { "deviation": "Rule 5-2-12", "reason": "Array type passed to function expecting a pointer" },
        { "deviation": "Rule 5-14-1", "reason": "side effects on right hand side of logical operator" },
        //6-x-x
        { "deviation": "Rule 6-2-1", "reason": "assignment operator used in sub-expression" },
        { "deviation": "Rule 6-4-3", "reason": "departure from MISRA switch syntax" },
        { "deviation": "Rule 6-6-4", "reason": "This might lead to badly structured code." },
        { "deviation": "Rule 6-6-5", "reason": "This might lead to badly structured code." },
        //7-x-x
        { "deviation": "Rule 7-1-1", "reason": "Deliberately disabled: Cost - Value ratio is negative" },
        { "deviation": "Rule 7-3-1", "reason": "Use global declarations" },
        { "deviation": "Rule 7-3-2", "reason": "Non-global function, main, declared" },
        { "deviation": "Rule 7-3-3", "reason": "Unnamed namespace in header" },
        { "deviation": "Rule 7-3-4", "reason": "Using-directive used" },
        { "deviation": "Rule 7-3-6", "reason": "Using-directive/declaration in header file" },
        //8-x-x
        { "deviation": "Rule 8-4-1", "reason": "Function has variable number of arguments using the ellipsis notation" },
        //9-x-x
        { "deviation": "Rule 9-3-2", "reason": "Non-const members allow to expose members." },
        { "deviation": "Rule 9-5-1", "reason": "Unions are used very carefully and allow saving space in memory." },
        //10-x-x
        { "deviation": "Rule 10-3-1", "reason": "Suppressed because the choice to use C++ includes also the decision to use polymorphism and overriding virtual methods." },
        //14-x-x
        { "deviation": "Rule 14-7-1", "reason": "Suppressed based on MISRA C++ 2008 Chapter 3.5, Library issues." },
        { "deviation": "Rule 14-7-2", "reason": "Suppressed based on MISRA C++ 2008 Chapter 3.5, Library issues." },
        //15-x-x
        { "deviation": "Rule 15-1-1", "reason": "CGI Studio does not use exception handling." },
        { "deviation": "Rule 15-3-3", "reason": "CGI Studio does not use exception handling." },
        { "deviation": "Rule 15-3-6", "reason": "CGI Studio does not use exception handling." },
        { "deviation": "Rule 15-5-1", "reason": "CGI Studio does not use exception handling." },
        { "deviation": "Rule 15-5-2", "reason": "CGI Studio does not use exception handling." },
        { "deviation": "Rule 15-5-3", "reason": "CGI Studio does not use exception handling." },
        //16-x-x
        { "deviation": "Rule 16-0-4", "reason": "Temporary disabled, justification needed." },
        { "deviation": "Rule 16-0-8", "reason": "Temporary disabled, justification needed." },
        { "deviation": "Rule 16-2-1", "reason": "CGI Studio uses macros." },
        { "deviation": "Rule 16-2-2", "reason": "Temporary disabled, justification needed." },
        //18-x-x
        { "deviation": "Rule 18-4-1", "reason": "CGI Studio requires dynamic memory allocation." },

// Document Rules
        //document rules are not checked according to the current configuration

// Suppressing Advisory Rules
        { "deviation": "Rule 2-5-1", "reason": "Advisory rules are suppressed." },
        { "deviation": "Rule 2-7-3", "reason": "Advisory rules are suppressed." },
        { "deviation": "Rule 2-10-5", "reason": "Advisory rules are suppressed." },
        { "deviation": "Rule 3-9-2", "reason": "Advisory rules are suppressed." },
        { "deviation": "Rule 5-0-2", "reason": "Advisory rules are suppressed." },
        { "deviation": "Rule 5-2-3", "reason": "Advisory rules are suppressed." },
        { "deviation": "Rule 5-2-9", "reason": "Advisory rules are suppressed." },
        { "deviation": "Rule 5-2-10", "reason": "Advisory rules are suppressed." },
        { "deviation": "Rule 5-19-1", "reason": "Advisory rules are suppressed." },
        { "deviation": "Rule 7-5-4", "reason": "Advisory rules are suppressed." },
        { "deviation": "Rule 10-1-1", "reason": "Advisory rules are suppressed." },
        { "deviation": "Rule 10-2-1", "reason": "Advisory rules are suppressed." },
        { "deviation": "Rule 12-1-2", "reason": "Advisory rules are suppressed." },
        { "deviation": "Rule 14-8-2", "reason": "Advisory rules are suppressed." },
        { "deviation": "Rule 15-0-2", "reason": "Advisory rules are suppressed." },
        { "deviation": "Rule 15-3-2", "reason": "Advisory rules are suppressed." },
        { "deviation": "Rule 16-2-5", "reason": "Advisory rules are suppressed." },
        { "deviation": "Rule 16-3-2", "reason": "Advisory rules are suppressed." },
    ]

}

```

# Tutorial for Application Life Cycle

# Startup and Asset Management

<div class="contents" id="bkmrk-startup-and-asset-ma"><div class="textblock">  
</div></div>##### <a class="anchor" id="bkmrk--6"></a>Description

This tutorial leads through all required steps to initialize and prepare a [Candera](http://dev.doc.cgistudio.at/APILINK/namespace_candera.html "[DataBinding_RefTypeSample]") application for loading a SceneComposer generated asset and accessing content provided by the asset.

##### **Initializing AssetLoader and Animations** 

##### <a class="anchor" id="bkmrk--8"></a>AssetLoader

For loading assets and accessing content, the application needs to create an instance of an [Candera::AssetProvider](http://dev.doc.cgistudio.at/APILINK/class_candera_1_1_asset_provider.html "Abstract class providing methods for retrieving objects.") and [Candera::ContentLoader](http://dev.doc.cgistudio.at/APILINK/class_candera_1_1_content_loader.html "Encapsulates routines for scene content handling.") to have them available for later usage.

```
    m_contentLoader = &ContentLoader::GetInstance();
    m_contentLoader->Init(&m_assetProvider);
```

##### <a class="anchor" id="bkmrk--9"></a>Animations

If Animations are used in the scene, a time dispatcher for dispatching world time to animation players needs to be constructed during initialization.

```
    m_animationDispatcher = <a class="code" href="http://dev.doc.cgistudio.at/APILINK/group___c_o_u_r_i_e_r___v_i_s_u_a_l_i_z_a_t_i_o_n.html#ggaf0e93dc4242f607c3c8d13dafd036af9aaabfa5309af24986d3111a092449f857">Animation::AnimationTimeDispatcher::Create</a>();
    UpdateSystem* updateSystem = EntitySystem::Get<UpdateSystem>();
    if (0 != updateSystem) {
        UpdateSystem::Handle animationUpdateComponent = updateSystem->CreateComponent();
        CANDERA_SUPPRESS_LINT_FOR_SYMBOL(1025, <a class="code" href="http://dev.doc.cgistudio.at/APILINK/class_candera_1_1_update_delegate.html#a9ff6d96eea27c57976d9df5590993ab2">Candera::UpdateDelegate::UpdateWithMilliseconds</a>, "False positive because the template arguments match.")
        UpdateSystem::Delegate animationUpdateDelegate = UpdateSystem::Delegate::UpdateWithMilliseconds<Animation::AnimationTimeDispatcher,
            &Animation::AnimationTimeDispatcher::Update>();
        result = updateSystem->SetComponentUpdateDelegate(animationUpdateComponent, animationUpdateDelegate) && result;
        result = updateSystem->AttachComponent(animationUpdateComponent, m_animationDispatcher.GetPointerToSharedInstance()) && result;
    }

#ifdef CANDERA_TRANSITIONS_ENABLED
    if (0 != m_transitionStrategy) {
        m_transitionStrategy->SetAnimationTimeDispatcher(m_animationDispatcher);
    }
#endif

```

#####   
**Initializing 3D DefaultRenderMode** 

##### <a class="anchor" id="bkmrk--10"></a>3D DefaultRenderMode

The default render mode is kind of a "global" render mode which is applied to all Nodes within a 3D [Candera::Scene](http://dev.doc.cgistudio.at/APILINK/class_candera_1_1_scene.html "The class Scene represents a top level scene graph node. Multiple Scenes are allowed. A Scene can not be part of any other Scene. To render a Scene, at least one Camera must be part of this Scene and the Camera must have rendering enabled. A Scene can have more than one Camera. Note: Lights added to a Scene apply for that Scene only and do not affect 3D objects in any other Scene.") which have no separate [Candera::RenderMode](http://dev.doc.cgistudio.at/APILINK/class_candera_1_1_render_mode.html "The class RenderMode is an Appearance component that encapsulates polygon-level and per-fragment comp...") set. Further, if a [Candera::Node](http://dev.doc.cgistudio.at/APILINK/class_candera_1_1_node.html "The class Node is an abstract base class for all scene graph nodes. Each Node defines a local coordin...") has its own RenderMode set, still dedicated components can be derived from Candera::DefaultRenderMode - like e.g. CullMode - if the "inheritance bit" in the Node's associated RenderMode is set to true.

<div class="contents" id="bkmrk-if-rendermode-is-def"><div class="contents"><div class="textblock"><dl class="note"><dd><p class="callout info">If RenderMode is defined for a [Candera::Camera](http://dev.doc.cgistudio.at/APILINK/class_candera_1_1_camera.html "A Camera provides Modelview and Projection matrices. Camera is a Transformable.* The eye point is set..."), the RenderMode of the camera replaces the DefaultRenderMode, temporarily during the camera's render pass.</p>

</dd></dl></div></div></div>The DefaultRenderMode can be created and manipulated as follows:

```
    /* To overwrite the default render mode as specified
       in scene composer you can create your own render mode.
       This would have to be set via Renderer::SetDefaultRenderMode(renderMode);
     */
    <a class="code" href="http://dev.doc.cgistudio.at/APILINK/class_feat_std_1_1_memory_management_1_1_shared_pointer.html" title="An intrusive reference-counting smart pointer. If you want your class to be managed by SharedPointer ...">Candera::MemoryManagement::SharedPointer<RenderMode></a> renderMode = <a class="code" href="http://dev.doc.cgistudio.at/APILINK/group___c_o_u_r_i_e_r___v_i_s_u_a_l_i_z_a_t_i_o_n.html#ggaf0e93dc4242f607c3c8d13dafd036af9aaabfa5309af24986d3111a092449f857">RenderMode::Create</a>();
    renderMode->SetWinding(RenderMode::CounterClockWise);
    renderMode->SetCulling(RenderMode::BackFaceCulling);
    renderMode->SetDepthWriteEnabled(true);
    renderMode->SetDepthTestEnabled(true);
```

##### <a class="anchor" id="bkmrk--11"></a>Apply DefaultRenderMode

<div class="contents" id="bkmrk-in-scenecomposer-the"><div class="textblock">- In SceneComposer the default render mode can be configured in configuration menu - see <span style="color: rgb(230, 126, 35);">[Render Mode](https://doc316en.candera.eu/link/132#bkmrk-render-mode)</span> in SceneComposer User Manual
- In [Candera](http://dev.doc.cgistudio.at/APILINK/namespace_candera.html "[DataBinding_RefTypeSample]"), use the interface [Candera::Renderer::SetDefaultRenderMode](http://dev.doc.cgistudio.at/APILINK/class_candera_1_1_renderer.html#a1fb82af52c979cf80cb24102cdf8bc1a).

</div></div><div class="contents" id="bkmrk-when-initializing-an"><div class="textblock"><dl class="note"><dd><p class="callout info">When initializing an asset the default render mode in [Candera](http://dev.doc.cgistudio.at/APILINK/namespace_candera.html "[DataBinding_RefTypeSample]") will be replaced by the values from the asset!</p>

</dd></dl></div></div>#####   
**Loading an Asset** 

##### <a class="anchor" id="bkmrk--12"></a>Initializing AssetProvider

To initialize [Candera::AssetProvider](http://dev.doc.cgistudio.at/APILINK/class_candera_1_1_asset_provider.html "Abstract class providing methods for retrieving objects.") either a [Candera::AssetRepository](http://dev.doc.cgistudio.at/APILINK/class_candera_1_1_asset_repository.html "Abstract class providing methods to read asset (e.g. from file, from flash)") or [Candera::AssetConfig](http://dev.doc.cgistudio.at/APILINK/class_candera_1_1_asset_config.html "Asset configuration that encapsulates various asset repositories Custom AssetConfig classes can be de...") has to be specified.

##### <a class="anchor" id="bkmrk--13"></a>AssetRepository

[Candera::AssetRepository](http://dev.doc.cgistudio.at/APILINK/class_candera_1_1_asset_repository.html "Abstract class providing methods to read asset (e.g. from file, from flash)") is an abstraction of the actual location of the asset. Currently following implementations are available:

<div class="contents" id="bkmrk-candera%3A%3Afileassetre"><div class="contents"><div class="textblock">- [Candera::FileAssetRepository](http://dev.doc.cgistudio.at/APILINK/class_candera_1_1_file_asset_repository.html "Class providing methods to read asset from file.") for assets in file system
- [Candera::MemoryAssetRepository](http://dev.doc.cgistudio.a/APILINK/class_candera_1_1_memory_asset_repository.html "Class providing methods to read asset from memory(e.g. from flash memory)") for assets in memory, e.g. flash memory.

</div></div></div>Custom AssetRepository implementations are possible.

##### <a class="anchor" id="bkmrk--14"></a>AssetConfig

[Candera::AssetConfig](http://dev.doc.cgistudio.at/APILINK/class_candera_1_1_asset_config.html "Asset configuration that encapsulates various asset repositories Custom AssetConfig classes can be de...") allows to specify multiple AssetRepository instances, typically for assets that are split with asset shaper and accessed on different locations. The application has to derive from the abstract [Candera::AssetConfig](http://dev.doc.cgistudio.at/APILINK/class_candera_1_1_asset_config.html "Asset configuration that encapsulates various asset repositories Custom AssetConfig classes can be de...") to create an AssetConfig that supports the AssetRepository instances according to the specific needs. This AssetConfig can then be used to initialize [Candera::AssetProvider](http://dev.doc.cgistudio.at/APILINK/class_candera_1_1_asset_provider.html "Abstract class providing methods for retrieving objects."):

```
    FEATSTD_LOG_INFO("- Initializing asset provider ...");

    static UInt32 validationFlags =
        AssetValidation::Flag<CffVersionAttribute, ErrorLevel>() |
        AssetValidation::Flag<FractionalNumberRepresentationAttribute, ErrorLevel>() |
        AssetValidation::Flag<PlatformNameAttribute, ErrorLevel>();

    if (!m_assetProvider.Initialize(&m_assetConfig, validationFlags)) {
        m_loadError = "Error: Asset initialization and validation failed!";
        FEATSTD_LOG_ERROR("%s\n", m_loadError);
        return false;
    }
```

##### <a class="anchor" id="bkmrk--15"></a>Creating a FileAssetRepository

Before loading an asset from a file, ensure that the file exists at the given path. Then a [Candera::FileAssetRepository](http://dev.doc.cgistudio.at/APILINK/class_candera_1_1_file_asset_repository.html "Class providing methods to read asset from file.") can be created using the file path:

```
    FileAssetRepository* repo = CANDERA_NEW(FileAssetRepository)(fileName);
    FEATSTD_DEBUG_ASSERT(repo != 0);
```

If this operation succeeds, the asset repository can be added to an [Candera::AssetConfig](http://dev.doc.cgistudio.at/APILINK/class_candera_1_1_asset_config.html "Asset configuration that encapsulates various asset repositories Custom AssetConfig classes can be de...") or specified directly to initialize [Candera::AssetProvider](http://dev.doc.cgistudio.at/APILINK/class_candera_1_1_asset_provider.html "Abstract class providing methods for retrieving objects.").

##### <a class="anchor" id="bkmrk--16"></a>Creating a MemoryAssetRepository

To create a [Candera::MemoryAssetRepository](http://dev.doc.cgistudio.at/APILINK/class_candera_1_1_memory_asset_repository.html "Class providing methods to read asset from memory(e.g. from flash memory)") the start address, where the asset can be found (e.g. the address in flash memory) has to be specified.

```
    MemoryAssetRepository* repo = CANDERA_NEW(MemoryAssetRepository)(startMemoryAddress);
    FEATSTD_DEBUG_ASSERT(repo != 0);
```

If this operation succeeds, the asset repository can be added to an [Candera::AssetConfig](http://dev.doc.cgistudio.at/APILINK/class_candera_1_1_asset_config.html "Asset configuration that encapsulates various asset repositories Custom AssetConfig classes can be de...") or specified directly to initialize [Candera::AssetProvider](http://dev.doc.cgistudio.at/APILINK/class_candera_1_1_asset_provider.html "Abstract class providing methods for retrieving objects.").

##### <a class="anchor" id="bkmrk--17"></a>Retrieving AssetDescriptor

After initializing the [Candera::AssetRepository](http://dev.doc.cgistudio.at/APILINK/class_candera_1_1_asset_repository.html "Abstract class providing methods to read asset (e.g. from file, from flash)"), the [Candera::AssetDescriptor](http://dev.doc.cgistudio.at/APILINK/class_candera_1_1_asset_descriptor.html "Descriptor of the loaded asset.") can be retrieved:

```
    const AssetDescriptor& assetDescriptor = m_assetProvider.GetAssetDescriptor();
```

The AssetDescriptor contains information about the asset library file and Candera::AssetNamesList lists of all scenes, animations, displays etc. can be queried.

##### <a class="anchor" id="bkmrk--18"></a>Create Displays and Render Targets

It is recommended to check if the asset contains at least one configured display, otherwise no display content will be visible in the application.

```
    if (assetDescriptor.GetAssetObjectCount(<a class="code" href="http://dev.doc.cgistudio.at/APILINK/group___asset_loader_base.html#gga55cedfecc49c10372c78ba9f8e779cc2a5eca0f4ed5db21a32c999a5c29481f0b" title="Library for Display objects.">DisplayLib</a>) == 0) {
        m_loadError = "Error: Missing elements.\n Please make sure that there are at least one display and at least one display render target and the cameras are attached to the corresponding render targets.";
        m_assetProvider.Finalize();
        return false;
    }
```

Next, the displays configured in the assets are created:

```
    Int displayId = -1;
    bool result = true;

    const AssetDescriptor& assetDescriptor = m_assetProvider.GetAssetDescriptor();

    Display* display = 0;
    Int displayWidth = -1;
    Int displayHeight = -1;
    for (AssetDescriptor::AssetIdIterator displayList = assetDescriptor.GetAssetIdIterator(<a class="code" href="http://dev.doc.cgistudio.at/APILINK/group___asset_loader_base.html#gga55cedfecc49c10372c78ba9f8e779cc2a5eca0f4ed5db21a32c999a5c29481f0b" title="Library for Display objects.">DisplayLib</a>); displayList.IsValid(); ++displayList) {

        displayId = m_assetProvider.GetDisplayDataById(*displayList, displayWidth, displayHeight);

        //check if already created before and destroy
        display = DevicePackageInterface::GetDisplay(displayId);
        if(display != 0) {
            DevicePackageInterface::DestroyDisplay(display);
        }
        display = DevicePackageInterface::CreateDisplay(displayId);
        if (display == 0) {
            FEATSTD_LOG_ERROR("Could not create display.\n");
            result = false;
        }
        static_cast<void>(m_displays.Add(display));

        // Load display meta information
        if (result) {
            if (!m_assetProvider.LoadDisplayProperties(*displayList)) {
                FEATSTD_LOG_INFO("- Loading of display properties failed");
            }
        }
        // Upload display if required
        if (result && upload) {
            Display::CommonSettings settings;
            settings.height = displayHeight;
            settings.width = displayWidth;
            if (!display->Upload(settings)) {
                FEATSTD_LOG_ERROR("Could not upload display.\n");
                result = false;
            }
        }
        // For simulation displays, set AutoKick disabled
        if ((display != 0)
            && (display->ToSimulatedDisplay() != 0)) {
                display->ToSimulatedDisplay()->SetAutoKickEnabled(false);
                FEATSTD_LOG_INFO("- AutoKick disabled");
        }
#ifdef FEATSTD_OS_WIN32
        //AppEnvironment::GetInstance().SetWindowPointer(display);
#endif
    }
    return result;
```

Here is an example how all render targets/layers can be read out of the asset file for further usage (like uploading, swapping, finalizing):

```
    GraphicDeviceUnit* gdu = 0;
    const AssetDescriptor& assetDescriptor = m_assetProvider.GetAssetDescriptor();
    Int rtCount = assetDescriptor.GetAssetObjectCount(<a class="code" href="http://dev.doc.cgistudio.at/APILINK/group___asset_loader_base.html#gga55cedfecc49c10372c78ba9f8e779cc2aca83dfd2fadc647ba24d09369d0a48cd" title="Library for GraphicDeviceUnit objects.">RenderTargetLib</a>);
    FEATSTD_UNUSED(rtCount);
    FEATSTD_LOG_INFO("Render target lib count = %d", rtCount);

#if (defined(CANDERA_3D_ENABLED) && defined(CGIAPP_STATISTICS_OVERLAY_ENABLED))
    static bool isRenderStatisticOverlayAttached = false;
#endif

    for (AssetDescriptor::RenderTargetIdIterator gduList = assetDescriptor.GetRenderTargetIdIterator(); gduList.IsValid(); ++gduList) {
        gdu = m_assetProvider.GetGraphicDeviceUnitById(*gduList);
        if (gdu != 0) {
            const Char* gduName = m_assetProvider.GetGraphicDeviceUnitById(*gduList)->GetName();
            FEATSTD_UNUSED(gduName);

#if (defined(CANDERA_3D_ENABLED) && defined(CGIAPP_STATISTICS_OVERLAY_ENABLED))
            Candera::DevicePackageDescriptor::UnitCategory unitCategory = DevicePackageDescriptor::GetUnitCategory(gdu->GetUnitType());
            switch (unitCategory) {
                case DevicePackageDescriptor::DisplayTarget3D:
                case DevicePackageDescriptor::DisplayTarget2D:
                case DevicePackageDescriptor::Mixed2D3DDisplayTarget:
                    // attach listener to first valid RT
                    if (!isRenderStatisticOverlayAttached) {
                        Candera::RenderTarget2D* renderTarget = gdu->ToRenderTarget2D();

                        if (0 != renderTarget) {
                            renderTarget->AddEventListener(m_renderTargetEventListener);
                            isRenderStatisticOverlayAttached = true;
                        }
                    }
                    break;
                default:
                    //do nothing;
                    break;

            }
#endif
            FEATSTD_LOG_INFO("GDU name = %s", gduName);
            if (upload) {
                //only upload if specified
                if (gdu->Upload()) {
                    FEATSTD_LOG_INFO("GDU upload sucessful");
                }
                else {
                    FEATSTD_LOG_ERROR("Upload of GDU %s failed\n", gduName);
                }
            }
            static_cast<void>(m_gdus.Add(gdu));
        }
        else {
            FEATSTD_LOG_INFO("GDU null pointer returned");
        }
    }
```

#####   
**Creating 3D Scenes from the Asset** 

##### <a class="anchor" id="bkmrk--19"></a>Getting 3D Scene List

In case that [Candera::AssetProvider](http://dev.doc.cgistudio.at/APILINK/class_candera_1_1_asset_provider.html "Abstract class providing methods for retrieving objects.") has successfully loaded an asset file, 3D scenes part of the asset are constructed like in the following example.

By means of [Candera::AssetDescriptor::GetAssetIdIterator](http://dev.doc.cgistudio.at/APILINK/class_candera_1_1_asset_descriptor.html#a0d22d16a59544b51649d3a67330f5414 "Get an iterator over object AssetIds."), it is possible to retrieve a list of 3D Scenes:

```
    for (AssetDescriptor::AssetIdIterator sceneIdList = assetDescriptor.GetAssetIdIterator(<a class="code" href="http://dev.doc.cgistudio.at/APILINK/group___asset_loader_base.html#gga55cedfecc49c10372c78ba9f8e779cc2a7a7ff493c3fd1c8a500abb4cd35b66da" title="Library for Scene objects.">SceneLib</a>); sceneIdList.IsValid(); ++sceneIdList) {
        static_cast<void>(sceneList.Add(m_assetProvider.GetSceneById(*sceneIdList)->GetScene()->GetName()));
    }
```

##### <a class="anchor" id="bkmrk--20"></a>Loading 3D Scene

The following listing shows how a [Candera::Scene](http://dev.doc.cgistudio.at/APILINK/class_candera_1_1_scene.html "The class Scene represents a top level scene graph node. Multiple Scenes are allowed. A Scene can not be part of any other Scene. To render a Scene, at least one Camera must be part of this Scene and the Camera must have rendering enabled. A Scene can have more than one Camera. Note: Lights added to a Scene apply for that Scene only and do not affect 3D objects in any other Scene.") instance is finally loaded from the asset via Candera::ContentLoader::BuildSceneContext():

```
        // load scene by building the regarding scene context
        ContentLoader::UploadPolicy uploadPolicy = ContentLoader::NoVramUploadPolicy;
        if (upload) {
            uploadPolicy = ContentLoader::DefaultUploadPolicy;
        }

        ContentLoader::BuildState buildState = contentLoader->BuildSceneContextById(sceneId, uploadPolicy);

         // load all packages of the scene without interleaved rendering.
        while (buildState == ContentLoader::MorePackets) {
            buildState = contentLoader->BuildSceneContextById(sceneId, uploadPolicy);
        }
        if (buildState == ContentLoader::Completed) {
            sceneContext = contentLoader->GetSceneContextById(sceneId);
        } else {
            sceneContext = 0;
        }

```

The [Candera::ContentLoader::DefaultUploadPolicy](http://dev.doc.cgistudio.at/APILINK/class_candera_1_1_content_loader.html#aeac726ed65d6cdb88644422ec9c5b0d2a374ada9b6b3da92611ff8e707530b68f "creates scene data in System RAM and uploads the asset data to VRAM") argument of the BuildSceneContext method forces the ContentLoader to create the scene data in the System RAM and to upload the asset data to VRAM. The upload of the asset data to VRAM can be avoided, if necessary, by using the argument [Candera::ContentLoader::NoVramUploadPolicy](http://dev.doc.cgistudio.at/APILINK/class_candera_1_1_content_loader.html#aeac726ed65d6cdb88644422ec9c5b0d2a8646da23e8199f2db5a21b82b1ae1978 "creates scene data in System RAM but does not upload anything to VRAM") instead.

The setting [Candera::DefaultAssetProvider::SetIterativeLoadingEnabled()](http://dev.doc.cgistudio.at/APILINK/class_candera_1_1_default_asset_provider.html#af6120ad7d7ba8ab28074d2778f475eb4 "Enable iterative loading.") allows iterative loading of device objects during calls to Candera::ContentLoader::BuildSceneContext(). In combination with [Candera::ContentLoader::NoVramUploadPolicy](http://dev.doc.cgistudio.at/APILINK/class_candera_1_1_content_loader.html#aeac726ed65d6cdb88644422ec9c5b0d2a8646da23e8199f2db5a21b82b1ae1978 "creates scene data in System RAM but does not upload anything to VRAM") it is possible to load and upload a scene iteratively in background while another scene is rendered.

Further, all 3D Widgets related to the given scene can be retrieved from the SceneContext and configured as required. To support animated widgets, the application needs to provide a [Candera::Animation::AnimationTimeDispatcher](http://dev.doc.cgistudio.at/APILINK/class_candera_1_1_animation_1_1_animation_time_dispatcher.html "Dispatches world time (as received from an application) to a collection of AnmationPlayers.") to its widgets, like this:

```
            Animation::AnimationTimeDispatcher::SharedPointer animationTimeDispatcher = GetAnimationTimeDispatcher();
            WidgetBase* widget = 0;
            for (bool success = sceneContext-><a class="code" href="http://dev.doc.cgistudio.at/APILINK/class_candera_1_1_scene_context_base.html#a40a6e1e8f767f40bacb3e712eac5ad5f">GetFirstWidget</a>(widget);
                success;
                success = sceneContext-><a class="code" href="http://dev.doc.cgistudio.at/APILINK/class_candera_1_1_scene_context_base.html#a53bc9bd82db2703cd05472e253c36781">GetNextWidget</a>(widget)) {
                    if (widget != 0) {
                        widget->SetAnimationTimeDispatcher(animationTimeDispatcher);
                        // Register Controller for all GenericEventWidgets
                        ExampleWidgets::CgiEventWidget* gew = Dynamic_Cast<ExampleWidgets::CgiEventWidget*>(widget);

                        if (gew != 0) {
                        #ifdef USE_STATE_MACHINE
                            // Register Statemachine for Widget Events
                            gew->Register(GenericController::UiEventCallback, 0);
                        #endif
                            // Set input event provider for every widget
                            gew->SetInputEventProvider(GetInputEventProvider());
                        // FEATSTD_LOG_INFO("* ++ widget registered for Input-Events ...\n");
                        }
                    }
            }

            for (TreeIterator<Node> nodeIterator(sceneContext-><a class="code" href="http://dev.doc.cgistudio.at/APILINK/class_candera_1_1_scene_context.html#a895f11e8ee586e4e10649838cfd12dd7">GetScene</a>()); nodeIterator.IsValid(); nodeIterator.Advance(TreeIterator<Node>::AdvanceToDescendant)) {
                CompositeGroup* compositeGroup = Dynamic_Cast<CompositeGroup*>(nodeIterator.GetNode());
                if (compositeGroup != 0) {
                    for (CompositeGroup::WidgetIterator widgetIterator = compositeGroup->GetWidgetIterator(); widgetIterator.IsValid(); ++widgetIterator) {
                        widget = *widgetIterator;
                        widget->SetAnimationTimeDispatcher(animationTimeDispatcher);
                    }
                }
            }
```

#####   
**Creating 2D Scenes from the Asset** 

##### <a class="anchor" id="bkmrk--21"></a>Getting 2D Scene List

It is possible to retrieve a list of 2D Scenes from [Candera::AssetDescriptor](http://dev.doc.cgistudio.at/APILINK/class_candera_1_1_asset_descriptor.html "Descriptor of the loaded asset."):

```
    for (AssetDescriptor::AssetIdIterator scene2DIdList = assetDescriptor.GetAssetIdIterator(<a class="code" href="http://dev.doc.cgistudio.at/APILINK/group___asset_loader_base.html#gga55cedfecc49c10372c78ba9f8e779cc2a4f6db201e8c60780f0d0d639cc0f4647" title="Library for Scene2D objects.">Scene2DLib</a>); scene2DIdList.IsValid(); ++scene2DIdList) {
        static_cast<void>(sceneList.Add(m_assetProvider.GetScene2DById(*scene2DIdList)->GetScene()->GetName()));
    }
```

##### <a class="anchor" id="bkmrk--22"></a>Loading 2D Scene

The following listing shows how a [Candera::Scene2D](http://dev.doc.cgistudio.at/APILINK/class_candera_1_1_scene2_d.html "The class Scene2D represents a top level scene graph node. Multiple scenes are allowed. A scene can not be part of any other scene.") instance is finally loaded from the asset:

```
        // load scene by building the regarding scene context
        ContentLoader::UploadPolicy uploadPolicy = ContentLoader::NoVramUploadPolicy;
        if (upload) {
            uploadPolicy = ContentLoader::DefaultUploadPolicy;
        }

        ContentLoader::BuildState buildState = contentLoader->BuildScene2DContextById(sceneId, uploadPolicy);

        // load all packages of the scene without interleaved rendering.
        while (buildState == ContentLoader::MorePackets) {
            buildState = contentLoader->BuildScene2DContextById(sceneId, uploadPolicy);
        }
        if (buildState == ContentLoader::Completed) {
            sceneContext = contentLoader->GetScene2DContextById(sceneId);
        } else {
            sceneContext = 0;
        }
```

As in the 3D case, the [Candera::ContentLoader::DefaultUploadPolicy](http://dev.doc.cgistudio.at/APILINK/class_candera_1_1_content_loader.html#aeac726ed65d6cdb88644422ec9c5b0d2a374ada9b6b3da92611ff8e707530b68f "creates scene data in System RAM and uploads the asset data to VRAM") argument of the BuildScene2DContext method forces the ContentLoader to create the scene data in the System RAM and to upload the asset data to VRAM. The upload of the asset data to VRAM can be avoided, if necessary, using the argument [Candera::ContentLoader::NoVramUploadPolicy](http://dev.doc.cgistudio.at/APILINK/class_candera_1_1_content_loader.html#aeac726ed65d6cdb88644422ec9c5b0d2a8646da23e8199f2db5a21b82b1ae1978 "creates scene data in System RAM but does not upload anything to VRAM") instead.

The setting [Candera::DefaultAssetProvider::SetIterativeLoadingEnabled()](http://dev.doc.cgistudio.at/APILINK/class_candera_1_1_default_asset_provider.html#af6120ad7d7ba8ab28074d2778f475eb4 "Enable iterative loading.") allows iterative loading of device objects during calls to Candera::ContentLoader::BuildSceneContext(). In combination with [Candera::ContentLoader::NoVramUploadPolicy](http://dev.doc.cgistudio.at/APILINK/class_candera_1_1_content_loader.html#aeac726ed65d6cdb88644422ec9c5b0d2a8646da23e8199f2db5a21b82b1ae1978 "creates scene data in System RAM but does not upload anything to VRAM") it is possible to load and upload a scene iteratively in background while another scene is rendered.

Again, similar to 3D widgets, 2D widgets related to the given scene can be retrieved from the SceneContext. Also in this 2D example the application provides a [Candera::Animation::AnimationTimeDispatcher](http://dev.doc.cgistudio.at/APILINK/class_candera_1_1_animation_1_1_animation_time_dispatcher.html "Dispatches world time (as received from an application) to a collection of AnmationPlayers.") to its 2D widgets:

```
            Animation::AnimationTimeDispatcher::SharedPointer animationTimeDispatcher = GetAnimationTimeDispatcher();
            WidgetBase* widget = 0;
            for (bool success = sceneContext-><a class="code" href="http://dev.doc.cgistudio.at/APILINK/class_candera_1_1_scene_context_base.html#a40a6e1e8f767f40bacb3e712eac5ad5f">GetFirstWidget</a>(widget);
                success;
                success = sceneContext-><a class="code" href="http://dev.doc.cgistudio.at/APILINK/class_candera_1_1_scene_context_base.html#a53bc9bd82db2703cd05472e253c36781">GetNextWidget</a>(widget)) {
                    if (widget != 0) {
                        widget->SetAnimationTimeDispatcher(animationTimeDispatcher);
                        // Register Controller for all GenericEventWidgets
                        ExampleWidgets::CgiEventWidget2D* gew = Dynamic_Cast<ExampleWidgets::CgiEventWidget2D*>(widget);

                        if (gew != 0) {
                        #ifdef USE_STATE_MACHINE
                            // Register Statemachine for Widget Events
                            gew->Register(GenericController::UiEventCallback, 0);
                        #endif
                            // Set input event provider for every widget
                            gew->SetInputEventProvider(GetInputEventProvider());
                        // FEATSTD_LOG_INFO("* ++ widget registered for Input-Events ...\n");
                        }
                    }
            }


            for (TreeIterator<Node2D> nodeIterator(sceneContext-><a class="code" href="http://dev.doc.cgistudio.at/APILINK/class_candera_1_1_scene_context.html#a895f11e8ee586e4e10649838cfd12dd7">GetScene</a>()); nodeIterator.IsValid(); nodeIterator.Advance(TreeIterator<Node2D>::AdvanceToDescendant)) {
                CompositeGroup2D* compositeGroup = Dynamic_Cast<CompositeGroup2D*>(nodeIterator.GetNode());
                if (compositeGroup != 0) {
                    for (CompositeGroup2D::WidgetIterator widgetIterator = compositeGroup->GetWidgetIterator(); widgetIterator.IsValid(); ++widgetIterator) {
                        widget = *widgetIterator;
                        widget->SetAnimationTimeDispatcher(animationTimeDispatcher);
                    }
                }
            }
```

#####   
**Loading Animation an AnimationGroup** 

##### <a class="anchor" id="bkmrk--23"></a>Loading Animation

As can be seen from application initialization, the application already configured a Candera::AnimationTimeDispatcher.

Animations configured in SceneComposer can be loaded from the asset into a Candera::AnimationPlayer and started like following:

```
        Animation::AnimationPlayerBase::SharedPointer animationPlayer = m_assetProvider.GetAnimationById(assetId);
        if (animationPlayer != 0) {
            static_cast<void>(m_animationDispatcher->AddPlayer(animationPlayer));
            if (!m_animationPlayers.Contains(animationPlayer)) {
                static_cast<void>(m_animationPlayers.Add(animationPlayer));
            }
            if (!animationPlayer->Start()) {
                FEATSTD_LOG_ERROR(" ERROR: animation player start failed for'%s\n", animationName);
            }
        }
```

##### <a class="anchor" id="bkmrk--24"></a>Loading AnimationGroup

Candera::AnimationGroup allows to start a hierarchical group of animations as configured in SceneComposer. The steps are similar besides that all children within the group have to be added to the Candera::AnimationTimeDispatcher, so it is advised to iterate through the tree recursively adding each child. The group can then be started at once:

```
        if (animationPlayer->IsTypeOf(Animation::AnimationGroupPlayer::GetTypeId())) {

            Animation::AnimationGroupPlayer::SharedPointer animationGroupPlayer
                = Dynamic_Cast<Animation::AnimationGroupPlayer::SharedPointer>(animationPlayer);
            if (animationGroupPlayer != 0) {
                AddAnimationGroupChildren(animationGroupPlayer,
                    animationGroupPlayer->GetFirstSuccessor(SharedPointer<Animation::AnimationPlayer>(0), Animation::AnimationGroupPlayer::WithPrevious));
                if (!animationGroupPlayer->Start()) {
                    FEATSTD_LOG_ERROR(" ERROR: animation player group start failed for'%s\n", animationName);
                }
            }
```

#####   
**Selecting a Theme** 

##### <a class="anchor" id="bkmrk--25"></a>Retrieving Available Themes

The available themes in the asset can be retrieved via [Candera::AssetDescriptor](http://dev.doc.cgistudio.at/APILINK/class_candera_1_1_asset_descriptor.html "Descriptor of the loaded asset."):

```
    for (AssetDescriptor::AssetIdIterator themeIdList = assetDescriptor.GetAssetIdIterator(<a class="code" href="http://dev.doc.cgistudio.at/APILINK/group___asset_loader_base.html#gga55cedfecc49c10372c78ba9f8e779cc2a6289ca1ce177a643ce6dcff1a70cde04" title="Library for Theme objects.">ThemeLib</a>); themeIdList.IsValid(); ++themeIdList) {
        static_cast<void>(themeList.Add(*themeIdList));
    }
```

##### <a class="anchor" id="bkmrk--26"></a>Selecting a Theme

Afterwards one of the available themes can be set to [Candera::AssetProvider](http://dev.doc.cgistudio.at/APILINK/class_candera_1_1_asset_provider.html "Abstract class providing methods for retrieving objects."):

```
            Candera::Id themeId = AssetProviderFunctions::GetIdByName(&m_assetProvider, <a class="code" href="http://dev.doc.cgistudio.at/APILINK/group___asset_loader_base.html#gga55cedfecc49c10372c78ba9f8e779cc2a6289ca1ce177a643ce6dcff1a70cde04" title="Library for Theme objects.">ThemeLib</a>, themeName);
            m_assetProvider.SetCurrentThemeById(themeId);
```

From now on this theme will be used when loading new scenes.

<div class="contents" id="bkmrk-you-need-to-reload-t"><div class="textblock"><dl class="note"><dd><p class="callout info">You need to reload the scene explicitly when you change the theme!</p>

</dd></dl></div></div>#####   
**Loading User Data** 

User data are raw data of any arbitrary type or format.

A SceneComposer asset can be used as a pass-through for such kind of proprietary data to the application.

Steps required:

<div class="contents" id="bkmrk-import-raw-data-to-t"><div class="contents"><div class="textblock">- Import Raw Data to the SceneComposer solution
- Assign a numerical asset id like "1" to the data item in SceneComposer, optionally assign a symbolic name for this item
- Export the asset (also the symbolic names header file is exported) and load it in the application
- Access the raw data via a ResourceHandle retrieved from [Candera::AssetProvider](http://dev.doc.cgistudio.at/APILINK/class_candera_1_1_asset_provider.html "Abstract class providing methods for retrieving objects.") based on the Asset ID(see below)

<div class="fragment">  
</div></div></div></div>```
    Id jpgId = CDA_LIBRARY_ASSETID(0x01); // Instead, a generated symbolic name could be used
    ResourceHandle resH = m_assetProvider->OpenRawResourceById(jpgId);
    Int32 resSize = m_assetProvider->GetResourceSize(resH);
    const void* dataPointer = m_assetProvider->GetResourceAddress(resH);
    UInt8* buffer = CANDERA_NEW_ARRAY(UInt8, resSize);
    UInt32 readBytes = m_assetProvider->ReadResource(resH, buffer, 0, resSize);
    CANDERA_DEBUG_ASSERT(resSize == readBytes);
    m_assetProvider->CloseResource(resH);   
    //...
    CANDERA_DELETE_ARRAY(buffer);
```

#####   
**Accessing Items via Asset Id** 

##### <a class="anchor" id="bkmrk--27"></a>Item Identification: Asset Id instead of String

All items in a solution have a type and a name which identifies them in their parent container and a full name which uniquely identifies them in the entire solution. For example, a mesh in a scene could have the full name `/Global/Scenes/MyScene/Group:RootNode/Mesh:MyMesh`.

Before CGI-Studio V3.0.0, for accessing items from an application, the `CanderaPath` property displayed the string, which uniquely identified this item in the asset library. For the example above, the same mesh would have been accessed from [Candera](http://dev.doc.cgistudio.at/APILINK/namespace_candera.html "[DataBinding_RefTypeSample]") via the name `/Scene:Global::Scenes::MyScene/Group:RootNode/Mesh:MyMesh`.

To improve asset loading performance, CGI-Studio V3.0.0 introduces numerical Ids for accessing items from asset libraries.

##### <a class="anchor" id="bkmrk--28"></a>Using Asset Ids

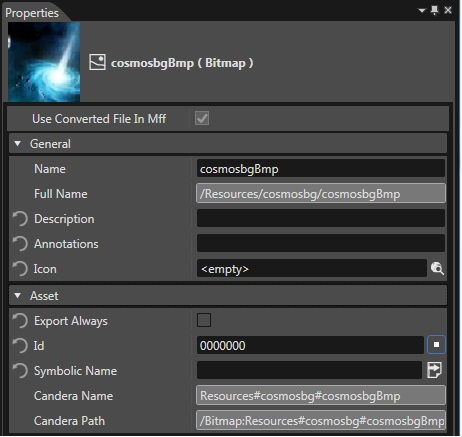
As an example, a bitmap called "cosmosbgBmp" is assigned a symbolic name in a SceneComposer solution:

<div drawio-diagram="1964"><img src="https://doc316en.candera.eu/uploads/images/drawio/2023-02/drawing-4-1676876821.png" alt=""/></div>

The "Id" field in SceneComposer displays by default "0000000". For this default, SceneComposer will generate a hash value for the Id. In case a custom value greater than '0' is entered in this field, the custom value will be generated instead, which is guaranteed to remain the same permanently, while the generated hash value could change over time.

Either during asset export, or explicitly via 'File -&gt; Export Symbolic Names ...' menu, a header file is generated by SceneComposer containing all symbolic names defined in the solution. For the bitmap symbolic names, the export looks like:

```
namespace CgiAssetNames {
    static const Candera::Id cosmosbgBmp = CDA_LIBRARY_ASSETID(0x0U, 0x11008CU);
} //namespace CgiAssetNames
```

To access this bitmap, use the interface [Candera::AssetProvider::GetBitmapById](http://dev.doc.cgistudio.at/APILINK/class_candera_1_1_asset_provider.html#a85e81d0b45b8340905ac5a98920389d5):

```
        Bitmap::SharedPointer bitmap = Base::GetAssetProvider()->GetBitmapById(CgiAssetNames::cosmosbgBmp);
```

Use the same approach for all other assets like displays, render target, nodes, font and raw data, ...

#####   
**Query Candera Compile Switches**   


##### <a class="anchor" id="bkmrk--30"></a>Candera Compile Switches

Note that [Candera](http://dev.doc.cgistudio.at/APILINK/namespace_candera.html "[DataBinding_RefTypeSample]") compile switches are documented in [Candera Configuration](http://dev.doc.cgistudio.at/APILINK/group___config.html).

As an example, in case of DEVICE device, following queries are supported: (DEVICE stands for your device)

```
#if CANDERA_DEVICE==DEVICE
    ...
#endif
```

Similarily:

```
#ifdef CANDERA_DEVICE_DEVICE
    ...
#endif
```

# Render Loop

##### <a class="anchor" id="bkmrk--31"></a>Description

After loading an asset and creating scenes, this chapter will now explain how an application can trigger and control rendering of 3D and 2D scenes.

Basically it is up to the application to define an event loop triggering render calls. [Candera](http://dev.doc.cgistudio.at/APILINK/namespace_candera.html "[DataBinding_RefTypeSample]") provides interfaces to render specific or all cameras, but scheduling and triggering these render calls is what the application is responsible for.

##### **3D Render Loop** 

##### <a class="anchor" id="bkmrk--33"></a>3D Render Calls

Static class [Candera::Renderer](http://dev.doc.cgistudio.at/APILINK/class_candera_1_1_renderer.html "The class Renderer represents the unique Candera render interface to the application. Each render call an base of Candera shall be triggered via the Renderer interface.") is part of [Candera](http://dev.doc.cgistudio.at/APILINK/namespace_candera.html "[DataBinding_RefTypeSample]") 3D Engine and provides two render call interfaces:

<div class="contents" id="bkmrk-render-all-3d-camera"><div class="contents"><div class="textblock">1. Render all 3D cameras: [Candera::Renderer::RenderAllCameras](http://dev.doc.cgistudio.at/APILINK/class_candera_1_1_renderer.html#aed822ba1d66620f2d1e794973e30f354)
2. Render a specific camera only: [Candera::Renderer::RenderCamera](http://dev.doc.cgistudio.at/APILINK/class_candera_1_1_renderer.html#a10dbe66b15c60f44cce3aaccd38d2ee5)

</div></div></div>Usually, rendering of all cameras is the safer and most convenient way, hence chosen here for the tutorial:

```
    <a class="code" href="http://dev.doc.cgistudio.at/APILINK/group___f_e_a_t_s_t_d___u_t_i_l_s.html#gacfaf93353b58715fbfa32e84c98af894" title="Suppress message_number for next expression.">FEATSTD_LINT_NEXT_EXPRESSION</a>(534, "return value not needed");
    Renderer::RenderAllCameras();
```

##### <a class="anchor" id="bkmrk--34"></a>Render Buffer Swapping

If the draw target operates on multiple buffers after each rendering cycle the presentation buffer is exchanged with the current background buffer, on which was written during the cycle.

For this, three interfaces are available:

<div class="contents" id="bkmrk-candera%3A%3Arendertarge"><div class="contents"><div class="textblock">- Candera::RenderTarget::SetAutoSwapEnabled(bool enabled): if *true*, render target buffers are swapped automatically, when a camera within the render target has been rendered. Default: *false*
- [Candera::Camera::SetSwapEnabled(bool enable)](http://dev.doc.cgistudio.at/APILINK/class_candera_1_1_camera.html#a4d8422ed9703ddb9e0803eae61fe0bc6): if *true*, buffers are swapped automatically after rendering the according camera. Default: *false*
- Candera::RenderTarget::SwapBuffers(): Trigger buffer swapping 'by hand'

</div></div></div>It is very important to control buffer swapping in the application correctly:

<div class="contents" id="bkmrk-if-swapping-is-never"><div class="contents"><div class="textblock">- If swapping is never done, the display will stay black
- If buffers are swapped too often, the display will flicker.

</div></div></div>The application doesn't need to swap its render targets in case:

<div class="contents" id="bkmrk-the-render-target-is"><div class="textblock">- the render target is set to swap automatically. For this, set the render target property "SetAutoSwapEnabled" to *true*.
- the proper camera is set to swap automatically. For this, set the camera property "SwapEnabled" to *true*.

</div></div><div class="contents" id="bkmrk-if-you-use-more-than"><div class="textblock"><dl class="note"><dd><p class="callout info">If you use more than one camera on a render target, take care to enable swapping only for the last camera (highest sequence number).</p>

</dd></dl></div></div>#####   
**2D Render Loop**   


##### <a class="anchor" id="bkmrk--35"></a>2D Render Calls

2D Render Call interfaces are provided by [Candera::Renderer2D](http://dev.doc.cgistudio.at/APILINK/class_candera_1_1_renderer2_d.html "The class Renderer2D represents the unique Candera 2D render interface to the application. Each render call shall be triggered via the Renderer2D interface.").

This is the 2D specific render call equivalent to 3D.

```
    Renderer2D::RenderAllCameras();
```

##### <a class="anchor" id="bkmrk--36"></a>Render Buffer Swapping

For 2D, render buffer swapping is analogous to 3D: The default value of 2D RenderTarget property "AutoSwapEnabled" and 2D Camera property "SwapEnabled" is *false*.

So take care to

<div class="contents" id="bkmrk-either-swap-render-t"><div class="textblock">- either swap render target
- or swap one of the cameras used
- or trigger buffer swapping on the render target 'by hand'.

</div></div>

# Finalization

##### <a class="anchor" id="bkmrk--37"></a>Description

This tutorial explains how to shut down a 2D or 3D application safely.

##### <a class="anchor" id="bkmrk--38"></a>Releasing Scenes

First all 3D or 2D scenes must be released.

<div class="contents" id="bkmrk-3d-scenes%3A"><div class="contents"><div class="contents"><div class="textblock">- 3D Scenes:

<div class="fragment">  
</div></div></div></div></div>```
    contentLoader->ReleaseAllSceneContexts();
    m_sceneContexts.Clear();
```

<div class="contents" id="bkmrk-2d-scenes%3A-the-same-"><div class="contents"><div class="contents"><div class="textblock"><div class="fragment">  
</div>- 2D Scenes: The same procedure as for 3D Scenes, whereas the [Candera::ContentLoader](http://dev.doc.cgistudio.at/APILINK/class_candera_1_1_content_loader.html "Encapsulates routines for scene content handling.") interface for releasing 2D scene contexts is different:

<div class="fragment">  
</div></div></div></div></div>```
    contentLoader->ReleaseAllScene2DContexts();
    m_sceneContexts.Clear();
```

Don't forget to shutdown the TextEngine, if there is one in use: `<a class="el" href="http://dev.doc.cgistudio.at/APILINK/struct_candera_1_1_text_rendering_1_1_font_engine.html#a9a4b6b6f60139c0a62683ef1f60f55fd">Candera::TextRendering::FontEngine::Instance()</a>.Shutdown();`

##### <a class="anchor" id="bkmrk--39"></a>Releasing AnimationPlayer

Next, all used Candera::AnimationPlayer and Candera::AnimationPlayerGroup instances have to be removed from the Candera::AnimationTimeDispatcher and freed.

##### <a class="anchor" id="bkmrk--40"></a>Unloading RenderTargets and Displays

All involved render targets / layers need to be unloaded from video memory:

```
    if (m_isRenderTargetsUploaded) {
        for (Int index = FeatStd::Internal::NumericConversion<Int>(m_gdus.Size()) - 1; index >= 0; --index) {
            GraphicDeviceUnit* gdu = m_gdus[index];
            if (gdu != 0) {
                if (0 != gdu->ToRenderTarget3D()) {
                    static_cast<void>(gdu->ToRenderTarget3D()->Activate());
                }
                gdu->Unload();
            }
            m_gdus[index] = 0;
        }
    }
    m_gdus.Clear();
```

Destory Displays in use:

```
    FEATSTD_LOG_INFO("- Destroy displays ...");
    Vector<Display*>::Iterator it;
    for (it = m_displays.Begin(); it != m_displays.End(); ++it) {
        Display* display = *it;
        if (display != 0) {
            display->Unload();
            DevicePackageInterface::DestroyDisplay(display);
        }
    }
    FEATSTD_LOG_INFO("- done");
    m_displays.Clear();
```

##### <a class="anchor" id="bkmrk--41"></a>Finalizing AssetProvider

Finally, [Candera::AssetProvider](http://dev.doc.cgistudio.at/APILINK/class_candera_1_1_asset_provider.html "Abstract class providing methods for retrieving objects.") and [Candera::ContentLoader](http://dev.doc.cgistudio.at/APILINK/class_candera_1_1_content_loader.html "Encapsulates routines for scene content handling.") shall be finalized:

```
    m_assetProvider.Finalize();
    m_contentLoader = 0;
```

##### <a class="anchor" id="bkmrk--42"></a>Destructing Other Resources

Don't forget to destruct any other resources in the application destructor.

# Asset Library Verification (Optional)

##### <a class="anchor" id="bkmrk--43"></a>Description

The optional Asset Library Verification feature allows asset version checks and provides means to verify the compatibility between an asset library file and an application.

##### **Asset Version Information** 

The asset file contains the following data to support asset verification:

<div class="contents" id="bkmrk-asset-version-%28int32"><div class="contents"><div class="textblock">- **Asset Version (Int32):** Describes the version of the asset file format. This version must match the version of the [Candera](http://dev.doc.cgistudio.at/APILINK/namespace_candera.html "[DataBinding_RefTypeSample]") AssetLoader to be able to load the asset file.
- **File Size (Int32):** Size of the file in bytes.
- **File Timestamp (Int64):** Contains the creation time of the asset.
- **Widget Hash (UInt32):** Hash value generated from the available widgets and their properties.
- **Widget Set Version (Int32):** Version of the Widget Set.
- **[Candera](http://dev.doc.cgistudio.at/APILINK/namespace_candera.html "[DataBinding_RefTypeSample]") Version (Int32\[4\]):** [Candera](http://dev.doc.cgistudio.at/APILINK/namespace_candera.html "[DataBinding_RefTypeSample]") version used within SceneComposer.
- **Solution GUID (Char\[16\]):** Unique ID of the Solution.
- **Custom ID (Int32):** Custom Id that can be set by the user upon asset generation.
- **SceneComposer Version (Int32\[4\]):** SceneComposer version used to generate the asset file.

</div></div></div>##### <a class="anchor" id="bkmrk--45"></a>Feature Comparison

Without the optional asset verification, only a limited set of information is available. The table below gives a comparison of asset information available by default in [Candera](http://dev.doc.cgistudio.at/APILINK/namespace_candera.html "[DataBinding_RefTypeSample]"), and asset information available with enabled asset verification feature.

<div class="contents" id="bkmrk-candera-default-asse"><div class="textblock"><table border="1" cellpadding="5" cellspacing="0" width="500"><tbody><tr bgcolor="#d4d4d4"><th width="34%">  
</th><th width="33%">**[Candera](http://dev.doc.cgistudio.at/APILINK/namespace_candera.html "[DataBinding_RefTypeSample]") Default**</th><th width="33%">**Asset Verification Enabled**</th></tr><tr><th bgcolor="#d4d4d4">**Asset Version**</th><td align="center">X</td><td align="center">  
</td></tr><tr><th bgcolor="#d4d4d4">**File Size**</th><td align="center">X</td><td align="center">  
</td></tr><tr><th bgcolor="#d4d4d4">**Time Stamp**</th><td align="center">  
</td><td align="center">X</td></tr><tr><th bgcolor="#d4d4d4">**Widget Hash**</th><td align="center">  
</td><td align="center">X</td></tr><tr><th bgcolor="#d4d4d4">**Widget Set Version**</th><td align="center">  
</td><td align="center">X</td></tr><tr><th bgcolor="#d4d4d4">**[Candera](http://dev.doc.cgistudio.at/APILINK/namespace_candera.html "[DataBinding_RefTypeSample]") Version**</th><td align="center">  
</td><td align="center">X</td></tr><tr><th bgcolor="#d4d4d4">**Solution GUID**</th><td align="center">  
</td><td align="center">X</td></tr><tr><th bgcolor="#d4d4d4">**Custom ID**</th><td align="center">  
</td><td align="center">X</td></tr><tr><th bgcolor="#d4d4d4">**SceneComposer Version**</th><td align="center">  
</td><td align="center">X</td></tr></tbody></table>

</div></div>##### **Export of Asset Version Info** 

##### <a class="anchor" id="bkmrk--46"></a>Automatic / User Defined Values

Most of the asset information is automatically generated by SceneComposer during asset export, but some can be controlled directly. The following table shows which properties can be set manually.

<div class="contents" id="bkmrk-user-defined-sceneco"><div class="contents"><div class="textblock"><table border="1" cellpadding="5" cellspacing="0" width="500"><tbody><tr bgcolor="#d4d4d4"><th width="34%">  
</th><th width="33%">**User Defined**</th><th width="33%">**SceneComposer**</th></tr><tr><th bgcolor="#d4d4d4">**Asset Version**</th><td align="center">  
</td><td align="center">X</td></tr><tr><th bgcolor="#d4d4d4">**File Size**</th><td align="center">  
</td><td align="center">X</td></tr><tr><th bgcolor="#d4d4d4">**Time Stamp**</th><td align="center">  
</td><td align="center">X</td></tr><tr><th bgcolor="#d4d4d4">**Widget Hash**</th><td align="center">  
</td><td align="center">X</td></tr><tr><th bgcolor="#d4d4d4">**Widget Set Version**</th><td align="center">X</td><td align="center">  
</td></tr><tr><th bgcolor="#d4d4d4">**[Candera](http://dev.doc.cgistudio.at/APILINK/namespace_candera.html "[DataBinding_RefTypeSample]") Version**</th><td align="center">  
</td><td align="center">X</td></tr><tr><th bgcolor="#d4d4d4">**Solution GUID**</th><td align="center">  
</td><td align="center">X</td></tr><tr><th bgcolor="#d4d4d4">**Custom ID**</th><td align="center">X</td><td align="center">  
</td></tr><tr><th bgcolor="#d4d4d4">**Scenecomposer Version**</th><td align="center">  
</td><td align="center">X</td></tr></tbody></table>

</div></div></div>##### <a class="anchor" id="bkmrk--47"></a>Set the WidgetSet Version Number

To set the user-defined WidgetSet version number the new macro `CdaVersion` can be used in the WidgetSet definition.

```
<a class="code" href="http://dev.doc.cgistudio.at/APILINK/group___widget_base.html#gaf22698a7899d856911f78b17f154dcb2">CdaWidgetSet</a>(DemoWidgetSet)
    CdaDescription("<a class="code" href="http://dev.doc.cgistudio.at/APILINK/group___c_o_u_r_i_e_r___m_e_s_s_a_g_i_n_g.html#ggac4e3f0853af916ef773e65d02a15c95dac1224e2f0bf57d4eede7026521a13aa8">Widget</a> Set Demo")
    <a class="code" href="http://dev.doc.cgistudio.at/APILINK/group___meta_info.html#gaf9690830e5c1261bd50034f8f5e5153d">CdaVersion</a>(1) // Sets the Widget-Set version
    <a class="code" href="http://dev.doc.cgistudio.at/APILINK/group___widget_base.html#gada111508ebf4b6014fe2564083936d3e">CdaWidgets</a>()
    
    <a class="code" href="http://dev.doc.cgistudio.at/APILINK/group___widget_base.html#ga311ed10f0878a04c24365fa67fd7e152">CdaWidget</a>(DemoWidget1)
    <a class="code" href="http://dev.doc.cgistudio.at/APILINK/group___widget_base.html#ga311ed10f0878a04c24365fa67fd7e152">CdaWidget</a>(DemoWidget2)
    
    <a class="code" href="http://dev.doc.cgistudio.at/APILINK/group___widget_base.html#gac004125a84968249f4727adb5f00d6a8">CdaWidgetsEnd</a>()
<a class="code" href="http://dev.doc.cgistudio.at/APILINK/group___widget_base.html#gaed11f2e55f8dc7cd01b081fefdbf601b">CdaWidgetSetEnd</a>()
```

##### <a class="anchor" id="bkmrk--48"></a>Set the Custom-Id

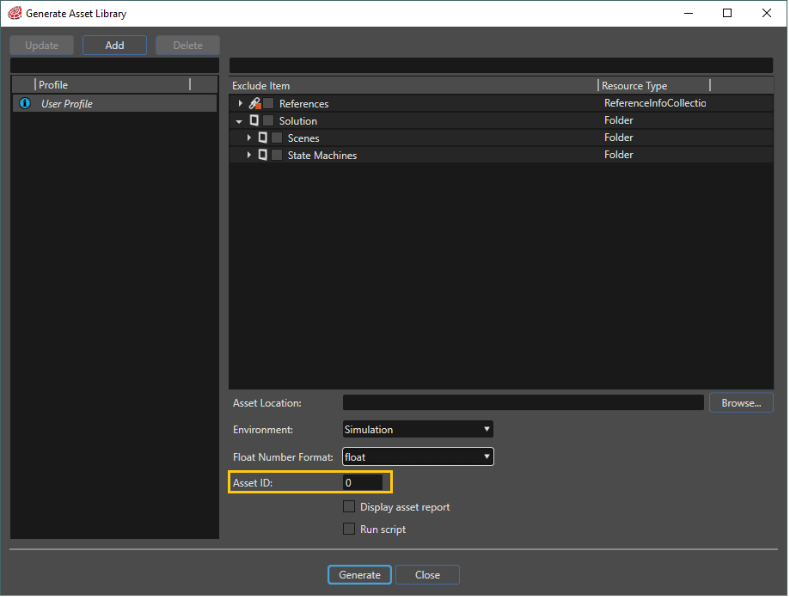
The Custom-Id can be set inside of the asset creation dialog of SceneComposer.

<div drawio-diagram="1965"><img src="https://doc316en.candera.eu/uploads/images/drawio/2023-02/drawing-4-1676877218.png" alt=""/></div>

<div class="contents" id="bkmrk--2"></div>##### **Asset Verification at Runtime** 

##### <a class="anchor" id="bkmrk--50"></a>Read Asset Version Data from Asset

The following code example will show how to extract the asset version information from an Asset Repository.

```
    AssetData::AssetVersionInfo versionInfo;
    m_assetDescriptor->GetVersionInfo(versionInfo);
```

The information is now available in the `versionInfo` structure.

##### <a class="anchor" id="bkmrk--51"></a>Get Runtime Version Info from Application

To compare asset version info from the loaded asset with the runtime values from the application, use following interfaces:

<div class="contents" id="bkmrk-get-candera-version-"><div class="contents"><div class="textblock">- Get Candera Version Number
- Get the Supported Asset Version
- WidgetSet verification

</div></div></div>##### <a class="anchor" id="bkmrk--52"></a>Get Candera Version Number

The version number of the currently used [Candera](http://dev.doc.cgistudio.at/APILINK/namespace_candera.html "[DataBinding_RefTypeSample]") can be found in the `CanderaVersionGen.h` file. This file is generated automatically by the build system and contains defines similar to this, describing the exact version of [Candera](http://dev.doc.cgistudio.at/APILINK/namespace_candera.html "[DataBinding_RefTypeSample]").

```
#define CANDERA_VERSION_MAJOR 3
#define CANDERA_VERSION_MINOR 12
#define CANDERA_VERSION_PATCH 0
#define CANDERA_VERSION_TWEAK 0
```

And can be used for example like this:

```
    AssetData::AssetVersionInfo versionInfo;
    assetDescriptor->GetVersionInfo(versionInfo);
    FEATSTD_LOG_INFO("Current Candera version = %d.%d.%d.%d, asset generated with version =  %d.%d.%d.%d\n",
        CANDERA_VERSION_MAJOR, CANDERA_VERSION_MINOR, CANDERA_VERSION_PATCH, CANDERA_VERSION_TWEAK,
        versionInfo.m_canderaVersion[0],versionInfo.m_canderaVersion[1],versionInfo.m_canderaVersion[2],versionInfo.m_canderaVersion[3]);
```

##### <a class="anchor" id="bkmrk--53"></a>Get the Supported Asset Version

The number of the asset file format that is supported by the asset loader is located in the `AssetValidation.h` file and can be accessed like this:

```
    if (versionInfo.m_fileVersion != Candera::AssetValidation::CURRENT_VERSION) {
        FEATSTD_LOG_ERROR("Asset version (%d) does not match supported asset file version (%d)\n", versionInfo.m_fileVersion, Candera::AssetValidation::CURRENT_VERSION);
    }
```

##### <a class="anchor" id="bkmrk--54"></a>WidgetSet verification

To retrieve the currently used WidgetSet version number and WidgetSet hash value, the following code can be used.

```
    if (<a class="code" href="http://dev.doc.cgistudio.at/APILINK/group___widget_base.html#ga6bd6cbb74cc17dacb3d610a2c584eebd">GetWidgetSet</a>() != 0) {
        FEATSTD_LOG_INFO("Widget set version: %d, asset generated with version: %d",
            <a class="code" href="http://dev.doc.cgistudio.at/APILINK/group___widget_base.html#ga6bd6cbb74cc17dacb3d610a2c584eebd">GetWidgetSet</a>()->GetVersion(), versionInfo.m_widgetSetVersion);
        FEATSTD_LOG_INFO("Widget set hash: %d, asset generated with hash: %d",
            <a class="code" href="http://dev.doc.cgistudio.at/APILINK/group___widget_base.html#ga6bd6cbb74cc17dacb3d610a2c584eebd">GetWidgetSet</a>()->GetHash(), versionInfo.m_widgetHash);
    }
```

<div class="contents" id="bkmrk-the-getwidgetset-fun"><div class="textblock"><dl class="note"><dd><p class="callout info">The `GetWidgetSet`-Function is part of the `WidgetMetaInfo.h` file.</p>

</dd></dl></div></div>##### **Candera::AssetValidation** 

Another option of asset verification is to use [Candera::AssetValidation](http://dev.doc.cgistudio.at/APILINK/class_candera_1_1_asset_validation.html) during asset loading. In this case, specific asset validation flags will be evaluated during asset loading

##### <a class="anchor" id="bkmrk--55"></a>Validation Attributes

Refer to [Candera::AssetValidationAttributes](http://dev.doc.cgistudio.at/APILINK/group___asset_loader_base.html#ga784eb587a8c308a03062e4d1d026b826) for all attributes which can be used for asset validation during asset loading.

##### <a class="anchor" id="bkmrk--56"></a>Validation Levels

Refer to [Candera::AssetValidationLevels](http://dev.doc.cgistudio.at/APILINK/group___asset_loader_base.html#ga1219c7b5206a24c2aff2d16b55f243e4) for the actions, which shall be taken after asset validation.

##### <a class="anchor" id="bkmrk--57"></a>Asset Validation during Asset Loading

[Candera::DefaultAssetProvider::Initialize](http://dev.doc.cgistudio.at/APILINK/class_candera_1_1_default_asset_provider.html#a18f6829c9b11c7e875adc523c6bbe852) method allows to specify asset validation flags as a parameter:

```
    if (!m_assetProvider->Initialize(&m_assetConfig, m_validationFlags)) {
        m_assetConfig.ClearRepositoryList();
        return false;
    }
```

# Dynamic Properties

##### <a class="anchor" id="bkmrk--58"></a>How to attach a Dynamic Property to CanderaObject

An application may want to attach any kind of application specific data to an arbitrary CanderaObject. This is easily possible as CanderaObject derives from DynamicPropertyHost, which can store dynamic properties. Different to conventional object properties, a dynamic property can be attached to an object, without being declared in the object itself. Further, a dynamic property does not allocate memory unless its value is set explicitly and differs from its default value.

Find below a simple example how to attach an application specific object, acting as dynamic property, to an object that derives from DynamicPropertyHost, like e.g. CanderaObject, Node, Mesh, Appearance, Texture, only to name a few.

<div class="contents" id="bkmrk-if-possible-the-dyna"><div class="textblock">- If possible the dynamic property definition (see class LayouterDynamicProperties) should be contained in the source file and not in the header file. Otherwise, the code size may get unnecessarily increased due to the inability of Gcc and Multi linker to get rid of duplicate template instantiation in the object files.
- Dynamic properties 
    - can be set (see SetSize and SetLayoutDirection)
    - can be retrieved (see GetSize and GetLayoutDirection)
    - can be checked if they are set (see IsSizeSet and IsLayoutDirectionSet)
    - can be cleared (see ClearLayoutDirection)
    - have default values: C++ default initialization for simple types (see LayoutDirection) or specific values for complex types (see Size)
    - can have an optional change notification (see OnSizeChanged and OnLayoutDirectionChanged)
- A convenience interface should be provided to set, get, clear and check the dynamic property (see class Layouter). The dynamic property is only accessed via that interface.
- The DynamicPropertyHost (see class Layouter) has to provide the ParentProvider method for inherited dynamic properties. 
    - In the Layouter sample it is guaranteed by the Layouter convenience interface that only CanderaObject instances are supported. Hence, a static\_cast to CanderaObject is safe.

- Layouter.h ```
    class Layouter : public CanderaObject
    {
        …
        static void SetSize(CanderaObject& node, const Vector2& size);
        static const Vector2& GetSize(const CanderaObject& node);
        static bool IsSizeSet(const CanderaObject &node);
        …
        static void SetLayoutDirection(CanderaObject& node, <a class="code" href="http://dev.doc.cgistudio.at/APILINK/group___core2_d.html#gaa4cc311d76d6576e74f346fa9f6d87cb" title="TextNode2DRenderState enumeration defines the states a text can have in view of rendering the text...">LayoutAlignment::LayoutDirection::Enum</a> direction);
        static <a class="code" href="http://dev.doc.cgistudio.at/APILINK/group___core2_d.html#gaa4cc311d76d6576e74f346fa9f6d87cb" title="TextNode2DRenderState enumeration defines the states a text can have in view of rendering the text...">LayoutAlignment::LayoutDirection::Enum</a> GetLayoutDirection(const CanderaObject& node);
        static bool IsLayoutDirectionSet(const CanderaObject &node);
        static void ClearLayoutDirection(CanderaObject& node);
        …
        static const <a class="code" href="http://dev.doc.cgistudio.at/APILINK/class_candera_1_1_dynamic_properties_1_1_dynamic_property_host.html" title="Represents one host of dynamic properties. Inheriting from this class enables the definition of dynam...">Candera::DynamicProperties::DynamicPropertyHost</a>* ParentProvider(const <a class="code" href="http://dev.doc.cgistudio.at/APILINK/class_candera_1_1_dynamic_properties_1_1_dynamic_property_host.html" title="Represents one host of dynamic properties. Inheriting from this class enables the definition of dynam...">Candera::DynamicProperties::DynamicPropertyHost</a>* host);
        …
        static const Vector2& SizeDefault();
        …
        static void OnSizeChanged(DynamicPropertyHost* obj, const DynamicProperties::ValueChangedArgs<Vector2>& /*args*/) { InvalidateLayout(obj); }
        …
        static void OnLayoutDirectionChanged(DynamicPropertyHost* obj, const DynamicProperties::ValueChangedArgs<LayoutAlignment::LayoutDirection::Enum>& /*args*/) { InvalidateLayout(obj); }
        …
    };
    ```

- Layouter.cpp ```
    class LayouterDynamicProperties
    {
        …
        static void SetSize(CanderaObject& node, const Vector2& size)
        {
            static_cast<void>(node.SetValue(<a class="code" href="http://dev.doc.cgistudio.at/APILINK/group___dynamic_properties_base.html#ga6f2de74138629f4edc7b62e6af84f51e">CdaDynamicPropertyInstance</a>(Size), size));
        }
     
        static const Vector2& GetSize(const CanderaObject& node)
        {
            return node.GetValue(<a class="code" href="http://dev.doc.cgistudio.at/APILINK/group___dynamic_properties_base.html#ga6f2de74138629f4edc7b62e6af84f51e">CdaDynamicPropertyInstance</a>(Size));
        }
     
        static bool IsSizeSet(const CanderaObject &node)
        {
            return node.IsValueSet(<a class="code" href="http://dev.doc.cgistudio.at/APILINK/group___dynamic_properties_base.html#ga6f2de74138629f4edc7b62e6af84f51e">CdaDynamicPropertyInstance</a>(Size));
        }
        …
        static void SetLayoutDirection(CanderaObject& node, <a class="code" href="http://dev.doc.cgistudio.at/APILINK/group___core2_d.html#gaa4cc311d76d6576e74f346fa9f6d87cb" title="TextNode2DRenderState enumeration defines the states a text can have in view of rendering the text...">LayoutAlignment::LayoutDirection::Enum</a> direction)
        {
            static_cast<void>(node.SetValue(<a class="code" href="http://dev.doc.cgistudio.at/APILINK/group___dynamic_properties_base.html#ga6f2de74138629f4edc7b62e6af84f51e">CdaDynamicPropertyInstance</a>(LayoutDirection), direction));
        }
     
        static <a class="code" href="http://dev.doc.cgistudio.at/APILINK/group___core2_d.html#gaa4cc311d76d6576e74f346fa9f6d87cb" title="TextNode2DRenderState enumeration defines the states a text can have in view of rendering the text...">LayoutAlignment::LayoutDirection::Enum</a> GetLayoutDirection(const CanderaObject& node)
        {
            return node.GetValue(<a class="code" href="http://dev.doc.cgistudio.at/APILINK/group___dynamic_properties_base.html#ga6f2de74138629f4edc7b62e6af84f51e">CdaDynamicPropertyInstance</a>(LayoutDirection));
        }
     
        static bool IsLayoutDirectionSet(const CanderaObject& node)
        {
            return node.IsValueSet(<a class="code" href="http://dev.doc.cgistudio.at/APILINK/group___dynamic_properties_base.html#ga6f2de74138629f4edc7b62e6af84f51e">CdaDynamicPropertyInstance</a>(LayoutDirection));
        }
     
        static void ClearLayoutDirection(CanderaObject& node)
        {
            static_cast<void>(node.ClearValue(<a class="code" href="http://dev.doc.cgistudio.at/APILINK/group___dynamic_properties_base.html#ga6f2de74138629f4edc7b62e6af84f51e">CdaDynamicPropertyInstance</a>(LayoutDirection)));
        }
        …
        <a class="code" href="http://dev.doc.cgistudio.at/APILINK/group___dynamic_properties_base.html#ga56cdb2a230d286a8fdcc9a09cc4560c0">CdaDynamicPropertiesDefinition</a>(<a class="code" href="http://dev.doc.cgistudio.at/APILINK/class_candera_1_1_layouter.html" title="A non-zero padding applies space inside the element layout's width and height. The values can be set ...">Candera::Layouter</a>, CanderaObject);
            …
            <a class="code" href="http://dev.doc.cgistudio.at/APILINK/group___dynamic_properties_base.html#ga3d8637f7abaf54bd9e96872758a9c665">CdaDynamicProperty</a>(Size, Vector2);
                <a class="code" href="http://dev.doc.cgistudio.at/APILINK/group___dynamic_properties_base.html#ga0d189d9ab27d0d6307f917596483ec7e">CdaDynamicPropertyValueChangedCb</a>(&Layouter::OnSizeChanged);
                <a class="code" href="http://dev.doc.cgistudio.at/APILINK/group___dynamic_properties_base.html#gadd8042ac73891b129031af15f8827386">CdaDynamicPropertyDefaultValue</a>(Layouter::SizeDefault());
                …
            <a class="code" href="http://dev.doc.cgistudio.at/APILINK/group___dynamic_properties_base.html#gadac4ce20579ebcc0c3de673003762c36">CdaDynamicPropertyEnd</a>();
            …
            <a class="code" href="http://dev.doc.cgistudio.at/APILINK/group___dynamic_properties_base.html#ga3d8637f7abaf54bd9e96872758a9c665">CdaDynamicProperty</a>(LayoutDirection, <a class="code" href="http://dev.doc.cgistudio.at/APILINK/group___core2_d.html#gaa4cc311d76d6576e74f346fa9f6d87cb" title="TextNode2DRenderState enumeration defines the states a text can have in view of rendering the text...">LayoutAlignment::LayoutDirection::Enum</a>);
                <a class="code" href="http://dev.doc.cgistudio.at/APILINK/group___dynamic_properties_base.html#ga0d189d9ab27d0d6307f917596483ec7e">CdaDynamicPropertyValueChangedCb</a>(&Layouter::OnLayoutDirectionChanged);
                …
            <a class="code" href="http://dev.doc.cgistudio.at/APILINK/group___dynamic_properties_base.html#gadac4ce20579ebcc0c3de673003762c36">CdaDynamicPropertyEnd</a>();
            …
        <a class="code" href="http://dev.doc.cgistudio.at/APILINK/group___dynamic_properties_base.html#ga7bdcb53ee21c7576202a7e19ed380602">CdaDynamicPropertiesEnd</a>();
    };
    …
    void Layouter::SetSize(CanderaObject& node, const Vector2& size)
    {
        LayouterDynamicProperties::SetSize(node, size);
    }
     
    const Vector2& Layouter::GetSize(const CanderaObject& node)
    {
        return LayouterDynamicProperties::GetSize(node);
    }
     
    bool Layouter::IsSizeSet(const CanderaObject &node)
    {
        return LayouterDynamicProperties::IsSizeSet(node);
    }
    …
    void Layouter::SetLayoutDirection(CanderaObject& node, <a class="code" href="http://dev.doc.cgistudio.at/APILINK/group___core2_d.html#gaa4cc311d76d6576e74f346fa9f6d87cb" title="TextNode2DRenderState enumeration defines the states a text can have in view of rendering the text...">LayoutAlignment::LayoutDirection::Enum</a> direction)
    {
        LayouterDynamicProperties::SetLayoutDirection(node, direction);
    }
     
    <a class="code" href="http://dev.doc.cgistudio.at/APILINK/group___core2_d.html#gaa4cc311d76d6576e74f346fa9f6d87cb" title="TextNode2DRenderState enumeration defines the states a text can have in view of rendering the text...">LayoutAlignment::LayoutDirection::Enum</a> Layouter::GetLayoutDirection(const CanderaObject& node)
    {
        return LayouterDynamicProperties::GetLayoutDirection(node);
    }
     
    bool Layouter::IsLayoutDirectionSet(const CanderaObject& node)
    {
        return LayouterDynamicProperties::IsLayoutDirectionSet(node);
    }
     
    void Layouter::ClearLayoutDirection(CanderaObject& node)
    {
        LayouterDynamicProperties::ClearLayoutDirection(node);
    }
    …
    const <a class="code" href="http://dev.doc.cgistudio.at/APILINK/class_candera_1_1_dynamic_properties_1_1_dynamic_property_host.html" title="Represents one host of dynamic properties. Inheriting from this class enables the definition of dynam...">Candera::DynamicProperties::DynamicPropertyHost</a>* Layouter::ParentProvider(const <a class="code" href="http://dev.doc.cgistudio.at/APILINK/class_candera_1_1_dynamic_properties_1_1_dynamic_property_host.html" title="Represents one host of dynamic properties. Inheriting from this class enables the definition of dynam...">Candera::DynamicProperties::DynamicPropertyHost</a>* host) {
        CANDERA_SUPPRESS_LINT_FOR_NEXT_EXPRESSION(1774, "Layouter interface only allows CanderaObject for dynamic properties")
        const CanderaObject* object = static_cast<const CanderaObject*>(host);
    #ifdef CANDERA_2D_ENABLED
        const Node2D* node2D = Dynamic_Cast<const Node2D*>(object);
        if (0 != node2D) {
            return node2D->GetParent();
        }
    #endif
    #ifdef CANDERA_3D_ENABLED
        const Node* node = Dynamic_Cast<const Node*>(object);
        if (0 != node) {
            return node->GetParent();
        }
    #endif
        return 0;
    }
    void <a class="code" href="http://dev.doc.cgistudio.at/APILINK/group___behaviors_control.html#ggae7abc816df647d0ecbc280480fefb788aedec46ef1b6fa21d7dc275c4961918cb">Layouter::Layout</a>(const AbstractNodePointer& node)
    {
    …
            Vector2 nodeSize(Layouter::GetSize(*node.ToCanderaObject()));
    …
    }
    ```

</div></div>

# Touch Support

Touch events are derived from generic events and are equally easy to implement.  
For an example of use have a look at the **ToggleButtonWidget** and it's base class **CgiEventWidget**.

<div class="contents" id="bkmrk-set-eventmask.-the-e"><div class="textblock">- Set EventMask. The EventMask determines which event types will be sent. ```
            const UInt cTbTouchEventExit = CgiEventWidget::TouchEventExit;
            const UInt cTbTouchEventUp = CgiEventWidget::TouchEventUp;
            const UInt cTbTouchEventDown = CgiEventWidget::TouchEventDown;
    
    
            Base::SetEventMask(cTbTouchEventExit | cTbTouchEventUp | cTbTouchEventDown);
    ```
- Override listener function. ```
            protected:
    
                virtual void OnTouchEvent(TouchEvent touchEvent, <a class="code" href="http://dev.doc.cgistudio.at/APILINK/class_candera_1_1_node.html" title="The class Node is an abstract base class for all scene graph nodes. Each Node defines a local coordin...">Candera::Node</a>* node, const CgiApplication::MouseEvent& event);
    
    ```
- Define your actions inside the listener function **OnTouchEvent**. ```
            switch(touchEvent) {
                case TouchEventDown:
                    m_focus = true;
                    SetOn(!IsOn());
                    break;
                case TouchEventUp:
                    if (m_focus) {
                        SendUiEvent(TouchEventClick, 0);
                    }
                    break;
                case TouchEventExit:
                    m_focus = false;
                    m_down = !m_down;
                    SwitchTexture();
                    break;
                default:
                    break;
            }
    ```

</div></div>

# Loading of Shaped / Compressed Assets

##### <a class="anchor" id="bkmrk--59"></a>Loading Shaped Assets

Shaped assets are the result of partitioning an asset into several smaller ones, each containing a part of the original asset, based on a predefined set of rules. Please refer to <span style="color: rgb(230, 126, 35);">[Shape Asset Library](https://doc316en.candera.eu/books/asset-tool/chapter/shape-asset-library "Shape Asset Library")</span> chapter for information on how to create them.

The routine for loading shaped assets is similar to the one presented in <span style="color: rgb(230, 126, 35);">[Loading an Asset](https://doc316en.candera.eu/link/418#bkmrk-loading-an-asset%C2%A0)</span> section. In this case, [Candera::AssetConfig](http://dev.doc.cgistudio.at/APILINK/class_candera_1_1_asset_config.html "Asset configuration that encapsulates various asset repositories Custom AssetConfig classes can be de...") might be used because it allows the definition of multiple instances of [Candera::AssetRepository](http://dev.doc.cgistudio.at/APILINK/class_candera_1_1_asset_repository.html "Abstract class providing methods to read asset (e.g. from file, from flash)").

The application should derive from the abstract [Candera::AssetConfig](http://dev.doc.cgistudio.at/APILINK/class_candera_1_1_asset_config.html "Asset configuration that encapsulates various asset repositories Custom AssetConfig classes can be de...") in order to support specific [Candera::AssetRepository](http://dev.doc.cgistudio.at/APILINK/class_candera_1_1_asset_repository.html "Abstract class providing methods to read asset (e.g. from file, from flash)") instances. The shaped asset repositories need be added, one by one, to [Candera::AssetConfig](http://dev.doc.cgistudio.at/APILINK/class_candera_1_1_asset_config.html "Asset configuration that encapsulates various asset repositories Custom AssetConfig classes can be de...") before initializing [Candera::AssetProvider](http://dev.doc.cgistudio.at/APILINK/class_candera_1_1_asset_provider.html "Abstract class providing methods for retrieving objects.").

**Loading shaped assets during runtime**

There is also the possibility of adding or removing asset repositories even after the initialization of the asset provider. In this case, the application should derive from [Candera::DynamicAssetConfig](http://dev.doc.cgistudio.at/APILINK/class_candera_1_1_dynamic_asset_config.html "DynamicAssetConfig is used for asset configurations which change during runtime."), which allows the asset configurations to be changed during runtime.

To add a repository during runtime, please use [Candera::DynamicAssetConfig::AddRepository](http://dev.doc.cgistudio.at/APILINK/class_candera_1_1_dynamic_asset_config.html#a23f6a27d15e6260addf2281e51bf84b0). In order to remove one, please use [Candera::DynamicAssetConfig::RemoveRepository](http://dev.doc.cgistudio.at/APILINK/class_candera_1_1_dynamic_asset_config.html#a66079f8a6b1013bdcdb69360d333baf7).

[Candera::AssetConfigListener::OnAssetRepositoryAdded](http://dev.doc.cgistudio.at/APILINK/class_candera_1_1_asset_config_listener.html#a590832dde8b6a40bdbba08fac8244692) should be called in the derived classes of [Candera::AssetConfig](http://dev.doc.cgistudio.at/APILINK/class_candera_1_1_asset_config.html "Asset configuration that encapsulates various asset repositories Custom AssetConfig classes can be de...") after a new asset has been added, to notify all listeners and load the asset repository. Call [Candera::AssetConfigListener::OnAssetRepositoryRemoved](http://dev.doc.cgistudio.at/APILINK/class_candera_1_1_asset_config_listener.html#a5661cfc59bb9536eb3883f0ece1557c5) when removing an asset repository.

<div class="contents" id="bkmrk-when-dynamically-add"><div class="contents"><div class="contents"><div class="textblock"><dl class="note"><dd><p class="callout info">When dynamically adding of partitioned assets, the newly added assets should belong to the same original asset that the previous loaded are belonging to.</p>

</dd></dl></div></div></div></div>##### <a class="anchor" id="bkmrk--60"></a>Using Asset Decompression

[Candera](http://dev.doc.cgistudio.at/APILINK/namespace_candera.html "[DataBinding_RefTypeSample]") AssetLoader is able to support and manage asset data compressed by CGI Studio Asset Shaper Tool. Please refer to <span style="color: rgb(230, 126, 35);">[Compression](https://doc316en.candera.eu/link/244#bkmrk-compression)</span> section for more information related to data compression.

Using of compressed assets inside the application is be possible only if *CANDERA\_ASSET\_DECOMPRESSION\_ENABLED* variable is set to *true* during the build process of [Candera](http://dev.doc.cgistudio.at/APILINK/namespace_candera.html "[DataBinding_RefTypeSample]"). After enabling this feature, *CANDERA\_ASSET\_DECOMPRESSION\_CHUNK\_SIZE* will be enabled for specifying the chunk buffer size for decompression.

A *chunk* represents the buffer size that is used for pulling data from the asset to perform the decompression operation, one chunk at a time. Using a smaller buffer size would be time consuming, so a larger buffer size would be recommended in this case, if enough memory is available.

<div class="contents" id="bkmrk-candera_asset_decomp"><div class="textblock"><dl class="note"><dd><p class="callout info">*CANDERA\_ASSET\_DECOMPRESSION\_CHUNK\_SIZE* is relevant only for [Candera::FileAssetRepository](http://dev.doc.cgistudio.at/APILINK/class_candera_1_1_file_asset_repository.html "Class providing methods to read asset from file.").</p>

</dd></dl></div></div>

# Tutorial for 3D Scene Graph and Nodes

# 3D Scenes and Nodes

#### <a class="anchor" id="bkmrk--95"></a>Scenes and Nodes

[Candera::Node](http://dev.doc.cgistudio.at/APILINK/class_candera_1_1_node.html "The class Node is an abstract base class for all scene graph nodes. Each Node defines a local coordin...") is an abstract base class for all scene graph nodes.

<div drawio-diagram="1966"><img src="https://doc316en.candera.eu/uploads/images/drawio/2023-02/drawing-4-1676880912.png" alt=""/></div>

<div class="contents" id="bkmrk--1"><div class="contents"><div class="textblock">  
</div></div></div>Each node defines a local coordinate system relative to the coordinate system of the parent node. The functionality to define the local coordinate system is derived from [Candera::Transformable](http://dev.doc.cgistudio.at/APILINK/class_candera_1_1_transformable.html "Defines common methods for manipulating node and texture transformations in local coordinate space (o...") and consists of following components:

<div class="contents" id="bkmrk-position%2C-rotation%2C-"><div class="contents"><div class="textblock">- position,
- rotation,
- scale,
- and a generic matrix called transform matrix.

</div></div></div>If the node is transformed from the local coordinate system to the world's coordinate system, then the node's local transformation is multiplied with all its parent's transformations. A node can also store a set of nodes as its children but a node can only have one parent at a time. Cycles are prohibited. The nodes alpha value is multiplied with the alpha value of its descendent nodes.

[Candera::Scene](http://dev.doc.cgistudio.at/APILINK/class_candera_1_1_scene.html "The class Scene represents a top level scene graph node. Multiple Scenes are allowed. A Scene can not be part of any other Scene. To render a Scene, at least one Camera must be part of this Scene and the Camera must have rendering enabled. A Scene can have more than one Camera. Note: Lights added to a Scene apply for that Scene only and do not affect 3D objects in any other Scene.") is the top level scene node which cannot be part of any other node.

# 3D Node Transformations

#### <a class="anchor" id="bkmrk--97"></a>3D Node Manipulation Example

To illustrate basic node transformation operations, the *NodeManipulationWidget\_3D* and the *DisplayPositionWidget3D* part of the Tutorial Widgets can be used. An usage example for *NodeManipulationWidget\_3D* widget is presented in **NodeManipulationSolution\_3D** solution provided in the content folder of *cgi\_studio\_player*.

**Please consider:**

<div class="contents" id="bkmrk-the-widget-property-"><div class="contents"><div class="textblock">- The widget property *Node* is derived from a base class and provides the node associated to the widget (e.g. the root node for content managed by the widget).
- Only if the widget is *enabled* (this property is also derived from a base class), the setter methods of the widget properties will take effect.
- If a widget property setter changes a node property of the associated node, the visual effect can be seen, but note that the static node properties maintained by SceneComposer are not changed accordingly!
- Widget dynamics are never reflected to static scene structure. It is recommended to use SceneComposer only for property configuration and dynamics only in the Player.

</div></div></div>#### <a class="anchor" id="bkmrk--98"></a>Translations

Once the NodeManipulationWidget\_3D is linked to a node from the static scene tree and enabled, the position coordinates can be set in the Player for this property to change the position.

```
        // Set node position
        node->SetPosition(m_position);
        // end Set node position
```

Use TranslateX property to move the node on the x axis with a delta value only. [Candera::Transformable::Translate](http://dev.doc.cgistudio.at/APILINK/class_candera_1_1_transformable.html#a34a94f1d107b2b9e163065ca26682853) adds the given Vector to the actual position .

```
       // Translate node on x axis
        node->Translate(Vector3(m_translateX, 0.0F, 0.0F));
        // end Translate node on x axis
```

#### <a class="anchor" id="bkmrk--99"></a>Rotations

Similar to translation, rotation can also be applied via [Candera::Transformable::SetRotation()](http://dev.doc.cgistudio.at/APILINK/class_candera_1_1_transformable.html#af76f9a446587115fa5cc19b0b37a64f3) or [Candera::Transformable::Rotate()](http://dev.doc.cgistudio.at/APILINK/class_candera_1_1_transformable.html#a55429982ad46b745fb37b306475e4b6d).

```
        // Set node rotation
        node->SetRotation(m_rotation);
        // end Set node rotation
```

#### <a class="anchor" id="bkmrk--100"></a>Scaling

Again there is also a [Candera::Transformable::SetScale](http://dev.doc.cgistudio.at/APILINK/class_candera_1_1_transformable.html#a750dce59a7a54ab4f28dd3763b879dde) and [Candera::Transformable::Scale](http://dev.doc.cgistudio.at/APILINK/class_candera_1_1_transformable.html#a5eaf72124658e7d27ecce86ad6576029) method.

```
        // set node scale
        node->SetScale(m_scale);
        // end node scale
```

#### <a class="anchor" id="bkmrk--101"></a>Pivot Point

It is possible to change your pivot point with the [Candera::Transformable::TranslatePivotPoint](http://dev.doc.cgistudio.at/APILINK/class_candera_1_1_transformable.html#a8de05c00892520953c933888152b0e5c) (or [Candera::Transformable::SetPivotPoint](http://dev.doc.cgistudio.at/APILINK/class_candera_1_1_transformable.html#a7a885bce1ab6cff4e26882759d1377ae)) method. The pivot point can be used to define e.g. the rotation point that the node should rotate around. It affects the scaling too.

#### <a class="anchor" id="bkmrk--102"></a>How to get the screen space coordinates of a node

With the DisplayPositionWidget3D you can retrieve the screen coordinates of an associated node. Please consider that a node and a camera have to be selected in the widget. In the solution the widget is disabled by default. To see the output of the node's display position, enabling the widget and log filter (via CgiAppLog -&gt; Info) in SceneComposer is mandatory. To get the screen space coordinates of an associated node you need the function [Candera::Math3D::TransformPointToScreen](http://dev.doc.cgistudio.at/APILINK/class_candera_1_1_math3_d.html#afb885f2eb69160b3d58ce74afb50d1b3), which transforms a point in world space into a point in screen space.

<div class="contents" id="bkmrk-first-you-need-the-w"><div class="textblock">- First you need the world position of your node. With Node::GetWorldPosition you get the screen coordinates as output. ```
            Vector3 worldPosition = node->GetWorldPosition();
    ```
- With the world position of your node and with your camera you can transform the point to screen space and you retrieve the display position as a [Candera::Vector2](http://dev.doc.cgistudio.at/APILINK/class_candera_1_1_vector2.html "The default Vector2 class."). ```
            Vector2 displayPos;
            static_cast<void>(Math3D::TransformPointToScreen(worldPosition, camera, displayPos));
    ```
- displayPos now contains the X and Y screen space coordinates of the selected node.

</div></div>

# 3D Node Appearance

#### <a class="anchor" id="bkmrk--103"></a>Description

[Candera::Appearance](http://dev.doc.cgistudio.at/APILINK/class_candera_1_1_appearance.html "The class Appearance groups following render attributes: Material, Textures, RenderMode, and Shader. Render attributes define the distinctive visualization of a geometry like Mesh, Billboard, and PointSprite. Further, render attributes can be shared across multiple objects, which conserves memory and enables sharing of appearance characteristics. An Appearance object is mandatory for any object in order to get rendered. Per default all render attributes are initialized to null, which is a valid setting. If the Appearance is activated, all render attributes that are set become activated. If no RenderMode is defined (null), then the default RenderMode is used instead;.") groups following render attributes:

<div class="contents" id="bkmrk-candera%3A%3Amaterial%2C-c"><div class="contents"><div class="textblock">- [Candera::Material](http://dev.doc.cgistudio.at/APILINK/class_candera_1_1_material.html "The class Material describes the color attributes of an object's surface and is primarily used for li..."),
- [Candera::Texture](http://dev.doc.cgistudio.at/APILINK/class_candera_1_1_texture.html "Texture encapsulates a TextureImage and a set of attributes specifying how it is applied to a vertex'..."),
- [Candera::RenderMode](http://dev.doc.cgistudio.at/APILINK/class_candera_1_1_render_mode.html "The class RenderMode is an Appearance component that encapsulates polygon-level and per-fragment comp...")
- [Candera::Shader](http://dev.doc.cgistudio.at/APILINK/class_candera_1_1_shader.html "The class Shader is an Appearance component representing a graphical processing unit (GPU) program...") and
- [Candera::ShaderParamSetter](http://dev.doc.cgistudio.at/APILINK/class_candera_1_1_shader_param_setter.html "ShaderParamSetter maintains a list of uniform parameters that are passed to a Shader.").

</div></div></div>Render attributes define the distinctive visualization of a geometry like [Candera::Mesh](http://dev.doc.cgistudio.at/APILINK/class_candera_1_1_mesh.html "The class Mesh represents a three-dimensional rigid body object defined by polygons. The Mesh's polygonal surface is defined by its VertexBuffer. Each Mesh must have exactly one Appearance set, in order to specify how the Mesh geometry is rendered."), [Candera::Billboard](http://dev.doc.cgistudio.at/APILINK/class_candera_1_1_billboard.html "The class Billboard represents a Plane that can align towards camera automatically, according to the alignment type set. Thus, Billboards are quite often used as "imposters" pretending to be a 3D geometry by showing a 2D image that is always facing the camera. In order to relief distinction between Billboard and PointSprite see following comparison: + Billboards support rectangular dimension and non-uniform scale, + Billboards support different rotation techniques (see Alignment), whereas PointSprites are aligned according to CenterEyeAlignment, exclusively. + Billboards take local rotation and scale into account (see class Transformable), whereas PointSprites ignore Transformable parameters others than position. + PointSprites have a performance advantage due to less geometry (one instead of 4 vertices). Overall recommendation: Use PointSprites for spherical shapes like particles, lens flares, sparkles, dust which are screen aligned (see Billboard::CameraUpAlignment). Further, use Billboards for world up oriented clouds, text, or yaw axis aligned trees, and signs, etc. Note: The Billboard - because of absent normals - does not support lighting. Belows sketch depicts the layout of a Billboard. W U:0,V:1 +-----+ U:1,V:1 H | X | Legend: texture coordinates: U,V; Width: W, Height: H, Local Center: X U:0,V:0 +-----+ U:1,V:0."), and [Candera::PointSprite](http://dev.doc.cgistudio.at/APILINK/class_candera_1_1_point_sprite.html "PointSprite represents a GL point primitive. The size (glPointSize) of the point is calculated by def..."). Further, render attributes can be shared across multiple objects, which conserve memory and enable sharing of appearance characteristics.

A [Candera::Appearance](http://dev.doc.cgistudio.at/APILINK/class_candera_1_1_appearance.html "The class Appearance groups following render attributes: Material, Textures, RenderMode, and Shader. Render attributes define the distinctive visualization of a geometry like Mesh, Billboard, and PointSprite. Further, render attributes can be shared across multiple objects, which conserves memory and enables sharing of appearance characteristics. An Appearance object is mandatory for any object in order to get rendered. Per default all render attributes are initialized to null, which is a valid setting. If the Appearance is activated, all render attributes that are set become activated. If no RenderMode is defined (null), then the default RenderMode is used instead;.") object is mandatory for any object in order to get rendered. Per default no Appearance attributes are attached.

If the Appearance is activated, all render attributes that are set become activated. If no RenderMode is defined (null), then the default RenderMode is used instead.

#### <a class="anchor" id="bkmrk--104"></a>**Appearance: Material**

##### <a class="anchor" id="bkmrk--105"></a>Material Attributes

[Candera::Material](http://dev.doc.cgistudio.at/APILINK/class_candera_1_1_material.html "The class Material describes the color attributes of an object's surface and is primarily used for li...") describes the color attributes of an object's surface and is primarily used for lighting computations. If no material is set, lighting calculations in associated shaders can not be applied.

The color attributes are defined as follows:

<div class="contents" id="bkmrk-ambient-rgb-color-th"><div class="contents"><div class="textblock"><table class="doxtable"><tbody><tr><td valign="top">Ambient</td><td valign="top">RGB color that interacts with the ambient attribute of light.</td></tr><tr><td valign="top">Emissive</td><td valign="top">RGB color that defines the self-lighting of the material. This color is visible, even when Material is unlighted.  
The emissive color attribute does neither interact with any type of light source nor with other 3D objects.</td></tr><tr><td valign="top">Diffuse</td><td valign="top">RGBA color that interacts with the diffuse attribute of light. The alpha value of the diffuse color, defines  
the alpha factor of the entire Material, supposed that alpha blending is enabled (For details see [Candera::RenderMode](http://dev.doc.cgistudio.at/APILINK/class_candera_1_1_render_mode.html "The class RenderMode is an Appearance component that encapsulates polygon-level and per-fragment comp...")).</td></tr><tr><td valign="top">Specular</td><td valign="top">RGB color that interacts with the specular attribute of light.</td></tr></tbody></table>

</div></div></div>Furthermore with Specular Power the sharpness of a specular highlight, if lit by specular light, can be defined.

##### <a class="anchor" id="bkmrk--106"></a>Create a new Material

```
    m_material = <a class="code" href="http://dev.doc.cgistudio.at/APILINK/group___c_o_u_r_i_e_r___v_i_s_u_a_l_i_z_a_t_i_o_n.html#ggaf0e93dc4242f607c3c8d13dafd036af9aaabfa5309af24986d3111a092449f857">Material::Create</a>();
```

##### <a class="anchor" id="bkmrk--107"></a>Set Colors

This sample code shows how to change the ambient color, the code for changing the diffuse color, the emissive color or the specular color looks similarly.

```
    // Set ambient color
    if (node->GetAppearance() != 0 && node->GetAppearance()->GetMaterial() != 0){
        node->GetAppearance()->GetMaterial()->SetAmbient(m_color);
    }
    // end Set ambient color
```

#### **Appearance: Texture** 

##### <a class="anchor" id="bkmrk--108"></a>Description

[Candera::Texture](http://dev.doc.cgistudio.at/APILINK/class_candera_1_1_texture.html "Texture encapsulates a TextureImage and a set of attributes specifying how it is applied to a vertex'...") encapsulates a [Candera::TextureImage](http://dev.doc.cgistudio.at/APILINK/class_candera_1_1_texture_image.html "Abstract base class for Texture images.A texture image mainly encapsulates a texture handle in VRAM a...") and a set of attributes specifying how it is applied to a vertex's texture coordinate. [Candera](http://dev.doc.cgistudio.at/APILINK/namespace_candera.html "[DataBinding_RefTypeSample]") implements a sharing mechanism based on TextureImages. These hold the actual VRAM handle. Multiple textures can share one TextureImage object. The TextureImage manages its upload to the VRAM.

**Attention:**

<div class="contents" id="bkmrk-the-texture-is-only-"><div class="contents"><div class="textblock">- The Texture is only useable with an associated TextureImage.
- Do not share TextureImages, if TextureImage modification shall not be shared across Textures.
- In order to support MipMapping or repeated wrapping, the bitmap's width and height must be a power of 2 (n^2), like e.g. 2, 4, 8, 16 ,32, etc. However, height and width can be different, e.g.: 256x128.

</div></div></div>##### <a class="anchor" id="bkmrk--109"></a>Texture Filtering

<div class="contents" id="bkmrk-minification-and-mag"><div class="contents"><div class="textblock">- **Minification and magnification:**

</div></div></div>Following texture filters can be used to improve visual quality of Textures: Magnification to upscale, Minification to downscale.

<div class="contents" id="bkmrk-nearest-value-of-the"><div class="contents"><div class="textblock"><table class="doxtable"><tbody><tr><td valign="top">Nearest</td><td valign="top">Value of the texel that is nearest to the center of the pixel being textured.</td></tr><tr><td valign="top">Linear</td><td valign="top">The weighted average of the four texels that are closest to the center of the pixel being textured.</td></tr></tbody></table>

</div></div></div><div class="contents" id="bkmrk-mipmapping%3A-mipmappi"><div class="contents"><div class="textblock">- **Mipmapping:** MipMapping can be used to avoid texture aliasing effects.

<table class="doxtable"><tbody><tr><td valign="top">None</td><td valign="top">MipMapping disabled</td></tr><tr><td valign="top">Nearest</td><td valign="top">MipMapping uses nearest mip map level</td></tr><tr><td valign="top">Linear</td><td valign="top">MipMapping uses bilinear mipmap interpolation of the two nearest mip map levels</td></tr></tbody></table>

</div></div></div><div class="contents" id="bkmrk-wrapmode%3A"><div class="contents"><div class="textblock">- **WrapMode:**

</div></div></div>It specifies how the texture is wrapped:

<div class="contents" id="bkmrk-repeat-repeat-the-te"><div class="contents"><div class="textblock"><table class="doxtable"><tbody><tr><td valign="top">Repeat</td><td valign="top">Repeat the texture</td></tr><tr><td valign="top">ClampToEdge</td><td valign="top">Clamp fetches to the edge of the texture</td></tr><tr><td valign="top">Linear</td><td valign="top">MipMapping uses bilinear mipmap interpolation of the two nearest mip map levels</td></tr></tbody></table>

</div></div></div><div class="contents" id="bkmrk-maxanisotropy%3A"><div class="contents"><div class="textblock">- **MaxAnisotropy:**

</div></div></div>It specifies the maximum degree of anisotropy to account for in texture filtering for the Texture object. Anisotropic filtering improves the quality of the textures when they are not uniformly scaled because, for example, the textured triangle is not exactly facing the camera. The value of maxAnisotropy must be greater or equal to 1.0f (isotropy) and is limited by the max detail of anisotropy supported by hardware, which can be retrieved with the function Candera::RenderDevice::GetMaxAnisotropySupportedByDevice.

##### <a class="anchor" id="bkmrk--110"></a>Changing Texture Image And Setting Filters

```
    m_textureImage = <a class="code" href="http://dev.doc.cgistudio.at/APILINK/group___c_o_u_r_i_e_r___v_i_s_u_a_l_i_z_a_t_i_o_n.html#ggaf0e93dc4242f607c3c8d13dafd036af9aaabfa5309af24986d3111a092449f857">BitmapTextureImage::Create</a>();
    m_textureImage->SetName("LabelTextureImage");
    static_cast<void>(m_textureImage->SetBitmap(m_bitmap));
    if (m_textureImage == 0) {
        FEATSTD_DEBUG_ASSERT(false);
        return; // memory is freed in destructor/UpdateBitmap()
    }


    m_texture = <a class="code" href="http://dev.doc.cgistudio.at/APILINK/group___c_o_u_r_i_e_r___v_i_s_u_a_l_i_z_a_t_i_o_n.html#ggaf0e93dc4242f607c3c8d13dafd036af9aaabfa5309af24986d3111a092449f857">Texture::Create</a>();
    m_texture->SetName("LabelTexture");
    m_texture->SetTextureImage(m_textureImage);
    m_texture->SetWrapModeU(Texture::ClampToEdge);
    m_texture->SetWrapModeV(Texture::ClampToEdge);
    m_texture->SetMinificationFilter(Texture::MinMagLinear);
    m_texture->SetMagnificationFilter(Texture::MinMagLinear);
```

#### **Appearance: Render Mode** 

##### <a class="anchor" id="bkmrk--111"></a>Description

[Candera::RenderMode](http://dev.doc.cgistudio.at/APILINK/class_candera_1_1_render_mode.html "The class RenderMode is an Appearance component that encapsulates polygon-level and per-fragment comp...") is an Appearance component that encapsulates polygon-level and per-fragment compositing render attributes. If an object's Appearance has set RenderMode to null, then the default RenderMode is used instead. For details how to set the default render mode, see [Candera::Renderer::SetDefaultRenderMode](http://dev.doc.cgistudio.at/APILINK/class_candera_1_1_renderer.html#a1fb82af52c979cf80cb24102cdf8bc1a).

If a Camera has a RenderMode attached \[camera-&gt;GetApperance()-&gt;SetRenderMode(...)\], then the Camera's RenderMode overrules the DefaultRenderMode during its render pass. Thus, all Nodes rendered by the Camera that do not have their own RenderMode set, use the RenderMode applied to the Camera.

If a RenderMode has set an inheritance bit for a certain render attribute, then the property of the base render mode is used, this is either the Camera's RenderMode if set or the DefaultRenderMode otherwise.

```
        bool m_isColorWriteRedEnabled;       // Default value: true
        bool m_isColorWriteGreenEnabled;     // Default value: true
        bool m_isColorWriteBlueEnabled;      // Default value: true
        bool m_isColorWriteAlphaEnabled;     // Default value: true
        bool m_isDepthWriteEnabled;          // Default value: true
        bool m_isDepthTestEnabled;           // Default value: true
        bool m_isStencilTestEnabled;         // Default value: false
        bool m_isBlendingEnabled;            // Default value: false
```

Set a rendermode:

```
    SharedPointer<RenderMode> rm = <a class="code" href="http://dev.doc.cgistudio.at/APILINK/group___c_o_u_r_i_e_r___v_i_s_u_a_l_i_z_a_t_i_o_n.html#ggaf0e93dc4242f607c3c8d13dafd036af9aaabfa5309af24986d3111a092449f857">RenderMode::Create</a>();
    rm->SetBlendingEnabled(true);
    rm->SetBlendMode(RenderMode::SourceAlpha, RenderMode::InverseSourceAlpha, RenderMode::Add);
    rm->SetDepthTestEnabled(false);
    rm->SetDepthWriteEnabled(false);
    appearance->SetRenderMode(rm);

```

##### <a class="anchor" id="bkmrk--112"></a>Render Mode Attributes

<div class="contents" id="bkmrk-blending"><div class="contents"><div class="textblock">- **blending**

</div></div></div>The next chapter <span style="color: rgb(230, 126, 35);">[Color Blending](#bkmrk-appearance%3A-render-m-0)</span> describes possible blending operations in detail.

<div class="contents" id="bkmrk-culling"><div class="contents"><div class="textblock">- **culling**

</div></div></div>Culling determines which side of a polygon is removed before rasterisation.

<div class="contents" id="bkmrk-frontfaceculling-fro"><div class="contents"><div class="textblock"><table class="doxtable"><tbody><tr><td valign="top">FrontFaceCulling</td><td valign="top">Front of the polygon is removed</td></tr><tr><td valign="top">BackFaceCulling</td><td valign="top">Back of the polygon is removed</td></tr><tr><td valign="top">NoCulling</td><td valign="top">Front and back of the polygon are rendered</td></tr></tbody></table>

</div></div></div><div class="contents" id="bkmrk-winding"><div class="contents"><div class="textblock">- **winding**

</div></div></div>Winding defines the front face of a polygon. A polygon side is the front-face if its screen-space vertices are in the same order as the winding specifies.

<div class="contents" id="bkmrk-clockwise-clockwise-"><div class="contents"><div class="textblock"><table class="doxtable"><tbody><tr><td valign="top">ClockWise</td><td valign="top">Clockwise ordered vertices define the front of the polygon.</td></tr><tr><td valign="top">CounterClockWise</td><td valign="top">Counterclockwise ordered vertices define the front of the polygon.</td></tr></tbody></table>

</div></div></div>[Candera::RenderMode::ComparisonFunction](http://dev.doc.cgistudio.at/APILINK/class_candera_1_1_render_mode.html#a698f416c261d527fd8a4558ab9b45e55) can be used with depth-, stencil-, or sampler state operations. It specifies how the source (new) data is compared against the destination (existing) data before passing the comparison operations (storing the data).

<div class="contents" id="bkmrk-comparenever-never-p"><div class="contents"><div class="textblock"><table class="doxtable"><tbody><tr><td valign="top">CompareNever</td><td valign="top">Never pass the comparison.</td></tr><tr><td valign="top">CompareLess</td><td valign="top">If source data is less than destination data, the comparison passes.</td></tr><tr><td valign="top">CompareEqual</td><td valign="top">If source data is equal than destination data, the comparison passes.</td></tr><tr><td valign="top">CompareLessEqual</td><td valign="top">If source data is less than or equal to destination data, the comparison passes.</td></tr><tr><td valign="top">CompareGreater</td><td valign="top">If source data is greater than destination data, the comparison passes.</td></tr><tr><td valign="top">CompareNotEqual</td><td valign="top">If source data is not equal to destination data, the comparison passes.</td></tr><tr><td valign="top">CompareGreaterEqual</td><td valign="top">If source data is greater than or equal to destination data, the comparison passes.</td></tr><tr><td valign="top">CompareAlways</td><td valign="top">Always pass the comparison.</td></tr></tbody></table>

</div></div></div><div class="contents" id="bkmrk-depth-bias"><div class="contents"><div class="textblock">- **depth bias**

</div></div></div>Depth bias that can be applied to co-planar primitives to reduce z-fighting, according to following function: *Depth bias = (max \* scaleFactor) + (r \* units)*; where *max* is the maximum depth slope of the triangle being rendered and *r* is an implementation-defined constant that is guaranteed to produce the smallest resolvable offset.

<div class="contents" id="bkmrk-olygons-that-are-cop"><div class="contents"><div class="contents"><div class="textblock"><dl class="note"><dt><p class="callout info">olygons that are coplanar can be made to appear not coplanar by adding a z-bias to each one. This is a technique commonly used to ensure that shadows, decals, or hidden-line images on coplanar surfaces are displayed properly. The depth bias is added before the depth test is performed but does not influence the original depth value written into depth buffer.</p>

</dt></dl></div></div></div></div>Via [Candera::RenderMode::SetDepthBias](http://dev.doc.cgistudio.at/APILINK/class_candera_1_1_render_mode.html#ae5e30756f98f874d6f05a8ba1b618b62) the depth bias can be set and [Candera::RenderMode::SetDepthTestEnabled](http://dev.doc.cgistudio.at/APILINK/class_candera_1_1_render_mode.html#a3983a4d136f976d1208a3bf0fc0832ee) and [Candera::RenderMode::SetDepthWriteEnabled](http://dev.doc.cgistudio.at/APILINK/class_candera_1_1_render_mode.html#a5417961fbefced86d218df5a62bb0935) enables it.

<div class="contents" id="bkmrk-stencil-buffer"><div class="contents"><div class="textblock">- **stencil buffer**

</div></div></div>StencilPlane specifies the face associated with the provided stencil function, which are *FrontFace*, *BackFace* and *FrontAndBackFace*. Front face stencil affects non-polygons and front-facing polygons whereas back face stencil affects back-facing polygons only.   
StencilOperation defines the stencil-buffer operation.

<div class="contents" id="bkmrk-settozero-set-the-st"><div class="textblock"><table class="doxtable"><tbody><tr><td style="background-color: rgb(206, 212, 217);" valign="top">**SetToZero**</td><td style="background-color: rgb(206, 212, 217);" valign="top">**Set the stencil-buffer entry to zero.**</td></tr><tr><td valign="top">Keep</td><td valign="top">Do not update the entry in the stencil buffer.</td></tr><tr><td valign="top">Replace</td><td valign="top">Replace the stencil-buffer entry with the reference value.</td></tr><tr><td valign="top">Increment</td><td valign="top">Increment the stencil-buffer entry, clamping to 2^n where n is the number of bits in the stencil buffer.</td></tr><tr><td valign="top">Decrement</td><td valign="top">Decrement the stencil-buffer entry, clamping to zero.</td></tr><tr><td valign="top">Invert</td><td valign="top">Invert the bits in the stencil-buffer entry.</td></tr><tr><td valign="top">IncrementWrap</td><td valign="top">Increment the stencil-buffer entry, wrapping to zero if the new value exceeds the maximum value</td></tr><tr><td valign="top">DecrementWrap</td><td valign="top">Decrement the stencil-buffer entry, wrapping to the maximum value if the new value is less than zero.</td></tr></tbody></table>

</div></div>#### **Appearance: Render Mode - Color Blending** 

##### <a class="anchor" id="bkmrk--113"></a>Description

When Blending is enabled, the output from the fragment shader is blended with the current contents of the frame buffer, rather than merely overwriting it. Blending is mostly used to make objects appear transparent, but can also produce various other effects. (eg. anti-aliasing, DOF, or multi-pass rendering.) There are multiple ways of using blending, but generally, the procedure is as follows:

<div class="contents" id="bkmrk-set-alpha-value-of-a"><div class="contents"><div class="textblock">- Set alpha value of a node
- Set alpha value of a material color
- Set alpha value of the material (this changes the alpha value of the materials diffuse color)
- Enable blending via RenderMode and use the alpha value of the texture in combination with [Candera::RenderMode::BlendMode](http://dev.doc.cgistudio.at/APILINK/struct_candera_1_1_render_mode_1_1_blend_mode.html)

</div></div></div>##### <a class="anchor" id="bkmrk--114"></a>Blend Operations

```
        enum BlendOperation
        {
            Add = 0,               
            Subtract = 1,          
            ReverseSubtract = 2,   
            Min = 3,               
            Max = 4                
        };
```

##### <a class="anchor" id="bkmrk--115"></a>Blend Factor

```
        enum BlendFactor
        {
            Zero = 0,                   
            One  = 1,                   
            SourceColor = 2,            
            InverseSourceColor = 3,     
            SourceAlpha = 4,            
            InverseSourceAlpha = 5,     
            DestColor = 6,              
            InverseDestColor = 7,       
            DestAlpha = 8,              
            InverseDestAlpha = 9,       
            ConstantColor = 10,         
            InverseConstantColor = 11,  
            ConstantAlpha = 12,         
            InverseConstantAlpha = 13,  
            SourceAlphaSaturate = 14    
        };
```

BlendMode combines the source and destination blend factors with the operation used in blending equation.

<div class="contents" id="bkmrk-rgb-blending-equatio"><div class="contents"><div class="textblock">- RGB blending equation: *final\_RGB = source\_RGB \* sourceRGBFactor (+operationRGB+) destination\_RGB \* destRGBFactor*.
- Alpha blending equation: *final\_alpha = source\_alpha \* sourceAlphaFactor (+operationAlpha+) destination\_alpha \* destAlphaFactor*.

</div></div></div>For the Blending Options ConstantColor, InverseConstantColor, ConstantAlpha, or InverseConstantAlpha a blending color can be set.

Set blending:

```
    SharedPointer<RenderMode> rm = <a class="code" href="http://dev.doc.cgistudio.at/APILINK/group___c_o_u_r_i_e_r___v_i_s_u_a_l_i_z_a_t_i_o_n.html#ggaf0e93dc4242f607c3c8d13dafd036af9aaabfa5309af24986d3111a092449f857">RenderMode::Create</a>();
    rm->SetBlendingEnabled(true);
    rm->SetBlendMode(RenderMode::SourceAlpha, RenderMode::InverseSourceAlpha, RenderMode::Add);
    rm->SetDepthTestEnabled(false);
    rm->SetDepthWriteEnabled(false);
    appearance->SetRenderMode(rm);
```

#### **Appearance: Shader** 

##### <a class="anchor" id="bkmrk--116"></a>Description

[Candera::Shader](http://dev.doc.cgistudio.at/APILINK/class_candera_1_1_shader.html "The class Shader is an Appearance component representing a graphical processing unit (GPU) program...") is an Appearance component representing a graphical processing unit (GPU) program, thus a vertex and fragment shader pair.

<div class="contents" id="bkmrk-the-shader-program-c"><div class="contents"><div class="textblock">- The Shader program can be parametrized with uniforms and attributes. It's guaranteed by the shader that the program is only created once in VRAM.
- Shader is a device object that counts its uploads to VRAM automatically. Thus, a shader is only uploaded if it has not been uploaded before.
- Further, a shader is unloaded from VRAM, if the upload count is decreased to zero. Take care, that upload is invoked as many times as unload.

</div></div></div>[Candera](http://dev.doc.cgistudio.at/APILINK/namespace_candera.html "[DataBinding_RefTypeSample]") and SceneComposer offer reference shaders of both vertex and fragment shaders.   
For details refer to section <span style="color: rgb(230, 126, 35);">[Shader Usage](https://doc316en.candera.eu/books/candera/chapter/tutorial-for-shader-usage)</span>.

In SceneComposer via the appearance of a node its ShaderProgram can be chanced easily. Further it is possible to change shaders, the default shader configuration, to create new shaders and combine two of them to a new ShaderProgram.

##### <a class="anchor" id="bkmrk--117"></a>The Default Shader Configuration in SceneComposer

<div class="contents" id="bkmrk-node-vertex-shader-f"><div class="contents"><div class="textblock"><table border="1" cellpadding="5" cellspacing="0"><tbody><tr bgcolor="#d4d4d4"><th>**Node**</th><th>**Vertex Shader**</th><th>**Fragment Shader**</th></tr><tr><td valign="top">Billboard</td><td valign="top">RefTrans</td><td valign="top">RefTex</td></tr><tr><td valign="top">Mesh without texture</td><td valign="top">RefTransLight1</td><td valign="top">RefColor</td></tr><tr><td valign="top">Mesh with texture</td><td valign="top">RefTransLight1</td><td valign="top">RefColorTex</td></tr><tr><td valign="top">MorphingMesh without texture</td><td valign="top">RefTransLight1Morph</td><td valign="top">RefColor</td></tr><tr><td valign="top">MorphingMesh with texture</td><td valign="top">RefTransLight1Morph</td><td valign="top">RefColorTex</td></tr><tr><td valign="top">PointSprite</td><td valign="top">RefTransPointSprite</td><td valign="top">RefPointSprite</td></tr><tr><td valign="top">SkyBox</td><td valign="top">RefTransCubeMap</td><td valign="top">RefCubeMapTex</td></tr></tbody></table>

</div></div></div>#### **Appearance: Shader Parameter Setters** 

##### <a class="anchor" id="bkmrk--118"></a>Description

The [Candera::ShaderParamSetter](http://dev.doc.cgistudio.at/APILINK/class_candera_1_1_shader_param_setter.html "ShaderParamSetter maintains a list of uniform parameters that are passed to a Shader.") class is used to pass uniform parameters to a Shader program. The most relevant methods for this class are [Candera::ShaderParamSetter::SetUniform](http://dev.doc.cgistudio.at/APILINK/class_candera_1_1_shader_param_setter.html#a2e95acd899a8578d4c2e62425a257b0c) which creates a new uniform (see example below):

```
    shaderParamSetter->SetUniform(m_uniformName, Shader::Float, &m_uniformValue);
```

and the [Candera::ShaderParamSetter::Activate](http://dev.doc.cgistudio.at/APILINK/class_candera_1_1_shader_param_setter.html#a40f13a2080caf433d894e4f40b9e9468) which activates all the uniforms previously set by the SetUniform method in the Shader.

<div class="contents" id="bkmrk-in-a-class-derived-f"><div class="contents"><div class="textblock"><dl class="note"><dt></dt><dd><p class="callout info">In a class derived from ShaderParamSetter, the methods which calculates the auto-uniforms (e.g. ModelViewProjectionMatrix4), should be invoked in the Activate method.</p>

</dd></dl></div></div></div>##### <a class="anchor" id="bkmrk--119"></a>Generic Shader Param Setters

[Candera::GenericShaderParamSetter](http://dev.doc.cgistudio.at/APILINK/class_candera_1_1_generic_shader_param_setter.html "GenericShaderParamSetter bundles uniform shader parameters that are calculated by Candera...") is a class derived from [Candera::ShaderParamSetter](http://dev.doc.cgistudio.at/APILINK/class_candera_1_1_shader_param_setter.html "ShaderParamSetter maintains a list of uniform parameters that are passed to a Shader.") which bundles uniform shader parameters that are calculated by [Candera](http://dev.doc.cgistudio.at/APILINK/namespace_candera.html "[DataBinding_RefTypeSample]"). The class interface offers, for each of these parameters, a specialized method which enables / disables the parameter.

```
    shaderParamSetter->SetModelMatrix4Enabled(true);
    shaderParamSetter->SetModelMatrix3Enabled(true);
    shaderParamSetter->SetNormalModelMatrix3Enabled(true);
    shaderParamSetter->SetModelViewMatrix4Enabled(true);
    shaderParamSetter->SetModelViewMatrix3Enabled(true);
    shaderParamSetter->SetNormalModelViewMatrix3Enabled(true);
    shaderParamSetter->SetModelViewProjectionMatrix4Enabled(true);
    shaderParamSetter->SetCameraLookAtVectorEnabled(true);
    shaderParamSetter->SetCameraPositionEnabled(true);
    shaderParamSetter->SetLightActivationEnabled(true);
    shaderParamSetter->SetMaterialActivationEnabled(true);
    shaderParamSetter->SetTextureActivationEnabled(true);
    shaderParamSetter->SetLightsCoordinateSpace(Light::World);
```

If a parameter is enabled then it will be calculated and passed to the shader, if disabled the parameter is neither calculated nor passed.

##### <a class="anchor" id="bkmrk--120"></a>Default Parameters

Some often needed shader parameters are enabled by default:

<div class="contents" id="bkmrk-modelviewprojectionm"><div class="contents"><div class="textblock">- ModelViewProjectionMatrix4
- LightActivation
- MaterialActivation
- TextureActivation

</div></div></div>If needed, for performance reasons, those parameters might be disabled.

##### <a class="anchor" id="bkmrk--121"></a>Generic Param Setters in SceneComposer

In SceneComposer the generic parameter setters are accessible through the graphic interface in two ways:

<div class="contents" id="bkmrk-as-customizable-unif"><div class="contents"><div class="textblock">- as customizable uniform setter, from the Toolbox panel in the Attachments bar. Once added in the Appearance node list this uniform setter should be configured in the Properties panel by enabling the desired uniforms.
- as a predefined uniform setter, from the Templates panel in the UniformSetters list.

</div></div></div>SceneComposer provides the following predefined uniform setters:

<div class="contents" id="bkmrk-transanisotropicligh"><div class="contents"><div class="textblock">- TransAnisotropicLightShaderParamSetter
- TransLightBumpMapShaderParamSetter
- TransLightShaderParamSetter
- TransLightSphereMapShaderParamSetter
- TransShaderParamSetter

</div></div></div>The table below shows some examples of shaders that can be set by each of the predefined shader parameter setters:

<div class="contents" id="bkmrk-shader-param-setter-"><div class="contents"><div class="textblock"><table border="1" cellpadding="5" cellspacing="0"><tbody><tr bgcolor="#d4d4d4"><th>**Shader Param Setter**</th><th>**Shader Program**</th></tr><tr><td>TransAnisotropicLightShaderParamSetter</td><td>RefTransAnisotropicLight1\_RefAnisotropicLight1SpecularTex</td></tr><tr><td>TransLightBumpMapShaderParamSetter</td><td>RefTransLight1BumpMap\_RefLight1BumpMap</td></tr><tr><td>TransShaderParamSetter</td><td>RefTransLight1\_RefColor</td></tr><tr><td>TransLightSphereMapShaderParamSetter</td><td>RefTransLight1SphereMap\_RefColorTex</td></tr><tr><td>TransLightShaderParamSetter</td><td>RefTransWorldLight1\_RefColor</td></tr></tbody></table>

</div></div></div>Shader parameter setters can be applied to a 3D node by selecting it in the panel and then drag-and-drop it in the Appearance list of the node.

#### **Customized Shader Parameter Setter** 

##### <a class="anchor" id="bkmrk--122"></a>Customized Shader Parameter Setter - Example

If for any reason the standard shader parameter setters are not sufficient, it is possible to create a customized shader parameter setter. However, a custom shader parameter setter cannot be configured in SceneComposer, it must be associated to the desired node by coding.

The following example explains how to create and use a customized shader parameter setter in a widget. Refer to the

<div class="contents" id="bkmrk-shaderparamsetterwid"><div class="contents"><div class="textblock">- *ShaderParamSetterWidget* in combination with the
- *ShaderParamSetterSolution*,   
    both present in the *cgi\_studio\_player* folder.

</div></div></div>The widget *ShaderParamSetterWidget* allows to set the u\_Material.emissive and the u\_MVPMatrix uniform parameters for any node using an appropriate shader program (for example, the nodes in the ShaderParamSetterSolution are using the **RefTransLight1\_RefColor** shader program).

##### <a class="anchor" id="bkmrk--123"></a>Simple Shader Parameter Setter for u\_Material.emissive &amp; u\_MVPMatrix Uniforms

In order to pass the u\_Material.emissive and u\_MVPMatrix uniforms to a shader program, the widget uses an instance of the class *SimpleShaderParameterSetter*:

```
    // Create uniform setter instance
    // m_shaderParamSetter is of type SharedPointer<SimpleShaderParamSetter> ;
    m_shaderParamSetter = <a class="code" href="http://dev.doc.cgistudio.at/APILINK/group___c_o_u_r_i_e_r___v_i_s_u_a_l_i_z_a_t_i_o_n.html#ggaf0e93dc4242f607c3c8d13dafd036af9aaabfa5309af24986d3111a092449f857">SimpleShaderParamSetter::Create</a>();
    // end Create uniform setter instance
```

The only method that needs to be overridden in the SimpleShaderParameterSetter is [Candera::ShaderParamSetter::Activate](http://dev.doc.cgistudio.at/APILINK/class_candera_1_1_shader_param_setter.html#a40f13a2080caf433d894e4f40b9e9468).

The example *ShaderParamSetterWidget* uses this SimpleShaderParameterSetter by attaching the created instance to the node, which is associated to the widget:

```
    // Attach uniform setter
    if ( (GetNode() != 0) && (GetNode()->GetAppearance() != 0) ) {
        GetNode()->GetAppearance()->SetShaderParamSetter(m_shaderParamSetter);
    }
    // end Attach uniform setter
```

Whenever the widget property "Uniform Color" is modified, the widget sets the given color value (m\_color) as u\_Material.emissive uniform to the SimpleShaderParameterSetter:

```
    // Set u_Material.emissive uniform
    FEATSTD_UNUSED(m_shaderParamSetter->SetUniform(ShaderParamNames::GetUniformName(ShaderParamNames::MaterialEmissive), Shader::FloatVec4, reinterpret_cast<Float*>(&m_shaderColor[0]), 1));
    // end Set u_Material.emissive uniform
```

The node vertices are mapped from the model space to the screen space using the Model-View-Projection Matrix (u\_MVPMatrix). SimpleShaderParameterSetter calculates the u\_MVPMatrix using the node and camera attributes and then passes it to the shader:

```
    // Set u_MVPMatrix uniform
    const Matrix4 mvpMatrix = node.GetWorldTransform() * RenderDevice::GetActiveCamera()->GetViewProjectionMatrix();
    return shader.SetUniform( mvpMatrix.GetData(), ShaderParamNames::GetUniformName(ShaderParamNames::ModelViewProjectionMatrix4), Shader::FloatMat4 );
    // end Set u_MVPMatrix uniform
```

Modifications made using the SetUniform method become effective each time the camera renders the scene because the method Activate is invoked internally by the node.

#### **Multipass Appearance** 

##### <a class="anchor" id="bkmrk--124"></a>Description

A [Candera::MultiPassAppearance](http://dev.doc.cgistudio.at/APILINK/class_candera_1_1_multi_pass_appearance.html "A MultiPassAppearance enables a node to be rendered multiple times with different appearance settings...") is a dedicated Appearance which enables a node to be rendered multiple times with different appearance settings which are blended in order to achieve a certain visual result like e.g. fur or blurred rendering.

The sequence of render passes is created by chaining instances of MultiPassAppearance using the SetNextPass method:

```
    multiPassAppearance1->SetNextPass(multiPassAppearance2);
    multiPassAppearance2->SetNextPass(multiPassAppearance3);
```

# 3D Scene Graph Dynamics

#### <a class="anchor" id="bkmrk--125"></a>Description

Usually all required nodes are already specified and preconfigured via SceneComposer, so in most cases it won't be necessary to make any adaptations within the scene graph loaded from an asset at runtime.

However, some use cases might require such adaptations. This tutorial covers the most common means to manipulate the scene graph structure dynamically.

#### <a class="anchor" id="bkmrk--127"></a>Example Solution

<div class="contents" id="bkmrk-scenegraphdynamicsso"><div class="textblock">- SceneGraphDynamicsSolution\_3D in folder *cgi\_studio\_player/content/Tutorials/03\_SceneGraphAndNodes*

</div></div>#### **Adding and Removing 3D Nodes** 

##### <a class="anchor" id="bkmrk--128"></a>3D Scene Graph Dynamics Example

For creating and adding a new node, the following can be used:

<div class="contents" id="bkmrk-scenegraphdynamicsso-0"><div class="contents"><div class="textblock">- **SceneGraphDynamicsSolution\_3D** from folder *cgi\_studio\_player/content/Tutorials/03\_SceneGraphAndNodes*
- **SceneGraphDynamicsWidget\_3D** (this is used in the example solution - refer to SceneGraphDynamicsWidget\_3D)

</div></div></div>As an example use case, a [Candera::Billboard](http://dev.doc.cgistudio.at/APILINK/class_candera_1_1_billboard.html "The class Billboard represents a Plane that can align towards camera automatically, according to the alignment type set. Thus, Billboards are quite often used as "imposters" pretending to be a 3D geometry by showing a 2D image that is always facing the camera. In order to relief distinction between Billboard and PointSprite see following comparison: + Billboards support rectangular dimension and non-uniform scale, + Billboards support different rotation techniques (see Alignment), whereas PointSprites are aligned according to CenterEyeAlignment, exclusively. + Billboards take local rotation and scale into account (see class Transformable), whereas PointSprites ignore Transformable parameters others than position. + PointSprites have a performance advantage due to less geometry (one instead of 4 vertices). Overall recommendation: Use PointSprites for spherical shapes like particles, lens flares, sparkles, dust which are screen aligned (see Billboard::CameraUpAlignment). Further, use Billboards for world up oriented clouds, text, or yaw axis aligned trees, and signs, etc. Note: The Billboard - because of absent normals - does not support lighting. Belows sketch depicts the layout of a Billboard. W U:0,V:1 +-----+ U:1,V:1 H | X | Legend: texture coordinates: U,V; Width: W, Height: H, Local Center: X U:0,V:0 +-----+ U:1,V:0.") can be created, added and removed. Use the SceneGraphDynamicsWidget\_3D properties described below:

<div class="contents" id="bkmrk-addbillboard%3A-if-add"><div class="contents"><div class="contents"><div class="textblock">- **AddBillboard**: If AddBillboard is enabled a new Billboard is created and added to the widget node. If disabled, the Billboard will be removed.

<div class="fragment">  
</div></div></div></div></div>```
        // Definition of WidgetProperty "AddBillboard"
        CdaProperty(AddBillboard, bool, GetAddBillboard, SetAddBillboard)
            CdaDescription("If AddBillboard is enabled a new Billboard is created and added to the widget Candera::Node. If disabled, the Billboard will be removed.")
        <a class="code" href="http://dev.doc.cgistudio.at/APILINK/group___meta_info.html#ga119bef57449bd05d8b3c40d7d514e375">CdaPropertyEnd</a>()
        // End Definition of WidgetProperty "AddBillboard"
```

##### <a class="anchor" id="bkmrk--129"></a>Creating a new Billboard

The following code snippet generates a basic [Candera::Billboard](http://dev.doc.cgistudio.at/APILINK/class_candera_1_1_billboard.html "The class Billboard represents a Plane that can align towards camera automatically, according to the alignment type set. Thus, Billboards are quite often used as "imposters" pretending to be a 3D geometry by showing a 2D image that is always facing the camera. In order to relief distinction between Billboard and PointSprite see following comparison: + Billboards support rectangular dimension and non-uniform scale, + Billboards support different rotation techniques (see Alignment), whereas PointSprites are aligned according to CenterEyeAlignment, exclusively. + Billboards take local rotation and scale into account (see class Transformable), whereas PointSprites ignore Transformable parameters others than position. + PointSprites have a performance advantage due to less geometry (one instead of 4 vertices). Overall recommendation: Use PointSprites for spherical shapes like particles, lens flares, sparkles, dust which are screen aligned (see Billboard::CameraUpAlignment). Further, use Billboards for world up oriented clouds, text, or yaw axis aligned trees, and signs, etc. Note: The Billboard - because of absent normals - does not support lighting. Belows sketch depicts the layout of a Billboard. W U:0,V:1 +-----+ U:1,V:1 H | X | Legend: texture coordinates: U,V; Width: W, Height: H, Local Center: X U:0,V:0 +-----+ U:1,V:0.") (size 30 x 30) with a [Candera::Material](http://dev.doc.cgistudio.at/APILINK/class_candera_1_1_material.html "The class Material describes the color attributes of an object's surface and is primarily used for li...") and a matching [Candera::Shader](http://dev.doc.cgistudio.at/APILINK/class_candera_1_1_shader.html "The class Shader is an Appearance component representing a graphical processing unit (GPU) program..."). The Shader has to be provided in the asset and is delivered through the AssetProvider by its name. Further, some translation is applied to the new Billboard.

```
        // Create and init a new Billboard

        SharedPointer<Appearance> myAppearance = <a class="code" href="http://dev.doc.cgistudio.at/APILINK/group___c_o_u_r_i_e_r___v_i_s_u_a_l_i_z_a_t_i_o_n.html#ggaf0e93dc4242f607c3c8d13dafd036af9aaabfa5309af24986d3111a092449f857">Appearance::Create</a>();
        SharedPointer<Material> myMaterial = <a class="code" href="http://dev.doc.cgistudio.at/APILINK/group___c_o_u_r_i_e_r___v_i_s_u_a_l_i_z_a_t_i_o_n.html#ggaf0e93dc4242f607c3c8d13dafd036af9aaabfa5309af24986d3111a092449f857">Material::Create</a>();
        myMaterial->SetEmissive(<a class="code" href="http://dev.doc.cgistudio.at/APILINK/group___behaviors_control.html#ggae7abc816df647d0ecbc280480fefb788a6d1d4da086e381cb2c5a5ce6a2513ebd">Color</a>(0.5F, 0.0F, 0.0F, 1.0F));
        myAppearance->SetMaterial(myMaterial);
        myAppearance->SetShader(Base::GetAssetProvider()->GetShader(CgiAssetNames::RefTransLight1_RefColor));
        myAppearance->SetName("Generated Appearance");

        m_billboard = <a class="code" href="http://dev.doc.cgistudio.at/APILINK/group___c_o_u_r_i_e_r___v_i_s_u_a_l_i_z_a_t_i_o_n.html#ggaf0e93dc4242f607c3c8d13dafd036af9aaabfa5309af24986d3111a092449f857">Billboard::Create</a>(30.0F, 30.0F);
        m_billboard->SetAppearance(myAppearance);
        m_billboard->Translate(Vector3(30.0F, 0.0F, 0.0F));

        // end Create and init a new Billboard
```

##### <a class="anchor" id="bkmrk--130"></a>Adding the new Billboard to the scene graph

Next the Billboard is uploaded to VRAM and appended to the node associated with the widget.

```
        // Add Billboard

        static_cast<void>(m_billboard->Upload());
        static_cast<void>(node->AddChild(m_billboard));

        // end Add Billboard
```

##### <a class="anchor" id="bkmrk--131"></a>Removing and destructing the Billboard

To remove the Billboard simply from the scene graph, use [Candera::Node::RemoveChild](http://dev.doc.cgistudio.at/APILINK/class_candera_1_1_node.html#a7748ed9b2f0e87acebf7de84b78b4095). If the Billboard will be used for further operations e.g. attaching it to an other node removing would be enough. Since in this example the Billboard isn't used further it should not only be removed but also be destructed completely (freeing the resources).

The following code snippet removes the previously generated billboard from its parents, unloads the Billboard from VRAM and frees with [Candera::Node::Dispose](http://dev.doc.cgistudio.at/APILINK/class_candera_1_1_node.html#a4dd4cc45a36bfb6b461d6a8af096e650) the resources.

```
        // Remove previously generated billboard and destruct it

        Node* parent = m_billboard->GetParent();
        if (parent != 0){
            static_cast<void>(parent->RemoveChild(m_billboard));
            FEATSTD_LOG_ERROR("- Node %s removed from parent %s ...\n", m_billboard->GetName(), parent->GetName());
        }
        // Destruct node

        static_cast<void>(m_billboard->Unload());
        m_billboard->Dispose();
        m_billboard = 0;

        // end Destruct node

        // end Remove previously generated billboard and destruct it
```

As [Candera::Node::Dispose](http://dev.doc.cgistudio.at/APILINK/class_candera_1_1_node.html#a4dd4cc45a36bfb6b461d6a8af096e650) internally calls the [Candera::Node::RemoveChild](http://dev.doc.cgistudio.at/APILINK/class_candera_1_1_node.html#a7748ed9b2f0e87acebf7de84b78b4095) on parent node following code would be enough for removing and destructing a node.

```
        // Destruct node

        static_cast<void>(m_billboard->Unload());
        m_billboard->Dispose();
        m_billboard = 0;

        // end Destruct node
```

<p class="callout info">In SceneComposer the newly added Node does not appear in the Scene Tree view because it is only added dynamically by the widget.  
- The used Shader for the generated Billboard in the widget has to be included when generating an asset from the solution - ensure that "Always include in asset" flag is marked at the Shaders properties.  
- The widget must control memory and VRAM management of its internal dynamic subtree autonomously.</p>

##### <a class="anchor" id="bkmrk--132"></a>Widget Interaction in the Player

First, the asset must be exported and loaded in the Player. Then, one of the two existing *SceneGraphDynamicsWidget\_3D* widgets must be selected for the 3D scene. After, **ChangeAppearance**, **CloneOperation** and **AddBillboard** properties can be enabled/disabled (1/0) to obtain different results.

#### **Changing Appearance and other 3D Node Attachments** 

For changing the appearance of a node, the following property of the SceneGraphDynamicsWidget\_3D can be used:

<div class="contents" id="bkmrk-changeappearance%3A-if"><div class="contents"><div class="contents"><div class="textblock">- **ChangeAppearance**: If ChangeAppearance is enabled, the appearance of the widgets associated node will be changed to a new generated appearance. If disabled, the previous appearance will be restored.

<div class="fragment">  
</div></div></div></div></div>```
        // Definition of WidgetProperty "ChangeAppearance"
        CdaProperty(ChangeAppearance, bool, GetChangeAppearance, SetChangeAppearance)
            CdaDescription("If ChangeAppearance is enabled, the appearance will be exchanged to a new generated appearance. If disabled, the previus appearance will be restored.")
        <a class="code" href="http://dev.doc.cgistudio.at/APILINK/group___meta_info.html#ga119bef57449bd05d8b3c40d7d514e375">CdaPropertyEnd</a>()
        // End Definition of WidgetProperty "ChangeAppearance"
```

Try the ChangeAppearance property at the SceneGraphDynamics\_3D\_Billboard widget in the example solution to change the Billboards appearance from a texture appearance to a material appearance.

##### <a class="anchor" id="bkmrk--133"></a>Creating and changing an Appearance

The following code snippet generates a basic [Candera::Appearance](http://dev.doc.cgistudio.at/APILINK/class_candera_1_1_appearance.html "The class Appearance groups following render attributes: Material, Textures, RenderMode, and Shader. Render attributes define the distinctive visualization of a geometry like Mesh, Billboard, and PointSprite. Further, render attributes can be shared across multiple objects, which conserves memory and enables sharing of appearance characteristics. An Appearance object is mandatory for any object in order to get rendered. Per default all render attributes are initialized to null, which is a valid setting. If the Appearance is activated, all render attributes that are set become activated. If no RenderMode is defined (null), then the default RenderMode is used instead;."). A [Candera::Material](http://dev.doc.cgistudio.at/APILINK/class_candera_1_1_material.html "The class Material describes the color attributes of an object's surface and is primarily used for li...") is created and its emissive color is set to a light green. The material and a proper shader is set to the Appearance. The shader has to be provided in the asset and is delivered through the AssetProvider by its name.

```
    // Create and set a new Appearance

    SharedPointer<Appearance> myAppearance = <a class="code" href="http://dev.doc.cgistudio.at/APILINK/group___c_o_u_r_i_e_r___v_i_s_u_a_l_i_z_a_t_i_o_n.html#ggaf0e93dc4242f607c3c8d13dafd036af9aaabfa5309af24986d3111a092449f857">Appearance::Create</a>();
    myAppearance->SetMaterial(<a class="code" href="http://dev.doc.cgistudio.at/APILINK/group___c_o_u_r_i_e_r___v_i_s_u_a_l_i_z_a_t_i_o_n.html#ggaf0e93dc4242f607c3c8d13dafd036af9aaabfa5309af24986d3111a092449f857">Material::Create</a>());
    myAppearance->GetMaterial()->SetEmissive(<a class="code" href="http://dev.doc.cgistudio.at/APILINK/group___behaviors_control.html#ggae7abc816df647d0ecbc280480fefb788a6d1d4da086e381cb2c5a5ce6a2513ebd">Color</a>(0.0F, 0.5F, 0.0F, 1.0F));
    myAppearance->SetShader(Base::GetAssetProvider()->GetShader(CgiAssetNames::RefTransLight1_RefColor));
    myAppearance->SetName("Generated Appearance");

    // end Create and set new Appearance
```

In the next step the node's previous Appearance is saved (for restoring purpose) and the new generated appearance is set to the node associated with the widget.

```
    // Change Appearance

    m_previousAppearance = node->GetAppearance();
    node->SetAppearance(myAppearance);
    static_cast<void>(myAppearance->Upload());

    // end Change Appearance
```

##### <a class="anchor" id="bkmrk--134"></a>Restoring / releasing an Appearance

Restore the previous Appearance and destruct the dynamically generated appearance.

```
        // Restoring appearance and destructing

        SharedPointer<Appearance> currentAppearance = node->GetAppearance();
        static_cast<void>(currentAppearance->Unload());
        currentAppearance.Release();
        node->SetAppearance(m_previousAppearance);

        // end Restoring appearance and destructing
```

<p class="callout info">In SceneComposer the changed Appearance does not appear in the Appearance panel because it is only changed dynamically by the widget.  
- The used shader for the generated Billboard in the widget has to be included when generating an asset from the solution - ensure that "Always include in asset" flag is marked at the Shaders properties.  
- The widget must control memory and VRAM management of dynamically created node attachments autonomously.</p>

#### **Cloning 3D Nodes** 

For cloning a node, the following property of the SceneGraphDynamicsWidget\_3D can be used:

<div class="contents" id="bkmrk-nodetoclone%3A-select-"><div class="contents"><div class="contents"><div class="textblock">- **NodeToClone**: Select an arbitrary node in the scene graph, which shall be cloned and added to the widget node

<div class="fragment">  
</div></div></div></div></div>```
        // Definition of WidgetProperty "NodeToClone"
        CdaProperty(NodeToClone, <a class="code" href="http://dev.doc.cgistudio.at/APILINK/class_candera_1_1_node.html" title="The class Node is an abstract base class for all scene graph nodes. Each Node defines a local coordin...">Candera::Node</a>*, GetNodeToClone, SetNodeToClone)
            CdaDescription("Select a Candera::Node which shall be cloned and added to the widget Candera::Node. The Candera::Node must be a child of this widget's scene.")
        <a class="code" href="http://dev.doc.cgistudio.at/APILINK/group___meta_info.html#ga119bef57449bd05d8b3c40d7d514e375">CdaPropertyEnd</a>()
        // End Definition of WidgetProperty "NodeToClone"
```

<div class="contents" id="bkmrk-cloneoperation%3A-if-e"><div class="contents"><div class="contents"><div class="textblock">- **CloneOperation**: If enabled, the clone operation will be executed and the cloned node will be added to the widget node.

<div class="fragment">  
</div></div></div></div></div>```
        // Definition of WidgetProperty "CloneOperation"
        CdaProperty(CloneOperation, bool, GetCloneOperation, SetCloneOperation)
            CdaDescription("If CloneOperation is enabled, the Candera::Node to clone will be cloned and added to the widget Candera::Node. If disabled, the clone will be removed.")
        <a class="code" href="http://dev.doc.cgistudio.at/APILINK/group___meta_info.html#ga119bef57449bd05d8b3c40d7d514e375">CdaPropertyEnd</a>()
        // End Definition of WidgetProperty "CloneOperation"
```

For the cloning operation, refer to [Candera::Node::Clone](http://dev.doc.cgistudio.at/APILINK/class_candera_1_1_node.html#a0c1909b131003514664878e065f7802b). The following code snippets illustrate, what the SceneGraphDynamicsWidget\_3D is actually doing for cloning a node and destructing it again.

##### <a class="anchor" id="bkmrk--135"></a>Validating Node to Clone

This example should allow to clone nodes, which are part of the scene graph the widget is linked to. The scene graph can be traversed from a given node up to its actual top level scene node to check whether it is part of the scene graph.

```
    // Search the parent scene of a given node

    Node* currentNode = node;

    while (currentNode != 0) {
        if (currentNode->IsTypeOf(Scene::GetTypeId())) {
            return static_cast<Scene*>(currentNode);
        }
        currentNode = currentNode->GetParent();
    }
    return 0;

    // end Search the parent scene of a given node
```

##### <a class="anchor" id="bkmrk--136"></a>Creating and Adding Clone

If the widget node and the node to clone have same top level scene, the node can be cloned and added to the widget node according to the following code snippet.

```
        // Clone the node and add it to the widgets associated node

        m_clonedNode = <a class="code" href="http://dev.doc.cgistudio.at/APILINK/group___cloning3_d.html#gaf1781cbf2a3e09d5d24d63bdf3685145" title="Specialization of TreeClonerBase for use with Node.">TreeCloner</a>().CreateClone(*m_nodeToClone);
        static_cast<void>(node->AddChild(m_clonedNode));
        static_cast<void>(m_clonedNode->UploadAll());
        m_clonedNode->SetName("Clone");

        // end Clone the node and add it to the widgets associated node
```

<div class="contents" id="bkmrk-nodes-can-be-attache"><div class="contents"><div class="textblock"><dl class="note"><dd><p class="callout info">Nodes can be attached to any 3D node.</p>

</dd></dl></div></div></div>##### <a class="anchor" id="bkmrk--137"></a>TreeCloner and Cloning Strategies

For more complex cloning see [Candera::TreeCloner](http://dev.doc.cgistudio.at/APILINK/group___cloning3_d.html#gaf1781cbf2a3e09d5d24d63bdf3685145 "Specialization of TreeClonerBase for use with Node.") and [Candera::TreeCloneStrategy](http://dev.doc.cgistudio.at/APILINK/class_candera_1_1_tree_clone_strategy.html "This is an interface for strategies used during cloning by TreeCloner."). [Candera::TreeClonerBase](http://dev.doc.cgistudio.at/APILINK/class_candera_1_1_tree_cloner_base.html "This class clones scene subtrees.") is provided for cloning trees.

<div class="contents" id="bkmrk-the-default-clone-st"><div class="contents"><div class="textblock">- The default clone strategy is to call the Clone interface on each node, and build the clone tree with the same node pattern as the original tree.
- For deeper cloning, TreeClonerBase supports attaching a [Candera::TreeCloneStrategy](http://dev.doc.cgistudio.at/APILINK/class_candera_1_1_tree_clone_strategy.html "This is an interface for strategies used during cloning by TreeCloner."). This TreeCloneStrategy is typically aware of different types of nodes, and delegates to other strategies.

</div></div></div>##### <a class="anchor" id="bkmrk--138"></a>Removing and Destructing Clone

Analogous to <span style="color: rgb(230, 126, 35);">[Removing and destructing the Billboard](https://doc316en.candera.eu/link/449#bkmrk-removing-and-destruc)</span> (removing/destructing a 3D node) the cloned node is destructed.

```
        // Remove a previously cloned node

        static_cast<void>(m_clonedNode->UnloadAll());
        m_clonedNode->Dispose();
        m_clonedNode = 0;

        // end Remove a previously cloned node
```

<div class="contents" id="bkmrk--17"><div class="textblock"><dl class="note"></dl>  
</div></div><p class="callout info">In SceneComposer the newly added node clone does not appear in the Scene Tree view because it is only added dynamically by the widget.  
- It is not allowed to modify the scene graph maintained by SceneComposer outside of the subtree owned by the widget!  
- The widget must control memory and VRAM management of its internal dynamic subtree autonomously.</p>

# 3D Render Order

#### <a class="anchor" id="bkmrk--139"></a>Description

There are various reasons why sorting of objects to render is required:

<div class="contents" id="bkmrk-transparency%3A-transp"><div class="contents"><div class="textblock">- **Transparency**: Transparent objects must be rendered from back to front, while opaque objects must be rendered from front to back.
- **Performance**: Front to back order or advanced techniques like state sorting provide the best performance
- **Other**: Custom rank, Skybox, other background geometry, dialogs, pop-ups, etc.

</div></div></div>#### **Render Order: Involved Classes** 

##### <a class="anchor" id="bkmrk--141"></a>Involved Render Order Classes

<div class="contents" id="bkmrk-candera%3A%3Arenderorder"><div class="textblock"><table class="doxtable" style="width: 100%;"><tbody><tr><td style="width: 24.4582%;" valign="top">[Candera::RenderOrder](http://dev.doc.cgistudio.at/APILINK/class_candera_1_1_render_order.html "Defines the order(sequence) in which nodes are rendered. Collaborates with Renderer. Must cover functional correctness (translucent/transparent objects after opaque/solid objects) as well as optimization-related orderings (sorting by state, defining a background bin for rendering without depth checks). Nodes are assigned to bins; all nodes in an "earlier" bin are rendered before all nodes in a "later" bin. Two default bins are defined and must not be deleted. The opaque bin, which is sorted from front to back (DistanceToCameraOrderCriterion), and the transparent bin, which is sorted from back to front (ReverseDistanceToCameraOrderCriterion). If a Node has no specific assignment to a render order bin, it will be automatically assigned by Candera either to opaque or transparent bin, according to its RenderMode::IsAlphaBlendingEnabled setting.")</td><td style="width: 75.5006%;" valign="top">Defines the sequence of nodes to render per scene and camera.  
Sorting is done according to following criteria:

1. Rank of render order bins: [Candera::RenderOrder::SetBinRank](http://dev.doc.cgistudio.at/APILINK/class_candera_1_1_render_order.html#ac5eef4f1c2868e99327595988dade0c9).
2. Sorting of Nodes within bin (see below).

Default bins are 'opaque' and 'transparent'. If no assignment is set, nodes are automatically assigned to opaque or transparent, according to the Node's transparency settings (RenderMode state).

</td></tr><tr><td style="width: 24.4582%;" valign="top">Candera::RenderOrderBin</td><td style="width: 75.5006%;" valign="top">RenderOrder maintains a set of RenderOrderBins. A bin - Contains nodes that have rendering enabled
- Candera::RenderOrderBin::SetOrderCriterion: Sorts nodes according to applied [Candera::OrderCriterion](http://dev.doc.cgistudio.at/APILINK/class_candera_1_1_order_criterion.html "Abstract class OrderCriterion defines an interface that compares two Nodes according to a specific so...")
- Candera::RenderOrderBin::SetRank: defines sequence of bin within render order
- Distinction between camera dependent and camera independent bins

</td></tr><tr><td style="width: 24.4582%;" valign="top">[Candera::OrderCriterion](http://dev.doc.cgistudio.at/APILINK/class_candera_1_1_order_criterion.html "Abstract class OrderCriterion defines an interface that compares two Nodes according to a specific so...")</td><td style="width: 75.5006%;" valign="top">Nodes within a bin are sorted according to an OrderCriterion.   
Predefined for **camera dependent bins:**

- [Candera::DistanceToCameraOrderCriterion](http://dev.doc.cgistudio.at/APILINK/class_candera_1_1_distance_to_camera_order_criterion.html "class DistanceToCameraOrderCriterion compares two Node's distances to the camera. A render order bin ...") (sorting from front to back for opaque bin)
- [Candera::ReverseDistanceToCameraOrderCriterion](http://dev.doc.cgistudio.at/APILINK/class_candera_1_1_reverse_distance_to_camera_order_criterion.html "class ReverseDistanceToCameraOrderCriterion compares two Node's distances to the camera. A render order bin using ReverseDistanceToCameraOrderCriterion can sort its Nodes from "Back to Front" according to selected distance function. (") (sorting from back to front for transparent bin)

Predefined for **camera independent bins, sorted by explicit rank values:**

- [Candera::RankOrderCriterion](http://dev.doc.cgistudio.at/APILINK/class_candera_1_1_rank_order_criterion.html "class RankOrderCriterion compares two Node's render order ranks, whereas lower render order rank is b...") (lower render order rank is before higher render order rank.)
- [Candera::ReverseRankOrderCriterion](http://dev.doc.cgistudio.at/APILINK/class_candera_1_1_reverse_rank_order_criterion.html "class ReverseRankOrderCriterion compares two Node's render order ranks, whereas higher render order r...") (higher render order rank is before lower render order rank)
- [Candera::RenderStateOrderCriterion](http://dev.doc.cgistudio.at/APILINK/class_candera_1_1_render_state_order_criterion.html) (takes in consideration the Node's Shader, Texture and RenderMode, whose changes are considered the most expensive)

</td></tr><tr><td style="width: 24.4582%;" valign="top">[Candera::Node](http://dev.doc.cgistudio.at/APILINK/class_candera_1_1_node.html "The class Node is an abstract base class for all scene graph nodes. Each Node defines a local coordin...")</td><td style="width: 75.5006%;" valign="top">A node must be assigned to a bin, and if this bin is sorted by rank, the node must also specify it's rank inside the bin. - [Candera::Node::SetRenderOrderBinAssignment](http://dev.doc.cgistudio.at/APILINK/class_candera_1_1_node.html#a1b5049fe6c069246a3d6632217600025): Defines bin assignment. If not set, then auto assignment is processed: Opaque or transparent, according to Node's RenderMode state
- [Candera::Node::SetRenderOrderRank](http://dev.doc.cgistudio.at/APILINK/class_candera_1_1_node.html#ac5a79fc4766b96fc638cef6ee0073794): Defines render order rank that is utilized if the bin assigned to is sorted by rank

</td></tr><tr><td style="width: 24.4582%;" valign="top">[Candera::Scene](http://dev.doc.cgistudio.at/APILINK/class_candera_1_1_scene.html "The class Scene represents a top level scene graph node. Multiple Scenes are allowed. A Scene can not be part of any other Scene. To render a Scene, at least one Camera must be part of this Scene and the Camera must have rendering enabled. A Scene can have more than one Camera. Note: Lights added to a Scene apply for that Scene only and do not affect 3D objects in any other Scene.")</td><td style="width: 75.5006%;" valign="top">Candera::Scene::SetRenderOrder: One RenderOrder is exactly assigned to one Scene.</td></tr><tr><td style="width: 24.4582%;" valign="top">[Candera::Renderer](http://dev.doc.cgistudio.at/APILINK/class_candera_1_1_renderer.html "The class Renderer represents the unique Candera render interface to the application. Each render call an base of Candera shall be triggered via the Renderer interface.")</td><td style="width: 75.5006%;" valign="top">Uses RenderOrder to render Nodes according to its defined sequence.</td></tr></tbody></table>

</div></div>#### **Default Render Order: Sorting by Distance to Camera** 

##### <a class="anchor" id="bkmrk--142"></a>Default Render Order

By default, all objects part of a scene are automatically sorted by [Candera](http://dev.doc.cgistudio.at/APILINK/namespace_candera.html "[DataBinding_RefTypeSample]") according to their render attributes into two predefined render order bins:

<div class="contents" id="bkmrk-opaque-bin%3A-opaque-o"><div class="contents"><div class="textblock">- **Opaque bin**: Opaque objects are rendered using [Candera::DistanceToCameraOrderCriterion](http://dev.doc.cgistudio.at/APILINK/class_candera_1_1_distance_to_camera_order_criterion.html "class DistanceToCameraOrderCriterion compares two Node's distances to the camera. A render order bin ...")
- **Transparent bin**: Transparent objects are rendered using [Candera::ReverseDistanceToCameraOrderCriterion](http://dev.doc.cgistudio.at/APILINK/class_candera_1_1_reverse_distance_to_camera_order_criterion.html "class ReverseDistanceToCameraOrderCriterion compares two Node's distances to the camera. A render order bin using ReverseDistanceToCameraOrderCriterion can sort its Nodes from "Back to Front" according to selected distance function. (")

</div></div></div>Both default bins are protected, which means that they are under control of [Candera](http://dev.doc.cgistudio.at/APILINK/namespace_candera.html "[DataBinding_RefTypeSample]") and cannot be deleted.

##### <a class="anchor" id="bkmrk--143"></a>Predefined Render Order in SceneComposer

In SceneComposer, each 3D scene gets the predefined render order bins assigned by default:

<div drawio-diagram="1967"><img src="https://doc316en.candera.eu/uploads/images/drawio/2023-02/drawing-4-1676882062.png" alt=""/></div>

<div class="contents" id="bkmrk--19"><div class="contents"><div class="textblock">  
</div></div></div>##### <a class="anchor" id="bkmrk--145"></a>Predefined Render Order in Candera

To apply the default behaviour with auto-assignment of transparent and opaque objects via [Candera](http://dev.doc.cgistudio.at/APILINK/namespace_candera.html "[DataBinding_RefTypeSample]") API, refer to following example:

```
// Create default render order with 2 default bins and max. number of 10 nodes each (opaque and transparent bin).
// Default rank for opaque bin is 10 and transparent bin is 20
static RenderOrder* renderOrder = <a class="code" href="http://dev.doc.cgistudio.at/APILINK/group___c_o_u_r_i_e_r___v_i_s_u_a_l_i_z_a_t_i_o_n.html#ggaf0e93dc4242f607c3c8d13dafd036af9aaabfa5309af24986d3111a092449f857">RenderOrder::Create</a>(10, 10);
// Assign render order to scene.
m_scene->SetRenderOrder(&renderOrder);
```

#### **Fixed Render Order** 

To customize the default render order with a fixed render order, scene nodes must be assigned to custom render order bins sorted by explicit rank values.

<div class="contents" id="bkmrk-using-candera%3A%3Aranko"><div class="contents"><div class="textblock">- Using [Candera::RankOrderCriterion](http://dev.doc.cgistudio.at/APILINK/class_candera_1_1_rank_order_criterion.html "class RankOrderCriterion compares two Node's render order ranks, whereas lower render order rank is b..."), the scene will be rendered so that lower render order rank is before higher render order rank.
- When using [Candera::ReverseRankOrderCriterion](http://dev.doc.cgistudio.at/APILINK/class_candera_1_1_reverse_rank_order_criterion.html "class ReverseRankOrderCriterion compares two Node's render order ranks, whereas higher render order r..."), higher render order rank is before lower render order rank.

</div></div></div>##### <a class="anchor" id="bkmrk--146"></a>Code Example: Fixed Render Order

As an example, create a render order with 3 bins and max. number of 10 nodes for O&amp;T bin:

```
static RenderOrder renderOrder(3, 10, 10);
m_scene->SetRenderOrder(&renderOrder);
```

Create new render order bin with name "UserBin", rank "30", max. Number of 10 nodes:

```
renderOrder.CreateBin("UserBin", 30, 10);
```

Create dedicated order criterion which sorts nodes by its render order rank:

```
static RankOrderCriterion userCriterion;
```

Assign order criterion to UserBin:

```
renderOrder.SetBinOrderCriterion("UserBin", &userCriterion);
```

Assign nodes to dedicated bins:

```
m_mesh1->SetRenderOrderBinAssignment("UserBin");
m_mesh2->SetRenderOrderBinAssignment("UserBin");
```

Set dedicated render order rank for nodes:

```
m_mesh1->SetRenderOrderRank(2);
m_mesh2->SetRenderOrderRank(1);
```

#### **Performance Optimized Render Order**   


[Candera::RenderStateOrderCriterion](http://dev.doc.cgistudio.at/APILINK/class_candera_1_1_render_state_order_criterion.html) implements a proof of concept OrderCriterion used for batching nodes to minimize render state changes. It takes into consideration the nodes shader, texture and render mode, whose changes are considered the most expensive.

<div class="contents" id="bkmrk-after-sorting-all-th"><div class="contents"><div class="textblock">- After sorting all the nodes using the [Candera::OrderCriterionValue](http://dev.doc.cgistudio.at/APILINK/class_candera_1_1_order_criterion_value.html "OrderCriterionValue class encapsulates a 32bit Float or Int value."), rendering is done in batches of nodes with the same shader.
- Inside a batch of nodes with the same shader, the rendering will be done in batches of nodes with the same texture.
- Inside a batch of nodes with the same shader and texture, the rendering will be done in batches of nodes with the same blending enabled value.

</div></div></div>The batching continues until the least expensive state change (CullingMode).

<p class="callout info">- Usage of Candera::RenderStateOrderCriterion does not guarantee best batching algorithm, which should be implemented after benchmarking the target render device's state change costs.  
- RenderStateOrderCriterion groups the nodes only by their first appearance and texture. Nodes with multi-pass rendering (MultiPassAppearance), or with multiple texture units, most probably will break the batches and cancel some performance gains.  
- CANDERA\_RENDER\_STATE\_CACHING\_ENABLED should be defined to use Candera's render state caching mechanism.</p>

# Searching for Nodes with SearchTreeTraverser

#### <a class="anchor" id="bkmrk--147"></a>Searching for Nodes

With [Candera::SearchTreeTraverser](http://dev.doc.cgistudio.at/APILINK/APILINK/class_candera_1_1_search_tree_traverser.html "Search nodes that meet a search criterion within a node tree.") it is possible to find nodes within a given scene tree by certain criteria. The search scene graph traverser is a [Candera::TreeTraverserBase](http://dev.doc.cgistudio.at/APILINK/APILINK/class_candera_1_1_tree_traverser_base.html "Traverses a Node tree depth-first. What is done at each node is customized in the ProcessNode virtual...") implementation that evaluates each node with a given [Candera::SearchCriterion](http://dev.doc.cgistudio.at/APILINK/APILINK/class_candera_1_1_search_criterion.html).

Following code snippets illustrate how to use the traverser.

#### <a class="anchor" id="bkmrk--148"></a>Creating a plugin that registers a configuration and uses the default configuration editor.

First create a [Candera::SearchTreeTraverser](http://dev.doc.cgistudio.at/APILINK/APILINK/class_candera_1_1_search_tree_traverser.html "Search nodes that meet a search criterion within a node tree.") and then set its [Candera::SearchCriterion](http://dev.doc.cgistudio.at/APILINK/APILINK/class_candera_1_1_search_criterion.html). The search criterion validates nodes based on the implemented criterion.

In the example below the criterion is a [Candera::ScopeMaskSearchCriterion](http://dev.doc.cgistudio.at/APILINK/APILINK/class_candera_1_1_scope_mask_search_criterion.html).

```
    // Create criterion
    ScopeMaskSearchCriterion<Node> scopeMaskCriterion;
    scopeMaskCriterion.SetScopeMask(scopeA);
    
    // Create SearchTreeTraverser
    SearchTreeTraverser<Node> scopeSearchTraverser;
    scopeSearchTraverser.SetSearchCriterion(&scopeMaskCriterion);
```

#### <a class="anchor" id="bkmrk--149"></a>Tree Traversing

To start a search within a node tree, call [Candera::SearchTreeTraverser::Traverse()](http://dev.doc.cgistudio.at/APILINK/APILINK/group___common_base.html#gab35eff4b3c78073dd03ea13e1f8234d6). With the [Candera::SearchTreeTraverser::SetOnFoundAction](http://dev.doc.cgistudio.at/APILINK/APILINK/class_candera_1_1_search_tree_traverser.html#a8f8ca3881df5b6559f4fcbc70787311b) you can define if the search should stop after the first node that fulfills the search criterion is found, or if it should continue to gather all valid nodes.

Possible TraverserActions are:

<div class="contents" id="bkmrk-proceedtraversing%3A-f"><div class="contents"><div class="textblock">- *ProceedTraversing*: Find all nodes matching the given search criterion (traversing is stopped at the end of the tree)
- *StopTraversingForDescendants*: Find only nodes on the top level of the tree (traversing stops at child nodes and proceeds at siblings, until the end of the tree)
- *StopTraversing*: Find only the first node matching the search criterion (traversing is stopped immediately).

</div></div></div>The nodes fulfilling the search criterion are retained and are available to be later retrieved. Get the nodes one by one with [Candera::SearchTreeTraverser::GetSearchResult](http://dev.doc.cgistudio.at/APILINK/APILINK/group___common_base.html#gac868b9574bbdc6bea6f3c9afdd3a6796). The order of the nodes is not defined and each node can be retrieved only once. When no more nodes are available, the method returns 0.

Following are examples for the different TraverserActions.

#### <a class="anchor" id="bkmrk--150"></a>ProceedTraversing

This action is used if the traversing should continue with the next child (if the current node has any) or with the next sibling.

First define the action and then call the Traverse() method. All nodes that fulfill the search criterion are found and stored internally in a list.

```
    // Set on found action and traverse
    scopeSearchTraverser.SetOnFoundAction(<a class="code" href="http://dev.doc.cgistudio.at/APILINK/APILINK/class_candera_1_1_tree_traverser_base.html" title="Traverses a Node tree depth-first. What is done at each node is customized in the ProcessNode virtual...">Candera::TreeTraverserBase<Node>::ProceedTraversing</a>);
    scopeSearchTraverser.Traverse(*groupRoot);
    
    // Get results
    UInt32 nodeCount = 0;
    for (Node* node = scopeSearchTraverser.GetSearchResult(); node != 0; node = scopeSearchTraverser.GetSearchResult()) {
        nodeCount++;
    }
```

#### <a class="anchor" id="bkmrk--151"></a>StopTraversingForDescendants

Used if the traversing should stop for all child nodes and continue with the next sibling.

```
    // Set on found action and traverse
    scopeSearchTraverser.SetOnFoundAction(<a class="code" href="http://dev.doc.cgistudio.at/APILINK/APILINK/class_candera_1_1_tree_traverser_base.html" title="Traverses a Node tree depth-first. What is done at each node is customized in the ProcessNode virtual...">Candera::TreeTraverserBase<Node>::StopTraversingForDescendants</a>);
    scopeSearchTraverser.Traverse(*groupRoot);
```

#### <a class="anchor" id="bkmrk--152"></a>StopTraversing

If you search for only one node which fulfills your criteria, you can use StopTraversing. The traversing will stop immediately after the first node is found.

```
    // Set on found action and traverse
    scopeSearchTraverser.SetOnFoundAction(<a class="code" href="http://dev.doc.cgistudio.at/APILINK/APILINK/class_candera_1_1_tree_traverser_base.html" title="Traverses a Node tree depth-first. What is done at each node is customized in the ProcessNode virtual...">Candera::TreeTraverserBase<Node>::StopTraversing</a>);
    scopeSearchTraverser.Traverse(*groupRoot);
    Node* resultNode = scopeSearchTraverser.GetSearchResult();
```

<div class="contents" id="bkmrk-another-call-of-cand"><div class="textblock"><div class="fragment">  
</div><dl class="note"><dd><p class="callout info">Another call of [Candera::SearchTreeTraverser::GetSearchResult](http://dev.doc.cgistudio.at/APILINK/group___common_base.html#gac868b9574bbdc6bea6f3c9afdd3a6796) would return 0, because we use StopTraversing here. This leads to one result only.</p>

</dd></dl></div></div>

# Vertex Geometry Builder

#### <a class="anchor" id="bkmrk--153"></a>Description

The [Candera::VertexGeometryBuilder](http://dev.doc.cgistudio.atcgistudio.at/APILINK/class_candera_1_1_vertex_geometry_builder.html "The VertexGeometryBuilder helps effectively build VertexGeometry objects.") class helps effectively build [Candera::VertexGeometry](http://dev.doc.cgistudio.atcgistudio.at/APILINK/class_candera_1_1_vertex_geometry.html "The VertexGeometry holds all vertex data of a mesh. VertexGeometry may be used also for multiple Vert...") objects.

<div class="contents" id="bkmrk-vertexgeometrybuilde"></div>#### **Procedural Geometry** 

##### <a class="anchor" id="bkmrk--156"></a>Example: Wireframe Cube with LineList

First example shows how to generate a wireframe cube using a [Candera::LineList](http://dev.doc.cgistudio.atcgistudio.at/APILINK/class_candera_1_1_line_list.html "The LineList represents a list of lines (segments). It can be used to store a wireframe, a list of connected vertices, or just a list of isolated segments. A generic LineList instance can be created by the static method LineList::Create. A wireframe LineList can be created out of a Mesh by the static helper function Math3D::CreateLineListFromMesh.") object.

The vertex geometry will be generated procedurally using a [Candera::VertexGeometryBuilder](http://dev.doc.cgistudio.atcgistudio.at/APILINK/class_candera_1_1_vertex_geometry_builder.html "The VertexGeometryBuilder helps effectively build VertexGeometry objects.") object (e.g. *m\_builder*).

##### <a class="anchor" id="bkmrk--157"></a>Vertex Element Format: Position and Color

At the beginning we have to specify what kind of information will be set in the vertices. Of course we need information about the position and, optionally, for an improved visual effect, we could also add color information.

```
    // Set the data type to be used: position & color
    m_builder.SetVertexElementFormat(VertexGeometry::Position, 0, VertexGeometry::Float32_3);
    m_builder.SetVertexElementFormat(<a class="code" href="http://dev.doc.cgistudio.atcgistudio.at/APILINK/group___behaviors_control.html#ggae7abc816df647d0ecbc280480fefb788a6d1d4da086e381cb2c5a5ce6a2513ebd">VertexGeometry::Color</a>, 0, VertexGeometry::Float32_4);
```

##### <a class="anchor" id="bkmrk--158"></a>Vertex Data: Position

The position information for the vertices is obtained from the array *c\_cubeData* which, in fact, stores the coordinates of the points A and G. The coordinates for the rest of the vertices are obtained relatively to this points (e.g. F(X<sub>A</sub>, Y<sub>G</sub>, Z<sub>G</sub>) or D(X<sub>G</sub>, Y<sub>A</sub>, Z<sub>A</sub>)

<div drawio-diagram="1968"><img src="https://doc316en.candera.eu/uploads/images/drawio/2023-02/drawing-4-1676882299.png" alt=""/></div>

```
// Coordinates for the points A & G
static const Float c_cubeData[2][3] = {
    {-1.0F, -1.0F, -1.0F },
    {1.0F, 1.0F, 1.0F }
};
```

##### <a class="anchor" id="bkmrk--160"></a>VertexGeometryBuilder: Set Vertex Elements

Because the LineType property of the LineList object will be set to LineType::Lines, the vertex buffer will have to contain a pair of vertices for each line of the cube: 2 vertices/line \* 12 lines = 24 vertices.

```
    // Set the position & color information for each vertex
    // Line segment AD
    m_builder.SetVertexElement(VertexGeometry::Position, 0, c_cubeData[0][0], c_cubeData[0][1], c_cubeData[0][2]); // A
    m_builder.SetVertexElement(<a class="code" href="http://dev.doc.cgistudio.atcgistudio.at/APILINK/group___behaviors_control.html#ggae7abc816df647d0ecbc280480fefb788a6d1d4da086e381cb2c5a5ce6a2513ebd">VertexGeometry::Color</a>, 0, 1.F, 0.F, 1.F, 1.F); // magenta
    // Increment the vertex cursor
    m_builder.IncrementVertexCursor();
    m_builder.SetVertexElement(VertexGeometry::Position, 0, c_cubeData[1][0], c_cubeData[0][1], c_cubeData[0][2]); // D
    m_builder.SetVertexElement(<a class="code" href="http://dev.doc.cgistudio.atcgistudio.at/APILINK/group___behaviors_control.html#ggae7abc816df647d0ecbc280480fefb788a6d1d4da086e381cb2c5a5ce6a2513ebd">VertexGeometry::Color</a>, 0, 1.F, 1.F, 1.F, 1.F); // white
    m_builder.IncrementVertexCursor();
    // Line segment AB
    m_builder.SetVertexElement(VertexGeometry::Position, 0, c_cubeData[0][0], c_cubeData[0][1], c_cubeData[0][2]); // A
    m_builder.SetVertexElement(<a class="code" href="http://dev.doc.cgistudio.atcgistudio.at/APILINK/group___behaviors_control.html#ggae7abc816df647d0ecbc280480fefb788a6d1d4da086e381cb2c5a5ce6a2513ebd">VertexGeometry::Color</a>, 0, 1.F, 0.F, 1.F, 1.F); // magenta
    m_builder.IncrementVertexCursor();
    m_builder.SetVertexElement(VertexGeometry::Position, 0, c_cubeData[0][0], c_cubeData[0][1], c_cubeData[1][2]); // B
    m_builder.SetVertexElement(<a class="code" href="http://dev.doc.cgistudio.atcgistudio.at/APILINK/group___behaviors_control.html#ggae7abc816df647d0ecbc280480fefb788a6d1d4da086e381cb2c5a5ce6a2513ebd">VertexGeometry::Color</a>, 0, 1.F, 1.F, 0.F, 1.F); // yellow
    // ...
```

##### <a class="anchor" id="bkmrk--161"></a>Create Vertex Buffer

Create a [Candera::VertexBuffer](http://dev.doc.cgistudio.atcgistudio.at/APILINK/class_candera_1_1_vertex_buffer.html "The VertexBuffer encapsulates the attributes of an uploaded VertexGeometry. It holds the actual handl...") object and attach to it the vertex geometry obtained from the [Candera::VertexGeometryBuilder](http://dev.doc.cgistudio.atcgistudio.at/APILINK/class_candera_1_1_vertex_geometry_builder.html "The VertexGeometryBuilder helps effectively build VertexGeometry objects."):

```
    VertexGeometry* vertexGeom = m_builder.GetVertexGeometry();
    SharedPointer<VertexBuffer> vertexBuffer = <a class="code" href="http://dev.doc.cgistudio.atcgistudio.at/APILINK/group___c_o_u_r_i_e_r___v_i_s_u_a_l_i_z_a_t_i_o_n.html#ggaf0e93dc4242f607c3c8d13dafd036af9aaabfa5309af24986d3111a092449f857">VertexBuffer::Create</a>();
    static_cast<void>(vertexBuffer->SetVertexGeometry(vertexGeom, VertexBuffer::VertexGeometryDisposer::Dispose));
    vertexBuffer->SetPrimitiveType(VertexBuffer::Lines);
```

##### <a class="anchor" id="bkmrk--162"></a>Create LineList using the Vertex Buffer

Attach the vertex buffer to LineList object:

```
    // Create and configure the line list object
    m_lineList = <a class="code" href="http://dev.doc.cgistudio.atcgistudio.at/APILINK/group___c_o_u_r_i_e_r___v_i_s_u_a_l_i_z_a_t_i_o_n.html#ggaf0e93dc4242f607c3c8d13dafd036af9aaabfa5309af24986d3111a092449f857">LineList::Create</a>();
    m_lineList->SetAppearance(<a class="code" href="http://dev.doc.cgistudio.atcgistudio.at/APILINK/group___c_o_u_r_i_e_r___v_i_s_u_a_l_i_z_a_t_i_o_n.html#ggaf0e93dc4242f607c3c8d13dafd036af9aaabfa5309af24986d3111a092449f857">Appearance::Create</a>());
    m_lineList->GetAppearance()->SetMaterial(<a class="code" href="http://dev.doc.cgistudio.atcgistudio.at/APILINK/group___c_o_u_r_i_e_r___v_i_s_u_a_l_i_z_a_t_i_o_n.html#ggaf0e93dc4242f607c3c8d13dafd036af9aaabfa5309af24986d3111a092449f857">Material::Create</a>());
    m_lineList->GetAppearance()->GetMaterial()->SetEmissive(<a class="code" href="http://dev.doc.cgistudio.atcgistudio.at/APILINK/group___behaviors_control.html#ggae7abc816df647d0ecbc280480fefb788a6d1d4da086e381cb2c5a5ce6a2513ebd">Color</a>(1.0F, 1.0F, 0.0F));
    m_lineList->GetAppearance()->SetShader(m_shaderLightMaterial);
    m_lineList->SetLineType(LineList::Lines);
    m_lineList->SetWidth(1.0);
    m_lineList->SetIntersectionTestEnabled(false);
    m_lineList->SetVertexBuffer(vertexBuffer);
    m_lineList->SetScopeMask(ScopeMask(false));
    static_cast<void>(m_lineList->SetScopeEnabled(1, true));
    m_lineList->SetRenderingEnabled(true);
    m_lineList->SetName("Wireframe");
    static_cast<void>(m_lineList->Upload());
```

##### <a class="anchor" id="bkmrk--163"></a>Wireframe Cube Result

The image below shows the resulting wireframe cube:

<div drawio-diagram="1970"><img src="https://doc316en.candera.eu/uploads/images/drawio/2023-02/drawing-4-1676882342.png" alt=""/></div>

<div class="contents" id="bkmrk--22"><div class="contents"><div class="textblock">  
</div></div></div><div class="contents" id="bkmrk-for-an-easier-manipu"><div class="textblock"><dl class="note"><dd><p class="callout info">For an easier manipulation of the widget in SceneComposer all the shaders are hardcoded in the source file and then created by the widget at the initialization time.</p>

<p class="callout info">Alternatively obtain shaders from [Candera::AssetProvider](http://dev.doc.cgistudio.atcgistudio.at/APILINK/class_candera_1_1_asset_provider.html "Abstract class providing methods for retrieving objects.") (e.g. GetAssetProvider()-&gt;GetShader("...")) in case the application uses an asset library.</p>

</dd></dl></div></div>####   
**Indexed Geometry**   


##### <a class="anchor" id="bkmrk--165"></a>Example: Solid Cube from one Triangle Strip

The next example will show how to create a solid cube from one triangle strip using a [Candera::Mesh](http://dev.doc.cgistudio.atcgistudio.at/APILINK/class_candera_1_1_mesh.html "The class Mesh represents a three-dimensional rigid body object defined by polygons. The Mesh's polygonal surface is defined by its VertexBuffer. Each Mesh must have exactly one Appearance set, in order to specify how the Mesh geometry is rendered.") object. In this case the cube is determined by only 14 vertices which have to be ordered in a special way.

The figure below presents a cube unfolded and a possible solution of ordering the vertices:

<div drawio-diagram="1971"><img src="https://doc316en.candera.eu/uploads/images/drawio/2023-02/drawing-4-1676882414.png" alt=""/></div>

<div class="contents" id="bkmrk--24"><div class="contents"><div class="textblock">  
</div></div></div>##### <a class="anchor" id="bkmrk--167"></a>Indexed Vertex Sequence

The vertex sequence is stored in the *c\_index\_order* array, encoding the order:

<div class="contents" id="bkmrk-g-%3Ec-%3Ef-%3Eb-%3Ea-%3Ec-%3Ed-"><div class="contents"><div class="textblock">- **G-&gt;C-&gt;F-&gt;B-&gt;A-&gt;C-&gt;D-&gt;H-&gt;A-&gt;E-&gt;F-&gt;H-&gt;G-&gt;C**.

</div></div></div>Each array element represents an offset it the vertex buffer.

```
// The vertex sequence - triangle strip
static const UInt16 c_index_order[] = { 12, 11, 7, 3, 0, 11, 1, 17, 0, 5, 7, 17, 12, 11 };
```

The vertex geometry builder object used in the previous example has already 24 vertices set with position and color information. Because only 14 vertices out of 24 are needed in this case and, also, because their sequence has to be different, an index buffer is added:

```
    // Change the order of the vertices using indexes
    for (Int index = 0; index < 14; index++) {
        // Define the value of the index
        m_builder.SetIndexElement(c_index_order[index]);
        // Increment the index cursor
        m_builder.IncrementIndexCursor();
    }
```

##### <a class="anchor" id="bkmrk--168"></a>Create TriangleStrip Vertex Buffer

<a class="anchor" id="bkmrk--169"></a>Create the vertex buffer using the geometry from the builder:

```
    VertexGeometry* vertexGeom = m_builder.GetVertexGeometry();
    SharedPointer<VertexBuffer> vertexBuffer = <a class="code" href="http://dev.doc.cgistudio.atcgistudio.at/APILINK/group___c_o_u_r_i_e_r___v_i_s_u_a_l_i_z_a_t_i_o_n.html#ggaf0e93dc4242f607c3c8d13dafd036af9aaabfa5309af24986d3111a092449f857">VertexBuffer::Create</a>();
    static_cast<void>(vertexBuffer->SetVertexGeometry(vertexGeom, VertexBuffer::VertexGeometryDisposer::Dispose));
    vertexBuffer->SetPrimitiveType(VertexBuffer::TriangleStrip);
```

##### <a class="anchor" id="bkmrk--170"></a>Create Mesh using the Vertex Buffer

<a class="anchor" id="bkmrk--171"></a>Configure mesh and attach the vertex buffer:

```
    m_mesh = <a class="code" href="http://dev.doc.cgistudio.atcgistudio.at/APILINK/group___c_o_u_r_i_e_r___v_i_s_u_a_l_i_z_a_t_i_o_n.html#ggaf0e93dc4242f607c3c8d13dafd036af9aaabfa5309af24986d3111a092449f857">Mesh::Create</a>();
    m_mesh->SetVertexBuffer(vertexBuffer);
    m_mesh->SetAppearance(appearance);
    m_mesh->SetRenderingEnabled(false);
    m_mesh->SetName("SolidNonTextured");
    static_cast<void>(m_mesh->Upload());
```

##### <a class="anchor" id="bkmrk--172"></a>Solid Cube Result

The image below shows the resulting solid cube:

<div drawio-diagram="1972"><img src="https://doc316en.candera.eu/uploads/images/drawio/2023-02/drawing-4-1676882451.png" alt=""/></div>

<div class="contents" id="bkmrk--26"></div>#### **Remove &amp; Add Vertex Elements**   


##### <a class="anchor" id="bkmrk--174"></a>Example: Textured Cube

In this example the vertex geometry builder object will be used to generate the vertex geometry for a textured cube.

Adding texture to a mesh requires that its vertices should contain specific information like *normal* and *texture coordinate*. Also, the *color* information is no longer needed so it can be removed:

```
    // Vertex Elements Manipulation
    // Remove color data associated to the vertices
    m_builder.RemoveVertexElement(<a class="code" href="http://dev.doc.cgistudio.atcgistudio.at/APILINK/group___behaviors_control.html#ggae7abc816df647d0ecbc280480fefb788a6d1d4da086e381cb2c5a5ce6a2513ebd">VertexGeometry::Color</a>,0);
    // Add data type to be used: texture coordinate & normal
    m_builder.SetVertexElementFormat(VertexGeometry::TextureCoordinate, 0, VertexGeometry::Float32_2);
    m_builder.SetVertexElementFormat(<a class="code" href="http://dev.doc.cgistudio.atcgistudio.at/APILINK/group___c_o_u_r_i_e_r___m_e_s_s_a_g_i_n_g.html#gga12eb807cc34f92845cb1483cd7e7fb07a35ab3707105aae81f65484ffd603264b">VertexGeometry::Normal</a>, 0, VertexGeometry::Float32_3);
```

##### <a class="anchor" id="bkmrk--175"></a>Vertex Data: Normals and Texture Coordinates

After adding the new data types for the vertices it is time to add the corresponding information. First, add normals for vertices:

```
    // Move the cursor to the first vertex
    m_builder.SetVertexCursor();
    for (UInt32 i = 0; i < m_builder.GetVertexCount(); i++ )
    {
        m_builder.SetVertexElement(<a class="code" href="http://dev.doc.cgistudio.atcgistudio.at/APILINK/group___c_o_u_r_i_e_r___m_e_s_s_a_g_i_n_g.html#gga12eb807cc34f92845cb1483cd7e7fb07a35ab3707105aae81f65484ffd603264b">VertexGeometry::Normal</a>, 0, 0.0F, 0.0F, 1.0F);
        m_builder.IncrementVertexCursor();
    }
```

In order to map the UV texture coordinate values correctly, the cube faces should be drawn using 4 vertices per face, so, in this case, all 24 vertices will be used. Of course, the vertex order has to be adjusted.

The new vertex order is stored in the *c\_indexDataTexturedCube* array.

```
// Vertex order - textured cube
static const UInt16 c_indexDataTexturedCube[24] = {
    1,17,0,5,
    2,6,3,7,
    9,8,11,12,
    13,14,19,21,
    15,23,16,22,
    4,10,20,18
};
```

Now, reorder the vertices:

```
    // Overwrite the index buffer
    // Move the cursor to the first index
    m_builder.SetIndexCursor();
    for (UInt32 i = 0; i < m_builder.GetVertexCount(); i++ )
    {
        // Define the value of the index
        m_builder.SetIndexElement(c_indexDataTexturedCube[i]);
        m_builder.IncrementIndexCursor();
    }
```

The vertices of each face of the cube should be set with texture coordinate information as shown below:

<div drawio-diagram="1973"><img src="https://doc316en.candera.eu/uploads/images/drawio/2023-02/drawing-4-1676882513.png" alt=""/></div>

<div class="contents" id="bkmrk--28"><div class="contents"><div class="textblock">  
</div></div></div>Set the texture coordinates for vertices:

```
    Int idx = 0;
    for (Int nb_of_faces = 0; nb_of_faces<6; nb_of_faces++) {
        for (Int u=0; u<=1; u++) {
            for (Int v=0; v<=1; v++) {
                //Set the position of the vertex cursor
                m_builder.SetVertexCursor(c_indexDataTexturedCube[idx]);
                m_builder.SetVertexElement(VertexGeometry::TextureCoordinate, 0, static_cast<Float>(u), static_cast<Float>(v));
                idx++;
            }
        }
    }
```

The vertex buffer is created and configured in the same way as in the <span style="color: rgb(230, 126, 35);">[previous example](#bkmrk-indexed-geometry%C2%A0)</span>.

The mesh setup is also similar but, unlike the <span style="color: rgb(230, 126, 35);">[solid cube](#bkmrk-solid-cube-result)</span>, the textured cube appearance has to be set with a texture and a texture shader.

##### <a class="anchor" id="bkmrk--177"></a>Textured Cube Result

Here is the final result:

<div drawio-diagram="1974"><img src="https://doc316en.candera.eu/uploads/images/drawio/2023-02/drawing-4-1676882532.png" alt=""/></div>

#### **Range Data Usage**   


##### <a class="anchor" id="bkmrk--179"></a>Example: Solid Cube using Range Data

This example will show how to create a solid cube as in the <span style="color: rgb(230, 126, 35);">[second example](#bkmrk-indexed-geometry%C2%A0)</span> but using range data.

First, all existing data from the vertex geometry builder is removed.

```
    // Clear all data stored by the builder
    m_builder.Clear();
```

The vertex data is taken from the two buffers *c\_positionData* and *c\_colorData*.

```
static const Float c_positionData[8][3] = {
    { -1.0F, 1.0F, 1.0F},
    { 1.0F, 1.0F, 1.0F},
    { -1.0F, -1.0F, 1.0F},
    { 1.0F, -1.0F, 1.0F},
    { -1.0F, 1.0F, -1.0F},
    { 1.0F, 1.0F, -1.0F},
    { -1.0F, -1.0F, -1.0F},
    { 1.0F, -1.0F, -1.0F}
};

static const Float c_colorData[8][4] = {
    { 0.0F, 0.0F, 1.0F, 1.0F},
    { 0.0F, 1.0F, 0.0F, 1.0F},
    { 0.0F, 1.0F, 1.0F, 1.0F},
    { 1.0F, 0.0F, 0.0F, 1.0F},
    { 1.0F, 0.0F, 1.0F, 1.0F},
    { 1.0F, 1.0F, 0.0F, 1.0F},
    { 1.0F, 1.0F, 1.0F, 1.0F},
    { 1.0F, 0.5F, 1.0F, 1.0F}
};
```

The vertex sequence is taken from the array *c\_indexData*.

```
// Range data index
static const UInt16 c_indexData[] = {3, 2, 1, 0, 4, 2, 6, 3, 7, 1, 5, 4, 7, 6 };
```

Use the methods [Candera::VertexGeometryBuilder::SetVertexElementRange](http://dev.doc.cgistudio.atcgistudio.at/APILINK/class_candera_1_1_vertex_geometry_builder.html#a262ac223bfe93c8e42571f0771cfd3fb) and [Candera::VertexGeometryBuilder::SetIndexElementRange](http://dev.doc.cgistudio.atcgistudio.at/APILINK/class_candera_1_1_vertex_geometry_builder.html#a37e18ba1d6f49c484d4dc172e123b136) to add the required information.

```
    // Add position, color and an index from range data
    // Splice values to the position buffer starting with the first vertex
    static_cast<void>(m_builder.SetVertexElementRange(VertexGeometry::Position, 0, 0, VertexGeometry::Float32_3,
        8, 3*sizeof(Float), c_positionData ));
    // Splice values to the color buffer starting with the first vertex
    static_cast<void>(m_builder.SetVertexElementRange(<a class="code" href="http://dev.doc.cgistudio.atcgistudio.at/APILINK/group___behaviors_control.html#ggae7abc816df647d0ecbc280480fefb788a6d1d4da086e381cb2c5a5ce6a2513ebd">VertexGeometry::Color</a>, 0, 0, VertexGeometry::Float32_4,
        8, 4*sizeof(Float), c_colorData ));

    // Splice values to the index buffer starting with the first index
    static_cast<void>(m_builder.SetIndexElementRange(0, sizeof(c_indexData)/sizeof(UInt16),c_indexData));
```

<span style="color: rgb(0, 0, 0);">The vertex buffer configuration and the mesh setup</span> are identical with the ones from the [second example](#bkmrk-create-mesh-using-th).

Here is the final result:

<div drawio-diagram="1975"><img src="https://doc316en.candera.eu/uploads/images/drawio/2023-02/drawing-4-1676882596.png" alt=""/></div>

<div class="contents" id="bkmrk--32"><div class="textblock">  
</div></div>#### **Concatenate Geometries**   


##### <a class="anchor" id="bkmrk--181"></a>VertexGeometryBuilder::SpliceGeometry

In some cases it might be useful to concatenate two vertex geometries. This can be done by using the [Candera::VertexGeometryBuilder::SpliceGeometry](http://dev.doc.cgistudio.atcgistudio.at/APILINK/class_candera_1_1_vertex_geometry_builder.html#ad0ce8d747bc1d48d32622282ab0731c8) method as shown below:

```
    m_builder.SpliceGeometry(0, 0, vertexGeometry1);
    m_builder.SpliceGeometry(vertexGeometry1->GetVertexCount(), vertexGeometry1->GetIndexCount(), vertexGeometry2);
    vertexGeometry1cat2 = builder.GetGeometry();
```

# Vertex Geometry Modifier

#### <a class="anchor" id="bkmrk--182"></a>Overview

The [VertexGeometryModifier](http://dev.doc.cgistudio.at/APILINK/class_candera_1_1_vertex_geometry_modifier.html "In conjunction with a VertexAccessor, the VertexGeometryModifier helps to effectively modify VertexGe..."), in conjunction with a [VertexAccessor](http://dev.doc.cgistudio.at/APILINK/class_candera_1_1_vertex_accessor.html), helps to modify [VertexGeometry](http://dev.doc.cgistudio.at/APILINK/class_candera_1_1_vertex_geometry.html "The VertexGeometry holds all vertex data of a mesh. VertexGeometry may be used also for multiple Vert...") objects by the means of the setters offered by the class interface. The interface offers also getters which are helpful to retrieve the values of the vertex elements from a given vertex buffer.

#### <a class="anchor" id="bkmrk--183"></a>Example

The example below shows how to change the position values for the vertices from a vertex buffer of a given mesh.

```
            VertexGeometry* vertexGeom;
            bool isMutable = m_mesh3->GetVertexBuffer()->GetVertexGeometry()->GetVertexArrayResourceHandle().m_isMutable;
            // Get the vertex geometry of the mesh
            if (isMutable) {
                vertexGeom = m_mesh3->GetVertexBuffer()->GetVertexGeometry();
            }
            else {
                DiagnosticPlatform::ConsoleOut("VertexGeometryData not mutable");
                break;
            }
             // The vertex accessor will be used by the vertex geometry modifier to access the vertices
            VertexAccessor accessor(*vertexGeom);

            // Create a vertex geometry modifier specifying as usage the type of vertex attribute
            // which will be changed
            VertexGeometryModifier modifier(*vertexGeom, <a class="code" href="http://dev.doc.cgistudio.at/APILINK/class_candera_1_1_vertex_geometry.html#af7691f69f328ccb7417ebdf28c39bb9ea952812830012c7d152a2513c8e14ed44" title="The position of a vertex in local space.">VertexGeometry::Position</a>, 0);
            Float vertexData[3];
            for(Int i = 0; i<8; i++) {
                if(s_inflate) {
                // Retrieve the position data of the vertex "i" in the vertexData array
                modifier.GetVertexElement(accessor.GetVertex(i), vertexData, 3);

                // Alter the data and set it back
                modifier.SetVertexElement(accessor.GetMutableVertex(i), vertexData[0]*1.3F, vertexData[1]*1.3F, vertexData[2]*1.3F);
                } 
                else {
                    // Set the position of the vertex with data get from an array (Float c_positionData[8][3])
                    modifier.SetVertexElement(accessor.GetMutableVertex(i), c_positionData[i], 3);
                }
            }

            // Update the vertex buffer on the mesh
            m_mesh3->GetVertexBuffer()->Update(0, m_mesh3->GetVertexBuffer()->GetVertexGeometry()->GetVertexCount());
```

# Candera 3D Listeners

Applications can receive notifications on scene graph events. Therefore implement and use a listener, which defines hooks to receive those notifications.

Following listener interfaces are provided in [Candera](http://dev.doc.cgistudio.at/APILINK/namespace_candera.html "[DataBinding_RefTypeSample]") 3D:

<div class="contents" id="bkmrk-candera%3A%3Arendererlis"><div class="contents"><div class="textblock">- [Candera::RendererListener](http://dev.doc.cgistudio.at/APILINK/class_candera_1_1_renderer_listener.html "A RendererListener defines hooks that are called before or after a Node is rendered.") defines hooks that are called before or after a node is rendered. It supports events for OnNodePreRender and OnNodePostRender, so you are informed before and after a node is rendered.
- [Candera::NodeListener](http://dev.doc.cgistudio.at/APILINK/class_candera_1_1_node_listener.html "A NodeListener defines hooks that are called when certain Node functions are triggered, e.g. when a Node's transformation changes. In order to register a NodeListener to a Node simply derive from NodeListener and override pure virtual functions with custom code.") defines hooks that are called when certain node functions are triggered, e.g. when a node's transformation changes.
- [Candera::SceneListener](http://dev.doc.cgistudio.at/APILINK/class_candera_1_1_scene_listener.html "The abstract class SceneListener defines an interface utilized by class Scene to notify listeners on ...") defines hooks that are called on certain scene actions. The listener informs when a scene is activated.
- Candera::AnimationPlayerListener defines several hooks for the AnimationPlayer. It informs about changes of the animation, like when an animation has started, stopped, finished, resumed, paused and when the direction has changed.
- [Candera::CameraListener](http://dev.doc.cgistudio.at/APILINK/class_candera_1_1_camera_listener.html "A CameraListener defines hooks that are called before or after a Camera is rendered. In order to register a CameraListener to a Camera simply derive from CameraListener and override pure virtual functions with custom code.") defines hooks that are called before or after a camera is rendered. It supports events for OnPreRender, OnPostRender, OnProjectionChanged and OnViewChanged.
- [Candera::ProjectionListener](http://dev.doc.cgistudio.at/APILINK/class_candera_1_1_projection_listener.html "A ProjectionListener defines hooks that are called when a projection's parameters are changed...") defines hooks that are called when projection parameters are changed. It supports OnProjectionChanged, which means the camera reacts to changes of the projection matrix associated and updates frustums accordingly.

</div></div></div>In order to register a listener simply derive from the listener class and override pure virtual functions with custom code.

#### <a class="anchor" id="bkmrk--184"></a>Example Listener Implementation

Refer to <span style="color: rgb(230, 126, 35);">[Using Animation Callback Functions](https://doc316en.candera.eu/books/candera/page/using-animation-callback-functions)</span> for an example how to implement and use an Animation listener.

# Tutorial for 2D Scene Graph and Nodes

# 2D Scenes and Nodes

##### <a class="anchor" id="bkmrk--187"></a>Scene Graph

The 2D scene graph is a tree structure which organizes nodes of type <span style="color: rgb(230, 126, 35);">[Candera::Node2D](http://dev.doc.cgistudio.at/APILINK/class_candera_1_1_node2_d.html "The class Node2D is an abstract base class for all 2D scene graph nodes.")</span>. The root of each scene graph has to be a node of type <span style="color: rgb(230, 126, 35);">[Candera::Scene2D](http://dev.doc.cgistudio.at/APILINK/class_candera_1_1_scene2_d.html "The class Scene2D represents a top level scene graph node. Multiple scenes are allowed. A scene can not be part of any other scene.").</span> All nodes of type <span style="color: rgb(230, 126, 35);">[Candera::Node2D](http://dev.doc.cgistudio.at/APILINK/class_candera_1_1_node2_d.html "The class Node2D is an abstract base class for all 2D scene graph nodes.") </span>can hold sub nodes added by <span style="color: rgb(230, 126, 35);">[Candera::Node2D::AddChild()](http://dev.doc.cgistudio.at/APILINK/class_candera_1_1_node2_d.html#aab2f0ab0ad5f608eca8042341612af8a)</span>.

Nodes of type <span style="color: rgb(230, 126, 35);">[Candera::RenderNode](http://dev.doc.cgistudio.at/APILINK/class_candera_1_1_render_node.html "RenderNode is a 2D node that links to an effect chain. Therefore this is the only type of 2D node whi...") </span>are representing content which has to be rendered to the target, e.g. text or a bitmap. At least one node of type <span style="color: rgb(230, 126, 35);">[Candera::Camera2D](http://dev.doc.cgistudio.at/APILINK/class_candera_1_1_camera2_d.html "A camera defines the view to the scene. At least one Camera2D has to be added to a 2D scene graph and...")</span> which is the link to the render target (e.g. a display) has to be part of the scene graph.

<div drawio-diagram="1976"><img src="https://doc316en.candera.eu/uploads/images/drawio/2023-02/drawing-4-1676946524.png" alt=""/></div>

<div class="contents" id="bkmrk-2d-scene-graph-examp"><div class="contents"><div class="textblock">  
</div></div></div>##### <a class="anchor" id="bkmrk--189"></a>RenderNode

Only nodes of type RenderNode are considered during rendering. Each render node requires a list of effects (effect chain) which implements the visual representation of that node. Each render node has a depth value as parameter which defines the order of rendering (z-order). Higher value means background, lower value means foreground.

<div drawio-diagram="1977"><img src="https://doc316en.candera.eu/uploads/images/drawio/2023-02/drawing-4-1676946545.png" alt=""/></div>

<div class="contents" id="bkmrk-class-diagram-node2d"><div class="contents"><div class="textblock">  
</div></div></div>##### <a class="anchor" id="bkmrk--191"></a>Transformations

The functionality to define the local coordinate system is derived from <span style="color: rgb(230, 126, 35);">[Candera::Transformable2D](http://dev.doc.cgistudio.at/APILINK/class_candera_1_1_transformable2_d.html "Defines common methods for manipulating node and texture transformations in local coordinate space (o...")</span> and consists of following components:

<div class="contents" id="bkmrk-position%2C-rotation%2C--0"><div class="contents"><div class="textblock">- position,
- rotation,
- scale,
- and the pivot offset.

</div></div></div>This information is always relative to its parent node. Changing one of these parameters affects the presentation of all child nodes. If for example a node is rotated, all child nodes are rotated accordingly. Each nodes rotation, translation (position) and scale values are combined in one transformation matrix which is multiplied with the parent nodes transformation matrix.

# 2D Node Transformations

#### <a class="anchor" id="bkmrk--192"></a>2D Node Manipulation Example

To illustrate basic node transformation operations, the *NodeManipulationWidget\_2D* and the *DisplayPositionWidget2D* part of the Tutorial Widgets cand be used. An usage example for *NodeManipulationWidget\_2D* can be seen in **NodeManipulationSolution\_2D** solution provided in the content folder of *cgi\_studio\_player*.

**Please consider:**

<div class="contents" id="bkmrk-a-node2dtotransform-"><div class="contents"><div class="textblock">- A *Node2DToTransform* on which the following transformations are made has to be selected in the widget.
- Only if the widget is *enabled* (this property is also derived from a base class), the setter methods of the widget properties will take effect.
- If a widget property setter changes a node property of the associated node, the visual effect can be seen, but note that the static node properties maintained by SceneComposer are not changed accordingly!
- Widget dynamics are never reflected to static scene structure. It is recommended to use SceneComposer only for property configuration and dynamics only in the Player.

</div></div></div>#### <a class="anchor" id="bkmrk--193"></a>Translations

Once the NodeManipulationWidget\_2D is linked with a node from the static scene tree and enabled, the position coordinates can be set in the Player for this property to change the position.

```
            // Set node position
            m_node->SetPosition(m_position);    // set absolute node position
            // End Set node position
```

```
            // Translate node
            m_node->Translate(m_translate);     // translate actual node position
            // End Translate node
```

<div class="contents" id="bkmrk-candera%3A%3Atransformab"><div class="contents"><div class="textblock"><dl class="note"><dd><p class="callout info">[Candera::Transformable2D::SetPosition](http://dev.doc.cgistudio.at/APILINK/class_candera_1_1_transformable2_d.html#a74becbea72134b186c14f5d3bf38f749) sets the absolute position of a node compared to [Candera::Transformable2D::Translate](http://dev.doc.cgistudio.at/APILINK/class_candera_1_1_transformable2_d.html#a9a4ed57cd39a872fcb4cfc0f9696ecf1), which adds the given vector to the current position. So setting the position first and then translating the node gives a different behavior than vice versa.</p>

</dd></dl></div></div></div>#### <a class="anchor" id="bkmrk--194"></a>Rotations

Similar to translation, rotation can also be applied via <span style="color: rgb(230, 126, 35);">[Candera::Transformable2D::Rotate](http://dev.doc.cgistudio.at/APILINK/class_candera_1_1_transformable2_d.html#ad41ec326d27717b061d3aec22a8ff628)</span> or <span style="color: rgb(230, 126, 35);">[Candera::Transformable2D::SetRotation](http://dev.doc.cgistudio.at/APILINK/class_candera_1_1_transformable2_d.html#a626aad8263416e87532dd2ffc6c3017f).</span>

```
            // Rotate node
            m_node->Rotate(m_rotate);
            // End Rotate node
```

#### <a class="anchor" id="bkmrk--195"></a>Scaling

Again there is also a<span style="color: rgb(230, 126, 35);"> [Candera::Transformable2D::Scale](http://dev.doc.cgistudio.at/APILINK/class_candera_1_1_transformable2_d.html#a83ec28ede49ce70093d2a6650b3adf89)</span> and <span style="color: rgb(230, 126, 35);">[Candera::Transformable::SetScale](http://dev.doc.cgistudio.at/APILINK/class_candera_1_1_transformable.html#a750dce59a7a54ab4f28dd3763b879dde) </span>method.

```
            // Scale node
            m_node->Scale(m_scale);
            // End Scale node
```

#### <a class="anchor" id="bkmrk--196"></a>Pivot Point

It is possible to change your pivot point with the<span style="color: rgb(230, 126, 35);"> [Candera::Transformable2D::TranslatePivotPoint](http://dev.doc.cgistudio.at/APILINK/class_candera_1_1_transformable2_d.html#a5cf36336c24d9468e68d0a69bc932ec1)</span> (or <span style="color: rgb(230, 126, 35);">[Candera::Transformable2D::SetPivotPoint](http://dev.doc.cgistudio.at/APILINK/class_candera_1_1_transformable2_d.html#a99ea052896f7f67537676a574631fffa)</span>) method. The pivot point can be used to define e.g. the rotation point that the node should rotate around. It affects the scaling too.

#### <a class="anchor" id="bkmrk--197"></a>How to get the screen space coordinates of a node

With the DisplayPositionWidget2D you can retrieve the screen coordinates of an associated node. Please consider that a node and a camera have to be selected in the widget. In the solution the widget is disabled by default, so if you want to see an output of your display position, you need to enable it. To get the screen space coordinates of an associated node, you simply need to add the render target position of your node to the window position.

<div class="contents" id="bkmrk-first-you-need-the-w-0"><div class="textblock">- First you need the world position of your node. With this position you can retrieve the viewport position, which you need for retrieving the render target position. ```
            Vector2 worldPosition = node->GetWorldPosition();
            Vector2 viewportPos = Math2D::TransformSceneToViewport(*camera, worldPosition);
            Vector2 renderTargetPos = Math2D::TransformViewportToRenderTarget(*camera, viewportPos);
    ```
- Now you need the window. ```
            Window* w = camera->GetRenderTarget()->GetGraphicDeviceUnit()->ToWindow();
            if (w != 0) {
                Vector2 delta(static_cast<Float>(w->GetX()), static_cast<Float>(w->GetY()));
    ```
- With these two <span style="color: rgb(230, 126, 35);">[Candera::Vector2](http://dev.doc.cgistudio.at/APILINK/class_candera_1_1_vector2.html "The default Vector2 class.")</span> you can calculate the screen space <span style="color: rgb(230, 126, 35);">[Candera::Vector2](http://dev.doc.cgistudio.at/APILINK/class_candera_1_1_vector2.html "The default Vector2 class.")</span> of your node. ```
                Vector2 displayPos = delta + renderTargetPos;
    ```
- displayPos now contains the X and Y screen space coordinates of the selected node.

</div></div>

# 2D Effects

#### <a class="anchor" id="bkmrk--198"></a>Description

Candera2D renders content exclusively by pieces of code which are named effects. Effects represent semantic functionality which considers hardware and driver capabilities.

<div class="contents" id="bkmrk-the-set-of-effects-s"><div class="contents"><div class="textblock"><dl class="note"><dt></dt><dd><p class="callout info">The set of effects supported depends on the feature set of the underlying graphic device unit. This tutorial is based on the reference platform ***iMX6***. Refer to the CanderaPlatformDevice API documentation to learn about the set of 2D effects supported on the platform used.</p>

</dd></dl></div></div></div>#### <a class="anchor" id="bkmrk--200"></a>Example Solution

<div class="contents" id="bkmrk-2dcombinedeffects-in"><div class="textblock">- 2DEffects Sample Solution in SceneComposer.

</div></div>#### **2D Effect Types**

Effects can be distinguished in three types of operations:

<div class="contents" id="bkmrk-candera%3A%3Abrusheffect"><div class="contents"><div class="textblock">1. <span style="color: rgb(230, 126, 35);">[Candera::BrushEffect2D](http://dev.doc.cgistudio.at/APILINK/class_candera_1_1_brush_effect2_d.html "Base class for all 2D brush effects.") </span>provides means of generating graphical content out of user-defined data. An example would be an effect which generates a rectangle of solid color based on red, green and blue values. Brush effects generate pixel data as output.
2. <span style="color: rgb(230, 126, 35);">[Candera::InPlaceEffect2D](http://dev.doc.cgistudio.at/APILINK/class_candera_1_1_in_place_effect2_d.html "Base class for all 2D in-place effects.") </span>requires input data provided. Input data is always given in form of pixel data and is supposed to be provided by either a Brush Effect or another InPlace Effect. These kinds of effects can utilize any additional parameters to transform the pixel data to output data. The output is again pixel data.
3. <span style="color: rgb(230, 126, 35);">[Candera::BlendEffect2D](http://dev.doc.cgistudio.at/APILINK/class_candera_1_1_blend_effect2_d.html "Base class for all 2D blend effects.")</span> is very similar to InPlaceEffect2D. To be specific, every InPlace effect resembles a specialization of blend effect, namely that they blend with a fixed functionality. What makes Blend Effects special is only their purpose of being the effect which also takes the render target into account as an input. This allows *blend effects* to transform the input and the render target to any kind of combination of both. Output is again pixel data.

</div></div></div>The effect types can be linked together so that they resemble an **Effect Chain**. An effect chain consists of one brush effect, zero to n InPlace effects and one blend effect.

<div class="contents" id="bkmrk-the-brush-effect-ref"><div class="contents"><div class="textblock">- The Brush Effect references already existing pixel data, so it defines the source data of the node (bitmap, solid color, text).
- InPlace Effects define pixel manipulation functions like mask, color transformation, etc.
- The Blend Effect is attached at the end of the chain so that the pixel data generated by the Brush Effect is processed together with the render target's pixel data to a combination.

</div></div></div>##### <a class="anchor" id="bkmrk--201"></a>Combined Effects

A Combined Effect is a single effect which represents a whole sequence of other effects in an effect chain. For example, if you want to render bitmap data with an alpha function, there usually is a combined effect which represents the Brush Effect and the Blend Effect in one single object.

<div class="contents" id="bkmrk-combined-effect-for-"><div class="contents"><div class="textblock">- Combined Effect for Brush and Blend Effect: <span style="color: rgb(230, 126, 35);">[Candera::BitmapBrushBlend](http://dev.doc.cgistudio.at/APILINK/class_candera_1_1_bitmap_brush_blend.html "This effect outputs a bitmap image, and blend it with the store buffer. Same as chaining (BitmapBrush...")</span>.

</div></div></div>This single object can take the advantage to perform operation in a single step as the external interfaces (pixel data) can be replaced internally by setting options in the native rendering API.

Refer to <span style="color: rgb(230, 126, 35);">[Candera::CombinedEffect2D](http://dev.doc.cgistudio.at/APILINK/class_candera_1_1_combined_effect2_d.html "Base class for all 2D combined effects.") </span>about which CombinedEffects are supported by <span style="color: rgb(230, 126, 35);">[Candera](http://dev.doc.cgistudio.at/APILINK/namespace_candera.html "[DataBinding_RefTypeSample]").</span>

#### **Combined Effects Examples**

An example of various effects and how they are configured can be seen in *2DEffects* Sample Solution in SceneComposer.

##### <a class="anchor" id="bkmrk--202"></a>Bitmap Effects

In order to render an image, a **BitmapNode** with one of the following effects must be set in a 2D scene:

<div class="contents" id="bkmrk-candera%3A%3Abitmapbrush"><div class="contents"><div class="textblock">- <span style="color: rgb(230, 126, 35);">[Candera::BitmapBrush](http://dev.doc.cgistudio.at/APILINK/class_candera_1_1_bitmap_brush.html "Output an image. The image is transformed to the space of the current node, but no pixel transformati...")</span>
- [<span style="color: rgb(230, 126, 35);">Candera::BitmapBrushBlend</span>](http://dev.doc.cgistudio.at/APILINK/class_candera_1_1_bitmap_brush_blend.html "This effect outputs a bitmap image, and blend it with the store buffer. Same as chaining (BitmapBrush...")
- <span style="color: rgb(230, 126, 35);">[Candera::BitmapBrushColor](http://dev.doc.cgistudio.at/APILINK/class_candera_1_1_bitmap_brush_color.html "Output a bitmap image and modulate the color. Same as chaining (BitmapBrush + ConstantAlphaEffect)")</span>
- <span style="color: rgb(230, 126, 35);">[Candera::BitmapBrushColorBlend](http://dev.doc.cgistudio.at/APILINK/class_candera_1_1_bitmap_brush_color_blend.html "Output a bitmap image, modulate the color, and blend it with the store buffer. Same as chaining (Bitm...")</span>

</div></div></div>For the above effects, the following properties can be set to obtain different rendering results:

<div class="contents" id="bkmrk-color---values-for-r"><div class="contents"><div class="textblock">- **Color** - values for red, green, blue and alpha must be set
- **Color Blend Factor** for source and destination
- **Color Blend Operation**
- **Alpha Blend Factor** for source and destination
- **Alpha Blend Operation**

</div></div></div>An example of Bitmap effects with different properties is shown below:

<div drawio-diagram="1978"><img src="https://doc316en.candera.eu/uploads/images/drawio/2023-02/drawing-4-1676946798.png" alt=""/></div>

<div class="contents" id="bkmrk--37"><div class="contents"><div class="textblock">  
</div></div></div><span style="color: rgb(230, 126, 35);">[Candera::BitmapBrushColorBlend](http://dev.doc.cgistudio.at/APILINK/class_candera_1_1_bitmap_brush_color_blend.html "Output a bitmap image, modulate the color, and blend it with the store buffer. Same as chaining (Bitm...")</span> is a combined effect between <span style="color: rgb(230, 126, 35);">[Candera::BitmapBrushBlend](http://dev.doc.cgistudio.at/APILINK/class_candera_1_1_bitmap_brush_blend.html "This effect outputs a bitmap image, and blend it with the store buffer. Same as chaining (BitmapBrush...")</span> and<span style="color: rgb(230, 126, 35);"> [Candera::BitmapBrushColor](http://dev.doc.cgistudio.at/APILINK/class_candera_1_1_bitmap_brush_color.html "Output a bitmap image and modulate the color. Same as chaining (BitmapBrush + ConstantAlphaEffect)")</span>. The properties of this effect sum up the properties of the other two. The values for the properties for <span style="color: rgb(230, 126, 35);">[Candera::BitmapBrushColorBlend](http://dev.doc.cgistudio.at/APILINK/class_candera_1_1_bitmap_brush_color_blend.html "Output a bitmap image, modulate the color, and blend it with the store buffer. Same as chaining (Bitm...")</span> used in the example, for left most, centre and right most images, are:

<div drawio-diagram="1979"><img src="https://doc316en.candera.eu/uploads/images/drawio/2023-02/drawing-4-1676946814.png" alt=""/></div>

<div class="contents" id="bkmrk--39"><div class="textblock">  
</div></div>##### Text with Bitmap Effects

In order to render text, a Text Node with one the following effect must be set in a 2D Scene.

- Candera::BitmapBrushBlend
- Candera::BitmapBrushColor
- Candera::BitmapBrushColorBlend
- Candera ::GlLinearGradientBitmapBrushBlend

Text node is a Render node that render text using the attached Bitmap Brush effect.

- Text and Style properties can be set using the Text node properties, as they are inherited from the Render node. To apply Style properties, the font of the text must be set.
- For Candera::BitmapBrushColorBlend, the properties Text Color, Color Blend Factors and Operations, Alpha Blend Factors and Operations, and the Text Clipping Area can be set to achieve different rendering effects.
- An example of Candera::BitmapBrushColorBlend and related properties is shown below.

<div drawio-diagram="8767"><img src="https://doc316en.candera.eu/uploads/images/drawio/2025-11/drawing-4-1763533313.png" alt=""/></div>

<div class="contents" id="bkmrk--41"><div class="textblock">  
</div></div>##### <a class="anchor" id="bkmrk--207"></a>Brush Effects

The following effects can be used with a **RenderNode** in a 2D scene:

<div class="contents" id="bkmrk-candera%3A%3Asolidcolorb"><div class="contents"><div class="textblock">- <span style="color: rgb(230, 126, 35);">[Candera::SolidColorBrush](http://dev.doc.cgistudio.at/APILINK/class_candera_1_1_solid_color_brush.html "Output a rectangle filled with a solid color. The rectangle is transformed to the transformation spac...")</span>
- [<span style="color: rgb(230, 126, 35);">Candera::SolidColorBrushBlend</span>](http://dev.doc.cgistudio.at/APILINK/class_candera_1_1_solid_color_brush_blend.html "Output rectangle filled with a solid color and blend it with the store buffer. Same as chaining (Soli...")

</div></div></div>**Fill Color** must be set for the above effects.

For <span style="color: rgb(230, 126, 35);">[Candera::SolidColorBrushBlend](http://dev.doc.cgistudio.at/APILINK/class_candera_1_1_solid_color_brush_blend.html "Output rectangle filled with a solid color and blend it with the store buffer. Same as chaining (Soli...")</span>, the properties **Color Blend Factor** and **Operation** and **Alpha Blend Factor** and **Operation** can also be set to obtain different rendering results.

An example of <span style="color: rgb(230, 126, 35);">[Candera::SolidColorBrushBlend](http://dev.doc.cgistudio.at/APILINK/class_candera_1_1_solid_color_brush_blend.html "Output rectangle filled with a solid color and blend it with the store buffer. Same as chaining (Soli...")</span> and related properties is shown below:

<div drawio-diagram="1981"><img src="https://doc316en.candera.eu/uploads/images/drawio/2023-02/drawing-4-1676946859.png" alt=""/></div>

<div drawio-diagram="1982"><img src="https://doc316en.candera.eu/uploads/images/drawio/2023-02/drawing-4-1676946878.png" alt=""/></div>

<div class="contents" id="bkmrk--44"><div class="contents"><div class="textblock">  
</div></div></div>##### <a class="anchor" id="bkmrk--210"></a>Mask Effects

As the name suggests, Mask effects allows masking different areas of a given image by applying a mask image with transparent areas.

The following effects can be used with a **BitmapNode**:

<div class="contents" id="bkmrk-candera%3A%3Aglbitmapbru"><div class="contents"><div class="textblock">- <span style="color: rgb(230, 126, 35);">[Candera::GlBitmapBrushColorMaskBlend](http://dev.doc.cgistudio.at/APILINK/class_candera_1_1_gl_bitmap_brush_color_mask_blend.html "Output a bitmap image, apply an alpha mask, and blend it with the store buffer. Same as chaining (Bit...")</span>
- <span style="color: rgb(230, 126, 35);">[Candera::GlBitmapBrushMaskBlend](http://dev.doc.cgistudio.at/APILINK/class_candera_1_1_gl_bitmap_brush_mask_blend.html "Output a bitmap image, apply an alpha mask, and blend it with the store buffer. Same as chaining (Bit...")</span>

</div></div></div>For the above effects, the following properties must be set:

<div class="contents" id="bkmrk-image-%E2%80%93-the-image-on"><div class="contents"><div class="textblock">- **Image** – the image on which the mask will be applied
- **Mask** – the mask image with transparent areas
- **Mask Node** – node used to control the position of the mask. If set to 0, the position of the current node is used. For **iMX6**, the mask takes into account the scale, the rotation and the pivot of the node.

</div></div></div>An example of mask effects is presented below:

<div drawio-diagram="1983"><img src="https://doc316en.candera.eu/uploads/images/drawio/2023-02/drawing-4-1676946920.png" alt=""/></div>

<div class="contents" id="bkmrk--46"><div class="contents"><div class="textblock">  
</div></div></div>Left most image has no **Mask Node** set, therefore the **BitmapNode** associated with the effect is used. The image from the center has **Mask Node** set to a **RenderNode** with **Rotation** property = -50. Thus, the mask also appears rotated. Right most image has **Mask Node** set to a **RenderNode** with different values for **Scale** property (x= 0,5 ; y = 0,5). Thus, the mask also appears smaller.

The properties **Color Blend Factor** and **Operation** and **Alpha Blend Factor** and **Operation** can also be set to obtain different rendering results.

#### **Manipulating an Effect on a Render Node**

To illustrate effect manipulation operations, the *NodeManipulationWidget\_2D* part of the Tutorial Widgets in combination with the NodeManipulationSolution\_2D provided in the content folder of *cgi\_studio\_player* can be used.

  
The type <span style="color: rgb(230, 126, 35);">[Candera::RenderNode](http://dev.doc.cgistudio.at/APILINK/class_candera_1_1_render_node.html "RenderNode is a 2D node that links to an effect chain. Therefore this is the only type of 2D node whi...") </span>defines a node that shall be rendered. Each render node requires an effect chain, which implements the visual representation of the node.

The following properties manipulate a<span style="color: rgb(230, 126, 35);"> [Candera::SolidColorBrushBlend](http://dev.doc.cgistudio.at/APILINK/class_candera_1_1_solid_color_brush_blend.html "Output rectangle filled with a solid color and blend it with the store buffer. Same as chaining (Soli...") </span>effect on a render node (this is a already combined effect with brush, inplace and blend):

<div class="contents" id="bkmrk-rendernodetomanipula"><div class="contents"><div class="textblock">- *RenderNodeToManipulate:* Select a RenderNode to manipulate its effect. Because of casts in the widgets code only select a render node with <span style="color: rgb(230, 126, 35);">[Candera::SolidColorBrushBlend](http://dev.doc.cgistudio.at/APILINK/class_candera_1_1_solid_color_brush_blend.html "Output rectangle filled with a solid color and blend it with the store buffer. Same as chaining (Soli...")</span>, otherwise the casts will fail! (See <span style="color: rgb(230, 126, 35);">[Manipulating an effect](#bkmrk-manipulating-an-effe-0)</span>)
- Set the widgets *SolidColor*, *FillArea*, *Blend* values to change the properties of the effect dynamically.

</div></div></div>##### <a class="anchor" id="bkmrk--212"></a>Manipulating an Effect

First the selected render node (which comes with type <span style="color: rgb(230, 126, 35);">[Candera::Node2D](http://dev.doc.cgistudio.at/APILINK/class_candera_1_1_node2_d.html "The class Node2D is an abstract base class for all 2D scene graph nodes.")</span> by the CDAProperty) is casted to a<span style="color: rgb(230, 126, 35);"> [Candera::RenderNode](http://dev.doc.cgistudio.at/APILINK/class_candera_1_1_render_node.html "RenderNode is a 2D node that links to an effect chain. Therefore this is the only type of 2D node whi...").</span>

```
    // Cast Node2D to RenderNode
    m_renderNode = Dynamic_Cast<RenderNode*>(node);
    // End Cast Node2D to RenderNode
```

Next the first effect of the selected render node of type <span style="color: rgb(230, 126, 35);">[Candera::Effect2D](http://dev.doc.cgistudio.at/APILINK/class_candera_1_1_effect2_d.html "Base class for all 2D effects which can be added to a 2D RenderNode.")</span> is casted to <span style="color: rgb(230, 126, 35);">[Candera::SolidColorBrushBlend](http://dev.doc.cgistudio.at/APILINK/class_candera_1_1_solid_color_brush_blend.html "Output rectangle filled with a solid color and blend it with the store buffer. Same as chaining (Soli...")</span> to get access to specialised properties.

<div class="contents" id="bkmrk-this-simple-example-"><div class="contents"><div class="contents"><div class="textblock"><dl class="note"><dt></dt><dd><p class="callout info">This simple example is based on a RenderNode with SolidColorBrushBlend effect, so if the example solution is changed, please take care to use only SolidColorBrushBlend on the node to manipulate.</p>

</dd></dl><div class="fragment">  
</div></div></div></div></div>```
    // Get and cast first effect of render node
    Effect2D* effect2D = node->GetEffect(0);
    SolidColorBrushBlend* effect = Dynamic_Cast<SolidColorBrushBlend*> (effect2D);
    // End Get and cast first effect of render node
```

Now properties of the effect can be set.

```
        // Set solid color
        SolidColorBrush& brush = effect->GetSolidColorBrush();
        brush.Color() = m_color;
        // End Set solid color
```

```
        // Set fill area
        brush.Size() = m_rect;
        // End Set fill area
```

The effect should be updated each time a property is changed. A good place for updating the effect might be the widget Update method.

```
        // Update effect
        static_cast<void>(effect->Update());
        // End Update effect
```

Arbitrary properties on arbitrary effects can be manipulated the same way.

#### **How to Integrate a Custom Combined Effect into SceneComposer**

##### <a class="anchor" id="bkmrk--213"></a>Integrate a custom effect to Candera and SceneComposer

<div class="contents" id="bkmrk-create-and-implement"><div class="contents"><div class="textblock">- Create and implement your own effect.
- Integrate the effect into the effect library of the device.

</div></div></div>For **DEVICE** that would mean to modify cgi\_studio\_candera/src/CanderaPlatform/Device/DEVICE/2D/DEVICEEffectLibrary.cpp, so that the new effect implementation is included and the Effect2DLibrary MetaInfo is extended by the new effect. (**DEVICE** stands for your specific device)

<div class="contents" id="bkmrk-integrate-the-new-de"><div class="contents"><div class="textblock">- Integrate the new device library in SceneComposer. Therefore set CMake source to *&lt;cgi-studio-root&gt;/cmake/Candera/Player* and build a SCHost.dll. The library CanderaDevice&lt;device&gt;.lib is linked to the SCHost.dll, which than has the new effect included.
- Start SceneComposer with the new SCHost.dll. The new effect is listed in the toolbox for a 2D scene.

</div></div></div>##### <a class="anchor" id="bkmrk--214"></a>How to create a combination of two effects

There are several effects which can be combined to a new effect. How to combine two effects to a new one is shown in <span style="color: rgb(230, 126, 35);">[Candera::GlBitmapBrushColorMaskBlend](http://dev.doc.cgistudio.at/APILINK/class_candera_1_1_gl_bitmap_brush_color_mask_blend.html "Output a bitmap image, apply an alpha mask, and blend it with the store buffer. Same as chaining (Bit...")</span> implementation.   
  
For the new effect <span style="color: rgb(230, 126, 35);">[Candera::GlBitmapBrushColorMaskBlend](http://dev.doc.cgistudio.at/APILINK/class_candera_1_1_gl_bitmap_brush_color_mask_blend.html "Output a bitmap image, apply an alpha mask, and blend it with the store buffer. Same as chaining (Bit...") </span>you need a combination of <span style="color: rgb(230, 126, 35);">[Candera::BitmapBrushColorBlend](http://dev.doc.cgistudio.at/APILINK/class_candera_1_1_bitmap_brush_color_blend.html "Output a bitmap image, modulate the color, and blend it with the store buffer. Same as chaining (Bitm...")</span> and <span style="color: rgb(230, 126, 35);">[Candera::GlBitmapBrushMaskBlend](http://dev.doc.cgistudio.at/APILINK/class_candera_1_1_gl_bitmap_brush_mask_blend.html "Output a bitmap image, apply an alpha mask, and blend it with the store buffer. Same as chaining (Bit...").</span> Create and implement the new effect analogous to <span style="color: rgb(230, 126, 35);">[Candera::GlBitmapBrushMaskBlend](http://dev.doc.cgistudio.at/APILINK/class_candera_1_1_gl_bitmap_brush_mask_blend.html "Output a bitmap image, apply an alpha mask, and blend it with the store buffer. Same as chaining (Bit...").</span> Now apply following changes:

<div class="contents" id="bkmrk-the-new-effect-conta"><div class="textblock">- The new effect contains both, MaskEffect and ColorEffect as member (wrapper, see in .h file).
- The implementation of the method Render() is a combination of <span style="color: rgb(230, 126, 35);">[Candera::BitmapBrushColorBlend::Render()](http://dev.doc.cgistudio.at/APILINK/class_candera_1_1_bitmap_brush_color_blend.html#a8ee02600ae12997d03848630cd5afb6c)</span> and <span style="color: rgb(230, 126, 35);">[Candera::GlBitmapBrushMaskBlend::Render()](http://dev.doc.cgistudio.at/APILINK/class_candera_1_1_gl_bitmap_brush_mask_blend.html#a415687094239fd93ed18483ab36896d8)</span>. This method has to handle all four effects in the following order: 
    - blend effect,
    - color effect,
    - mask effect and
    - brush effect.
- Upload(), <span style="color: rgb(230, 126, 35);">[Unload()](http://dev.doc.cgistudio.at/APILINK/group___c_o_u_r_i_e_r___v_i_s_u_a_l_i_z_a_t_i_o_n.html#ggaebf7a2d5677fc4e6ddcb367db56e9c15a1b6f59824b91ac64e42a98cf561639d6),</span> and Update() have to handle all four effects.
- Apply changes to the Effect Meta Info. The new effect needs all four effects (BitmapBrush, ColorEffect, MaskEffect, BlendEffect).

</div></div>

# 2D Scene Graph Dynamics

#### <a class="anchor" id="bkmrk--215"></a>Description

Usually all required nodes are already specified and preconfigured via SceneComposer, so in most cases it won't be necessary to make any adaptations within the scene graph loaded from an asset at runtime.

However, some use cases might require such adaptations. This tutorial covers the most common means to manipulate the scene graph structure dynamically.

#### Example Solution

<div class="contents" id="bkmrk-scenegraphdynamicsso-1"><div class="textblock">- SceneGraphDynamicsSolution\_2D in folder *cgi\_studio\_player/content/Tutorials/03\_SceneGraphAndNodes*

</div></div>#### **Adding and Removing 2D Nodes** 

##### <a class="anchor" id="bkmrk--218"></a>Scene Graph Dynamics 2D Example

There are some differences between a 2D and a 3D scene graph. This chapter will explain the differences in detail.

For 2D scene graph dynamics, the following examples can be used:

<div class="contents" id="bkmrk-scenegraphdynamicsso-2"><div class="contents"><div class="textblock">- **SceneGraphDynamicsSolution\_2D** from folder *cgi\_studio\_player/content/Tutorials/03\_SceneGraphAndNodes*
- **SceneGraphDynamicsWidget\_2D**

</div></div></div>##### <a class="anchor" id="bkmrk--219"></a>Adding and Removing 2D Nodes

In the widget a RenderNode with text is created and added/removed to/from the 2D scene graph. For adding and removing 2D nodes on the scene graph the following properties can be used:

<div class="contents" id="bkmrk-addtonode2d%3A-select-"><div class="contents"><div class="contents"><div class="textblock">- **AddToNode2D:** Select the node where the new RenderNode should be attached. This node can be any sub-type of <span style="color: rgb(230, 126, 35);">[Candera::Node2D](http://dev.doc.cgistudio.at/APILINK/class_candera_1_1_node2_d.html "The class Node2D is an abstract base class for all 2D scene graph nodes.")</span>.

<div class="fragment">  
</div></div></div></div></div>```
        CdaProperty(AddToNode, <a class="code" href="http://dev.doc.cgistudio.at/APILINK/class_candera_1_1_node2_d.html" title="The class Node2D is an abstract base class for all 2D scene graph nodes.">Candera::Node2D</a>*, GetAddToNode, SetAddToNode)
            CdaDescription("Node2D, where a new TextNode shall be added to")
            CdaCategory("Adding and Removing 2D Nodes")
        <a class="code" href="http://dev.doc.cgistudio.at/APILINK/group___meta_info.html#ga119bef57449bd05d8b3c40d7d514e375">CdaPropertyEnd</a>()
```

<div class="contents" id="bkmrk-textnodefont%3A-select"><div class="contents"><div class="contents"><div class="textblock"><div class="fragment">  
</div>- **TextNodeStyle :** Sets the style to be used for the text node. This allows the user to provide a custom style for the dynamic text.

</div></div></div></div>```
CdaProperty(TextNodeStyle, Candera::TextRendering::SharedStyle::SharedPointer, GetTextNodeStyle, SetTextNodeStyle)
 CdaDescription("Style for the new Text Node ")
 CdaCategory("Adding and Removing 2D Nodes ")
```

<div class="contents" id="bkmrk-addtextnode%3A-if-addt"><div class="contents"><div class="contents"><div class="textblock"><div class="fragment">  
</div>- **AddTextNode:** If AddTextNode is enabled, a new text node with the selected font is created and attached to the selected node. If disabled, the text node is removed from the scene graph again.

<div class="fragment">  
</div></div></div></div></div>```
        CdaProperty(AddTextNode, bool, GetAddTextNode, SetAddTextNode)
            CdaDescription("If AddTextNode is enabled, a new TextNode with Selected TextNodeStyle Will be added to the selected AddToNode property. If disabled the new TextNode will be removed.")
            CdaCategory("Adding and Removing 2D Nodes")
        CdaPropertyEnd()

```

##### <a class="anchor" id="bkmrk--220"></a>Creating a new Text Node

To display new text, a new TextNode2D is created. TextNode2D represents a Render Node (Candera::TextNode2D). It requires a BitmapBrush effect for rendering. The Candera::BitmapTextNodeRenderer then generates the bitmap images from the given text, and these images are finally rendered using the attached Bitmap Brush effect.

Create an instance of BitmapBrushEffect and a text node for the scene graph using the following code used.

```
BitmapBrushColorBlend::SharedPointer bbc = BitmapBrushColorBlend::Create();
bbc->GetColorEffect().Color().Set(Color(255 / 255, 255, 255 / 255, 1));
m_addedNode = TextNode2D::Create();
m_addedNode ->AddEffect(bbc.GetPointerToSharedInstance());
m_addedNode ->SetName("AddedTextNode");
m_addedNode ->SetText("AddedNode");
m_addedNode ->SetStyle(m_textNodeStyle);
m_addedNode ->SetTextNodeRenderer(BitmapTextNodeRenderer::Create());
m_addedNode ->SetPosition(100, 200);    
```

##### <a class="anchor" id="bkmrk--221"></a>Adding Text Node to Scene Graph

Next the text node is uploaded to VRAM and appended to the selected node.

```
        static_cast<void>(m_addedNode->Upload());
        static_cast<void>(m_addToNode->AddChild(m_addedNode));
```

##### <a class="anchor" id="bkmrk--222"></a>Removing and Destructing Text Node

A 2D node can be removed by calling <span style="color: rgb(230, 126, 35);">[Candera::Node2D::RemoveChild](http://dev.doc.cgistudio.at/APILINK/class_candera_1_1_node2_d.html#a2c5fb3b53f03a11d0cc1336eebcbddef).</span> This is also described in the 3D part of this chapter (see <span style="color: rgb(230, 126, 35);">[Removing and destructing the Billboard](https://doc316en.candera.eu/link/449#bkmrk-removing-and-destruc)</span>). For removing and completely destructing the node, following code is used:

```
        static_cast<void>(m_addedNode->Unload());
        m_addedNode->Dispose();
        m_addedNode = 0;
```

The text node is unloaded from VRAM. The method <span style="color: rgb(230, 126, 35);">[Candera::Node2D::Dispose](http://dev.doc.cgistudio.at/APILINK/class_candera_1_1_node2_d.html#abaf2f0b8fd406b23a626560ff8395c7c)</span> removes the node from its parent and frees the resources.

<div class="contents" id="bkmrk-in-scenecomposer-the-3"><div class="textblock"><dl class="note"><dd><p class="callout info">In SceneComposer the manipulated scene graph and the changed properties do not appear because it is only changed dynamically by the widget.</p>

<p class="callout info">The widget must control memory and VRAM management of its internal dynamic subtree autonomously.</p>

</dd></dl></div></div>#### **Replacing a 2D Effect** 

##### <a class="anchor" id="bkmrk--223"></a>Replacing an Effect

In the SceneGraphDynamicsWidget\_2D example, the effect of a <span style="color: rgb(230, 126, 35);">[Candera::RenderNode](http://dev.doc.cgistudio.at/APILINK/class_candera_1_1_render_node.html "RenderNode is a 2D node that links to an effect chain. Therefore this is the only type of 2D node whi...") </span>can be either replaced by a <span style="color: rgb(230, 126, 35);">[Candera::SolidColorBrushBlend](http://dev.doc.cgistudio.at/APILINK/class_candera_1_1_solid_color_brush_blend.html "Output rectangle filled with a solid color and blend it with the store buffer. Same as chaining (Soli...") </span>or a <span style="color: rgb(230, 126, 35);">[Candera::BitmapBrushBlend](http://dev.doc.cgistudio.at/APILINK/class_candera_1_1_bitmap_brush_blend.html "This effect outputs a bitmap image, and blend it with the store buffer. Same as chaining (BitmapBrush...")</span> effect. Of course the same procedure works for Text effects.

To replace the effect in the example, the following properties can be used:

<div class="contents" id="bkmrk-nodetochange%3A-select"><div class="contents"><div class="contents"><div class="textblock">- **NodeToChange:** Select any render node with an effect whose appearance should be changed. Ensure that just a render node which has an effect is selected (in the sample solution this could be e.g. the node BitmapNode\_BarTop). For further information see <span style="color: rgb(230, 126, 35);">[Adding Replacing Effect](#bkmrk-adding-replacing-eff)</span>.

<div class="fragment">  
</div></div></div></div></div>```
        CdaProperty(NodeToChange, <a class="code" href="http://dev.doc.cgistudio.at/APILINK/class_candera_1_1_node2_d.html" title="The class Node2D is an abstract base class for all 2D scene graph nodes.">Candera::Node2D</a>* , GetNodeToChange, SetNodeToChange)
            CdaDescription("Select a RenderNode which effect should be exchanged")
            CdaCategory("Replacing a 2D Effect")
        <a class="code" href="http://dev.doc.cgistudio.at/APILINK/group___meta_info.html#ga119bef57449bd05d8b3c40d7d514e375">CdaPropertyEnd</a>()
```

<div class="contents" id="bkmrk-changeeffect%3A-if-cha"><div class="contents"><div class="contents"><div class="textblock"><div class="fragment">  
</div>- **ChangeEffect:** If ChangeEffect is enabled, the effect of the selected NodeToChange will be removed and a <span style="color: rgb(230, 126, 35);">[Candera::SolidColorBrushBlend](http://dev.doc.cgistudio.at/APILINK/class_candera_1_1_solid_color_brush_blend.html "Output rectangle filled with a solid color and blend it with the store buffer. Same as chaining (Soli...") </span>effect is added to the node, instead. If disabled, the actual effect will be removed too and a <span style="color: rgb(230, 126, 35);">[Candera::BitmapBrushBlend](http://dev.doc.cgistudio.at/APILINK/class_candera_1_1_bitmap_brush_blend.html "This effect outputs a bitmap image, and blend it with the store buffer. Same as chaining (BitmapBrush...")</span> effect is added to the node.

<div class="fragment">  
</div></div></div></div></div>```
        CdaProperty(ChangeEffect, bool, GetChangeEffect, SetChangeEffect)
            CdaDescription("<a class="code" href="http://dev.doc.cgistudio.at/APILINK/group___c_o_u_r_i_e_r___v_i_s_u_a_l_i_z_a_t_i_o_n.html#ggaebf7a2d5677fc4e6ddcb367db56e9c15af6e24437ca5022a15546ac6a5abac675">Change</a> effect of selected NodeToChange. Set either a SolidColorBrushAlphaBlend (enabled) or BitmapBrushAlphaBlend effect (disabled).")
            CdaCategory("Replacing a 2D Effect")
        <a class="code" href="http://dev.doc.cgistudio.at/APILINK/group___meta_info.html#ga119bef57449bd05d8b3c40d7d514e375">CdaPropertyEnd</a>()
```

##### <a class="anchor" id="bkmrk--224"></a>Creating a Color Effect

First a new effect is created by creating an instance of <span style="color: rgb(230, 126, 35);">[Candera::SolidColorBrushBlend](http://dev.doc.cgistudio.at/APILINK/class_candera_1_1_solid_color_brush_blend.html "Output rectangle filled with a solid color and blend it with the store buffer. Same as chaining (Soli...").</span>

<div class="contents" id="bkmrk-2d-effects-are-part--0"><div class="contents"><div class="contents"><div class="textblock"><dl class="note"><dt></dt><dd><p class="callout info">2D effects are part of the device package, therefore in order to create a concrete instance of the effect, the effect must be enabled for the device. Please see chapter **2D Effects** of this tutorial to see how to enable an effect for a certain device.</p>

</dd></dl><div class="fragment">  
</div></div></div></div></div>```
        <a class="code" href="http://dev.doc.cgistudio.at/APILINK/class_feat_std_1_1_memory_management_1_1_shared_pointer.html" title="An intrusive reference-counting smart pointer. If you want your class to be managed by SharedPointer ...">Candera::SolidColorBrushBlend::SharedPointer</a> brush = <a class="code" href="http://dev.doc.cgistudio.at/APILINK/group___c_o_u_r_i_e_r___v_i_s_u_a_l_i_z_a_t_i_o_n.html#ggaf0e93dc4242f607c3c8d13dafd036af9aaabfa5309af24986d3111a092449f857">Candera::SolidColorBrushBlend::Create</a>();
        brush->GetSolidColorBrush().Size().Set(m_Rect);
        brush->GetSolidColorBrush().Color().Set(m_ColorBlue);
        brush->GetBlendEffect().SetBlendMode(RenderDevice2D::SourceAlpha, RenderDevice2D::InverseSourceAlpha, RenderDevice2D::Add);
```

##### <a class="anchor" id="bkmrk--225"></a>Adding Replacing Effect

Once the effect is created it can be added to the render node. In the following code snippet the selected NodeToChange is cast to a <span style="color: rgb(230, 126, 35);">[Candera::RenderNode](http://dev.doc.cgistudio.at/APILINK/class_candera_1_1_render_node.html "RenderNode is a 2D node that links to an effect chain. Therefore this is the only type of 2D node whi...")</span> (for this a RenderNode **must** be selected, otherwise the cast will fail). The first effect of the node is removed via its reference and the new created effect added.

```
    RenderNode* rn = Dynamic_Cast<RenderNode*>(m_nodeToChange);
    if (rn == 0) {
        return;
    }

    static_cast<void>(rn->Unload());

    //remove old effect
    Effect2D* oldEffect = rn->GetEffect(0);
    static_cast<void>(rn->RemoveEffect(oldEffect));

    //add new effect
    static_cast<void>(rn->AddEffect(effect));
    static_cast<void>(rn->Upload());
```

##### <a class="anchor" id="bkmrk--226"></a>Creating a Bitmap Effect

Creating a <span style="color: rgb(230, 126, 35);">[Candera::BitmapBrushBlend](http://dev.doc.cgistudio.at/APILINK/class_candera_1_1_bitmap_brush_blend.html "This effect outputs a bitmap image, and blend it with the store buffer. Same as chaining (BitmapBrush...")</span> effect is similar to creating other effects (see <span style="color: rgb(230, 126, 35);">[Creating a Color Effect](#bkmrk-creating-a-color-eff)</span>). Just apply other properties.

```
        <a class="code" href="http://dev.doc.cgistudio.at/APILINK/class_feat_std_1_1_memory_management_1_1_shared_pointer.html" title="An intrusive reference-counting smart pointer. If you want your class to be managed by SharedPointer ...">Candera::MemoryManagement::SharedPointer<Candera::BitmapBrushBlend></a> brush = <a class="code" href="http://dev.doc.cgistudio.at/APILINK/group___c_o_u_r_i_e_r___v_i_s_u_a_l_i_z_a_t_i_o_n.html#ggaf0e93dc4242f607c3c8d13dafd036af9aaabfa5309af24986d3111a092449f857">Candera::BitmapBrushBlend::Create</a>();
        Bitmap::SharedPointer bitmap = Base::GetAssetProvider()->GetBitmapById(CgiAssetNames::cosmosbgBmp);
        if (m_image != 0) {
            static_cast<void>(m_image->SetBitmap(bitmap));
        }
        brush.<a class="code" href="http://dev.doc.cgistudio.at/APILINK/class_feat_std_1_1_memory_management_1_1_shared_pointer.html#a5f3988146f96e93069657ec84a969c40">GetSharedInstance</a>().<a class="code" href="http://dev.doc.cgistudio.at/APILINK/class_candera_1_1_bitmap_brush_blend.html#ae26ca8fce23a9566c2f291c969ec6697">GetBitmapBrush</a>().Image().Set(m_image);
        brush.<a class="code" href="http://dev.doc.cgistudio.at/APILINK/class_feat_std_1_1_memory_management_1_1_shared_pointer.html#a5f3988146f96e93069657ec84a969c40">GetSharedInstance</a>().<a class="code" href="http://dev.doc.cgistudio.at/APILINK/class_candera_1_1_bitmap_brush_blend.html#a0c3cc14496925e1b90a91f241e382c04">GetBlendEffect</a>().SetBlendMode(RenderDevice2D::SourceAlpha, RenderDevice2D::InverseSourceAlpha, RenderDevice2D::Add);
```

<div class="contents" id="bkmrk-in-scenecomposer-the-4"><div class="textblock"><div class="fragment">  
</div><dl class="note"><dt>  
</dt><dd><p class="callout info">In SceneComposer the manipulated scene graph and the changed properties do not appear because it is only changed dynamically by the widget.</p>

<p class="callout info">The widget must control memory and VRAM management of its internal dynamic subtree autonomously.</p>

<p class="callout info">Don't forget to set a name for the dynamically created nodes.</p>

</dd></dl></div></div>#### **Cloning 2D Nodes** 

Cloning 2D nodes is equivalent to cloning of 3D nodes. In accordance to Tree Cloning Strategies, the following support is provided for deep cloning:

<div class="contents" id="bkmrk-candera%3A%3Atreecloner2"><div class="contents"><div class="textblock">- <span style="color: rgb(230, 126, 35);">[Candera::TreeCloner2D](http://dev.doc.cgistudio.at/APILINK/group___cloning2_d.html#ga3422d4b6927060f781728ced9fa020fa "Specialization of TreeClonerBase for use with Node2D.")</span> is a specialization for the 2D scene tree of<span style="color: rgb(230, 126, 35);"> [Candera::TreeClonerBase](http://dev.doc.cgistudio.at/APILINK/class_candera_1_1_tree_cloner_base.html "This class clones scene subtrees.").</span>
- <span style="color: rgb(230, 126, 35);">[Candera::DeepNode2DCloneStrategy](http://dev.doc.cgistudio.at/APILINK/class_candera_1_1_deep_node2_d_clone_strategy.html "This is the default clone strategy for deep cloning.")</span> provides a generic node strategy that clones the delegates the cloning of derived Nodes to specialized strategies.
- <span style="color: rgb(230, 126, 35);">[Candera::DeepCompositeGroup2DCloneStrategy](http://dev.doc.cgistudio.at/APILINK/class_candera_1_1_deep_composite_group2_d_clone_strategy.html "This is the default clone strategy for deep cloning composite groups. See DeepNode2DCloneStrategy for...") </span>resolves node binding by use of <span style="color: rgb(230, 126, 35);">[Candera::TreeMatch2D](http://dev.doc.cgistudio.at/APILINK/group___cloning2_d.html#ga47d53fd45a19ef3060e551d576bb8245 "Specialization of TreeMatchBase for use with Node2D.")</span>.
- <span style="color: rgb(230, 126, 35);">[Candera::DeepRenderNodeCloneStrategy](http://dev.doc.cgistudio.at/APILINK/class_candera_1_1_deep_render_node_clone_strategy.html "This is the default clone strategy for deep cloning render nodes. See DeepNode2DCloneStrategy for rul...") </span>resolves the sharing of effects by use of a map.
- <span style="color: rgb(230, 126, 35);">[Candera::DeepTreeCloner2D](http://dev.doc.cgistudio.at/APILINK/class_candera_1_1_deep_tree_cloner2_d.html "This class creates deep clones scene subtrees.")</span> is a wrapper of <span style="color: rgb(230, 126, 35);">[Candera::DeepNode2DCloneStrategy](http://dev.doc.cgistudio.at/APILINK/class_candera_1_1_deep_node2_d_clone_strategy.html "This is the default clone strategy for deep cloning.")</span> that provides an interface similar to <span style="color: rgb(230, 126, 35);">[Candera::TreeCloner2D](http://dev.doc.cgistudio.at/APILINK/group___cloning2_d.html#ga3422d4b6927060f781728ced9fa020fa "Specialization of TreeClonerBase for use with Node2D.").</span>

</div></div></div>Refer to

<div class="contents" id="bkmrk-candera%3A%3Anode2d%3A%3Aclo"><div class="contents"><div class="textblock">- <span style="color: rgb(230, 126, 35);">[Candera::Node2D::Clone](http://dev.doc.cgistudio.at/APILINK/class_candera_1_1_node2_d.html#aabc132c0ed42fc91e2491eadbb69eff4)</span>

</div></div></div>as well as the example for cloning 3D nodes:

<div class="contents" id="bkmrk-cloning-3d-nodes"><div class="textblock">- <span style="color: rgb(230, 126, 35);">[Cloning 3D Nodes](https://doc316en.candera.eu/link/449#bkmrk-cloning-3d-nodes%C2%A0)</span>

</div></div>

# Camera / Viewport 

The following example shows the interaction between scene and camera. The objects are placed relatively to the scene origin (which is the root node). The camera defines the view to that scene by defining also a position relative to the scene.

<div drawio-diagram="1984"><img src="https://doc316en.candera.eu/uploads/images/drawio/2023-02/drawing-4-1676947701.png" alt=""/></div>

<div class="contents" id="bkmrk--52"><div class="contents"><div class="textblock">  
</div></div></div>The view port dimensions (width and height) relate to the area on the render target the camera is painting on.

<div drawio-diagram="1985"><img src="https://doc316en.candera.eu/uploads/images/drawio/2023-02/drawing-4-1676947712.png" alt=""/></div>

<div class="contents" id="bkmrk--54"></div>

# 2D Layout

#### <a class="anchor" id="bkmrk--229"></a>Description

In a typical user interface users need to distribute screen space to different elements. If the size of elements is dynamic, it's desired that the screen space distribution is done automatically based on the contents's natural size. To enable easy arrangement of elements, Candera2D supports layout functionalities.

#### <a class="anchor" id="bkmrk--231"></a>Example Solution

<div class="contents" id="bkmrk-layout2dsolution-in-"><div class="textblock">- Layout2DSolution in folder *cgi\_studio\_player/content/Tutorials/Layout2DSolution.zip*

</div></div>#### **Candera::GridLayouter** 

##### <a class="anchor" id="bkmrk--232"></a>Introduction

Basically, in SceneComposer for each [Candera::Group2D](http://dev.doc.cgistudio.at/APILINK/class_candera_1_1_group2_d.html "The class Group2D is a scene graph node that stores a set of nodes as its children. The parent-child relationship between groups and nodes is bidirectional. Whereas a group can hold a group of nodes, a node can at most have one parent at a time. Cycles are prohibited. Changing the groups transformation or alpha value affects the children nodes of the group.") a [Candera::Layouter](http://dev.doc.cgistudio.at/APILINK/class_candera_1_1_layouter.html "A non-zero padding applies space inside the element layout's width and height. The values can be set ...") can be attached. The attached layouter defines the arrangements of the group's children.

##### <a class="anchor" id="bkmrk--233"></a>Cell Spanning

[Candera::GridLayouter](http://dev.doc.cgistudio.at/APILINK/class_candera_1_1_grid_layouter.html "GridLayouter arranges its elements in a grid. The amount of rows and columns for the grid must be spe...") provides a feature that allows joining of adjacent columns and rows into a larger single cell.

Cells can be joined horizontally, vertically or both. In order to achieve this, you must specify **Row Span** and **Column Span** properties for elements inside a [Candera::GridLayouter](http://dev.doc.cgistudio.at/APILINK/class_candera_1_1_grid_layouter.html "GridLayouter arranges its elements in a grid. The amount of rows and columns for the grid must be spe..."):

<div class="contents" id="bkmrk-row-span%3A-specifies-"><div class="contents"><div class="textblock">- Row Span: Specifies the number of rows that the element should span across.
- Column Span: Specifies the number of columns that the element should span across.

</div></div></div><div class="contents" id="bkmrk-default-value-for-ro"><div class="contents"><div class="textblock"><dl class="note"><dd><p class="callout info">Default value for row and column span properties is 1.</p>

</dd></dl></div></div></div>##### <a class="anchor" id="bkmrk--234"></a>Example

The **Layout2DSolution** provided in the content folder of *cgi\_studio\_player* gives an example how the 2D layout can be applied in SceneComposer. This section gives just a brief overview on layout features and shows how it looks like.

In the example on the outermost group, a [Candera::GridLayouter](http://dev.doc.cgistudio.at/APILINK/class_candera_1_1_grid_layouter.html "GridLayouter arranges its elements in a grid. The amount of rows and columns for the grid must be spe...") with 6 rows and 3 columns is defined.

All child nodes, here a bunch of bitmap-, text- and solid-nodes, are arranged along the grid. Each inner grid element can set various dynamic properties which define its size and alignment inside a grid cell.

Layouters can be nested. The outer grid contains a inner grid and two inner stack layouters ([Candera::StackLayouter](http://dev.doc.cgistudio.at/APILINK/class_candera_1_1_stack_layouter.html "A StackLayouter stacks its elements either in horizontal or vertical order.")).

<div drawio-diagram="1986"><img src="https://doc316en.candera.eu/uploads/images/drawio/2023-02/drawing-4-1676947861.png" alt=""/></div>

<div class="contents" id="bkmrk--57"><div class="contents"><div class="textblock">  
</div></div></div>The example consists of a grid layouter with fixed size 1280 x 756 px.

<div class="contents" id="bkmrk-the-3-column%27s-width"><div class="contents"><div class="textblock">- The **3 column's width** values are: 100 / 0,5 / 0,5. 
    - The first column has a absolute width of 100 px,
    - the second and third column share the rest of the space (1180 px) relatively to each other (indicated by 0.0 &lt;= value &lt;= 1.0).
    - In fact the effective width column 2 and 3 is calculated by the layouter as follows: (1180 \* 0,5) / (0,5 + 0,5) = 590 px.
- The **row heights** are defined as 126 / 0,1 / 0,1 / 0,1 / 0,1 / 0,1.. 
    - The first row has a absolute height of 126 px,
    - and the remaining height (630 px) is partitioned relatively to the other rows. Row height = (630 \* 0,1) / (0,1 + 0,1 + 0,1 + 0,1 + 0,1) = 126 px.

</div></div></div><div class="contents" id="bkmrk-if-a-size-value-is-s"><div class="contents"><div class="textblock"><dl class="note"><dd><p class="callout info">If a size value is set to -1 the width or height is set to the preferred size of the inner elements.</p>

</dd></dl></div></div></div>The bitmaps in the left column have different **alignments** (Top-Left, Centered, Bottom-Right). In the inner grid 9 bitmaps are scaled down (by the stretching property) to a fixed element size.

<div class="contents" id="bkmrk-the-grey-grid-raster"><div class="contents"><div class="textblock"><dl class="note"><dd><p class="callout info">The grey grid raster in the background is set up manually by solid nodes to illustrate the inner grid borders.</p>

</dd></dl></div></div></div>##### Cell Spanning Example

In the example, below a [Candera::GridLayouter](http://dev.doc.cgistudio.at/APILINK/class_candera_1_1_grid_layouter.html "GridLayouter arranges its elements in a grid. The amount of rows and columns for the grid must be spe...") with 5 rows and 4 columns defined is used to exemplify how cell spanning is working:

<div class="contents" id="bkmrk-horizontal-spanning%3A"><div class="contents"><div class="contents"><div class="textblock">- **Horizontal Spanning**: Element in Row(0) and Column(1) has a Column Span of 2.
- **Vertical Spanning**: Element in Row(1) and Column(3) has a Row Span of 3.
- **Horizontal and Vertical Spanning**: Element in Row(2) and Column(0) has a Row Span of 2 and Column Span of 2.

</div></div></div></div><div drawio-diagram="1987"><img src="https://doc316en.candera.eu/uploads/images/drawio/2023-02/drawing-4-1676947967.png" alt=""/></div>

<div class="contents" id="bkmrk-please-note-that-sin"><div class="contents"><div class="contents"><div class="textblock"><dl class="note"><dt></dt><dd><p class="callout info">Please note that single cells might still be used for other elements if needed, like in the following example:</p>

<p class="callout info">A [Candera::GridLayouter](http://dev.doc.cgistudio.at/APILINK/class_candera_1_1_grid_layouter.html "GridLayouter arranges its elements in a grid. The amount of rows and columns for the grid must be spe...") with 2 rows and 2 columns is defined. Element in (0,0) has a row and column span of 2, but element at (1,1) is still accessible.</p>

</dd></dl></div></div></div></div><div drawio-diagram="1988"><img src="https://doc316en.candera.eu/uploads/images/drawio/2023-02/drawing-4-1676948004.png" alt=""/></div>

<div class="contents" id="bkmrk--60"><div class="contents"><div class="textblock">  
</div></div></div>**See also:**

<div class="contents" id="bkmrk-grid-layouter-in-sce"><div class="textblock">- <span style="color: rgb(230, 126, 35);">[Grid Layouter](https://doc316en.candera.eu/link/152#bkmrk-grid-layouter)</span> in SceneComposer User Manual

</div></div>#### **Candera::BaseLineLayouter** 

##### <a class="anchor" id="bkmrk--238"></a>Introduction

[Candera::BaseLineLayouter](http://dev.doc.cgistudio.at/APILINK/class_candera_1_1_base_line_layouter.html "A BaseLineLayouter behaves similar to a Horizontal StackLayouter but instead of aligning the objects ...") behaves similar to a Horizontal StackLayouter but instead of aligning the objects to the client area of the Layouter, it aligns them to a line.

The idea is to be able to align text with different sizes in different ways.

<div class="contents" id="bkmrk-for-instance-it-can-"><div class="contents"><div class="textblock">- For instance it can align all the text by the top of its bounding box (VTop).
- It can align the text by taking into consideration the bottom of the bounding box (VBottom).
- Or, the most interesting feature it can align the items with different size by their **base line** (VCenter).

</div></div></div>##### <a class="anchor" id="bkmrk--239"></a>Example

The **Layout2DSolution** provided in the content folder of *cgi\_studio\_player* gives an example how the 2D BaseLineLayouter can be applied in SceneComposer.

<div class="contents" id="bkmrk-in-the-scene2dbaseli"><div class="contents"><div class="textblock">- In the Scene2DBaseLineLayouter scene, on three groups, a [Candera::BaseLineLayouter](http://dev.doc.cgistudio.at/APILINK/class_candera_1_1_base_line_layouter.html "A BaseLineLayouter behaves similar to a Horizontal StackLayouter but instead of aligning the objects ...") is defined.
- The base line offset configured on the groups is visualized by an orange line.
- The text parts of each group are defined with "VTop", "VBottom", or "VCenter", for the Vertical Alignment attribute.

</div></div></div>The baseline can be either fixed or automatic. The automatic baseline is configured such that all the children fit from the top of the client area.

<div drawio-diagram="1989"><img src="https://doc316en.candera.eu/uploads/images/drawio/2023-02/drawing-4-1676948049.png" alt=""/></div>

<div class="contents" id="bkmrk--62"><div class="contents"><div class="textblock">  
</div></div></div>**See also:**

<div class="contents" id="bkmrk-baseline-layouter-in"><div class="textblock">- <span style="color: rgb(230, 126, 35);">[Baseline Layouter](https://doc316en.candera.eu/link/152#bkmrk-baseline-layouter)</span> in SceneComposer User Manual

</div></div>#### **Candera::OverlayLayouter** 

##### <a class="anchor" id="bkmrk--241"></a>Introduction

A [Candera::OverlayLayouter](http://dev.doc.cgistudio.at/APILINK/class_candera_1_1_overlay_layouter.html "OverlayLayouter sets sizes of all child elements to fulfill the given area.") is a container that layouts enfolded nodes by overlaying them in same place in a sorted sequence. With this layouter, elements can be arranged that they fulfill a given area and lay on top of one another.

##### <a class="anchor" id="bkmrk--242"></a>Example

The **Layout2DSolution** provided in the content folder of *cgi\_studio\_player* gives an example how the OverlayLayouter can be applied in SceneComposer. Some important use cases are:

<div class="contents" id="bkmrk-the-outer-group-repr"><div class="contents"><div class="contents"><div class="textblock">- The outer group represents the given area, in which the nodes are arranged. You can set the size of the group to define the height and the width of the area. If you don't set any size, it will automatically be set to the size of the biggest inner child element.
- The sequence of the nodes in the overlay group is important. In the example the Inner\_Overlay\_Group is displayed in front of the Outer\_Overlay\_Group.
- Three very small images (mainBmp, gradient\_verticalBmp, gradient\_horizontalBmp, see in ExampleSolution) are stretched and blended to create a big image. They fulfill the given area.
- The text nodes are aligned to the center and in the corners. You can set several vertical and horizontal alignments for each node.

</div></div></div></div><div drawio-diagram="1991"><img src="https://doc316en.candera.eu/uploads/images/drawio/2023-02/drawing-4-1676948095.png" alt=""/></div>

<div class="contents" id="bkmrk--64"><div class="contents"><div class="textblock">  
</div></div></div>**See also:**

<div class="contents" id="bkmrk-overlay-layouter-in-"><div class="textblock">- <span style="color: rgb(230, 126, 35);">[Overlay Layouter](https://doc316en.candera.eu/link/152#bkmrk-overlay-layouter)</span> in SceneComposer User Manual

</div></div>#### **Candera::DockPanelLayouter** 

##### <a class="anchor" id="bkmrk--244"></a>Introduction

The [Candera::DockPanelLayouter](http://dev.doc.cgistudio.at/APILINK/class_candera_1_1_dock_panel_layouter.html "The Dock Panel Layouter provides an easy docking of elements to the left, right, top, bottom or center of the panel. The dock side of an element is defined by the attached dynamic DockSide property. To dock an element to the center of the panel, it must be the last child of the panel.") provides an easy docking of elements to the left, right, top, bottom or center of the panel. To dock an element to the center of the panel, it must be the last child of the panel.

##### <a class="anchor" id="bkmrk--245"></a>Example

The **Layout2DSolution** provided in the content folder of *cgi\_studio\_player* gives an example how the DockPanelLayouter can be applied in SceneComposer.

<div drawio-diagram="1994"><img src="https://doc316en.candera.eu/uploads/images/drawio/2023-02/drawing-4-1676948156.png" alt=""/></div>

<div class="contents" id="bkmrk--66"><div class="contents"><div class="textblock">  
</div></div></div>**See also:**

<div class="contents" id="bkmrk-candera%3A%3Adockpanella-0"><div class="textblock">- [Candera::DockPanelLayouter](http://dev.doc.cgistudio.at/APILINK/class_candera_1_1_dock_panel_layouter.html "The Dock Panel Layouter provides an easy docking of elements to the left, right, top, bottom or center of the panel. The dock side of an element is defined by the attached dynamic DockSide property. To dock an element to the center of the panel, it must be the last child of the panel.")
- <span style="color: rgb(230, 126, 35);">[DockPanel Layouter](https://doc316en.candera.eu/link/152#bkmrk-dockpanel-layouter)</span> in SceneComposer User Manual

</div></div>#### **Automatic Resize Depending on Content** 

##### <a class="anchor" id="bkmrk--247"></a>Introduction

This tutorial will show how to create resizable dialog popups using a hierarchy of groups and different kind of nodes (bitmap, solid color and text) arranged specifically using layouters.

##### <a class="anchor" id="bkmrk--248"></a>Examples

##### **Resizable Dialog Example Using Grid Layouter** 

For this example the dialog elements are arranged using Grid and Overlay layouts.

##### <a class="anchor" id="bkmrk--250"></a>Group Hierarchy

Create the parent group for the pop-up and name it GridDialog. Create another two groups (Background and Content) and add them as children of GridDialog group.

<div drawio-diagram="1997"><img src="https://doc316en.candera.eu/uploads/images/drawio/2023-02/drawing-4-1676948340.png" alt=""/></div>

<div class="contents" id="bkmrk--68" style="padding-left: 40px;"><div class="contents" style="padding-left: 40px;"><div class="textblock" style="padding-left: 40px;">  
</div></div></div>##### <a class="anchor" id="bkmrk--252"></a>Layout Configuration

Set the layout for each group as shown in the image below:

<div drawio-diagram="1998"><img src="https://doc316en.candera.eu/uploads/images/drawio/2023-02/drawing-4-1676948359.png" alt=""/></div>

<div class="contents" id="bkmrk--70" style="padding-left: 40px;"><div class="contents" style="padding-left: 40px;"><div class="textblock" style="padding-left: 40px;">  
</div></div></div>Configure the column width and row height:

<div drawio-diagram="2000"><img src="https://doc316en.candera.eu/uploads/images/drawio/2023-02/drawing-4-1676948390.png" alt=""/></div>

<div class="contents" id="bkmrk--72" style="padding-left: 40px;"><div class="contents" style="padding-left: 40px;"><div class="textblock" style="padding-left: 40px;">  
</div></div></div>In SceneComposer this can be achieved in the "Grid Layout Editor" (right click on the Background group and select "Configure Layout").

##### <a class="anchor" id="bkmrk--255"></a>Adding Nodes

The Background group should be populated with bitmap or solid color nodes with the following settings:

<div drawio-diagram="2002"><img src="https://doc316en.candera.eu/uploads/images/drawio/2023-02/drawing-4-1676948508.png" alt=""/></div>

<div class="contents" id="bkmrk--74" style="padding-left: 40px;"><div class="contents" style="padding-left: 40px;"><div class="textblock" style="padding-left: 40px;">  
</div></div></div>The Content group might be filled with one or more nodes of any type, as desired:

<div drawio-diagram="2003"><img src="https://doc316en.candera.eu/uploads/images/drawio/2023-02/drawing-4-1676948531.png" alt=""/></div>

<div class="contents" id="bkmrk--76" style="padding-left: 40px;"><div class="contents" style="padding-left: 40px;"><div class="textblock" style="padding-left: 40px;">  
</div></div></div>##### <a class="anchor" id="bkmrk--258"></a>Result

After putting everything together the dialog will look as above:

<div drawio-diagram="2004"><img src="https://doc316en.candera.eu/uploads/images/drawio/2023-02/drawing-4-1676948555.png" alt=""/></div>

<div class="contents" id="bkmrk--78" style="padding-left: 40px;"></div>#####   
**Resizable Dialog Example Using DockPanel Layouter** 

For this example the dialog elements are arranged using DockPanel and Overlay layouts.

##### <a class="anchor" id="bkmrk--261"></a>Group Hierarchy

Create the following structure of groups:

<div drawio-diagram="2006"><img src="https://doc316en.candera.eu/uploads/images/drawio/2023-02/drawing-4-1676948675.png" alt=""/></div>

<div class="contents" id="bkmrk--80" style="padding-left: 40px;"><div class="contents" style="padding-left: 40px;"><div class="textblock" style="padding-left: 40px;">  
</div></div></div>##### <a class="anchor" id="bkmrk--263"></a>Layout Configuration

Set the layout for each group as shown in the image below:

<div drawio-diagram="2007"><img src="https://doc316en.candera.eu/uploads/images/drawio/2023-02/drawing-4-1676948697.png" alt=""/></div>

<div class="contents" id="bkmrk-be-sure-the-order-of" style="padding-left: 40px;"><div class="contents" style="padding-left: 40px;"><div class="textblock" style="padding-left: 40px;"><dl class="note"><dd></dd><dd><p class="callout info">Be sure the order of adding the children groups in the Background group is Top - Bottom - Center otherwise the elements will not be arranged correctly.</p>

</dd></dl></div></div></div>##### <a class="anchor" id="bkmrk--265"></a>Adding Nodes

The children groups of Background should be populated with bitmap or solid color nodes with the following settings:

<div drawio-diagram="2008"><img src="https://doc316en.candera.eu/uploads/images/drawio/2023-02/drawing-4-1676948734.png" alt=""/></div>

<div class="contents" id="bkmrk-be-sure-the-order-of-0" style="padding-left: 40px;"><div class="contents" style="padding-left: 40px;"><div class="textblock" style="padding-left: 40px;"><dl class="note"><dd></dd><dd><p class="callout info">Be sure the order of nodes in the groups is Left - Right - Center otherwise the elements will not be arranged correctly.</p>

</dd></dl></div></div></div>The Content group should be configured as explained in the previous chapter for the dialog based on grid layout with the only difference that the text node will be replaced with a bitmap. Please see the Content group part from the <span style="color: rgb(230, 126, 35);">[Adding Nodes](#bkmrk-adding-nodes)</span> section.

##### <a class="anchor" id="bkmrk--267"></a>Result

After putting everything together the dialog will look as above:

<div drawio-diagram="2009"><img src="https://doc316en.candera.eu/uploads/images/drawio/2023-02/drawing-4-1676948769.png" alt=""/></div>

<div class="contents" id="bkmrk--84" style="padding-left: 40px;"></div>

# Candera 2D Listener

Applications can receive notifications on scene graph events. Therefore implement a listener, which defines hooks to receive those notifications.   
Following listener interfaces are provided in [Candera](http://dev.doc.cgistudio.at/APILINK/namespace_candera.html "[DataBinding_RefTypeSample]") 2D:

<div class="contents" id="bkmrk-candera%3A%3Acamera2dlis"><div class="contents"><div class="contents"><div class="textblock">- [Candera::Camera2DListener](http://dev.doc.cgistudio.at/APILINK/class_candera_1_1_camera2_d_listener.html "A Camera2DListener defines hooks that are called before or after a Camera2D is rendered. In order to register a Camera2DListener to a Camera2D simply derive from Camera2DListener and override pure virtual functions with custom code.") defines hooks that are called before or after a Camera2D is rendered. In order to register a Camera2DListener to a Camera2D simply derive from Camera2DListener and override pure virtual functions with custom code.
- [Candera::Renderer2DListener](http://dev.doc.cgistudio.at/APILINK/class_candera_1_1_renderer2_d_listener.html "A Renderer2DListener defines hooks that are called before and after a Node is rendered.") defines hooks that are called before or after a node is rendered. It supports events for OnNodePreRender and OnNodePostRender, so you are informed before and after a node is rendered.

</div></div></div></div>#### <a class="anchor" id="bkmrk--269"></a>Example Listener Implementation

Refer to <span style="color: rgb(230, 126, 35);">[Using Animation Callback Functions](https://doc316en.candera.eu/books/candera/page/using-animation-callback-functions)</span> for an example how to implement and use an Animation listener.

# Tutorial for Shader Usage

# Programmable Graphics Pipeline

#### <a class="anchor" id="bkmrk--9"></a>Description

When working with shaders, a fundamental knowledge of OpenGL ES 2.0 / 3.0 and the corresponding GLSL ES 1.0 / 3.0 shader language is required, to unleash the freedom and power programmable graphic pipelines provide, compared to the former fixed-function graphics pipeline. The focus of this chapter is to give the reader a basic overview of the OpenGL ES 2.0 / 3.0 rendering pipeline, in order to understand how OpenGL ES 2.0 / 3.0 works, and how the advantages that come with shader programming can be leveraged.

#### **OpenGL ES 2.0 / 3.0 Graphics Pipeline** 

The OpenGL ES 2.0 / 3.0 Graphics Pipeline determines how data stored in Vertex Buffers and Textures get processed, in order to produce the final image in the framebuffer (which might be displayed on screen or an off-screen render buffer, see <span style="color: rgb(230, 126, 35);">[Tutorial 7](https://doc316en.candera.eu/books/candera/chapter/tutorial-for-graphic-device-interface)</span>).

<div class="contents" id="bkmrk-only-a-simplified-vi"><div class="contents"><div class="textblock"><dl class="note"><dt><p class="callout info">Only a simplified view is described here, in order to enable the reader to gain a basic knowledge and comprehension of shader programs, their purpose and principles of operation.</p>

</dt></dl></div></div></div>Basically the data passed to the OpenGL ES 2.0 API (encapsulated by Candera::Engine3D::Core Classes, such as <span style="color: rgb(230, 126, 35);">[Candera::VertexBuffer](http://dev.doc.cgistudio.at/APILINK/class_candera_1_1_vertex_buffer.html "The VertexBuffer encapsulates the attributes of an uploaded VertexGeometry. It holds the actual handl...")</span>, <span style="color: rgb(230, 126, 35);">[Candera::Texture](http://dev.doc.cgistudio.at/APILINK/class_candera_1_1_texture.html "Texture encapsulates a TextureImage and a set of attributes specifying how it is applied to a vertex'...")</span>) is stored in **Vertex Buffers** and **Texture Memory**.

**Vertex Buffers** get processed by the **Vertex Shader unit**, and are transformed and projected from model space into world space, and finally screen space. This data is then assembled into primitives (triangles, lines, points) which subsequently get rasterized to determine which pixels are covered by the primitive and are subject to be rendered.

<div class="contents" id="bkmrk-pixels-at-this-stage"><div class="contents"><div class="textblock"><dl class="note"><dd><p class="callout info">Pixels at this stage of the pipeline, are known as fragments, as they might be discarded by the pipeline in subsequent tests and thus never appear as a pixel in color buffer.</p>

</dd></dl></div></div></div>The **Fragment Shader** then takes these fragments, interpolates the attributes of each vertex inside a primitive and combines these with the colors stored in **Texture Memory**. After applying some tests, blending and dithering, the final pixel gets written to the **Framebuffer**. The following image describes this workflow graphically.<span style="color: rgb(230, 126, 35);"><sup>[\[2\]](https://doc316en.candera.eu/link/473#bkmrk-%5B2%5D-munshi%2C-aaftab%3B-) </sup></span>

<div class="contents" id="bkmrk-"><div class="textblock">  
</div></div><div drawio-diagram="2266"><img src="https://doc316en.candera.eu/uploads/images/drawio/2023-02/drawing-4-1677048280.png" alt=""/></div>

<div class="contents" id="bkmrk--1"><div class="contents"><div class="textblock">  
</div></div></div>The following table shortly describes the single stages in the image above.

<div class="contents" id="bkmrk-stage-description-ap"><div class="contents"><div class="textblock"><table class="doxtable"><tbody><tr><td valign="top">**Stage**</td><td valign="top">**Description**</td></tr><tr><td valign="top">API</td><td valign="top">OpenGL ES application programming interface, this is encapsulated by <span style="color: rgb(230, 126, 35);">[Candera](http://dev.doc.cgistudio.at/APILINK/namespace_candera.html "[DataBinding_RefTypeSample]")</span>.</td></tr><tr><td valign="top">Vertex Arrays / Buffer Objects</td><td valign="top">Buffer in VRAM that stores vertices along with their vertex attributes. Vertex attributes are typically positions, normals, texture coordinates, colors etc. which are stored for every vertex of every primitive. This array is filled and managed by <span style="color: rgb(230, 126, 35);">[Candera::VertexBuffer](http://dev.doc.cgistudio.at/APILINK/class_candera_1_1_vertex_buffer.html "The VertexBuffer encapsulates the attributes of an uploaded VertexGeometry. It holds the actual handl...")</span>.</td></tr><tr><td valign="top">Vertex Shader</td><td valign="top">Processes the data stored in vertex buffer, and transforms them to screen coordinates with depth.</td></tr><tr><td valign="top">Primitive Assembly</td><td valign="top">Assembles the data processed shaded vertices into individual geometric primitives that can be drawn. Such primitives can be triangles, lines or points. The necessary settings here are also set in <span style="color: rgb(230, 126, 35);">[Candera::VertexBuffer](http://dev.doc.cgistudio.at/APILINK/class_candera_1_1_vertex_buffer.html "The VertexBuffer encapsulates the attributes of an uploaded VertexGeometry. It holds the actual handl...")</span>.</td></tr><tr><td valign="top">Rasterization</td><td valign="top">Single primitives are converted to a set of two-dimensional fragments (describing the normalized position in the framebuffer). This is the input data to the fragment shader.</td></tr><tr><td valign="top">Texture Memory</td><td valign="top">Texture memory is the location in VRAM where textures (2D or CubeMaps. In OpenGL ES 2.0, 1D and 3D textures are only supported through extensions) are stored. This memory is filled and managed by <span style="color: rgb(230, 126, 35);">[Candera::Texture](http://dev.doc.cgistudio.at/APILINK/class_candera_1_1_texture.html "Texture encapsulates a TextureImage and a set of attributes specifying how it is applied to a vertex'...")</span>.</td></tr><tr><td valign="top">Fragment Shader</td><td valign="top">Fragment shader takes the processed fragments as input, and combines them with the data stored in Texture memory. This stage results in assigning the fragment a color.</td></tr><tr><td valign="top">Per-Fragment Operations</td><td valign="top">Each fragment is tested, to determine whether it is to be drawn. Blending and dithering operations conclude the pipeline. Various configurations are set, using <span style="color: rgb(230, 126, 35);">[Candera::RenderMode](http://dev.doc.cgistudio.at/APILINK/class_candera_1_1_render_mode.html "The class RenderMode is an Appearance component that encapsulates polygon-level and per-fragment comp...")</span>. Here Depth-, Stencil-, Scissoring Tests, Blending and Dithering apply.</td></tr><tr><td valign="top">Framebuffer</td><td valign="top">Includes color, depth-, and stencil buffer to store final render output.</td></tr></tbody></table>

</div></div></div>This chapter described the stages **Vertex Shader** and **Fragment Shader**. The next chapter explains how to interact and control programmable shaders.

#### **Programmable Shaders** 

##### <a class="anchor" id="bkmrk--12"></a>Description

This chapter is about user-programmable Vertex and Fragment Shader units.

##### <a class="anchor" id="bkmrk--13"></a>Chapters

<div class="contents" id="bkmrk-shader-programs-intr"><div class="textblock">- <span style="color: rgb(230, 126, 35);">[Shader Programs Introduction](https://doc316en.candera.eu/link/473#bkmrk-shader-programs-intr-0)</span>
- <span style="color: rgb(230, 126, 35);">[Vertex Shaders](https://doc316en.candera.eu/link/473#bkmrk-vertex-shaders%C2%A0)</span>
- <span style="color: rgb(230, 126, 35);">[Fragment Shaders](https://doc316en.candera.eu/link/473#bkmrk-fragment-shaders%C2%A0)</span>

</div></div>##### **Shader Programs Introduction** 

##### <a class="anchor" id="bkmrk--14"></a>Programmable Shaders

Before OpenGL 2.0 and OpenGL ES 2.0, Vertex Shader and Fragment Shader units had fixed functionality. The common wording for this is "fixed function pipeline". Since OpenGL 2.0 and OpenGL ES 2.0 the behavior of these shaders became user-programmable. The wording is "programmable pipeline".

Being able to program these stages of the pipe offers a whole new set of opportunities. The shaders still have the same inputs and outputs, but the way in which these outputs are generated can now be defined by the user. Also, using user-defined variables may now be passed to the shader.

Programmable **Vertex Shader** units offer the possibility of manipulating every single vertex of geometry in a user-defined way, using different input attributes, user-defined uniform variables or even textures to compute the final outcome.

**Fragment** operations allows the final color to be computed from different sources, as the user wishes. This gives the user the powerful ability to produce almost every desired effect. Typical examples range from per pixel-lighting, normal mapping, multi-texturing, environment mapping (using cubemaps) and many more.

However, there is one small disadvantage. The "fixed-function" pipeline has been replaced by the programmable one, which forces the user to re-implement any behaviour of the "fixed function pipeline", which may be required.

##### <a class="anchor" id="bkmrk--15"></a>Shader Programs

A shader program is the user-generated code that gives the pipeline its user-defined behavior. A user of OpenGL ES 2.0 / 3.0 has to provide this before rendering any object. In <span style="color: rgb(230, 126, 35);">[Candera](http://dev.doc.cgistudio.at/APILINK/namespace_candera.html "[DataBinding_RefTypeSample]")</span> this is encapsulated in <span style="color: rgb(230, 126, 35);">[Candera::Shader](http://dev.doc.cgistudio.at/APILINK/class_candera_1_1_shader.html "The class Shader is an Appearance component representing a graphical processing unit (GPU) program...")</span> as described in <span style="color: rgb(230, 126, 35);">[Tutorial 3](https://doc316en.candera.eu/link/448#bkmrk-appearance%3A-shader%C2%A0)</span>. A shader program consists of two parts, a vertex shader and a fragment shader, which must be linked together to form the shader program.

These two shader objects are generated from a special programming language known as the OpenGL Shading Language (ES) or GLSL (ES), which uses a C-like syntax. The method in which the shader is passed, is platform dependent. On Desktop GPU's the shader compiler is normally integrated into the graphics driver, and therefore the GLSL source is directly passed to <span style="color: rgb(230, 126, 35);">[Candera::Shader::SetVertexShader](http://dev.doc.cgistudio.at/APILINK/class_candera_1_1_shader.html#ad11ed5eec2a476d2d5719c1198d9e324)</span> and <span style="color: rgb(230, 126, 35);">[Candera::Shader::SetFragmentShader](http://dev.doc.cgistudio.at/APILINK/class_candera_1_1_shader.html#a7ce096ed76f97c07d3b0cdf6b9b706e5)</span>, while on some target devices, pre-compiled binaries are expected.

For a detailed step-by-step tutorial see the corresponding section. What follows is an overview on how the different types of shader objects work and which data they process.

#####   
**Vertex Shaders** 

Vertex shader objects are the program objects that give Vertex Shaders user-defined behavior. The following image illustrates the input and output data processed by this kind of shader object.*.*<span style="color: rgb(230, 126, 35);"><sup>[\[3\]](https://doc316en.candera.eu/link/473#bkmrk-%5B3%5D-munshi%2C-aaftab%3B-)</sup></span>

<div drawio-diagram="2267"><img src="https://doc316en.candera.eu/uploads/images/drawio/2023-02/drawing-4-1677048500.png" alt=""/></div>

<div class="contents" id="bkmrk--4"><div class="contents"><div class="textblock">  
</div></div></div>**Attributes** are the data components of a vertex, describing values such as position, normal, texture coordinates, color, tangent or binormal. This data is stored inside the vertex buffer and is the input that comes over the OpenGL ES 2.0 / 3.0 pipeline. The vertex shader is executed once for each incoming vertex.

**Uniforms** and **Samplers** (actually also passed as uniform) are user-defined input variables that are passed to every instance of a shader. A user defines it once for a shader object, but all shaders get this value. This input can consist of 4x4-, 3x3-, 2x2- matrices, 2-4 component vectors, single values and arrays, all of type Float, Int or Bool. Special sampler uniforms are handles to uploaded 2D- or CubeMap Textures. Textures can also be used in vertex shaders, a good example for this is Displacement Mapping, where the values stored in the textures colors are interpreted as vectors to offset the vertices. This can be used e.g. to transform a plane into a virtual terrain.

**Varyings** are user-defined output variables of a vertex shader, which are finally interpolated between all members of a primitive after primitive assembly. These can have the same data types as the incoming uniforms, except for sampler handles. For each fragment, the interpolated data then gets passed into the fragment shader. Typically texture coordinates are forwarded from the vertex buffer to the fragment shader in this way, but you can pass any kind of data where it makes sense to interpolate between the vertices of a primitive.

**Temporary Variables** are variables which live inside the scope of one shader object. They can have the same data types as uniforms or varyings.

**Vertex Shader Special Output Variables** *gl\_Position* and *gl\_PointSize* are only available in vertex shaders. *gl\_FrontFacing* is not available in OpenGL ES, but only in full OpenGL. *gl\_Position* is reserved for writing the vertex position in homogeneous coordinates (after transforming into world space, camera space and projected to screen space). This value has to be written by every vertex shader, in order to enable primitive assembly and rasterization. Not setting *gl\_Position* results in undefined behavior. *gl\_PointSize* can be used optionally to set the point size of vertices, if the primitive type points is used.

#####   
**Fragment Shaders** 

Fragment shader objects are the program objects that give Fragment Shaders user-defined behavior. The following image illustrates the input and output data processed by this kind of shader object.<span style="color: rgb(230, 126, 35);"><sup>[\[4\]](https://doc316en.candera.eu/link/473#bkmrk-%5B4%5D-munshi%2C-aaftab%3B-)</sup></span>

<div drawio-diagram="2268"><img src="https://doc316en.candera.eu/uploads/images/drawio/2023-02/drawing-4-1677048673.png" alt=""/></div>

<div class="contents" id="bkmrk--6"><div class="contents"><div class="textblock">  
</div></div></div>**Varyings** are user-defined input variables for a fragment shader. These values have to match the varyings in the vertex shader (data type and name). A fragment shader is called once for each rendered pixel, which implies that the incoming varyings hold the interpolated value of all varyings passed per primitive from the vertex shader.

**Uniforms** and **Samplers** are user-defined input variables that are passed to every instance of a shader. They have the same meaning as in the vertex shader. Additionally uniforms in vertex and fragment shaders can have the same data type and name. In this case, when passing the variables value, it'll be passed to both the vertex and the fragment shader.

**Temporary Variables** are variables which live inside the scope of one shader object. They can have the same data types as uniforms or varyings.

**Fragment Shader Special Input Variables** *gl\_FragCoord*, *gl\_FrontFacing* and *gl\_PointCoord* are read-only variables only available in fragment shaders. *gl\_FragCoord* holds the window relative coordinates x,y,z and 1/w values for the fragment. Z-value is the value that's used for depth testing after passing the Fragment Shader stage. *gl\_FrontFacing* holds a boolean value which determines whether the fragment belongs to a front facing primitive (true) or not (false). *gl\_PointCoord* specifies where the fragment is located, within a point primitive. If the primitive is of type line or triangle, this value is undefined.

**Fragment Shader Special Output Variable** *gl\_FragColor* is used to write the output of the fragment shader into the current fragment. *gl\_FragColor* holds a 4-component vector of floats ranging from 0.0 to 1.0 for each component. This describes the RGBA color of the current fragment, used by the rest of the OpenGL ES 2.0 / 3.0 rendering pipeline. This will be the color you actually see on the screen or will be blended against another color, if the fragment passes all succeeding tests. Not setting this value will result in undefined colors on the screen.

####   
**References** 

The knowledge presented in this tutorial is a summary of:

\[1\] Munshi, Aaftab; Ginsburg, Dan; Shreiner, Dave: OpenGL ES 2.0 Programming Guide. Addison Wesley, 2008. ISBN 978-0-321-50279-7

The images were taken from:

<a class="anchor" id="bkmrk--18"></a>\[2\] Munshi, Aaftab; Ginsburg, Dan; Shreiner, Dave: OpenGL ES 2.0 Programming Guide. p.4. Addison Wesley, 2008. ISBN 978-0-321-50279-7

<a class="anchor" id="bkmrk--19"></a>\[3\] Munshi, Aaftab; Ginsburg, Dan; Shreiner, Dave: OpenGL ES 2.0 Programming Guide. p.5. Addison Wesley, 2008. ISBN 978-0-321-50279-7

<a class="anchor" id="bkmrk--20"></a>\[4\] Munshi, Aaftab; Ginsburg, Dan; Shreiner, Dave: OpenGL ES 2.0 Programming Guide. p.8. Addison Wesley, 2008. ISBN 978-0-321-50279-7

# The OpenGL ES Shading Language

#### <a class="anchor" id="bkmrk--1"></a>Description

The focus of this chapter is to understand how to write shader programs in conjunction with [Candera](http://dev.doc.cgistudio.at/APILINK/namespace_candera.html "[DataBinding_RefTypeSample]"). In OpenGL ES 2.0 / 3.0, the OpenGL ES Shader Language (GLSL ES) is used as programming language for creating various effects, from simple texturing to stunning effects, like bump mapping, anisotropic lighting, and so forth. The programmable pipeline of ES 2.0 is also valid for ES 3.0, but the shading language has been extended somewhat. OpenGL ES 2.0 uses the GLSL ES 1.0 shading language. OpenGL ES 3.0 uses the GLSL ES 3.0 shading language.

For more detailed information you may refer to the <span style="color: rgb(230, 126, 35);">[GLSL ES specification](https://doc316en.candera.eu/link/475#bkmrk-references)</span> or to the <span style="color: rgb(230, 126, 35);">[OpenGL ES 2.0 Programming Guide](https://doc316en.candera.eu/link/475#bkmrk-references)</span>. Additionally, vast resources of GLSL as well as GLSL ES shader tutorials can be found on the internet. GLSL is to a large extent compatible to the GLSL ES shader language.

#### <a class="anchor" id="bkmrk--3"></a>See also:

For hints on how to optimize shaders refer to

<div class="contents" id="bkmrk-optimizing-shader-pr"><div class="textblock">- <span style="color: rgb(230, 126, 35);">[Optimizing Shader Programs](https://doc316en.candera.eu/books/performance-optimization/chapter/optimizing-shader-programs)</span> in **Application Development Best Practices**

</div></div>#### **A Minimal Shader Program**  


Here is a small example to demonstrate the syntax of GLSL ES. The following example simply transforms the vertices into clip coordinate space, forwards texture coordinates, and applies a texture to the rasterized image.

##### <a class="anchor" id="bkmrk--4"></a>Vertex Shader

This is the vertex shader code of our example:

```
#ifndef GL_ES

// An OpenGL environment might not support precision qualifiers. Thus, define them to void.
#define lowp
#define mediump
#define highp
#define precision

#endif

/*
 Uniforms
 */
uniform mat4 u_MVPMatrix;       // Model-View-Projection Matrix

/*
 Attributes
 */
attribute vec4 a_Position;
attribute vec2 a_TextureCoordinate;

/*
 Varyings
 */
varying mediump vec2 v_TexCoord;

/*---------------------------------- MAIN ------------------------------------*/
void main(void)
{
    /* Transform vertex into world space */
    gl_Position = u_MVPMatrix * a_Position;

    v_TexCoord = a_TextureCoordinate;
}
```

Purpose of this vertex shader is simply to transform the incoming *a\_Position* vertex attribute into clip coordinate space, using the model-view-transformation matrix provided as uniform *u\_MVPMatrix*. Additionally, the incoming attribute *a\_TextureCoordinate* is forwarded to the next stage as varying *v\_TexCoord* and will be available in the fragment shader, if a varying with same name exists. In the fragment shader the incoming value will be interpolated between the vertices of a primitive.

The preprocessor directives (#ifndef #define ... #endif) simply check if the shader is running inside a OpenGL ES or OpenGL rendering pipeline and defines the precision qualifiers to nothing if not running in an ES context. This simply transforms the OpenGL ES shader into a compatible OpenGL shader if necessary, as the only differences are the precision qualifiers.

##### <a class="anchor" id="bkmrk--5"></a>Fragment Shader

This is the fragment shader code of our example:

```
#ifndef GL_ES

// An OpenGL environment might not support precision qualifiers. Thus, define them to void.
#define lowp
#define mediump
#define highp
#define precision

#endif

/*
 Uniforms
 */
uniform sampler2D u_Texture;

/*
 Varyings
 */
varying mediump vec2 v_TexCoord;

/*---------------------------------- MAIN ------------------------------------*/
void main(void)
{
    gl_FragColor = texture2D(u_Texture, v_TexCoord);
}
```

Purpose of this fragment shader is to query the color from the passed sampler *u\_Texture* (handle to a texture) at the address of the incoming varying *v\_TexCoord* and to apply this color to the fragment. This will be the color that is finally displayed, if all succeeding tests have passed. Nothing more, nothing less. It can be observed that the varying variable *v\_TexCoord* has the same name than in the vertex shader.

The preprocessor fulfills the same purpose as in the vertex shader.

##### <a class="anchor" id="bkmrk--6"></a>Output

The following image shows the result of rendering a vertex buffer (containing vertices of a cube) using the vertex and fragment shader above. The model-view-projection matrix was set to rotate the cube, a 2D texture was applied to it as sampler2D u\_Texture.

<div drawio-diagram="2279"><img src="https://doc316en.candera.eu/uploads/images/drawio/2023-02/drawing-4-1677049271.png" alt=""/></div>

<div class="contents" id="bkmrk--0"><div class="textblock">  
</div></div>#### **Basic OpenGL ES 2.0 Shading Language elements**  


##### <a class="anchor" id="bkmrk--8"></a>Basic OpenGL ES 2.0 / 3.0 Shading Language elements

The subject of this section is to comprehend the syntax and structure of the vertex and fragment shaders, presented in the lean shader example, see the previous <span style="color: rgb(230, 126, 35);">[A Minimal Shader Program](https://doc316en.candera.eu/link/475#bkmrk-a-minimal-shader-pro-0)</span>. Knowledge of C like languages is assumed to understand GLSL syntax.

##### <a class="anchor" id="bkmrk--9"></a>Declaring Uniform variables

The qualifier *uniform* is used to declare immutable variables in vertex or fragment shaders, which are set from client code.

<div class="contents" id="bkmrk-uniforms-are-global-"><div class="contents"><div class="textblock"><dl class="note"><dd><p class="callout info">Uniforms are global variables, and therefore have to be declared outside of function scope.</p>

</dd></dl></div></div></div>In our example the following uniforms are used:

```
 uniform mat4 u_MVPMatrix; 
```

*u\_MVPMatrix* is used to pass the model-view-projection matrix to the vertex shader object, which is used to transform all vertices.

```
 uniform sampler2D u_Texture; 
```

*u\_Texture* is the handle to the texture, which is addressed using the texture2D function.

##### <a class="anchor" id="bkmrk--10"></a>Declaring Varying variables

The qualifier *varying* is used in two different ways.

<div class="contents" id="bkmrk-in-the-vertex-shader"><div class="contents"><div class="textblock">- In the vertex shader it is used to declare variables which are written by the shader, and are further passed over primitive assembly and rasterization. Therefore they get interpolated inside the fragments, which are finally input of the fragment shader.
- In fragment shader the same keyword is used to declare incoming variables. Like uniforms these varying variables are global, and therefore have to be defined outside function scope.

</div></div></div><div class="contents" id="bkmrk-varying-variables-ha"><div class="contents"><div class="textblock"><dl class="note"><dd><p class="callout info">Varying variables have to have exactly the same name and type in vertex and fragment shader, otherwise linking of them together will fail.</p>

</dd></dl></div></div></div>In our example only one varying is used:

```
 varying mediump vec2 v_TexCoord; 
```

*v\_TexCoord* is used to pass the texture coordinates stored inside the vertices attributes to the fragment shader. While passing the OpenGL ES 2.0 pipe they get interpolated between the vertices of a primitive. Inside the fragment shader the interpolated coordinates are finally used to address the texture sampler, in order to determine the final color of a fragment.

##### <a class="anchor" id="bkmrk--11"></a>Precision Qualifiers

Compared to "full" GLSL, GLSL ES has the specialty of precision qualifiers, which can be used to declare variables to be handled with different precision. Reason for this language feature was the focus on embedded hardware, which might provide faster medium precision floating point or integer units than the high precision ones. Precision of a float or uniform variable is defined using one of the qualifiers *lowp*, *mediump* or *highp*.

For further details on how these kinds of variables behave when they get assigned to each other, or when arithmetic is used with different precision, please refer to the <span style="color: rgb(230, 126, 35);">[GLSL ES standard](https://doc316en.candera.eu/link/475#bkmrk-references)</span>.

In our example this was used for the varying variable in both shaders:

```
 varying mediump vec2 v_TexCoord; 
```

##### <a class="anchor" id="bkmrk--12"></a>Function Declaration

Functions can be defined like in almost every other C-like programming language. Function definitions follow the syntax shown below:

```
returnType functionName (type0 arg0, type1 arg1, ... , typen argn)
{
    //Method Body
    return returnValue;
}
```

Like in C they can be prototyped with leaving the method body and closing the declaration using a semicolon. For calling the function of course it has to be defined.

A function then is called using its name followed by a list of arguments in parentheses (or empty ones if no arguments apply).

Function names can further be overloaded as long as the argument types are different.

Return and argument types can be any type allowed in GLSL (such as int, float, double, vec4, mat4, sampler2D, ...). Additionally returnType can be void, which indicates that the function doesn't return anything. Arrays can be passed as argument, but cannot be returned.

In our examples above only one function is defined for the vertex and the fragment shader:

```
void main(void)
{
    //Main Body
}
```

The main function is mandatory for both vertex and fragment shader, this is the entry point to the shader. It has to take no argument and has to return no value (void). From here further functions can be called.

##### <a class="anchor" id="bkmrk--13"></a>Writing Output Data

There are two possibilities to output a **vertex shaders** result.

<div class="contents" id="bkmrk-the-first-and-mandat"><div class="contents"><div class="textblock">- The first and mandatory way is to write the transformed vertex coordinates in clip coordinate space to *gl\_Position*. This one is required to be set by any vertex shader. The behavior is undefined, if *gl\_Position* is not set.
- The second, optional way is to use variables declared as varying to output any desired data, as described in <span style="color: rgb(230, 126, 35);">[the varying section](https://doc316en.candera.eu/link/475#bkmrk-declaring-varying-va)</span>. The content of varyings is passed as input to the fragment shader, the fragment shader will receive the interpolated values per transformed primitive.

</div></div></div>Results of **fragment shaders** are written to *gl\_FragColor*, which is a 4-component vector (vec4) representing the final color that will be displayed if all further tests pass. It is possible to use the *discard* keyword to abort a fragment shader based on conditions, which might be useful if some fragments shall be completely skipped, in this case also no depth or stencil value will be written. This trick can be applied for e.g. creating an interlace mask for interlaced stereoscopic 3D.

##### <a class="anchor" id="bkmrk--14"></a>Accessing textures

One very important function of fragment shaders is to fetch colors from textures and use it for composing the final *gl\_FragColor*. This task is done using the GLSL ES built-in function *texture2D*:

```
vec4 texture2D (sampler2D sampler, vec2 coord );
```

where *sampler* is the handle to the texture to query the color from, *coord* is the texture coordinate pair to address a certain "texel" (point of a texture).

The *sampler2D* variable has to be passed as uniform to the shader, this is the OpenGL handle to the texture in VRAM. In our simple fragment shader example the color read from the texture is passed directly as *gl\_FragColor*, therefore the resulting cube has the wall image directly applied.

The following snippet shows how the uniform containing the texture handle is declared.

```
uniform sampler2D u_Texture;
```

The following incoming varying vec2 is used to address a texel.

```
varying mediump vec2 v_TexCoord;
```

The final color is queried from the texture using the *texture2D* function.

```
gl_FragColor = texture2D(u_Texture, v_TexCoord);
```

<div class="contents" id="bkmrk-texturing-can-also-b"><div class="contents"><div class="textblock"><dl class="note"><dd><p class="callout info">Texturing can also be used in vertex shaders. This can be used to e.g. realize a technique called *Displacement Mapping* where the vectors stored inside a texel are not interpreted as color but as offset being applied to the current vertex position. Consequently, a displacement map can be used e.g. to transform a flat plane to a terrain.</p>

</dd></dl></div></div></div>Also other types of samplers (e.g. samplerCube) and corresponding texture addressing functions (e.g. textureCube) exist, again for more details please have a look at the <span style="color: rgb(230, 126, 35);">[GLSL ES Standard](https://doc316en.candera.eu/link/475#bkmrk-references)</span>.

##### <a class="anchor" id="bkmrk--15"></a>Commenting shader programs

Comments in GLSL are delimited, as in other C-like languages, by

```
/* and */
```

or

```
 // and EOL.
```

Everything in between these delimiters will be ignored by the compiler.

##### <a class="anchor" id="bkmrk--16"></a>Other language features, data types and function library.

For a more detailed view on how to specify control structures, available data types, built-in functions, and other language features please refer to the <span style="color: rgb(230, 126, 35);">[GLSL ES Standard](https://doc316en.candera.eu/link/475#bkmrk-references)</span>.

# Shader Usage in Candera

#### <a class="anchor" id="bkmrk--7"></a>Description

This chapter demonstrates how customized shader programs can be used with <span style="color: rgb(230,126,35);">[Candera](http://dev.doc.cgistudio.at/APILINK/namespace_candera.html "[DataBinding_RefTypeSample]")</span>. Subject of this chapter depicts how to use the <span style="color: rgb(230,126,35);">[Candera](http://dev.doc.cgistudio.at/APILINK/namespace_candera.html "[DataBinding_RefTypeSample]")</span> classes to set custom shaders for each node, and how to apply shader parameters. Further, it shows how to realize different classes of effects, namely single pass-, local multi pass- and global multi pass effects.

#### **Shader Related Class Usage**

This section is about on how the already introduced <span style="color: rgb(230,126,35);">[Candera::Appearance](http://dev.doc.cgistudio.at/APILINK/class_candera_1_1_appearance.html "The class Appearance groups following render attributes: Material, Textures, RenderMode, and Shader. Render attributes define the distinctive visualization of a geometry like Mesh, Billboard, and PointSprite. Further, render attributes can be shared across multiple objects, which conserves memory and enables sharing of appearance characteristics. An Appearance object is mandatory for any object in order to get rendered. Per default all render attributes are initialized to null, which is a valid setting. If the Appearance is activated, all render attributes that are set become activated. If no RenderMode is defined (null), then the default RenderMode is used instead;.")</span> class and its members can be used to realize customized shader effects.

##### <a class="anchor" id="bkmrk--9"></a>Loading shader programs

First step to realize shader programs is to actually write them. See the <span style="color: rgb(230,126,35);">[GLSL chapter](https://doc316en.candera.eu/books/candera/page/the-opengl-es-shading-language)</span> for details on that. For a developer it is recommended to develop using SceneComposer, where the effects can be seen immediately in the Scene Editor window.

This tutorial further focuses on programming with <span style="color: rgb(230,126,35);">[Candera](http://dev.doc.cgistudio.at/APILINK/namespace_candera.html "[DataBinding_RefTypeSample]")</span>, but the concepts are supported as well in collaboration with SceneComposer. Beside of SceneComposer's shader editor, shader authoring tools like <span style="color: rgb(230,126,35);">[AMD's RenderMonkey](#bkmrk-references)</span> can also be used. Benefits from using either SceneComposer or shader authoring tools are syntax highlighting, seeing compiler and linker errors and having a preview scene where the effect can be examined. One unique advantage of using SceneComposer is the support for device dependent shader compilers.

After having finished your shader program you need to load it in your application based on <span style="color: rgb(230,126,35);">[Candera](http://dev.doc.cgistudio.at/APILINK/namespace_candera.html "[DataBinding_RefTypeSample]")</span>. Use your favorite file I/O libraries among the available ones. It depends on the platform if the underlying OpenGL ES implementation needs the shader source or pre-compiled shader objects. On host you typically load the source of your shader program directly, it will be compiled and linked at runtime by the OpenGL driver invoked by Candera's Upload mechanisms. On targets you might need to provide pre-compiled shader objects, where pre-compiling is done using dedicated shader compile tools. Please refer to the device manufacturers manual.

##### <a class="anchor" id="bkmrk--10"></a>Using Candera::Shader

[Candera::Shader](http://dev.doc.cgistudio.at/APILINK/class_candera_1_1_shader.html "The class Shader is an Appearance component representing a graphical processing unit (GPU) program...") is the class that abstracts from OpenGL ES shader interfaces and manages the shaders handle after creation. For a small description see <span style="color: rgb(230,126,35);">[the tutorial on the Appearance class](https://doc316en.candera.eu/link/448#bkmrk-appearance%3A-shader%C2%A0)</span>. See below how to use the class.

First you need to create an instance of the <span style="color: rgb(230,126,35);">[Candera::Shader](http://dev.doc.cgistudio.at/APILINK/class_candera_1_1_shader.html "The class Shader is an Appearance component representing a graphical processing unit (GPU) program...")</span> class using its <span style="color: rgb(230,126,35);">[Create()](http://dev.doc.cgistudio.at/APILINK/group___c_o_u_r_i_e_r___v_i_s_u_a_l_i_z_a_t_i_o_n.html#ggaf0e93dc4242f607c3c8d13dafd036af9aaabfa5309af24986d3111a092449f857)</span> method.

```
static MemoryManagement::SharedPointer<Shader> <a class="code" href="http://dev.doc.cgistudio.at/APILINK/group___c_o_u_r_i_e_r___v_i_s_u_a_l_i_z_a_t_i_o_n.html#ggaf0e93dc4242f607c3c8d13dafd036af9aaabfa5309af24986d3111a092449f857">Create</a>();
```

Next step is to provide the loaded shader sources or objects to the class using the according setters:

```
bool SetVertexShader(const void* vertexShader, DisposerFn disposerFn);
bool SetFragmentShader(const void* fragmentShader, DisposerFn disposerFn);
```

<div class="contents" id="bkmrk-the-shaders-are-pass"><div class="contents"><div class="textblock"><div class="fragment">  
</div></div><div class="textblock"><dl class="note"><dt></dt><dd><p class="callout info">The shaders are passed as *void\** to ensure that platform dependent representations of the shader program can be passed. The parameter DisposerFn hands over lifetime responsibility of shader passed: If it's set to 0 you'll have to take care of the provided *void\** by yourself.</p>

</dd></dl></div></div></div>Finally, the shader needs to be associated to a node's appearance in order to leave the remaining steps (like Uploading and further Activating) to <span style="color: rgb(230,126,35);">[Candera](http://dev.doc.cgistudio.at/APILINK/namespace_candera.html "[DataBinding_RefTypeSample]")</span>. Upload takes care of compiling, linking, and retrieving the shaders handle. Vertex attribute binding is done in the appearances activation method, automatically.

The following code snippet demonstrates how a Billboard node with a custom shader can be created.

```
void Initialize() {
    Char* vertexShader = "";
    Char* fragmentShader = "";
    // Do File I/O here, filling vertexShader and fragmentShader with the read data.

    Scene* scene = <a class="code" href="http://dev.doc.cgistudio.at/APILINK/group___c_o_u_r_i_e_r___v_i_s_u_a_l_i_z_a_t_i_o_n.html#ggaf0e93dc4242f607c3c8d13dafd036af9aaabfa5309af24986d3111a092449f857">Scene::Create</a>();
    //Do camera setup here, add it to scene graph.

    SharedPointer<Shader> shader = <a class="code" href="http://dev.doc.cgistudio.at/APILINK/group___c_o_u_r_i_e_r___v_i_s_u_a_l_i_z_a_t_i_o_n.html#ggaf0e93dc4242f607c3c8d13dafd036af9aaabfa5309af24986d3111a092449f857">Shader::Create</a>();
    shader->SetVertexShader(vertexShader, 0); //vertexShader needs to be disposed manually.
    shader->SetFragmentShader(fragmentShader, 0); //fragmentShader needs to be disposed manually.

    Billboard* billboard = <a class="code" href="http://dev.doc.cgistudio.at/APILINK/group___c_o_u_r_i_e_r___v_i_s_u_a_l_i_z_a_t_i_o_n.html#ggaf0e93dc4242f607c3c8d13dafd036af9aaabfa5309af24986d3111a092449f857">Billboard::Create</a>(2.0f, 2.0f);
    billboard->SetAppearance(<a class="code" href="http://dev.doc.cgistudio.at/APILINK/group___c_o_u_r_i_e_r___v_i_s_u_a_l_i_z_a_t_i_o_n.html#ggaf0e93dc4242f607c3c8d13dafd036af9aaabfa5309af24986d3111a092449f857">Appearance::Create</a>());
    billboard->GetAppearance()->SetShader(shader); //Here the previously instantiated and configured shader is added.
    //Set and configure remaining appearance members.

    scene->AddChild(billboard);

    scene->UploadAll(); //All nodes, all their Appearance objects and therefore all set shader objects get uploaded.

}

void Render() {
    Renderer::RenderAllCameras(); //Here the scene graph gets traversed, for every node the shaders get activated, and the vertex buffers attribute get bound
                                  //to the shaders attributes.
}
```

##### <a class="anchor" id="bkmrk--11"></a>Auto Uniforms

<span style="color: rgb(230,126,35);">[Candera::ShaderParamSetter](http://dev.doc.cgistudio.at/APILINK/class_candera_1_1_shader_param_setter.html "ShaderParamSetter maintains a list of uniform parameters that are passed to a Shader.")</span> and derived classes are used to set uniform parameters of shaders, they abstract from OpenGL ES's glUniform\_ interfaces. They are part of a node's appearance, how to use them is already described in the <span style="color: rgb(230,126,35);">[Appearance Tutorial](https://doc316en.candera.eu/link/448#bkmrk-appearance%3A-shader-p)</span>.

As described the derived class <span style="color: rgb(230,126,35);">[Candera::GenericShaderParamSetter](http://dev.doc.cgistudio.at/APILINK/class_candera_1_1_generic_shader_param_setter.html "GenericShaderParamSetter bundles uniform shader parameters that are calculated by Candera...")</span> offers to automatically compute and set shader parameters from the configured scene graph. The following table shows which uniforms are reserved for this purpose, what <span style="color: rgb(230,126,35);">[Candera](http://dev.doc.cgistudio.at/APILINK/namespace_candera.html "[DataBinding_RefTypeSample]")</span> classes they affect and what their semantics are.

<div class="contents" id="bkmrk-note%3A-the-values-of-"><div class="contents"><div class="textblock"><dl class="note"><dt>**Note:**</dt><dd>The values of reserved variables cannot be edited in SceneComposer, here the <span style="color: rgb(230,126,35);">[Candera::GenericShaderParamSetter](http://dev.doc.cgistudio.at/APILINK/class_candera_1_1_generic_shader_param_setter.html "GenericShaderParamSetter bundles uniform shader parameters that are calculated by Candera...")</span> has to be used.</dd></dl></div></div></div>The table is structured as follows:

<div class="contents" id="bkmrk-column-uniform-varia"><div class="contents"><div class="textblock">- Column **Uniform Variable** is the name of the reserved variable.
- Column **Data Type** describes its data type.
- Column **GenericShaderParamSetter Flag** describes which properties have to be enabled in <span style="color: rgb(230,126,35);">[Candera::GenericShaderParamSetter](http://dev.doc.cgistudio.at/APILINK/class_candera_1_1_generic_shader_param_setter.html "GenericShaderParamSetter bundles uniform shader parameters that are calculated by Candera...")</span> in order to compute and set the variable.
- Column **Affected Classes** describes which classes are used to compute the parameters.
- The last parameter **Semantic** describes for what purpose this parameter is needed.

</div></div></div><div class="contents" id="bkmrk-if-no-instance-of-th"><div class="contents"><div class="textblock"><dl class="note"><dt></dt><dd><p class="callout info">If no instance of the affected classes exist, the corresponding shader parameters will not be set, even if they are enabled in <span style="color: rgb(230,126,35);">[Candera::GenericShaderParamSetter](http://dev.doc.cgistudio.at/APILINK/class_candera_1_1_generic_shader_param_setter.html "GenericShaderParamSetter bundles uniform shader parameters that are calculated by Candera...")</span>.</p>

</dd></dl></div></div></div><div class="contents" id="bkmrk-uniform-variable-dat"><div class="contents"><div class="textblock"><table style="width: 100%; height: 2587.34px;"><tbody><tr style="background-color: #d4d4d4; height: 63.3906px;"><th style="width: 13.23%; height: 63.3906px;">Uniform Variable</th><th style="width: 10.4887%; height: 63.3906px;">Data Type</th><th style="width: 11.7998%; height: 63.3906px;">GenericShaderParamSetter Flag</th><th style="width: 19.6663%; height: 63.3906px;">Affected Classes</th><th style="width: 44.9344%; height: 63.3906px;">Semantic</th></tr><tr style="height: 66.3906px;"><td style="width: 13.23%; height: 66.3906px;">u\_MMatrix3</td><td style="width: 10.4887%; height: 66.3906px;">Matrix3</td><td style="width: 11.7998%; height: 66.3906px;">ModelMatrix3Enabled</td><td style="width: 19.6663%;"><span style="color: rgb(230,126,35);">[Candera::Node](http://dev.doc.cgistudio.at/APILINK/class_candera_1_1_node.html "The class Node is an abstract base class for all scene graph nodes. Each Node defines a local coordin...")</span></td><td style="width: 44.9344%; height: 66.3906px;">Computes the ModelMatrix3 from the Node's transformation data, used to transform 3-component vectors from model to world space.</td></tr><tr style="height: 83.1875px;"><td style="width: 13.23%; height: 83.1875px;">u\_MVMatrix3</td><td style="width: 10.4887%; height: 83.1875px;">Matrix3</td><td style="width: 11.7998%; height: 83.1875px;">ModelViewMatrix3Enabled</td><td style="width: 19.6663%;"><span style="color: rgb(230,126,35);">[Candera::Node](http://dev.doc.cgistudio.at/APILINK/class_candera_1_1_node.html "The class Node is an abstract base class for all scene graph nodes. Each Node defines a local coordin...")</span>, <span style="color: rgb(230,126,35);">[Candera::Camera](http://dev.doc.cgistudio.at/APILINK/class_candera_1_1_camera.html "A Camera provides Modelview and Projection matrices. Camera is a Transformable.* The eye point is set...")</span></td><td style="width: 44.9344%; height: 83.1875px;">Computes the ModelViewMatrix3 from the Node's transformation data and the currently rendered Camera's ViewMatrix. Used to transform 3-component vectors from model to view space.</td></tr><tr style="height: 83.1875px;"><td style="width: 13.23%; height: 83.1875px;">u\_NormalMMatrix3</td><td style="width: 10.4887%; height: 83.1875px;">Matrix3</td><td style="width: 11.7998%; height: 83.1875px;">NormalModelMatrix3Enabled</td><td style="width: 19.6663%;"><span style="color: rgb(230,126,35);">[Candera::Node](http://dev.doc.cgistudio.at/APILINK/class_candera_1_1_node.html "The class Node is an abstract base class for all scene graph nodes. Each Node defines a local coordin...")</span></td><td style="width: 44.9344%; height: 83.1875px;">Computes the NormalModelMatrix3 from the Node's transformation data, used to transform 3-component directional vectors (especially normals) from model to world space.</td></tr><tr><td style="width: 13.23%; border-width: 1px;">u\_NormalMMatrix4</td><td style="width: 10.4887%; border-width: 1px;">Matrix4</td><td style="width: 11.7998%; border-width: 1px;">NormalModelMatrix4Enabled</td><td style="width: 19.6663%; border-width: 1px;"><span style="color: rgb(230,126,35);">[Candera::Node](http://dev.doc.cgistudio.at/APILINK/class_candera_1_1_node.html "The class Node is an abstract base class for all scene graph nodes. Each Node defines a local coordin...")</span></td><td style="width: 44.9344%; border-width: 1px;"><span style="vertical-align: inherit;"><span style="vertical-align: inherit;">Computes the NormalModelMatrix4 (4×4 normal-transform matrix) from the node’s transform and passes it to the shader.</span></span></td></tr><tr style="height: 99.9844px;"><td style="width: 13.23%; height: 99.9844px;">u\_NormalMVMatrix3</td><td style="width: 10.4887%; height: 99.9844px;">Matrix3</td><td style="width: 11.7998%; height: 99.9844px;">NormalModelViewMatrix3Enabled</td><td style="width: 19.6663%;"><span style="color: rgb(230,126,35);">[Candera::Node](http://dev.doc.cgistudio.at/APILINK/class_candera_1_1_node.html "The class Node is an abstract base class for all scene graph nodes. Each Node defines a local coordin...")</span>, <span style="color: rgb(230,126,35);">[Candera::Camera](http://dev.doc.cgistudio.at/APILINK/class_candera_1_1_camera.html "A Camera provides Modelview and Projection matrices. Camera is a Transformable.* The eye point is set...")</span></td><td style="width: 44.9344%; height: 99.9844px;">Computes the NormalModelViewMatrix3 from the Node's transformation data and the currently rendered Camera's ViewMatrix. Used to transform 3-component directional vectors (especially normals) from model to view space.</td></tr><tr style="height: 66.3906px;"><td style="width: 13.23%; height: 66.3906px;">u\_MMatrix</td><td style="width: 10.4887%; height: 66.3906px;">Matrix4</td><td style="width: 11.7998%; height: 66.3906px;">ModelMatrix4Enabled</td><td style="width: 19.6663%;"><span style="color: rgb(230,126,35);">[Candera::Node](http://dev.doc.cgistudio.at/APILINK/class_candera_1_1_node.html "The class Node is an abstract base class for all scene graph nodes. Each Node defines a local coordin...")</span></td><td style="width: 44.9344%; height: 66.3906px;">Computes the ModelMatrix from the Node's transformation data, used to transform 4-component vectors from model to world space.</td></tr><tr style="height: 83.1875px;"><td style="width: 13.23%; height: 83.1875px;">u\_MVMatrix</td><td style="width: 10.4887%; height: 83.1875px;">Matrix4</td><td style="width: 11.7998%; height: 83.1875px;">ModelViewMatrix4Enabled</td><td style="width: 19.6663%;"><span style="color: rgb(230,126,35);">[Candera::Node](http://dev.doc.cgistudio.at/APILINK/class_candera_1_1_node.html "The class Node is an abstract base class for all scene graph nodes. Each Node defines a local coordin...")</span>, <span style="color: rgb(230,126,35);">[Candera::Camera](http://dev.doc.cgistudio.at/APILINK/class_candera_1_1_camera.html "A Camera provides Modelview and Projection matrices. Camera is a Transformable.* The eye point is set...")</span></td><td style="width: 44.9344%; height: 83.1875px;">Computes the ModelViewMatrix4 from the Node's transformation data and the currently rendered Camera's ViewMatrix. Used to transform 4-component vectors from model to view space.</td></tr><tr style="height: 66.3906px;"><td style="width: 13.23%; height: 66.3906px;">u\_PMatrix</td><td style="width: 10.4887%; height: 66.3906px;">Matrix4</td><td style="width: 11.7998%; height: 66.3906px;">ProjectionMatrix4Enabled</td><td style="width: 19.6663%;">[Candera::Camera](http://dev.doc.cgistudio.at/APILINK/class_candera_1_1_camera.html "A Camera provides Modelview and Projection matrices. Camera is a Transformable.* The eye point is set...")</td><td style="width: 44.9344%; height: 66.3906px;">Passes the ProjectionMatrix4 from the active camera to the shader.</td></tr><tr><td style="width: 13.23%; border-width: 1px;">u\_VPMatrix</td><td style="width: 10.4887%; border-width: 1px;">Matrix4</td><td style="width: 11.7998%; border-width: 1px;">ViewProjectionMatrix4Enabled</td><td style="width: 19.6663%; border-width: 1px;">[Candera::Camera](http://dev.doc.cgistudio.at/APILINK/class_candera_1_1_camera.html "A Camera provides Modelview and Projection matrices. Camera is a Transformable.* The eye point is set...")</td><td style="width: 44.9344%; border-width: 1px;"><span style="vertical-align: inherit;"><span style="vertical-align: inherit;">Passes the active camera’s the ViewProjectionMatrix4 (View × Projection) to the shader.</span></span></td></tr><tr style="height: 99.9844px;"><td style="width: 13.23%; height: 99.9844px;">u\_MVPMatrix</td><td style="width: 10.4887%; height: 99.9844px;">Matrix4</td><td style="width: 11.7998%; height: 99.9844px;">ModelViewProjectionMatrix4Enabled</td><td style="width: 19.6663%;"><span style="color: rgb(230,126,35);">[Candera::Node](http://dev.doc.cgistudio.at/APILINK/class_candera_1_1_node.html "The class Node is an abstract base class for all scene graph nodes. Each Node defines a local coordin...")</span>, <span style="color: rgb(230,126,35);">[Candera::Camera](http://dev.doc.cgistudio.at/APILINK/class_candera_1_1_camera.html "A Camera provides Modelview and Projection matrices. Camera is a Transformable.* The eye point is set...")</span></td><td style="width: 44.9344%; height: 99.9844px;">Computes the ModelViewProjectionMatrix4 from the Node's transformation data and the currently rendered Camera's ViewProjectionMatrix. Used to transform 4-component vectors from model to homogeneous screen space.</td></tr><tr style="height: 99.9844px;"><td style="width: 13.23%; height: 99.9844px;">u\_CamDirection</td><td style="width: 10.4887%; height: 99.9844px;">Vector3</td><td style="width: 11.7998%; height: 99.9844px;">CameraLookAtVectorEnabled, LightActivationEnabled</td><td style="width: 19.6663%;"><span style="color: rgb(230,126,35);">[Candera::Camera](http://dev.doc.cgistudio.at/APILINK/class_candera_1_1_camera.html "A Camera provides Modelview and Projection matrices. Camera is a Transformable.* The eye point is set...")</span>, <span style="color: rgb(230,126,35);">[Candera::Light](http://dev.doc.cgistudio.at/APILINK/class_candera_1_1_light.html "A Node that represents different kinds of light sources. Light sources are used to determine the colo...")</span></td><td style="width: 44.9344%; height: 99.9844px;">Passes the currently rendered Camera's look-at vector in world space to the shader. Transforms it to object space if LightsCoordinateSpace is set to Object. Can be done explicitly, or inside lighting calculations.</td></tr><tr style="height: 49.5938px;"><td style="width: 13.23%; height: 49.5938px;">u\_CamPosition</td><td style="width: 10.4887%; height: 49.5938px;">Vector3</td><td style="width: 11.7998%; height: 49.5938px;">CameraPositionEnabled</td><td style="width: 19.6663%;">[Candera::Camera](http://dev.doc.cgistudio.at/APILINK/class_candera_1_1_camera.html "A Camera provides Modelview and Projection matrices. Camera is a Transformable.* The eye point is set...")</td><td style="width: 44.9344%; height: 49.5938px;">Passes the currently rendered Camera's position in world space to the shader.</td></tr><tr style="height: 74.5781px;"><td style="width: 13.23%; height: 74.5781px;">u\_Size</td><td style="width: 10.4887%; height: 74.5781px;">Float</td><td style="width: 11.7998%; height: 74.5781px;">-</td><td style="width: 19.6663%;"><span style="color: rgb(230,126,35);">[Candera::PointSprite](http://dev.doc.cgistudio.at/APILINK/class_candera_1_1_point_sprite.html "PointSprite represents a GL point primitive. The size (glPointSize) of the point is calculated by def...")</span></td><td style="width: 44.9344%; height: 74.5781px;">Passes the size of a <span style="color: rgb(230,126,35);">[Candera::PointSprite](http://dev.doc.cgistudio.at/APILINK/class_candera_1_1_point_sprite.html "PointSprite represents a GL point primitive. The size (glPointSize) of the point is calculated by def...")</span> node to the shader. This is always done, if node is type of <span style="color: rgb(230,126,35);">[Candera::PointSprite](http://dev.doc.cgistudio.at/APILINK/class_candera_1_1_point_sprite.html "PointSprite represents a GL point primitive. The size (glPointSize) of the point is calculated by def...")</span>.</td></tr><tr style="height: 77.5781px;"><td style="width: 13.23%; height: 77.5781px;">u\_Material.ambient</td><td style="width: 10.4887%; height: 77.5781px;">Vector4</td><td style="width: 11.7998%; height: 77.5781px;">MaterialActivationEnabled</td><td style="width: 19.6663%;"><span style="color: rgb(230,126,35);">[Candera::Material](http://dev.doc.cgistudio.at/APILINK/class_candera_1_1_material.html "The class Material describes the color attributes of an object's surface and is primarily used for li...")</span></td><td style="width: 44.9344%; height: 77.5781px;">Passes the ambient color component of the node's material (member of Appearance, see <span style="color: rgb(230,126,35);">[the section on material](https://doc316en.candera.eu/link/448#bkmrk-appearance%3A-material-0)</span>.)</td></tr><tr style="height: 77.5781px;"><td style="width: 13.23%; height: 77.5781px;">u\_Material.diffuse</td><td style="width: 10.4887%; height: 77.5781px;">Vector4</td><td style="width: 11.7998%; height: 77.5781px;">MaterialActivationEnabled</td><td style="width: 19.6663%;">[Candera::Material](http://dev.doc.cgistudio.at/APILINK/class_candera_1_1_material.html "The class Material describes the color attributes of an object's surface and is primarily used for li...")</td><td style="width: 44.9344%; height: 77.5781px;">Passes the diffuse color component of the node's material (member of Appearance, see <span style="color: rgb(230,126,35);">[the section on material](https://doc316en.candera.eu/link/448#bkmrk-appearance%3A-material-0)</span>.)</td></tr><tr style="height: 77.5781px;"><td style="width: 13.23%; height: 77.5781px;">u\_Material.emissive</td><td style="width: 10.4887%; height: 77.5781px;">Vector4</td><td style="width: 11.7998%; height: 77.5781px;">MaterialActivationEnabled</td><td style="width: 19.6663%;">[Candera::Material](http://dev.doc.cgistudio.at/APILINK/class_candera_1_1_material.html "The class Material describes the color attributes of an object's surface and is primarily used for li...")</td><td style="width: 44.9344%; height: 77.5781px;">Passes the emissive color component of the node's material (member of Appearance, see <span style="color: rgb(230,126,35);">[the section on material](https://doc316en.candera.eu/link/448#bkmrk-appearance%3A-material-0)</span>.)</td></tr><tr style="height: 77.5781px;"><td style="width: 13.23%; height: 77.5781px;">u\_Material.specular</td><td style="width: 10.4887%; height: 77.5781px;">Vector4</td><td style="width: 11.7998%; height: 77.5781px;">MaterialActivationEnabled</td><td style="width: 19.6663%;">[Candera::Material](http://dev.doc.cgistudio.at/APILINK/class_candera_1_1_material.html "The class Material describes the color attributes of an object's surface and is primarily used for li...")</td><td style="width: 44.9344%; height: 77.5781px;">Passes the specular color component of the node's material (member of Appearance, see <span style="color: rgb(230,126,35);">[the section on material](https://doc316en.candera.eu/link/448#bkmrk-appearance%3A-material-0)</span>.)</td></tr><tr style="height: 66.3906px;"><td style="width: 13.23%; height: 66.3906px;">u\_Material.shininess</td><td style="width: 10.4887%; height: 66.3906px;">Float</td><td style="width: 11.7998%; height: 66.3906px;">MaterialActivationEnabled</td><td style="width: 19.6663%;">[Candera::Material](http://dev.doc.cgistudio.at/APILINK/class_candera_1_1_material.html "The class Material describes the color attributes of an object's surface and is primarily used for li...")</td><td style="width: 44.9344%; height: 66.3906px;">Passes the shininess of the node's material (member of Appearance, see <span style="color: rgb(230,126,35);">[the section on material](https://doc316en.candera.eu/link/448#bkmrk-appearance%3A-material-0)</span>.)</td></tr><tr style="height: 127.969px;"><td style="width: 13.23%; height: 127.969px;">u\_Texture\[i\]</td><td style="width: 10.4887%; height: 127.969px;">Integer</td><td style="width: 11.7998%; height: 127.969px;">TextureActivationEnabled</td><td style="width: 19.6663%;"><span style="color: rgb(230,126,35);">[Candera::Texture](http://dev.doc.cgistudio.at/APILINK/class_candera_1_1_texture.html "Texture encapsulates a TextureImage and a set of attributes specifying how it is applied to a vertex'...")</span>, <span style="color: rgb(230,126,35);">[Candera::BitmapTextureImage](http://dev.doc.cgistudio.at/APILINK/class_candera_1_1_bitmap_texture_image.html "TextureImage encapsulates a VRAM handle which is retrieved when uploading an image to the vram...")</span>, <span style="color: rgb(230,126,35);">[Candera::ProxyTextureImage](http://dev.doc.cgistudio.at/APILINK/class_candera_1_1_proxy_texture_image.html "The class ProxyTextureImage provides a TextureImage interface to an externally maintained image sourc...")</span></td><td style="width: 44.9344%; height: 127.969px;">Passes the activated textures handle to the shader if the textures <span style="color: rgb(230,126,35);">[Candera::TextureImage](http://dev.doc.cgistudio.at/APILINK/class_candera_1_1_texture_image.html "Abstract base class for Texture images.A texture image mainly encapsulates a texture handle in VRAM a...")</span> is of type <span style="color: rgb(230,126,35);">[Candera::BitmapTextureImage](http://dev.doc.cgistudio.at/APILINK/class_candera_1_1_bitmap_texture_image.html "TextureImage encapsulates a VRAM handle which is retrieved when uploading an image to the vram...")</span> or Candera::ProxyTextureImage(with TextureTargetType Texture2D). i can be from 1 to 7 or nothing (e.g u\_Texture, u\_Texture1,..).</td></tr><tr style="height: 127.969px;"><td style="width: 13.23%; height: 127.969px;">u\_CubeMapTexture\[i\]</td><td style="width: 10.4887%; height: 127.969px;">Integer</td><td style="width: 11.7998%; height: 127.969px;">TextureActivationEnabled</td><td style="width: 19.6663%;"><span style="color: rgb(230,126,35);">[Candera::Texture](http://dev.doc.cgistudio.at/APILINK/class_candera_1_1_texture.html "Texture encapsulates a TextureImage and a set of attributes specifying how it is applied to a vertex'...")</span>, <span style="color: rgb(230,126,35);">[Candera::CubeMapTextureImage](http://dev.doc.cgistudio.at/APILINK/class_candera_1_1_cube_map_texture_image.html "CubeMapTextureImage encapsulates a VRAM handle which is retrieved when uploading a cube mapping textu...")</span>, <span style="color: rgb(230,126,35);">[Candera::ProxyTextureImage](http://dev.doc.cgistudio.at/APILINK/class_candera_1_1_proxy_texture_image.html "The class ProxyTextureImage provides a TextureImage interface to an externally maintained image sourc...")</span></td><td style="width: 44.9344%; height: 127.969px;">Passes the activated textures handle to the shader if the textures <span style="color: rgb(230,126,35);">[Candera::TextureImage](http://dev.doc.cgistudio.at/APILINK/class_candera_1_1_texture_image.html "Abstract base class for Texture images.A texture image mainly encapsulates a texture handle in VRAM a...")</span> is of type <span style="color: rgb(230,126,35);">[Candera::CubeMapTextureImage](http://dev.doc.cgistudio.at/APILINK/class_candera_1_1_cube_map_texture_image.html "CubeMapTextureImage encapsulates a VRAM handle which is retrieved when uploading a cube mapping textu...")</span> or Candera::ProxyTextureImage(with TextureTargetType TextureCubeMap). i can be from 1 to 7 or nothing (e.g u\_CubeMapTexture, u\_CubeMapTexture1,..).</td></tr><tr style="height: 49.5938px;"><td style="width: 13.23%; height: 49.5938px;">u\_Light\[i\].type</td><td style="width: 10.4887%; height: 49.5938px;">Integer</td><td style="width: 11.7998%; height: 49.5938px;">LightActivationEnabled</td><td style="width: 19.6663%;"><span style="color: rgb(230,126,35);">[Candera::Light](http://dev.doc.cgistudio.at/APILINK/class_candera_1_1_light.html "A Node that represents different kinds of light sources. Light sources are used to determine the colo...")</span></td><td style="width: 44.9344%; height: 49.5938px;">Passes an integer defining the type of light i to the shader, i can range from 0 to 7.</td></tr><tr style="height: 49.5938px;"><td style="width: 13.23%; height: 49.5938px;">u\_Light\[i\].ambient</td><td style="width: 10.4887%; height: 49.5938px;">Vector4</td><td style="width: 11.7998%; height: 49.5938px;">LightActivationEnabled</td><td style="width: 19.6663%;">[Candera::Light](http://dev.doc.cgistudio.at/APILINK/class_candera_1_1_light.html "A Node that represents different kinds of light sources. Light sources are used to determine the colo...")</td><td style="width: 44.9344%; height: 49.5938px;">Passes the ambient color component of light i to the shader, i can range from 0 to 7.</td></tr><tr style="height: 49.5938px;"><td style="width: 13.23%; height: 49.5938px;">u\_Light\[i\].diffuse</td><td style="width: 10.4887%; height: 49.5938px;">Vector4</td><td style="width: 11.7998%; height: 49.5938px;">LightActivationEnabled</td><td style="width: 19.6663%;">[Candera::Light](http://dev.doc.cgistudio.at/APILINK/class_candera_1_1_light.html "A Node that represents different kinds of light sources. Light sources are used to determine the colo...")</td><td style="width: 44.9344%; height: 49.5938px;">Passes the diffuse color component of light i to the shader, i can range from 0 to 7.</td></tr><tr><td style="width: 13.23%; border-width: 1px;">u\_Light\[i\].intensity</td><td style="width: 10.4887%; border-width: 1px;">float</td><td style="width: 11.7998%; border-width: 1px;">LightActivationEnabled</td><td style="width: 19.6663%; border-width: 1px;">[Candera::Light](http://dev.doc.cgistudio.at/APILINK/class_candera_1_1_light.html "A Node that represents different kinds of light sources. Light sources are used to determine the colo...")</td><td style="width: 44.9344%; border-width: 1px;"><span style="vertical-align: inherit;"><span style="vertical-align: inherit;">Passes the intensity factor applied to the diffuse color of light i to the shader, i can range from 0 to 7. Ignored if the light type is Ambient.</span></span></td></tr><tr style="height: 49.5938px;"><td style="width: 13.23%; height: 49.5938px;">u\_Light\[i\].specular</td><td style="width: 10.4887%; height: 49.5938px;">Vector4</td><td style="width: 11.7998%; height: 49.5938px;">LightActivationEnabled</td><td style="width: 19.6663%;">[Candera::Light](http://dev.doc.cgistudio.at/APILINK/class_candera_1_1_light.html "A Node that represents different kinds of light sources. Light sources are used to determine the colo...")</td><td style="width: 44.9344%; height: 49.5938px;">Passes the specular color component of light i to the shader, i can range from 0 to 7.</td></tr><tr style="height: 49.5938px;"><td style="width: 13.23%; height: 49.5938px;">u\_Light\[i\].position</td><td style="width: 10.4887%; height: 49.5938px;">Vector4</td><td style="width: 11.7998%; height: 49.5938px;">LightActivationEnabled</td><td style="width: 19.6663%;">[Candera::Light](http://dev.doc.cgistudio.at/APILINK/class_candera_1_1_light.html "A Node that represents different kinds of light sources. Light sources are used to determine the colo...")</td><td style="width: 44.9344%; height: 49.5938px;">Passes the position of a point or spotlight i to the shader, i can range from 0 to 7.</td></tr><tr style="height: 49.5938px;"><td style="width: 13.23%; height: 49.5938px;">u\_Light\[i\].direction</td><td style="width: 10.4887%; height: 49.5938px;">Vector3</td><td style="width: 11.7998%; height: 49.5938px;">LightActivationEnabled</td><td style="width: 19.6663%;">[Candera::Light](http://dev.doc.cgistudio.at/APILINK/class_candera_1_1_light.html "A Node that represents different kinds of light sources. Light sources are used to determine the colo...")</td><td style="width: 44.9344%; height: 49.5938px;">Passes the direction vector of a directional or spotlight i to the shader, i can range from 0 to 7.</td></tr><tr style="height: 49.5938px;"><td style="width: 13.23%; height: 49.5938px;">u\_Light\[i\].halfplane</td><td style="width: 10.4887%; height: 49.5938px;">Vector3</td><td style="width: 11.7998%; height: 49.5938px;">LightActivationEnabled</td><td style="width: 19.6663%;">[Candera::Light](http://dev.doc.cgistudio.at/APILINK/class_candera_1_1_light.html "A Node that represents different kinds of light sources. Light sources are used to determine the colo...")</td><td style="width: 44.9344%; height: 49.5938px;">Passes the halfplane vector of a directional, point or spotlight i to the shader, i can range from 0 to 7.</td></tr><tr style="height: 49.5938px;"><td style="width: 13.23%; height: 49.5938px;">u\_Light\[i\].attenuation</td><td style="width: 10.4887%; height: 49.5938px;">Vector4</td><td style="width: 11.7998%; height: 49.5938px;">LightActivationEnabled</td><td style="width: 19.6663%;">[Candera::Light](http://dev.doc.cgistudio.at/APILINK/class_candera_1_1_light.html "A Node that represents different kinds of light sources. Light sources are used to determine the colo...")</td><td style="width: 44.9344%; height: 49.5938px;">Passes the attenuation weights of a point or spotlight i to the shader, i can range from 0 to 7.</td></tr><tr style="height: 49.5938px;"><td style="width: 13.23%; height: 49.5938px;">u\_Light\[i\].spotCosCutoff</td><td style="width: 10.4887%; height: 49.5938px;">Float</td><td style="width: 11.7998%; height: 49.5938px;">LightActivationEnabled</td><td style="width: 19.6663%;">[Candera::Light](http://dev.doc.cgistudio.at/APILINK/class_candera_1_1_light.html "A Node that represents different kinds of light sources. Light sources are used to determine the colo...")</td><td style="width: 44.9344%; height: 49.5938px;">Passes the cut off angle of a spotlight i to the shader, i can range from 0 to 7.</td></tr><tr style="height: 49.5938px;"><td style="width: 13.23%; height: 49.5938px;">u\_Light\[i\].spotExponent</td><td style="width: 10.4887%; height: 49.5938px;">Float</td><td style="width: 11.7998%; height: 49.5938px;">LightActivationEnabled</td><td style="width: 19.6663%;">[Candera::Light](http://dev.doc.cgistudio.at/APILINK/class_candera_1_1_light.html "A Node that represents different kinds of light sources. Light sources are used to determine the colo...")</td><td style="width: 44.9344%; height: 49.5938px;">Passes the spot exponent of a directional, point or spotlight i to the shader, i can range from 0 to 7.</td></tr><tr style="height: 49.5938px;"><td style="width: 13.23%; height: 49.5938px;">u\_Light\[i\].range</td><td style="width: 10.4887%; height: 49.5938px;">Float</td><td style="width: 11.7998%; height: 49.5938px;">LightActivationEnabled</td><td style="width: 19.6663%;">[Candera::Light](http://dev.doc.cgistudio.at/APILINK/class_candera_1_1_light.html "A Node that represents different kinds of light sources. Light sources are used to determine the colo...")</td><td style="width: 44.9344%; height: 49.5938px;">Passes the range of a point or spotlight i to the shader, i can range from 0 to 7.</td></tr><tr style="height: 49.5938px;"><td style="width: 13.23%; height: 49.5938px;">u\_Light\[i\].enabled</td><td style="width: 10.4887%; height: 49.5938px;">Bool</td><td style="width: 11.7998%; height: 49.5938px;">LightActivationEnabled</td><td style="width: 19.6663%;">[Candera::Light](http://dev.doc.cgistudio.at/APILINK/class_candera_1_1_light.html "A Node that represents different kinds of light sources. Light sources are used to determine the colo...")</td><td style="width: 44.9344%; height: 49.5938px;">Passes whether light i is enabled or not to the shader, i can range from 0 to 7.</td></tr><tr style="height: 83.1875px;"><td style="width: 13.23%; height: 83.1875px;">u\_Light\[i\].cameraLookAtVector</td><td style="width: 10.4887%; height: 83.1875px;">Vector3</td><td style="width: 11.7998%; height: 83.1875px;">LightActivationEnabled</td><td style="width: 19.6663%;"><span style="color: rgb(230,126,35);">[Candera::Light](http://dev.doc.cgistudio.at/APILINK/class_candera_1_1_light.html "A Node that represents different kinds of light sources. Light sources are used to determine the colo...")</span>, <span style="color: rgb(230,126,35);">[Candera::Camera](http://dev.doc.cgistudio.at/APILINK/class_candera_1_1_camera.html "A Camera provides Modelview and Projection matrices. Camera is a Transformable.* The eye point is set...")</span></td><td style="width: 44.9344%; height: 83.1875px;">Computes the look-at vector of the active Camera, and passes it to the shader. Depending on the Light::CoordinateSpace the look-at vector is either in world space or in the object space of the light.</td></tr><tr style="height: 74.5781px;"><td style="width: 13.23%; height: 74.5781px;">u\_MorphWeight</td><td style="width: 10.4887%; height: 74.5781px;">Float Array</td><td style="width: 11.7998%; height: 74.5781px;">-</td><td style="width: 19.6663%;"><span style="color: rgb(230,126,35);">[Candera::MorphingMesh](http://dev.doc.cgistudio.at/APILINK/class_candera_1_1_morphing_mesh.html "MorphingMesh is a Mesh that stores weight values for morphing, and activates them as uniforms at rend...")</span></td><td style="width: 44.9344%; height: 74.5781px;">Passes the weights of a <span style="color: rgb(230,126,35);">[Candera::MorphingMesh](http://dev.doc.cgistudio.at/APILINK/class_candera_1_1_morphing_mesh.html "MorphingMesh is a Mesh that stores weight values for morphing, and activates them as uniforms at rend...")</span> to the shader. This is always done, if node is type of <span style="color: rgb(230,126,35);">[Candera::MorphingMesh](http://dev.doc.cgistudio.at/APILINK/class_candera_1_1_morphing_mesh.html "MorphingMesh is a Mesh that stores weight values for morphing, and activates them as uniforms at rend...")</span>.</td></tr><tr style="height: 66.3906px;"><td style="width: 13.23%; height: 66.3906px;">u\_CanvasPivot</td><td style="width: 10.4887%; height: 66.3906px;">Vector2</td><td style="width: 11.7998%; height: 66.3906px;">CanvasActivationEnabled</td><td style="width: 19.6663%;"><span style="color: rgb(230,126,35);">[Candera::CanvasRenderable](http://dev.doc.cgistudio.at/APILINK/class_candera_1_1_canvas_renderable.html "CanvasRenderable is used as base class for renderable canvas objects. The canvas renderable sets up t...")</span></td><td style="width: 44.9344%; height: 66.3906px;">Passes the position of the pivot of a <span style="color: rgb(230,126,35);">[Candera::CanvasRenderable](http://dev.doc.cgistudio.at/APILINK/class_candera_1_1_canvas_renderable.html "CanvasRenderable is used as base class for renderable canvas objects. The canvas renderable sets up t...")</span> to the shader.</td></tr><tr style="height: 66.3906px;"><td style="width: 13.23%; height: 66.3906px;">u\_CanvasSize</td><td style="width: 10.4887%; height: 66.3906px;">Vector2</td><td style="width: 11.7998%; height: 66.3906px;">CanvasActivationEnabled</td><td style="width: 19.6663%;">[Candera::CanvasRenderable](http://dev.doc.cgistudio.at/APILINK/class_candera_1_1_canvas_renderable.html "CanvasRenderable is used as base class for renderable canvas objects. The canvas renderable sets up t...")</td><td style="width: 44.9344%; height: 66.3906px;">Passes the actual size of a [Candera::CanvasRenderable](http://dev.doc.cgistudio.at/APILINK/class_candera_1_1_canvas_renderable.html "CanvasRenderable is used as base class for renderable canvas objects. The canvas renderable sets up t...") to the shader.</td></tr><tr style="height: 66.3906px;"><td style="width: 13.23%; height: 66.3906px;">ub\_Material</td><td style="width: 10.4887%; height: 66.3906px;">Uniform Buffer Object</td><td style="width: 11.7998%; height: 66.3906px;">MaterialActivationEnabled</td><td style="width: 19.6663%;">[Candera::Material](http://dev.doc.cgistudio.at/APILINK/class_candera_1_1_material.html "The class Material describes the color attributes of an object's surface and is primarily used for li...")</td><td style="width: 44.9344%; height: 66.3906px;">Passes all of the material parameters from above in a uniform buffer object to the shader.</td></tr><tr style="height: 66.3906px;"><td style="width: 13.23%; height: 66.3906px;">ub\_Lights</td><td style="width: 10.4887%; height: 66.3906px;">Uniform Buffer Object</td><td style="width: 11.7998%; height: 66.3906px;">LightActivationEnabled</td><td style="width: 19.6663%;"><span style="color: rgb(230,126,35);">[Candera::Light](http://dev.doc.cgistudio.at/APILINK/class_candera_1_1_light.html "A Node that represents different kinds of light sources. Light sources are used to determine the colo...")</span>, <span style="color: rgb(230,126,35);">[Candera::Camera](http://dev.doc.cgistudio.at/APILINK/class_candera_1_1_camera.html "A Camera provides Modelview and Projection matrices. Camera is a Transformable.* The eye point is set...")</span></td><td style="width: 44.9344%; height: 66.3906px;">Passes all of the light parameters from above in a uniform buffer object to the shader.</td></tr><tr><td style="width: 13.23%;">u\_JointMatrices</td><td style="width: 10.4887%;">Matrix4</td><td style="width: 11.7998%;">SkinningMeshActivationEnable</td><td style="width: 19.6663%;"><span style="color: rgb(230,126,35);">[Candera::SkinningMesh](http://dev.doc.cgistudio.at/APILINK/class_candera_1_1_skinning_mesh.html)</span></td><td style="width: 44.9344%;">Passes the Inverse Bind Matrix of a Joint to the shader.</td></tr></tbody></table>

</div></div></div>##### <a class="anchor" id="bkmrk--12"></a>Attribute Names

[Candera](http://dev.doc.cgistudio.at/APILINK/namespace_candera.html "[DataBinding_RefTypeSample]") uses pre-defined attribute names to bind a vertex buffers attributes. When writing shader programs the following attribute names shall be used:

<div class="contents" id="bkmrk-attribute-name-seman"><div class="textblock"><table style="width: 100%;"><tbody><tr style="background-color: #d4d4d4;"><th style="width: 21.2493%;">**Attribute Name**</th><th style="width: 78.7095%;">**Semantic**</th></tr><tr><td style="width: 21.2493%;">PositionAttribute\[i\]</td><td style="width: 78.7095%;">Use this attribute for passing vertex positions (local space). i ranges from 1 to 7 or is nothing (e.g. PositionAttribute, PositionAttribute1,...).</td></tr><tr><td style="width: 21.2493%;">PositionTransformedAttribute\[i\]</td><td style="width: 78.7095%;">Use this attribute for passing transformed vertex positions. i ranges from 1 to 7 or is nothing (e.g. PositionTransformedAttribute, PositionTransformedAttribute1,...).</td></tr><tr><td style="width: 21.2493%;">NormalAttribute\[i\]</td><td style="width: 78.7095%;">Use this attribute for passing the vertices normals. i ranges from 1 to 7 or is nothing (e.g. NormalAttribute, NormalAttribute1,...).</td></tr><tr><td style="width: 21.2493%;">TextureCoordinateAttribute\[i\]</td><td style="width: 78.7095%;">Use this attribute for passing the vertices texture coordinates. i ranges from 1 to 7 or is nothing (e.g. TextureCoordinateAttribute, TextureCoordinateAttribute1,...).</td></tr><tr><td style="width: 21.2493%;">ColorAttribute\[i\]</td><td style="width: 78.7095%;">Use this attribute for passing the vertices colors. i ranges from 1 to 7 or is nothing (e.g. ColorAttribute, ColorAttribute1,...).</td></tr><tr><td style="width: 21.2493%;">BlendWeightAttribute\[i\]</td><td style="width: 78.7095%;">Use this attribute for passing the vertices blend weight attributes. i ranges from 1 to 7 or is nothing (e.g. BlendWeightAttribute, BlendWeightAttribute1,...).</td></tr><tr><td style="width: 21.2493%;">BlendIndexAttribute\[i\]</td><td style="width: 78.7095%;">Use this attribute for passing the vertices blend index attributes. i ranges from 1 to 7 or is nothing (e.g. BlendIndexAttribute, BlendIndexAttribute1,...).</td></tr><tr><td style="width: 21.2493%;">PointSizeAttribute\[i\]</td><td style="width: 78.7095%;">Use this attribute for passing the vertices point sizes. i ranges from 1 to 7 or is nothing (e.g. PositionAttribute, PositionAttribute1,...).</td></tr><tr><td style="width: 21.2493%;">TangentAttribute\[i\]</td><td style="width: 78.7095%;">Use this attribute for passing the vertices tangents. i ranges from 1 to 7 or is nothing (e.g. TangentAttribute, TangentAttribute1,...).</td></tr><tr><td style="width: 21.2493%;">BiNormalAttribute\[i\]</td><td style="width: 78.7095%;">Use this attribute for passing the vertices binormals. i ranges from 1 to 7 or is nothing (e.g. BiNormalAttribute, BiNormalAttribute1,...).</td></tr><tr><td style="width: 21.2493%;">TesselationFactorAttribute\[i\]</td><td style="width: 78.7095%;">Use this attribute for passing the vertices tesselation factors. i ranges from 1 to 7 or is nothing (e.g. TesselationFactorAttribute, TesselationFactorAttribute1,...).</td></tr><tr><td style="width: 21.2493%;">FogAttribute\[i\]</td><td style="width: 78.7095%;">Use this attribute for passing the vertices fog attributes. i ranges from 1 to 7 or is nothing (e.g. FogAttribute, FogAttribute1,...).</td></tr><tr><td style="width: 21.2493%;">DepthAttribute\[i\]</td><td style="width: 78.7095%;">Use this attribute for passing the vertices depth attributes. i ranges from 1 to 7 or is nothing (e.g. DepthAttribute, DepthAttribute1,...).</td></tr><tr><td style="width: 21.2493%;">SampleAttribute\[i\]</td><td style="width: 78.7095%;">Use this attribute for passing the vertices sample attributes. i ranges from 1 to 7 or is nothing (e.g. SampleAttribute, SampleAttribute1,...).</td></tr><tr><td style="width: 21.2493%;">CustomAttribute\[i\]</td><td style="width: 78.7095%;">Use this attribute for passing your custom data per vertex. i ranges from 1 to 7 or is nothing (e.g. CustomAttribute, CustomAttribute1,...).</td></tr></tbody></table>

</div></div>####   
**Single Pass Effects**

Single pass effects can be achieved in one camera pass only. They are simply realized with a single <span style="color: rgb(230,126,35);">[Candera::Appearance](http://dev.doc.cgistudio.at/APILINK/class_candera_1_1_appearance.html "The class Appearance groups following render attributes: Material, Textures, RenderMode, and Shader. Render attributes define the distinctive visualization of a geometry like Mesh, Billboard, and PointSprite. Further, render attributes can be shared across multiple objects, which conserves memory and enables sharing of appearance characteristics. An Appearance object is mandatory for any object in order to get rendered. Per default all render attributes are initialized to null, which is a valid setting. If the Appearance is activated, all render attributes that are set become activated. If no RenderMode is defined (null), then the default RenderMode is used instead;.")</span> attached to a <span style="color: rgb(230,126,35);">[Candera::Node](http://dev.doc.cgistudio.at/APILINK/class_candera_1_1_node.html "The class Node is an abstract base class for all scene graph nodes. Each Node defines a local coordin...")</span>.

Examples for single pass effects can be found in the <span style="color: rgb(230,126,35);">[Special Render Techniques chapter](https://doc316en.candera.eu/books/candera/page/single-pass-effects-in-candera-examples-for-3d-effect-shaders)</span>.

####   
**Local Multi Pass Effects**

Local multi pass effects describe effects with local impact only, thus, they belong to one certain node. They can be realized using <span style="color: rgb(230,126,35);">[Candera::MultiPassAppearance](http://dev.doc.cgistudio.at/APILINK/class_candera_1_1_multi_pass_appearance.html "A MultiPassAppearance enables a node to be rendered multiple times with different appearance settings...")</span>. These appearances are processed in a sequence; for each appearance the node is rendered once and the results are blended together using the different RenderMode settings.

Examples for local multi pass effects can be found in the <span style="color: rgb(230,126,35);">[Special Render Techniques chapter](https://doc316en.candera.eu/books/candera/page/multi-pass-effects-in-candera-examples-for-local-3d-effect-shaders)</span>.

####   
**Global Multi Pass Effects**

Global multi pass (also known as screen-based effects) typically operate on render targets, often they are also referred to as post-processing effects. To realize post-processing effects first images have to be rendered into an offscreen render target. How this is done is presented in <span style="color: rgb(230,126,35);">[Render Targets Tutorial](https://doc316en.candera.eu/books/candera/chapter/tutorial-for-graphic-device-interface)</span>.

The resulting image can further be processed in any desired way.

Examples for global multi pass effects can be found in chapter <span style="color: rgb(230,126,35);">[Special Render Techniques](https://doc316en.candera.eu/books/candera/page/multi-pass-effects-in-candera-examples-for-global-3d-effect-shaders)</span>.

##### <a class="anchor" id="bkmrk--13"></a>Creating Full Screen Effects

You can of course process the resulting texture on any mesh or object you like, but often post processing effects are applied to full screen images. For that purpose a dedicated scene with only a camera and a billboard can be used. The trick is to give the Billboard a size of 1.0 unit in both dimensions.

```
Billboard* fullScreenBB = <a class="code" href="http://dev.doc.cgistudio.at/APILINK/group___c_o_u_r_i_e_r___v_i_s_u_a_l_i_z_a_t_i_o_n.html#ggaf0e93dc4242f607c3c8d13dafd036af9aaabfa5309af24986d3111a092449f857">Billboard::Create</a>(1.0F, 1.0F);
```

This causes the billboard to have a vertex buffer with coordinates that match the corners of the window/screen in Canderas viewport space. To draw the billboard full screen you just need to use a vertex shader that doesn't transform the vertex coordinates, use ReferenceShaders\\Core\\RefViewportSpace.vertp for this purpose. The fragment shader then does the actual post processing. As texture for the billboard you need to use the image provided by the offscreen render target.

*RefViewportSpace.vertp* takes two float uniforms (u\_offsetLeft, u\_offsetTop) as inputs, which determine the top left corner of the billboard to render. These values are defined as being in normalized viewport space, where values range from 0.0 to 1.0, where 0.0 is interpreted as the left border respectively top border of the viewport, and 1.0 as the right, respectively bottom border.

The vertex position attribute of a vertex buffer used with this vertex shader is not transformed using a model-view-projection matrix, but simply translated into OpenGL's clip coordinate space with the specified offset applied.

The following examples demonstrate how to use the RefViewportSpace.vert shader in conjunction with the depth-of-field global multi pass effect.

Specify a full screen rectangle:

```
//Do Shader File I/O here and initialize m_dofCombineShader shader object.
Float m_viewportLeft = 1.0F;
Float m_vieportTop = 1.0F;
m_dofCombineSps = <a class="code" href="http://dev.doc.cgistudio.at/APILINK/group___c_o_u_r_i_e_r___v_i_s_u_a_l_i_z_a_t_i_o_n.html#ggaf0e93dc4242f607c3c8d13dafd036af9aaabfa5309af24986d3111a092449f857">GenericShaderParamSetter::Create</a>();
m_dofCombineSps->SetModelViewProjectionMatrix4Enabled(false);
m_dofCombineSps->SetUniform("u_offsetLeft", Shader::Float, &m_viewportLeft);
m_dofCombineSps->SetUniform("u_offsetTop", Shader::Float, &m_viewportTop);
m_fullScreenQuadDof = <a class="code" href="http://dev.doc.cgistudio.at/APILINK/group___c_o_u_r_i_e_r___v_i_s_u_a_l_i_z_a_t_i_o_n.html#ggaf0e93dc4242f607c3c8d13dafd036af9aaabfa5309af24986d3111a092449f857">Billboard::Create</a>(1.0f,1.0f);
m_fullScreenQuadDof->GetAppearance()->SetShader(m_dofCombineShader);
m_fullScreenQuadDof->GetAppearance()->SetShaderParamSetter(m_dofCombineSps);
```

This results in the following image:

<div drawio-diagram="2311"><img src="https://doc316en.candera.eu/uploads/images/drawio/2023-02/drawing-4-1677054213.png" alt="drawing-4-1677054213.png"/></div>

<div class="contents" id="bkmrk--0"><div class="contents"><div class="textblock">  
</div></div></div>Specify a centered rectangle with half viewport resolution:

```
//Do Shader File I/O here and initialize m_dofCombineShader shader object.
Float m_viewportLeft = 0.25F;
Float m_vieportTop = 0.25F;
m_dofCombineSps = <a class="code" href="http://dev.doc.cgistudio.at/APILINK/group___c_o_u_r_i_e_r___v_i_s_u_a_l_i_z_a_t_i_o_n.html#ggaf0e93dc4242f607c3c8d13dafd036af9aaabfa5309af24986d3111a092449f857">GenericShaderParamSetter::Create</a>();
m_dofCombineSps->SetModelViewProjectionMatrix4Enabled(false);
m_dofCombineSps->SetUniform("u_offsetLeft", Shader::Float, &m_viewportLeft);
m_dofCombineSps->SetUniform("u_offsetTop", Shader::Float, &m_viewportTop);
m_fullScreenQuadDof = <a class="code" href="http://dev.doc.cgistudio.at/APILINK/group___c_o_u_r_i_e_r___v_i_s_u_a_l_i_z_a_t_i_o_n.html#ggaf0e93dc4242f607c3c8d13dafd036af9aaabfa5309af24986d3111a092449f857">Billboard::Create</a>(0.5f,0.5f);
m_fullScreenQuadDof->GetAppearance()->SetShader(m_dofCombineShader);
m_fullScreenQuadDof->GetAppearance()->SetShaderParamSetter(m_dofCombineSps);
```

This results in the following image:

<div drawio-diagram="2310"><img src="https://doc316en.candera.eu/uploads/images/drawio/2023-02/drawing-4-1677054197.png" alt="drawing-4-1677054197.png"/></div>

<div class="contents" id="bkmrk--3"><div class="contents"><div class="textblock">  
</div></div></div>Specify a rectangle in bottom right corner with quarter viewport resolution:

```
//Do Shader File I/O here and initialize m_dofCombineShader shader object.
Float m_viewportLeft = 0.75F;
Float m_vieportTop = 0.75F;
m_dofCombineSps = <a class="code" href="http://dev.doc.cgistudio.at/APILINK/group___c_o_u_r_i_e_r___v_i_s_u_a_l_i_z_a_t_i_o_n.html#ggaf0e93dc4242f607c3c8d13dafd036af9aaabfa5309af24986d3111a092449f857">GenericShaderParamSetter::Create</a>();
m_dofCombineSps->SetModelViewProjectionMatrix4Enabled(false);
m_dofCombineSps->SetUniform("u_offsetLeft", Shader::Float, &m_viewportLeft);
m_dofCombineSps->SetUniform("u_offsetTop", Shader::Float, &m_viewportTop);
m_fullScreenQuadDof = <a class="code" href="http://dev.doc.cgistudio.at/APILINK/group___c_o_u_r_i_e_r___v_i_s_u_a_l_i_z_a_t_i_o_n.html#ggaf0e93dc4242f607c3c8d13dafd036af9aaabfa5309af24986d3111a092449f857">Billboard::Create</a>(0.25f,0.25f);
m_fullScreenQuadDof->GetAppearance()->SetShader(m_dofCombineShader);
m_fullScreenQuadDof->GetAppearance()->SetShaderParamSetter(m_dofCombineSps);
```

This results in the following image:

<div drawio-diagram="2309"><img src="https://doc316en.candera.eu/uploads/images/drawio/2023-02/drawing-4-1677054180.png" alt="drawing-4-1677054180.png"/></div>

<div class="contents" id="bkmrk--6"><div class="contents"><div class="textblock">  
</div></div></div><div class="contents" id="bkmrk-overlapping-billboar"><div class="contents"><div class="contents"><div class="textblock"><dl class="note"><dt></dt><dd><p class="callout info">Overlapping Billboards (in screen space) would produce depth-fighting artifacts. Disabling depth test and using render order as well as using depth bias can be used to avoid them.</p>

</dd></dl><div class="fragment">  
</div></div></div></div></div>```
m_fullScreenQuadDof->GetAppearance()->SetRenderMode(<a class="code" href="http://dev.doc.cgistudio.at/APILINK/group___c_o_u_r_i_e_r___v_i_s_u_a_l_i_z_a_t_i_o_n.html#ggaf0e93dc4242f607c3c8d13dafd036af9aaabfa5309af24986d3111a092449f857">RenderMode::Create</a>());
m_fullScreenQuadDof->GetAppearance()->GetRenderMode()->SetDepthBias(0.1F);
```

For details on how to use render order please refer to <span style="color: rgb(230,126,35);">[Tutorial 3](https://doc316en.candera.eu/books/candera/page/3d-render-order)</span>.

# Candera Reference Shaders

#### <a class="anchor" id="bkmrk-"></a>Description

This document describes content and usage of <span style="color: rgb(230, 126, 35);">[Candera](http://dev.doc.cgistudio.at/APILINK/namespace_candera.html "[DataBinding_RefTypeSample]")</span> Reference Shaders part of CGI Studio releases. Within this document the set of <span style="color: rgb(230, 126, 35);">[Candera](http://dev.doc.cgistudio.at/APILINK/namespace_candera.html "[DataBinding_RefTypeSample]")</span> Reference Shaders is listed with additional information how to use and combine them in 3D applications based on [<span style="color: rgb(230, 126, 35);">Candera</span>](http://dev.doc.cgistudio.at/APILINK/namespace_candera.html "[DataBinding_RefTypeSample]").

#### **Location of Reference Shaders** 

<span style="color: rgb(230, 126, 35);">[Candera](http://dev.doc.cgistudio.at/APILINK/namespace_candera.html "[DataBinding_RefTypeSample]")</span> delivers a set of reference shader implementations, which can be found at following location:

<div class="contents" id="bkmrk-%5Ccgi_studio_candera%5C"><div class="contents"><div class="textblock">- \\cgi\_studio\_candera\\src\\<span style="color: rgb(230, 126, 35);">[Candera](http://dev.doc.cgistudio.at/APILINK/namespace_candera.html "[DataBinding_RefTypeSample]")</span>\\ReferenceShaders

</div></div></div>The same set of reference shaders is available in SceneComposer.

Preferred way of usage is to export shaders to a binary asset file and to load it in an application based on <span style="color: rgb(230, 126, 35);">[Candera](http://dev.doc.cgistudio.at/APILINK/namespace_candera.html "[DataBinding_RefTypeSample]")</span>. Shaders part of exported scenes are automatically added to the asset file and loaded by <span style="color: rgb(230, 126, 35);">[Candera](http://dev.doc.cgistudio.at/APILINK/namespace_candera.html "[DataBinding_RefTypeSample]")</span>.

#### **Used Include Files** 

Some parts of shader code used in <span style="color: rgb(230, 126, 35);">[Candera](http://dev.doc.cgistudio.at/APILINK/namespace_candera.html "[DataBinding_RefTypeSample]")</span> Reference Shaders have been collected into several files in order to be reused as include files.

Following files are available and can be used as include files:

<div class="contents" id="bkmrk-include-file-support"><div class="textblock"><table border="1" cellpadding="5" cellspacing="0" style="border-collapse: collapse; width: 800px; height: 235.375px; border-width: 1px; border-spacing: 0px;" width="900"><tbody><tr bgcolor="#d4d4d4" style="height: 29.4583px;"><th style="height: 29.4583px; border-width: 1px; padding: 5px;">**Include File**</th><th style="height: 29.4583px; border-width: 1px; padding: 5px;">**Supports**</th><th style="height: 29.4583px; border-width: 1px; padding: 5px;">**Include In**</th><th style="height: 29.4583px; border-width: 1px; padding: 5px;">**Note**</th><th style="height: 29.4583px; border-width: 1px; padding: 5px;">**Displaces**</th></tr><tr style="height: 63.0417px;"><td style="height: 63.0417px; border-width: 1px; padding: 5px;">RefEnvironment.inc</td><td style="height: 63.0417px; border-width: 1px; padding: 5px;">Platform specific defines</td><td style="height: 63.0417px; border-width: 1px; padding: 5px;">All Shaders</td><td style="height: 63.0417px; border-width: 1px; padding: 5px;">Shall be included in each Shader as first statement</td><td style="height: 63.0417px; border-width: 1px; padding: 5px;">Environment.incv, Environment.incf</td></tr><tr style="height: 79.8333px;"><td style="height: 79.8333px; border-width: 1px; padding: 5px;">RefLighting.inc</td><td style="height: 79.8333px; border-width: 1px; padding: 5px;">Lighting specific functions, also functions for anisotropic lighting</td><td style="height: 79.8333px; border-width: 1px; padding: 5px;">Shaders that support lighting</td><td style="height: 79.8333px; border-width: 1px; padding: 5px;">Useful helper functions for vertex lighting and pixel lighting</td><td style="height: 79.8333px; border-width: 1px; padding: 5px;">DefaultLighting.incv</td></tr><tr style="height: 63.0417px;"><td style="height: 63.0417px; border-width: 1px; padding: 5px;">RefTexturing.inc</td><td style="height: 63.0417px; border-width: 1px; padding: 5px;">Texturing specific functions, e.g. Environment Mapping</td><td style="height: 63.0417px; border-width: 1px; padding: 5px;">Shaders that support certain texture effects</td><td style="height: 63.0417px; border-width: 1px; padding: 5px;">Useful helper functions especially for common texture effects</td><td style="height: 63.0417px; border-width: 1px; padding: 5px;">Texturing.incv</td></tr><tr><td style="border-width: 1px; padding: 5px;">RefSkinning.inc</td><td style="border-width: 1px; padding: 5px;">Skinning specific features</td><td style="border-width: 1px; padding: 5px;">Shaders that support skinning</td><td style="border-width: 1px; padding: 5px;">Useful helper functions for skinning</td><td style="border-width: 1px; padding: 5px;">Skinning.incv</td></tr></tbody></table>

</div></div>#### **Reference Vertex Shaders** 

<div class="contents" id="bkmrk-vertex-shaders-suppo"><div class="textblock"><table border="1" cellpadding="5" cellspacing="0" style="border-collapse: collapse; width: 800px; border-width: 1px; border-spacing: 0px;" width="1000"><tbody><tr bgcolor="#d4d4d4"><th style="border-width: 1px; padding: 5px; width: 121.344px;" width="15%">**Vertex Shaders**</th><th style="border-width: 1px; padding: 5px; width: 121.344px;" width="15%">**Supports**</th><th style="border-width: 1px; padding: 5px; width: 80.875px;" width="10%">**Combine with Fragment Shaders**</th><th style="border-width: 1px; padding: 5px; width: 161.797px;" width="20%">**GenericShaderParamSetter Configuration**</th><th style="border-width: 1px; padding: 5px; width: 323.641px;" width="40%">**Note**</th></tr><tr><td style="border-width: 1px; padding: 5px; width: 121.344px;">Core/RefTrans</td><td style="border-width: 1px; padding: 5px; width: 121.344px;">Transformation,  
Texture</td><td style="border-width: 1px; padding: 5px; width: 80.875px;">Core/RefTex,   
Core/RefUniColor,   
Core/RefUniColorTex,  
Core/RefTex2LightMap,  
Core/RefUniDiffuseMatTex,  
Effects/RefTexDofBlur,  
Effects/RefTexDofCombine</td><td style="border-width: 1px; padding: 5px; width: 161.797px;">SetModelViewProjectionMatrix4Enabled(true)  
SetMaterialActivationEnabled(true)  
SetTextureActivationEnabled(true)</td><td style="border-width: 1px; padding: 5px; width: 323.641px;">Lighting has no influence.</td></tr><tr><td style="border-width: 1px; padding: 5px; width: 121.344px;">Core/RefTransColor</td><td style="border-width: 1px; padding: 5px; width: 121.344px;">Transformation,  
VertexColor,  
Texture</td><td style="border-width: 1px; padding: 5px; width: 80.875px;">Core/RefColor,   
Core/RefColorTex,  
Core/RefColorTexAlpha,  
Effects/RefColorTexAlphaOutline</td><td style="border-width: 1px; padding: 5px; width: 161.797px;">SetModelViewProjectionMatrix4Enabled(true)  
SetMaterialActivationEnabled(true)  
SetTextureActivationEnabled(true)</td><td style="border-width: 1px; padding: 5px; width: 323.641px;">Lighting has no influence.</td></tr><tr><td style="border-width: 1px; padding: 5px; width: 121.344px;">Core/RefTransLight1</td><td style="border-width: 1px; padding: 5px; width: 121.344px;">Transformation,   
Vertex Lighting with one light source,  
Texture</td><td style="border-width: 1px; padding: 5px; width: 80.875px;">Core/RefColor,   
Core/RefColorTex</td><td style="border-width: 1px; padding: 5px; width: 161.797px;">SetModelViewProjectionMatrix4Enabled(true)  
SetLightActivationEnabled(true)  
SetMaterialActivationEnabled(true)  
SetTextureActivationEnabled(true)</td><td style="border-width: 1px; padding: 5px; width: 323.641px;">If Texture is used, depends on corresponding fragment shader only.</td></tr><tr><td style="border-width: 1px; padding: 5px; width: 121.344px;">Core/RefTransLight2</td><td style="border-width: 1px; padding: 5px; width: 121.344px;">Transformation,   
Vertex Lighting with two light sources.  
Texture</td><td style="border-width: 1px; padding: 5px; width: 80.875px;">Core/RefColor,   
Core/RefColorTex</td><td style="border-width: 1px; padding: 5px; width: 161.797px;">SetModelViewProjectionMatrix4Enabled(true)  
SetLightActivationEnabled(true)  
SetMaterialActivationEnabled(true)  
SetTextureActivationEnabled(true)</td><td style="border-width: 1px; padding: 5px; width: 323.641px;">If Texture is used, depends on corresponding fragment shader only.</td></tr><tr><td style="border-width: 1px; padding: 5px; width: 121.344px;">Core/RefTransLight3</td><td style="border-width: 1px; padding: 5px; width: 121.344px;">Transformation,   
Vertex Lighting with three light sources.  
Texture</td><td style="border-width: 1px; padding: 5px; width: 80.875px;">Core/RefColor,   
Core/RefColorTex</td><td style="border-width: 1px; padding: 5px; width: 161.797px;">SetModelViewProjectionMatrix4Enabled(true)  
SetLightActivationEnabled(true)  
SetMaterialActivationEnabled(true)  
SetTextureActivationEnabled(true)</td><td style="border-width: 1px; padding: 5px; width: 323.641px;">If Texture is used, depends on corresponding fragment shader only.</td></tr><tr><td style="border-width: 1px; padding: 5px; width: 121.344px;">Core/RefTransWorldLight1</td><td style="border-width: 1px; padding: 5px; width: 121.344px;">Transformation,   
Lighting in WorldSpace with 1 Light  
Texture</td><td style="border-width: 1px; padding: 5px; width: 80.875px;">Core/RefColor,   
Core/RefColorTex</td><td style="border-width: 1px; padding: 5px; width: 161.797px;">SetModelViewProjectionMatrix4Enabled(true)  
SetLightActivationEnabled(true)  
SetMaterialActivationEnabled(true)  
SetTextureActivationEnabled(true)  
SetLightsCoordinateSpace(World)</td><td style="border-width: 1px; padding: 5px; width: 323.641px;">Lighting calculations are processed in world space instead of model space (For details see function Light::SetCoordinateSpace).  
If Texture is used, depends on corresponding fragment shader only.</td></tr><tr><td style="border-width: 1px; padding: 5px; width: 121.344px;">Effects/RefTransSphereMap</td><td style="border-width: 1px; padding: 5px; width: 121.344px;">Transformation,   
Sphere Texture Mapping</td><td style="border-width: 1px; padding: 5px; width: 80.875px;">Core/RefTex,  
Core/RefUniColorTex,  
Core/RefUniDiffuseMatTex</td><td style="border-width: 1px; padding: 5px; width: 161.797px;">SetModelViewMatrix4Enabled(true)  
SetNormalModelViewMatrix3Enabled(true)  
SetModelViewProjectionMatrix4Enabled(true)  
SetLightActivationEnabled(true)  
SetMaterialActivationEnabled(true)  
SetTextureActivationEnabled(true)</td><td style="border-width: 1px; padding: 5px; width: 323.641px;">Used to process a sphere texture for environment mapping.</td></tr><tr><td style="border-width: 1px; padding: 5px; width: 121.344px;">Effects/RefTransLight1SphereMap</td><td style="border-width: 1px; padding: 5px; width: 121.344px;">Transformation,   
Vertex Lighting with one light source,  
Sphere Texture Mapping</td><td style="border-width: 1px; padding: 5px; width: 80.875px;">Core/RefColorTex</td><td style="border-width: 1px; padding: 5px; width: 161.797px;">SetModelViewMatrix4Enabled(true)  
SetNormalModelViewMatrix3Enabled(true)  
SetModelViewProjectionMatrix4Enabled(true)  
SetLightActivationEnabled(true)  
SetMaterialActivationEnabled(true)  
SetTextureActivationEnabled(true)</td><td style="border-width: 1px; padding: 5px; width: 323.641px;">Used to process a sphere texture for environment mapping.</td></tr><tr><td style="border-width: 1px; padding: 5px; width: 121.344px;">Effects/RefTransLight2SphereMap</td><td style="border-width: 1px; padding: 5px; width: 121.344px;">Transformation,   
Vertex Lighting with two light sources,  
Sphere Texture Mapping</td><td style="border-width: 1px; padding: 5px; width: 80.875px;">Core/RefColorTex</td><td style="border-width: 1px; padding: 5px; width: 161.797px;">SetModelViewMatrix4Enabled(true)  
SetNormalModelViewMatrix3Enabled(true)  
SetModelViewProjectionMatrix4Enabled(true)  
SetLightActivationEnabled(true)  
SetMaterialActivationEnabled(true)  
SetTextureActivationEnabled(true)</td><td style="border-width: 1px; padding: 5px; width: 323.641px;">Used to process a sphere texture for environment mapping.</td></tr><tr><td style="border-width: 1px; padding: 5px; width: 121.344px;">Effects/RefTransLight3SphereMap</td><td style="border-width: 1px; padding: 5px; width: 121.344px;">Transformation,   
Vertex Lighting with three light sources,  
Sphere Texture Mapping</td><td style="border-width: 1px; padding: 5px; width: 80.875px;">Core/RefColorTex</td><td style="border-width: 1px; padding: 5px; width: 161.797px;">SetModelViewMatrix4Enabled(true)  
SetNormalModelViewMatrix3Enabled(true)  
SetModelViewProjectionMatrix4Enabled(true)  
SetLightActivationEnabled(true)  
SetMaterialActivationEnabled(true)  
SetTextureActivationEnabled(true)</td><td style="border-width: 1px; padding: 5px; width: 323.641px;">Used to process a sphere texture for environment mapping.</td></tr><tr><td style="border-width: 1px; padding: 5px; width: 121.344px;">Core/RefTransPointSprite</td><td style="border-width: 1px; padding: 5px; width: 121.344px;">Transformation of PointSprite</td><td style="border-width: 1px; padding: 5px; width: 80.875px;">Core/RefPointSprite</td><td style="border-width: 1px; padding: 5px; width: 161.797px;">SetModelViewProjectionMatrix4Enabled(true)  
SetMaterialActivationEnabled(true)  
SetTextureActivationEnabled(true)</td><td style="border-width: 1px; padding: 5px; width: 323.641px;">Use with PointSprite.  
As usual for point sprites, lighting has no influence.</td></tr><tr><td style="border-width: 1px; padding: 5px; width: 121.344px;">Core/RefTransLight1Morph</td><td style="border-width: 1px; padding: 5px; width: 121.344px;">Transformation,  
VertexLighting with one lighe source,  
Morphing Weights</td><td style="border-width: 1px; padding: 5px; width: 80.875px;">Core/RefColor,   
Core/RefColorTex</td><td style="border-width: 1px; padding: 5px; width: 161.797px;">SetModelViewProjectionMatrix4Enabled(true)  
SetLightActivationEnabled(true)  
SetMaterialActivationEnabled(true)  
SetTextureActivationEnabled(true)</td><td style="border-width: 1px; padding: 5px; width: 323.641px;">Use with MorphingMesh.  
If Texture is used, depends on corresponding fragment shader only.</td></tr><tr><td style="border-width: 1px; padding: 5px; width: 121.344px;">Effects/RefTransLight1BumpMap</td><td style="border-width: 1px; padding: 5px; width: 121.344px;">Transformation,  
Calculation of lighting vectors in tangent space.</td><td style="border-width: 1px; padding: 5px; width: 80.875px;">Effects/RefLight1BumpMap</td><td style="border-width: 1px; padding: 5px; width: 161.797px;">SetModelMatrix4Enabled(true)  
SetNormalModelMatrix3Enabled(true)  
SetModelViewProjectionMatrix4Enabled(true)  
SetCameraPositionEnabled(true)  
SetLightActivationEnabled(true)  
SetMaterialActivationEnabled(true)  
SetTextureActivationEnabled(true)  
SetLightsCoordinateSpace(World)</td><td style="border-width: 1px; padding: 5px; width: 323.641px;">Used to prepare lighting vectors for bump map shaders.</td></tr><tr><td style="border-width: 1px; padding: 5px; width: 121.344px;">Effects/RefTransLight1ProceduralWood</td><td style="border-width: 1px; padding: 5px; width: 121.344px;">Transformation,   
Vertex Lighting with one light source,  
Passing position to fragment shader for procedural calculations.</td><td style="border-width: 1px; padding: 5px; width: 80.875px;">Effects/RefProceduralWood</td><td style="border-width: 1px; padding: 5px; width: 161.797px;">SetModelViewProjectionMatrix4Enabled(true)  
SetLightActivationEnabled(true)  
SetMaterialActivationEnabled(true)  
SetTextureActivationEnabled(true)</td><td style="border-width: 1px; padding: 5px; width: 323.641px;">  
</td></tr><tr><td style="border-width: 1px; padding: 5px; width: 121.344px;">Effects/RefTransAnisotropicLight1Strand</td><td style="border-width: 1px; padding: 5px; width: 121.344px;">Transformation, passes vertex attributes in world space to fragment shader. Calculates direction of anisotropy, eye vector and light direction.</td><td style="border-width: 1px; padding: 5px; width: 80.875px;">Effects/RefAnisotropicLight1StrandTex</td><td style="border-width: 1px; padding: 5px; width: 161.797px;">SetModelViewProjectionMatrix4Enabled(true)  
SetModelMatrix4Enabled(true)  
SetNormalModelMatrix3Enabled(true)  
SetCameraPositionEnabled(true)  
SetLightActivationEnabled(true)  
SetMaterialActivationEnabled(true)  
SetTextureActivationEnabled(true)  
SetLightsCoordinateSpace(World)</td><td style="border-width: 1px; padding: 5px; width: 323.641px;">  
</td></tr><tr><td style="border-width: 1px; padding: 5px; width: 121.344px;">Effects/RefTransAnisotropicLight1</td><td style="border-width: 1px; padding: 5px; width: 121.344px;">Transformation,   
Passes vertex attributes in world space to fragment shader.</td><td style="border-width: 1px; padding: 5px; width: 80.875px;">Effects/RefAnisotropicLight1SpecularTex</td><td style="border-width: 1px; padding: 5px; width: 161.797px;">SetModelMatrix4Enabled(true)  
SetNormalModelMatrix3Enabled(true)  
SetModelViewProjectionMatrix4Enabled(true)  
SetCameraPositionEnabled(true)  
SetLightActivationEnabled(true)  
SetMaterialActivationEnabled(true)  
SetTextureActivationEnabled(true)  
SetLightsCoordinateSpace(World)</td><td style="border-width: 1px; padding: 5px; width: 323.641px;">  
</td></tr><tr><td style="border-width: 1px; padding: 5px; width: 121.344px;">Effects/RefTransFur</td><td style="border-width: 1px; padding: 5px; width: 121.344px;">Transformation,   
Indexed Multi pass upscaling in direction of normals, Texture</td><td style="border-width: 1px; padding: 5px; width: 80.875px;">Effects/RefUniColorTexFur</td><td style="border-width: 1px; padding: 5px; width: 161.797px;">SetModelViewProjectionMatrix4Enabled(true)  
SetMaterialActivationEnabled(true)  
SetTextureActivationEnabled(true)</td><td style="border-width: 1px; padding: 5px; width: 323.641px;">Lighting has no influence.</td></tr><tr><td style="border-width: 1px; padding: 5px; width: 121.344px;">Effects/RefTransCubeMapReflection</td><td style="border-width: 1px; padding: 5px; width: 121.344px;">Transformation,   
Texturing reflection using one CubeMap texture</td><td style="border-width: 1px; padding: 5px; width: 80.875px;">Core/RefCubeMapTex</td><td style="border-width: 1px; padding: 5px; width: 161.797px;">SetModelMatrix4Enabled(true)  
SetNormalModelMatrix3Enabled(true)  
SetModelViewProjectionMatrix4Enabled(true)  
SetCameraPositionEnabled(true)  
SetMaterialActivationEnabled(true)  
SetTextureActivationEnabled(true)</td><td style="border-width: 1px; padding: 5px; width: 323.641px;">Environment mapping reflections using a CubeMap texture. Lighting is not considered.</td></tr><tr><td style="border-width: 1px; padding: 5px; width: 121.344px;">Effects/RefTransCubeMapRefraction</td><td style="border-width: 1px; padding: 5px; width: 121.344px;">Transformaion,   
Texturing refraction using one cubemap texture.</td><td style="border-width: 1px; padding: 5px; width: 80.875px;">Core/RefCubeMapTex</td><td style="border-width: 1px; padding: 5px; width: 161.797px;">SetModelMatrix4Enabled(true)  
SetNormalModelMatrix3Enabled(true)  
SetModelViewProjectionMatrix4Enabled(true)  
SetCameraPositionEnabled(true)  
SetMaterialActivationEnabled(true)  
SetTextureActivationEnabled(true)</td><td style="border-width: 1px; padding: 5px; width: 323.641px;">Environment mapping refractions using a CubeMap texture. Lighting is not considered. Refraction ratio has to be passed as additional uniform float refractionRatio.</td></tr><tr><td style="border-width: 1px; padding: 5px; width: 121.344px;">Effects/RefTransCubeMapReflectionRefraction</td><td style="border-width: 1px; padding: 5px; width: 121.344px;">Transformation,   
Texturing reflection and refraction using one cubemap texture.</td><td style="border-width: 1px; padding: 5px; width: 80.875px;">Core/RefCubeMapTex2</td><td style="border-width: 1px; padding: 5px; width: 161.797px;">SetModelMatrix4Enabled(true)  
SetNormalModelMatrix3Enabled(true)  
SetModelViewProjectionMatrix4Enabled(true)  
SetCameraPositionEnabled(true)  
SetMaterialActivationEnabled(true)  
SetTextureActivationEnabled(true)</td><td style="border-width: 1px; padding: 5px; width: 323.641px;">Environment mapping refractions and reflections using a CubeMap texture. Lighting is not considered. Refraction ratio has to be passed as additional uniform float refractionRatio.</td></tr><tr><td style="border-width: 1px; padding: 5px; width: 121.344px;">Core/RefTransCubeMap</td><td style="border-width: 1px; padding: 5px; width: 121.344px;">Transformation,   
Texturing using one CubeMap texture, addressed directly by object space vertex coordinates.</td><td style="border-width: 1px; padding: 5px; width: 80.875px;">Core/RefCubeMapTex</td><td style="border-width: 1px; padding: 5px; width: 161.797px;">SetModelViewProjectionMatrix4Enabled(true)  
SetMaterialActivationEnabled(true)  
SetTextureActivationEnabled(true)</td><td style="border-width: 1px; padding: 5px; width: 323.641px;">Direct addressing of CubeMap texture using object space vertex positions. Can be used for e.g. a SkyBox using a CubeMap texture.</td></tr><tr><td style="border-width: 1px; padding: 5px; width: 121.344px;">Effects/RefTransDof</td><td style="border-width: 1px; padding: 5px; width: 121.344px;">Transformation,  
Texturing with one texture,  
First render pass of depth-of-field rendering: Rendering the scene,  
Scaled depth value passed as varying.</td><td style="border-width: 1px; padding: 5px; width: 80.875px;">Effects/RefTexDof</td><td style="border-width: 1px; padding: 5px; width: 161.797px;">SetModelViewProjectionMatrix4Enabled(true)  
SetMaterialActivationEnabled(true)  
SetTextureActivationEnabled(true)</td><td style="border-width: 1px; padding: 5px; width: 323.641px;">First pass of depth-of-field rendering has to be applied to every node that is rendered. The resulting image then contains the scene's depth values as alpha value, which is used for further processing. If other effects (e.g. Light, bump mapping etc.) have to be applied on the nodes, then also the corresponding shaders have to be adapted to meet the depth-of-field requirements. Additional uniform u\_depthScale has to be passed to scale the depth values.</td></tr><tr><td style="border-width: 1px; padding: 5px; width: 121.344px;">Effects/RefTransLight1Dof</td><td style="border-width: 1px; padding: 5px; width: 121.344px;">Transformation,   
Texturing with one Texture  
Vertex Lighting with one light source,  
First render pass of depth-of-field rendering: Rendering the scene,  
Scaled depth value passed as varying.</td><td style="border-width: 1px; padding: 5px; width: 80.875px;">Effects/RefColorTexDof</td><td style="border-width: 1px; padding: 5px; width: 161.797px;">SetModelViewProjectionMatrix4Enabled(true)  
SetMaterialActivationEnabled(true)  
SetTextureActivationEnabled(true)  
  
SetLightsCoordinateSpace(Light::Object);</td><td style="border-width: 1px; padding: 5px; width: 323.641px;">First pass of depth-of-field rendering has to be applied to every node that is rendered. The resulting image then contains the scene's depth values as alpha value, which is used for further processing. If other effects (e.g. bump mapping etc.) have to be applied on the nodes, then also the corresponding shaders have to be adapted to meet the depth-of-field requirements. Additional uniform u\_depthScale has to be passed to scale the depth values.  
Supports per vertex lighting.</td></tr><tr><td style="border-width: 1px; padding: 5px; width: 121.344px;">Effects/RefTransFragmentLightDof</td><td style="border-width: 1px; padding: 5px; width: 121.344px;">Transformation,   
Texturing with one Texture,  
Normal and position for per fragment lighting,  
First render pass of depth-of-field rendering: Rendering the scene,  
Scaled depth value passed as varying.</td><td style="border-width: 1px; padding: 5px; width: 80.875px;">Effects/RefTexFragmentLightDof</td><td style="border-width: 1px; padding: 5px; width: 161.797px;">SetModelViewProjectionMatrix4Enabled(true)  
SetMaterialActivationEnabled(true)  
SetTextureActivationEnabled(true)  
  
SetLightsCoordinateSpace(Light::World);  
SetModelMatrix4Enabled(true);  
SetNormalModelMatrix3Enabled(true);</td><td style="border-width: 1px; padding: 5px; width: 323.641px;">First pass of depth-of-field rendering has to be applied to every node that is rendered. The resulting image then contains the scene's depth values as alpha value, which is used for further processing. If other effects (e.g. bump mapping etc.) have to be applied on the nodes, then also the corresponding shaders have to be adapted to meet the depth-of-field requirements. Additional uniform u\_depthScale has to be passed to scale the depth values.  
Supports per Fragment lighting.</td></tr><tr><td style="border-width: 1px; padding: 5px; width: 121.344px;">Core/RefTransPos</td><td style="border-width: 1px; padding: 5px; width: 121.344px;">Transformation,  
Texture,  
Vertex position to fragment shader</td><td style="border-width: 1px; padding: 5px; width: 80.875px;">Core/RefFlatLight1</td><td style="border-width: 1px; padding: 5px; width: 161.797px;">SetModelViewProjectionMatrix4Enabled(true)  
SetMaterialActivationEnabled(true)  
SetTextureActivationEnabled(true)  
SetLightActivationEnabled(true)</td><td style="border-width: 1px; padding: 5px; width: 323.641px;">No light calculation, passing vertex position to fragment shader for FlatShading calculations.</td></tr><tr><td style="border-width: 1px; padding: 5px; width: 121.344px;">Effects/RefTransLight1Gooch</td><td style="border-width: 1px; padding: 5px; width: 121.344px;">Transformation, Assignment of ambient light component, Calculation of varyings needed for computation of specular component in world space. First pass of gooch-shading: Shading.</td><td style="border-width: 1px; padding: 5px; width: 80.875px;">Effects/RefGoochShading</td><td style="border-width: 1px; padding: 5px; width: 161.797px;">SetModelMatrix4Enabled(true)  
SetNormalModelMatrix3Enabled(true)  
SetModelViewProjectionMatrix4Enabled(true)  
SetCameraPositionEnabled(true)  
SetMaterialActivationEnabled(true)  
SetTextureActivationEnabled(true)  
SetLightActivationEnabled(true)  
SetLightsCoordinateSpace(Light::World)</td><td style="border-width: 1px; padding: 5px; width: 323.641px;">This vertex shader in conjunction with RefGoochShading.fragp realizes the first pass of an implementation of Gooch's rendering technique to simulate the appearance of technical illustrations, often occuring in e.g. manuals or schematic presentations etc. (SIGGRAPH'98 paper "A Non-Photorealistic Lighting Model For Automatic Technical Illustration"). The first pass renders the object using a transition from "cool" to "warm" colors according to the lighting model. While phong shading is normally used to simulate real lighting, this lighting model aims more on preserving details away from the light source. The second pass then draws the silhoutte of the object. For this the object is upscaled and rendered with a fixed color (e.g. black). On <span style="vertical-align: inherit;"><span style="vertical-align: inherit;"><span style="color: rgb(230, 126, 35);">[Candera](http://dev.doc.cgistudio.at/APILINK/namespace_candera.html "[DataBinding_RefTypeSample]") </span></span></span>side the first and the second pass have to be rendered with different Culling states, such that first pass renders the front of the object, and the second only the back side.</td></tr><tr><td style="border-width: 1px; padding: 5px; width: 121.344px;">Effects/RefTransScale</td><td style="border-width: 1px; padding: 5px; width: 121.344px;">Transformation, Upscaling in direction of normals, texture coordinates.</td><td style="border-width: 1px; padding: 5px; width: 80.875px;">Core/RefTex,   
Core/RefUniColor,   
Core/RefUniColorTex,  
Core/RefUniDiffuseMat,  
Core/RefTex2LightMap</td><td style="border-width: 1px; padding: 5px; width: 161.797px;">SetModelViewProjectionMatrix4Enabled(true)  
SetMaterialActivationEnabled(true)  
SetTextureActivationEnabled(true)</td><td style="border-width: 1px; padding: 5px; width: 323.641px;">Lighting has no influence. Used to upscale the vertices inside the vertex shader, using a float scale factor passed as uniform u\_Scale. Is used for silhouette rendering in gooch-shading, but may be also used for other techniques.</td></tr><tr><td style="border-width: 1px; padding: 5px; width: 121.344px;">Core/RefViewportSpace</td><td style="border-width: 1px; padding: 5px; width: 121.344px;">Texture  
Adjusting the position of the screen aligned billboard by setting uniform u\_offsetLeft and u\_offsetTop.</td><td style="border-width: 1px; padding: 5px; width: 80.875px;">Effects/RefTexGaussianBlurX,  
Effects/RefTexGaussianBlurY,  
Effects/RefTexDofCombine,  
Effects/RefBloomThreshold,  
Effects/RefCombineBloom,  
Core/RefInterlaceMask</td><td style="border-width: 1px; padding: 5px; width: 161.797px;">SetModelViewProjectionMatrix4Enabled(false)SetMaterialActivationEnabled(true)  
SetTextureActivationEnabled(true)</td><td style="border-width: 1px; padding: 5px; width: 323.641px;">Used in subsequent post processing passes in conjuction with a screen-aligned billboard. The billboard should be of size 0.0 to 1.0 with 1.0 being a fullscreen billboard. The position of the billboard on the screen can be adjusted by setting the left and top offset in the range of 0.0 to 1.0.  
Passes the position and texture coordinate to the fragment shader without any matrix transformation. Therefore the incoming vertex buffer should already be in homogenous screen coordinates.  
Note: Overlapping Billboards (in screen space) would produce Z-fighting artifacts. Disabling depth test and using render order as well as using depth bias can be used to avoid them.</td></tr><tr><td style="border-width: 1px; padding: 5px; width: 121.344px;">Effects/RefTransLight1Carbon</td><td style="border-width: 1px; padding: 5px; width: 121.344px;">Transformation, Lighting with one light source, Texture, Line of Sight</td><td style="border-width: 1px; padding: 5px; width: 80.875px;">Effects/RefCarbon</td><td style="border-width: 1px; padding: 5px; width: 161.797px;">SetModelMatrix3Enabled(true)  
SetNormalModelMatrix3Enabled(true)  
SetModelViewProjectionMatrix4Enabled(true)  
SetLightActivationEnabled(true)  
SetMaterialActivationEnabled(true)  
SetTextureActivationEnabled(true)  
SetLightsCoordinateSpace(Light::Object)</td><td style="border-width: 1px; padding: 5px; width: 323.641px;">Seamless texture utilized as carbon image</td></tr><tr><td style="border-width: 1px; padding: 5px; width: 121.344px;">Effects/RefTransLight1FlopCarPaint</td><td style="border-width: 1px; padding: 5px; width: 121.344px;">Transformation, Lighting with one light source, Line of Sight, Mixes two color components diffuse and emissive based on camera position</td><td style="border-width: 1px; padding: 5px; width: 80.875px;">Effects/RefFlopCarPaint</td><td style="border-width: 1px; padding: 5px; width: 161.797px;">SetModelMatrix3Enabled(true)  
SetNormalModelMatrix3Enabled(true)  
SetModelViewProjectionMatrix4Enabled(true)  
SetLightActivationEnabled(true)  
SetMaterialActivationEnabled(true)  
SetTextureActivationEnabled(false)  
SetLightsCoordinateSpace(Light::Object)</td><td style="border-width: 1px; padding: 5px; width: 323.641px;">Mixes two color components (diffuse and emissive) based on the camera position</td></tr><tr><td style="border-width: 1px; padding: 5px; width: 121.344px;">Effects/RefTransLight1MetalFlakesCarPaint</td><td style="border-width: 1px; padding: 5px; width: 121.344px;">Transformation, Lighting with one light source, Line of Sight, Texture</td><td style="border-width: 1px; padding: 5px; width: 80.875px;">Effects/RefMetalFlakesCarPaint</td><td style="border-width: 1px; padding: 5px; width: 161.797px;">SetModelMatrix3Enabled(true)  
SetNormalModelMatrix3Enabled(true)  
SetModelViewProjectionMatrix4Enabled(true)  
SetLightActivationEnabled(true)  
SetMaterialActivationEnabled(true)  
SetTextureActivationEnabled(true)  
SetLightsCoordinateSpace(Light::Object)</td><td style="border-width: 1px; padding: 5px; width: 323.641px;">Metal flake effect with one noise texture</td></tr><tr><td style="border-width: 1px; padding: 5px; width: 121.344px;">Effects/RefTransLight1FlopMetalFlakesCarPaint</td><td style="border-width: 1px; padding: 5px; width: 121.344px;">Transformation, Lighting with one light source, Line of Sight, Texture, Mixes two color components diffuse and emissive based on camera position</td><td style="border-width: 1px; padding: 5px; width: 80.875px;">Effects/RefFlopMetalFlakesCarPaint</td><td style="border-width: 1px; padding: 5px; width: 161.797px;">SetModelMatrix3Enabled(true)  
SetNormalModelMatrix3Enabled(true)  
SetModelViewProjectionMatrix4Enabled(true)  
SetLightActivationEnabled(true)  
SetMaterialActivationEnabled(true)  
SetTextureActivationEnabled(true)  
SetLightsCoordinateSpace(Light::Object)</td><td style="border-width: 1px; padding: 5px; width: 323.641px;">Metal flake effect with one noise texture  
Mixes two color components (diffuse and emissive) based on the camera position</td></tr><tr><td style="border-width: 1px; padding: 5px; width: 121.344px;">Core/RefCanvasTrans</td><td style="border-width: 1px; padding: 5px; width: 121.344px;">Applying scale and offset to vertices before transformation,   
Transformation into world space,   
Texturing with one texture.</td><td style="border-width: 1px; padding: 5px; width: 80.875px;">Core/RefTex,   
Core/RefUniColor,   
Core/RefUniColorTex,  
Core/RefTex2LightMap,  
Core/RefUniDiffuseMatTex</td><td style="border-width: 1px; padding: 5px; width: 161.797px;">SetModelViewProjectionMatrix4Enabled(true)  
SetMaterialActivationEnabled(true)  
SetTextureActivationEnabled(true)  
SetCanvasActivationEnabled(true)</td><td style="border-width: 1px; padding: 5px; width: 323.641px;">Similar to RefTrans, but additionally applies canvas offset and size before multiplying the mvp matrix.</td></tr><tr><td style="border-width: 1px; padding: 5px; width: 121.344px;">Core/RefCanvasTransLight1</td><td style="border-width: 1px; padding: 5px; width: 121.344px;">Applying scale and offset to vertices before transformation,   
Transformation,  
Texturing with one tetxture,  
One light source with lighting in model space.</td><td style="border-width: 1px; padding: 5px; width: 80.875px;">Core/RefColor,   
Core/RefColorTex</td><td style="border-width: 1px; padding: 5px; width: 161.797px;">SetModelViewProjectionMatrix4Enabled(true)  
SetLightActivationEnabled(true)  
SetMaterialActivationEnabled(true)  
SetTextureActivationEnabled(true)  
SetCanvasActivationEnabled(true)  
SetLightsCoordinateSpace(Light::Object)</td><td style="border-width: 1px; padding: 5px; width: 323.641px;">Similar to RefTransLight1, but additionally applies canvas offset and size before multiplying the mvp matrix.</td></tr><tr><td style="border-width: 1px; padding: 5px; width: 121.344px;">Core/RefCanvasTransUniDiffuseMat</td><td style="border-width: 1px; padding: 5px; width: 121.344px;">Applying scale and offset to vertices before transformation,   
Transformation into world space,   
Texturing with one texture,  
Forwarding of material diffuse color to fragment shader.</td><td style="border-width: 1px; padding: 5px; width: 80.875px;">Core/RefCanvasUniDiffuseMat</td><td style="border-width: 1px; padding: 5px; width: 161.797px;">SetModelViewProjectionMatrix4Enabled(true)  
SetMaterialActivationEnabled(true)  
SetTextureActivationEnabled(true)  
SetCanvasActivationEnabled(true)</td><td style="border-width: 1px; padding: 5px; width: 323.641px;">Similar to RefTrans, but additionally applies canvas offset and size before multiplying the mvp matrix. Additionally it passes material diffuse color to fragment shader. This shader is used to achieve the same effect as a SolidColorBrush in 2D.</td></tr><tr><td style="border-width: 1px; padding: 5px; width: 121.344px;">Effects/RefFxaa</td><td style="border-width: 1px; padding: 5px; width: 121.344px;">Coordinates in normalized device space.</td><td style="border-width: 1px; padding: 5px; width: 80.875px;">Effects/RefFxaa</td><td style="border-width: 1px; padding: 5px; width: 161.797px;">SetModelViewProjectionMatrix4Enabled(false)  
SetLightActivationEnabled(false)  
SetMaterialActivationEnabled(false)</td><td style="border-width: 1px; padding: 5px; width: 323.641px;">Applies the "Fast approximate anti-aliasing" algorithm to its input, which should be a quad using normalized device coordinates. The uniform (u\_Resolution) needs to be set to the width and height of the input texture measured in texels.</td></tr><tr><td style="border-width: 1px; padding: 5px; width: 121.344px;">Effects/Ref</td><td style="border-width: 1px; padding: 5px; width: 121.344px;">Texture</td><td style="border-width: 1px; padding: 5px; width: 80.875px;">Effects/RefTexGaussianBlurX,  
Effects/RefTexGaussianBlurY,  
Effects/RefTexDofCombine,  
Effects/RefBloomThreshold,  
Effects/RefCombineBloom</td><td style="border-width: 1px; padding: 5px; width: 161.797px;">SetModelViewProjectionMatrix4Enabled(false)  
SetLightActivationEnabled(false)  
SetMaterialActivationEnabled(false)  
SetTextureActivationEnabled(true)</td><td style="border-width: 1px; padding: 5px; width: 323.641px;">Passes texture coordinates and vertex position to fragment shader without applying a transformation. This is useful for post processing effects when the vertex buffer is just a quad in normalized device coordinates (-1,1).</td></tr><tr><td style="border-width: 1px; padding: 5px; width: 121.344px;">Effects/RefTransGradientLinear</td><td style="border-width: 1px; padding: 5px; width: 121.344px;">Transformation into world space,  
Vertex based linear gradient computations.</td><td style="border-width: 1px; padding: 5px; width: 80.875px;">Effects/RefGradientLinear</td><td style="border-width: 1px; padding: 5px; width: 161.797px;">SetModelViewProjectionMatrix4Enabled(true)</td><td style="border-width: 1px; padding: 5px; width: 323.641px;">Vertex Shader for linear gradient computations.</td></tr><tr><td style="border-width: 1px; padding: 5px; width: 121.344px;">Effects/RefTransGradientRadial</td><td style="border-width: 1px; padding: 5px; width: 121.344px;">Transformation into world space,  
Passing vertex position to fragment shader.</td><td style="border-width: 1px; padding: 5px; width: 80.875px;">Effects/RefGradientRadial</td><td style="border-width: 1px; padding: 5px; width: 161.797px;">SetModelViewProjectionMatrix4Enabled(true)</td><td style="width: 323.641px; border-width: 1px; padding: 5px;">Vertex Shader for radial gradient computations. <div class="contents"><div class="textblock">  
</div></div></td></tr><tr><td style="border-width: 1px; padding: 5px; width: 121.344px;">Core/RefTransLight1Skin</td><td style="border-width: 1px; padding: 5px; width: 121.344px;">Skinning</td><td style="border-width: 1px; padding: 5px; width: 80.875px;">Core/RefColor,  
Core/RefColorTex</td><td style="border-width: 1px; padding: 5px; width: 161.797px;">SetModelViewProjectionMatrix4Enabled(true)  
SetLightActivationEnabled(true)  
SetMaterialActivationEnabled(true)  
SetTextureActivationEnabled(true)  
SetSkinningMeshActivationEnabled(true)</td><td style="width: 323.641px; border-width: 1px; padding: 5px;">If Texture is used, depends on corresponding fragment shader only. And, use with SkinningMesh.</td></tr></tbody></table>

Vertex Shader for radial gradient computations. </div></div>#### **Reference Fragment Shaders**   


<div class="contents" id="bkmrk-fragment-shaders-sup"><div class="textblock"><table border="1" cellpadding="5" cellspacing="0" style="border-collapse: collapse; width: 800px; border-width: 1px; border-spacing: 0px;" width="1000"><tbody><tr bgcolor="#d4d4d4"><th style="border-width: 1px; padding: 5px;" width="15%">**Fragment Shaders**</th><th style="border-width: 1px; padding: 5px;" width="15%">**Supports**</th><th style="border-width: 1px; padding: 5px;" width="10%">**Combine with Vertex Shaders**</th><th style="border-width: 1px; padding: 5px;" width="20%">**GenericShaderParamSetter Configuration**</th><th style="border-width: 1px; padding: 5px;" width="40%">**Note**</th></tr><tr><td style="border-width: 1px; padding: 5px;">Core/RefColor</td><td style="border-width: 1px; padding: 5px;">Color from varying</td><td style="border-width: 1px; padding: 5px;">Core/RefTransLight\*,  
Core/RefTransWorldLight\*,  
Core/RefTransLight1Morph</td><td style="border-width: 1px; padding: 5px;">See configuration of RefTransLight\* or RefTransWorldLight1</td><td style="border-width: 1px; padding: 5px;">Normaly used for models that support lighting but no texture.  
varying color (v\_Color) is typically either set by lit material or by vertex color.</td></tr><tr><td style="border-width: 1px; padding: 5px;">Core/RefTex</td><td style="border-width: 1px; padding: 5px;">Texture</td><td style="border-width: 1px; padding: 5px;">Core/RefTrans,  
Effects/RefTransSphereMap,  
Effects/RefTransScale</td><td style="border-width: 1px; padding: 5px;">See configuration of RefTrans or RefTransSphereMap</td><td style="border-width: 1px; padding: 5px;">Lighting has no influence.</td></tr><tr><td style="border-width: 1px; padding: 5px;">Core/RefColorTex</td><td style="border-width: 1px; padding: 5px;">Color from varying,  
Texture</td><td style="border-width: 1px; padding: 5px;">Core/RefTransLight\*,  
Core/RefTransWorldLight\*,  
Core/RefTransColor,  
Core/RefTransLight1Morph,  
Core/RefTransLight\*SphereMap</td><td style="border-width: 1px; padding: 5px;">See configuration of RefTransLight\* or RefTransWorldLight1</td><td style="border-width: 1px; padding: 5px;">Normaly used for models that support lighting and one texture.  
varying color (v\_Color) is normaly either set by lit material or by vertex color.</td></tr><tr><td style="border-width: 1px; padding: 5px;">Core/RefUniColor</td><td style="border-width: 1px; padding: 5px;">Color from uniform</td><td style="border-width: 1px; padding: 5px;">Core/RefTrans,  
Effects /RefTransScale</td><td style="border-width: 1px; padding: 5px;">See configuration of RefTrans</td><td style="border-width: 1px; padding: 5px;">Useful if certain color is set via uniform (u\_Color) directly.   
Lighting or vertex colors have no influence.</td></tr><tr><td style="border-width: 1px; padding: 5px;">Core/RefUniColorTex</td><td style="border-width: 1px; padding: 5px;">Color from uniform,  
Texture</td><td style="border-width: 1px; padding: 5px;">Core/RefTrans,   
Effects/RefTransSphereMap,  
Effects /RefTransScale</td><td style="border-width: 1px; padding: 5px;">See configuration of RefTrans or RefTransSphereMap</td><td style="border-width: 1px; padding: 5px;">Useful if certain color is set via uniform (u\_Color) directly and blended with one texture.  
Lighting or vertex colors have no influence.</td></tr><tr><td style="border-width: 1px; padding: 5px;">Core/RefUniDiffuseMatTex</td><td style="border-width: 1px; padding: 5px;">Material diffuse color,  
Texture</td><td style="border-width: 1px; padding: 5px;">Core/RefTrans,  
Effects/RefTransSphereMap</td><td style="border-width: 1px; padding: 5px;">See configuration of RefTrans or RefTransSphereMap</td><td style="border-width: 1px; padding: 5px;">Final color = materials diffuse color \* texel color.  
The uniform value of the materials diffuse color is set by <span style="vertical-align: inherit;"><span style="vertical-align: inherit;"><span style="color: rgb(230, 126, 35);">[Candera](http://dev.doc.cgistudio.at/APILINK/namespace_candera.html "[DataBinding_RefTypeSample]")</span></span></span> automatically if a Material is applied to a Node. Lighting or vertex colors have no influence.</td></tr><tr><td style="border-width: 1px; padding: 5px;">Core/RefPointSprite</td><td style="border-width: 1px; padding: 5px;">Pointsprite incl. Texturing</td><td style="border-width: 1px; padding: 5px;">Core/RefTransPointSprite</td><td style="border-width: 1px; padding: 5px;">See configuration of RefTransPointSprite</td><td style="border-width: 1px; padding: 5px;">Used for point sprites only.</td></tr><tr><td style="border-width: 1px; padding: 5px;">Core/RefTex2LightMap</td><td style="border-width: 1px; padding: 5px;">Texture,  
LightMap</td><td style="border-width: 1px; padding: 5px;">Core/RefTrans,  
Effects /RefTransScale</td><td style="border-width: 1px; padding: 5px;">See configuration of RefTrans</td><td style="border-width: 1px; padding: 5px;">Lightmap Multitexturing: A Lightmap typically defines an illumination texture at unit 1 that is multiplied with texture at unit 0.</td></tr><tr><td style="border-width: 1px; padding: 5px;">Effects/RefLight1BumpMap</td><td style="border-width: 1px; padding: 5px;">Per pixel lighting using the normals supplied in u\_Texture1 (normal map). Computed color is combined with the texture in u\_Texture0.</td><td style="border-width: 1px; padding: 5px;">Effects/RefTransLight1BumpMap</td><td style="border-width: 1px; padding: 5px;">See configuration of RefTransLight1BumpMap</td><td style="border-width: 1px; padding: 5px;">Used to display rough surfaces without adding polygon complexity to it.  
The shader accepts two textures. u\_Texture0 defines the color map used. u\_Texture1  
defines a normal map, that stores normals in tangent space to be used for lighting   
calculations.</td></tr><tr><td style="border-width: 1px; padding: 5px;">Effects/RefProceduralWood</td><td style="border-width: 1px; padding: 5px;">Procedural calculation of interpolated rings, which appears like annual rings of wood if the right colors are chosen.</td><td style="border-width: 1px; padding: 5px;">Effects/RefTransLight1ProceduralWood</td><td style="border-width: 1px; padding: 5px;">See configuration of RefTransLight1ProceduralWood</td><td style="border-width: 1px; padding: 5px;">For procedural calculations two color, the orgin of the annual rings and a multiplier that controls the densitiy of the rings can be passed.</td></tr><tr><td style="border-width: 1px; padding: 5px;">Effects/RefAnisotropicLight1StrandTex</td><td style="border-width: 1px; padding: 5px;">Per pixel anisotropic lighting, using a strand texture</td><td style="border-width: 1px; padding: 5px;">Effects/RefTransAnisotropicLight1Strand</td><td style="border-width: 1px; padding: 5px;">First texture for color, second for strand.</td><td style="border-width: 1px; padding: 5px;">The strand texture must hold the diffuse and specular light intensity in the R and G channels, respectively.</td></tr><tr><td style="border-width: 1px; padding: 5px;">Effects/RefAnisotropicLight1SpecularTex</td><td style="border-width: 1px; padding: 5px;">Per pixel anisotropic lighting</td><td style="border-width: 1px; padding: 5px;">Effects/RefTransAnisotropicLight1</td><td style="border-width: 1px; padding: 5px;">See configuration of RefTransAnisotropicLight1</td><td style="border-width: 1px; padding: 5px;">Using alternative anisotropic specular highlights, according to Ward's SIGGRAPH 92 paper "Measuring and Modeling Anisotropic Reflection". Additional calculated specular component is combined with u\_Texture0.  
Used to display the reflection behavior of multiple surfaces. Uniforms u\_AlphaX and u\_AlphaY model the distribution of the specular highlight. Combined with a texture it can for example be used to simulate metallic surfaces like brushed steel. In the cited paper alphaX and alphaY for several materials can be found.</td></tr><tr><td style="border-width: 1px; padding: 5px;">Effects/RefUniColorTexFur</td><td style="border-width: 1px; padding: 5px;">Assignment of product of alpha mask, texture and fixed color.</td><td style="border-width: 1px; padding: 5px;">Effects/RefTransFur</td><td style="border-width: 1px; padding: 5px;">See configuration of RefTransFur</td><td style="border-width: 1px; padding: 5px;">Simulates the appearance of fur if applied with MulitPassRendering. Is also intended to demonstrate multi pass rendering.</td></tr><tr><td style="border-width: 1px; padding: 5px;">Core/RefCubeMapTex</td><td style="border-width: 1px; padding: 5px;">Addressing one cube map texture using a single varying vec3.</td><td style="border-width: 1px; padding: 5px;">Effects/RefTransCubeMapReflection, Effects/RefTransCubeMapRefraction,  
Core/RefTransCubeMap</td><td style="border-width: 1px; padding: 5px;">See configuration of RefTransCubeMapReflection, RefTransCubeMapRefraction,  
RefTransCubeMap</td><td style="border-width: 1px; padding: 5px;">Cube Map addressing, material colors or lighting are not considered.</td></tr><tr><td style="border-width: 1px; padding: 5px;">Core/RefCubeMapTex2</td><td style="border-width: 1px; padding: 5px;">Mixing two different addressed fragments of a CubeMap using a varying ratio. Addressing is done using two varying vec3.</td><td style="border-width: 1px; padding: 5px;">Effects/RefTransCubeMapReflectionRefraction</td><td style="border-width: 1px; padding: 5px;">See configuration of RefTransCubeMapReflectionRefraction</td><td style="border-width: 1px; padding: 5px;">Cube Map addressing, material colors or lighting are not considered.</td></tr><tr><td style="border-width: 1px; padding: 5px;">Core/RefUniDiffuseMat</td><td style="border-width: 1px; padding: 5px;">Material diffuse color</td><td style="border-width: 1px; padding: 5px;">Core/RefTrans</td><td style="border-width: 1px; padding: 5px;">See configuration of RefTrans</td><td style="border-width: 1px; padding: 5px;">Final color = materials diffuse color  
The uniform value of the materials diffuse color is set by <span style="vertical-align: inherit;"><span style="vertical-align: inherit;"><span style="color: rgb(230, 126, 35);">[Candera](http://dev.doc.cgistudio.at/APILINK/namespace_candera.html "[DataBinding_RefTypeSample]")</span></span></span> automatically if a Material is applied to a Node. Lighting or vertex colors have no influence.</td></tr><tr><td style="border-width: 1px; padding: 5px;">Effects/RefTexDof</td><td style="border-width: 1px; padding: 5px;">Assignment of Texture, First render pass of depth-of-field rendering: Rendering the scene, Depth encoded into alpha channel.</td><td style="border-width: 1px; padding: 5px;">Effects/RefTransDof</td><td style="border-width: 1px; padding: 5px;">See configuration of RefTransDof</td><td style="border-width: 1px; padding: 5px;">First pass of depth-of-field rendering has to be applied to every node that is rendered. The resulting image then contains the scene's depth values as alpha value, which is used for further processing. If other effects (e.g. Light, bump mapping etc.) have to be applied on the nodes, then also the corresponding shaders have to be adapted to meet the depth-of-field requirements.</td></tr><tr><td style="border-width: 1px; padding: 5px;">Effects/RefColorTexDof</td><td style="border-width: 1px; padding: 5px;">Color from varying,  
Assignment of Texture,   
First render pass of depth-of-field rendering: Rendering the scene, Depth encoded into alpha channel.</td><td style="border-width: 1px; padding: 5px;">Effects/RefTransLight1Dof</td><td style="border-width: 1px; padding: 5px;">See configuration of RefTransLight1Dof</td><td style="border-width: 1px; padding: 5px;">First pass of depth-of-field rendering has to be applied to every node that is rendered. The resulting image then contains the scene's depth values as alpha value, which is used for further processing. If other effects (e.g. bump mapping etc.) have to be applied on the nodes, then also the corresponding shaders have to be adapted to meet the depth-of-field requirements.  
Support per vertex lighting.</td></tr><tr><td style="border-width: 1px; padding: 5px;">Effects/RefTexFragmentLightDof</td><td style="border-width: 1px; padding: 5px;">Per fragment lighting with one light source,  
Assignment of Texture,   
First render pass of depth-of-field rendering: Rendering the scene, Depth encoded into alpha channel.</td><td style="border-width: 1px; padding: 5px;">Effects/RefTransFragmentLightDof</td><td style="border-width: 1px; padding: 5px;">See configuration of RefTransFragmentLightDof</td><td style="border-width: 1px; padding: 5px;">First pass of depth-of-field rendering has to be applied to every node that is rendered. The resulting image then contains the scene's depth values as alpha value, which is used for further processing. If other effects (e.g. bump mapping etc.) have to be applied on the nodes, then also the corresponding shaders have to be adapted to meet the depth-of-field requirements.  
Supports per fragment lighting.</td></tr><tr><td style="border-width: 1px; padding: 5px;">Effects/RefTexDofBlur</td><td style="border-width: 1px; padding: 5px;">Assignment of texture, second render pass of depth-of-field: blurring the texture, simulating an optical circle of confusion, caused by lens refraction out of focus.</td><td style="border-width: 1px; padding: 5px;">Core/RefTrans</td><td style="border-width: 1px; padding: 5px;">See configuration of RefTrans</td><td style="border-width: 1px; padding: 5px;">Second pass of depth-of-field rendering: blurring the incoming image. Result is a blurred image of the passed texture. u\_CocScale controls the size of the circle of confusion, and therefore the blur strength.</td></tr><tr><td style="border-width: 1px; padding: 5px;">Effects/RefTexDofCombine</td><td style="border-width: 1px; padding: 5px;">Third pass of depth of field: Assignment and blending of two textures, representing the sharp and blurred image. Blend weights result from focus and focus range of the simulated camera lens.</td><td style="border-width: 1px; padding: 5px;">Core/RefViewportSpace, Effects/Ref</td><td style="border-width: 1px; padding: 5px;">See configuration of RefTrans</td><td style="border-width: 1px; padding: 5px;">Third pass of depth rendering: Combines the sharp and the blurred image according to the set focus of the simulated camera lens. u\_Focus controls the distance of the focus plane (where a sharp image would be formed). u\_Range controls the size of the area around the focus plane, where a sharp image would be drawn.</td></tr><tr><td style="border-width: 1px; padding: 5px;">Effects/RefTexGaussianBlurX</td><td style="border-width: 1px; padding: 5px;">Assignment of texture,  
Subsequent pass of post-processing effect: blurring the texture with a Gaussian blur,  
Gaussian blur step width from unifrom</td><td style="border-width: 1px; padding: 5px;">Core/RefViewportSpace, Effects/Ref</td><td style="border-width: 1px; padding: 5px;">See configuration of RefViewportSpace  
plus  
SetUniform("u\_blurFactor",Shader::Float, &amp;blurFactor)</td><td style="border-width: 1px; padding: 5px;">Subsequent pass of post-processing effect: blurring the incoming image horizontally. Result is a blurred image of the passed texture. u\_blurFactor controls the step width of the Gaussian function. u\_blurFactor should always be 1.0/TextureWidth so that every step will correlate with one pixel.</td></tr><tr><td style="border-width: 1px; padding: 5px;">Effects/RefTexGaussianBlurY</td><td style="border-width: 1px; padding: 5px;">Assignment of texture,   
Subsequent pass of post-processing effect: blurring the texture with a Gaussian blur,  
Gaussian blur step width from unifrom</td><td style="border-width: 1px; padding: 5px;">Core/RefViewportSpace, Effects/Ref</td><td style="border-width: 1px; padding: 5px;">See configuration of RefViewportSpace  
plus  
SetUniform("u\_blurFactor",Shader::Float, &amp;blurFactor)</td><td style="border-width: 1px; padding: 5px;">Subsequent pass of post-processing effect: blurring the incoming image vertically. Result is a blurred image of the passed texture. u\_blurFactor controls the step width of the Gaussian function. u\_blurFactor should always be 1.0/TextureHeight so that every step will correlate with one pixel.</td></tr><tr><td style="border-width: 1px; padding: 5px;">Core/RefFlatLight1</td><td style="border-width: 1px; padding: 5px;">Per fragment lighting with one light source for Flat Shading.</td><td style="border-width: 1px; padding: 5px;">Core/RefTransPos</td><td style="border-width: 1px; padding: 5px;">See configuration of RefTransPos</td><td style="border-width: 1px; padding: 5px;">In order to use derivative functions dFdx and dFdy the extension GL\_OES\_standard\_derivatives has to be enabled and supported by driver.</td></tr><tr><td style="border-width: 1px; padding: 5px;">Effects/RefGoochShading</td><td style="border-width: 1px; padding: 5px;">Per Fragment calculation of specular component, Mixing cool and warm color using the dot product of light direction and vertex normal as weight, Output: Mixed color + specular and ambient lightcomponent.</td><td style="border-width: 1px; padding: 5px;">Effects/RefTransLight1Gooch</td><td style="border-width: 1px; padding: 5px;">See configuration of RefTransLight1Gooch</td><td style="border-width: 1px; padding: 5px;">This fragment shader in conjunction with RefTransLight1Gooch.vertp realizes the first pass of an implementation of Gooch's rendering technique to simulate the appearance of technical illustrations, often occuring in e.g. manuals or schematic presentations etc. (SIGGRAPH'98 paper "A Non-Photorealistic Lighting Model For Automatic Technical Illustration"). For details please refer to the description of the vertex shader, and to the cited paper. The following unifiorms are needed: u\_CoolColor and u\_CoolColor are 4-component vectors that describe the colors for the cool to warm transition. u\_CoolDiffuseWeight and u\_WarmDiffuseWeight are float values that describe, how the original diffuse color is combined with the warm and cool colors.</td></tr><tr><td style="border-width: 1px; padding: 5px;">Effects/RefBloomThreshold</td><td style="border-width: 1px; padding: 5px;">Assignment of texture,  
Subsequent pass of bloom effect: extracting only the bright parts of the image that should be blurred,  
brightness threshold from unifrom</td><td style="border-width: 1px; padding: 5px;">Core/RefViewportSpace, Effects/Ref</td><td style="border-width: 1px; padding: 5px;">See configuration of Core/RefViewportSpace</td><td style="border-width: 1px; padding: 5px;">Subsequent pass of post-processing bloom effect: extracting only the bright parts of the incoming texture. Those bright parts are blurred in the next step to generate a bloom effect.</td></tr><tr><td style="border-width: 1px; padding: 5px;">Effects/RefCombineBloom</td><td style="border-width: 1px; padding: 5px;">Subsequent pass of bloom effect: Assignment and djustable combination of the original and the bloomed texture</td><td style="border-width: 1px; padding: 5px;">Core/RefViewportSpace, Effects/Ref</td><td style="border-width: 1px; padding: 5px;">See configuration of RefViewportSpace</td><td style="border-width: 1px; padding: 5px;">Subsequent pass of post-processing bloom effect: The incoming texture of the original scene and the incoming texture of the bright, bloomed parts are combined. The blending of the two textures is adjustable by uniforms representing the intensity and saturation of the images.</td></tr><tr><td style="border-width: 1px; padding: 5px;">Core/RefInterlaceMask</td><td style="border-width: 1px; padding: 5px;">Uses a texture's color to create a mask through discarding pixels with low transparency. No value is written to the discarded fragments, so also no depth or stencil values.</td><td style="border-width: 1px; padding: 5px;">Core/RefViewportSpace</td><td style="border-width: 1px; padding: 5px;">See configuration of RefViewportSpace</td><td style="border-width: 1px; padding: 5px;">Is especially useful for e.g. Creating stencil masks for stereoscopic 3D.</td></tr><tr><td style="border-width: 1px; padding: 5px;">Effects/RefCarbon</td><td style="border-width: 1px; padding: 5px;">Wraps a seamless texture multible times around the object to achieve carbon look.</td><td style="border-width: 1px; padding: 5px;">Effects/RefTransLight1Carbon</td><td style="border-width: 1px; padding: 5px;">See configuration RefTransLight1Carbon</td><td style="border-width: 1px; padding: 5px;">Creates a car paint with typical carbon look.</td></tr><tr><td style="border-width: 1px; padding: 5px;">Effects/RefFlopCarPaint</td><td style="border-width: 1px; padding: 5px;">Mixes the two color components together based on the camera position and a user defined bias</td><td style="border-width: 1px; padding: 5px;">Effects/RefTransLight1FlopCarPaint</td><td style="border-width: 1px; padding: 5px;">See configuration RefTransLight1FlopCarPaint</td><td style="border-width: 1px; padding: 5px;">Creates a car paint with shiny, anisotropic two color look.</td></tr><tr><td style="border-width: 1px; padding: 5px;">Effects/RefMetalFlakesCarPaint</td><td style="border-width: 1px; padding: 5px;">Adding a noise to the spectral part of the light. Noise can be wrapped around the object multible times. Create the illusion of metal flakes in the car paint.</td><td style="border-width: 1px; padding: 5px;">Effects/RefTransLight1MetalFlakesCarPaint</td><td style="border-width: 1px; padding: 5px;">See configuration RefTransLight1MetalFlakesCarPaint</td><td style="border-width: 1px; padding: 5px;">Creates a car paint with shiny, sparkling look produced by metal flakes within specular highlight</td></tr><tr><td style="border-width: 1px; padding: 5px;">Effects/RefFlopMetalFlakesCarPaint</td><td style="border-width: 1px; padding: 5px;">Mixes the two color components together based on the camera position and a user defined bias.  
Adding a noise to the spectral part of the light. Noise can be wrapped around the object multible times. Create the illusion of metal flakes in the car paint.</td><td style="border-width: 1px; padding: 5px;">Effects/RefTransLight1FlopMetalFlakesCarPaint</td><td style="border-width: 1px; padding: 5px;">See configuration RefTransLight1FlopMetalFlakesCarPaint</td><td style="border-width: 1px; padding: 5px;">Creates a car paint with shiny, sparkling look produced by metal flakes within specular highlight combined with anisotropic two color look.</td></tr><tr><td style="border-width: 1px; padding: 5px;">Core/RefCanvasUniDiffuseMat</td><td style="border-width: 1px; padding: 5px;">Assignment of material's diffuse color to fragment color</td><td style="border-width: 1px; padding: 5px;">Core/RefCanvasTransUniDiffuseMat</td><td style="border-width: 1px; padding: 5px;">See configuration  
RefCanvasTransUniDiffuseMat</td><td style="border-width: 1px; padding: 5px;">This shader is used to achieve the same effect as a SolidColorBrush in 2D.</td></tr><tr><td style="border-width: 1px; padding: 5px;">Effects/RefFxaa</td><td style="border-width: 1px; padding: 5px;">Coordinates in normalized device space.</td><td style="border-width: 1px; padding: 5px;">Effects/RefFxaa</td><td style="border-width: 1px; padding: 5px;">See configuration of Effects/RefFxaa</td><td style="border-width: 1px; padding: 5px;">Applies the "Fast approximate anti-aliasing" algorithm to its input, which should be a quad using normalized device coordinates. The uniform (u\_Resolution) needs to be set to the width and height of the input texture measured in texels.</td></tr><tr><td style="border-width: 1px; padding: 5px;">Effects/RefGradientLinear</td><td style="border-width: 1px; padding: 5px;">Mixing fragment color according to gradient computations.</td><td style="border-width: 1px; padding: 5px;">Effects/RefTransGradientLinear</td><td style="border-width: 1px; padding: 5px;">See configuration  
RefTransGradientLinear</td><td style="border-width: 1px; padding: 5px;">Fragment Shader for linear gradient computations.</td></tr><tr><td style="border-width: 1px; padding: 5px;">Effects/RefGradientRadial</td><td style="border-width: 1px; padding: 5px;">Assignment of radial gradient color to fragment color.</td><td style="border-width: 1px; padding: 5px;">Effects/RefTransGradientRadial</td><td style="border-width: 1px; padding: 5px;">See configuration  
RefTransGradientRadial</td><td style="border-width: 1px; padding: 5px;">Fragment Shader for radial gradient computations.</td></tr><tr><td style="border-width: 1px; padding: 5px;">Core/RefColorTexAlpha,</td><td style="border-width: 1px; padding: 5px;">Assignment of product of varying color and texture color to fragment color.</td><td style="border-width: 1px; padding: 5px;">Core/RefTransColor</td><td style="border-width: 1px; padding: 5px;">See configuration RefTransColor</td><td style="border-width: 1px; padding: 5px;">This fragment shader shall be used for text or alpha mask rendering.</td></tr><tr><td style="border-width: 1px; padding: 5px;">Effects/RefColorTexAlphaOutline</td><td style="border-width: 1px; padding: 5px;">This fragment shader renders an outline of color "u\_outlineColor" and width specified by  
"u\_outlineWidth" around the contents in the texture "u\_Texture". The input texture is also  
multiplied by the vertex color. If the "u\_outlineWidth" value is bigger than 10, the contents  
of the texture need be bigger than 10 too, otherwise artefacts will start to appear with increasing  
outline width.  
There is no instancing version of this shader, because it will usually be applied to text  
rendering which is batched by Canvas rather than the Renderer.</td><td style="border-width: 1px; padding: 5px;">Core/RefTransColor</td><td style="border-width: 1px; padding: 5px;">See configuration RefTransColor  
Additionally:  
SetTexelSizeActivationEnabled(true)  
Custom uniforms:  
uniform vec4 u\_outlineColor; // Color of outline.  
uniform float u\_outlineWidth; //Width of outline.</td><td style="border-width: 1px; padding: 5px;">This fragment shader shall be used if a text or an alpha mask shall receive an outline.</td></tr></tbody></table>

</div></div>

# Tutorial for Text Rendering

# Introduction

Text Rendering involves both the handling of Unicode standards regarding character encoding as well as the generation and rendering of the glyphs. The sub-chapters here explain the basic principles.

####   
**Character Encodings**

character encoding system consists of a code that pairs each character from a given repertoire with something else such as a bit pattern, sequence of natural numbers, octets, or electrical pulses (Source: Wikipedia).

Unicode is the most important standard for character encodings and defines (among other things) the mapping of a character to a Unicode code point (bit pattern):

<div class="contents" id="bkmrk-fixed-length-encodin"><div class="contents"><div class="textblock">- Fixed length encodings of code points (ASCII, UCS2, UCS4 etc).
- Variable length encoding of code points (UTF-8, UTF-16, UTF-32)
- Chinese GB18030 is the only relevant other encoding standard

</div></div></div>All texts which are rendered within the TextEngine have to be of type TChar\*. Text in TChar\* have to be encoded in UTF-8. UTF-8 uses a varying number of TChars to encode one glyph. E.g. a UTF-8 encoded string with special characters: "&amp;auml&amp;Auml&amp;ouml&amp;Ouml&amp;uuml&amp;Uuml&amp;szlig&amp;#8364" consists of 8 glyphs but of 17 bytes because several of these special characters are encoded in more than one byte.

The methods <span style="color: rgb(230, 126, 35);">[FeatStd::String::GetCharCount()](http://dev.doc.cgistudio.at/APILINK/class_feat_std_1_1_string.html#a664debb9d7058c47f4d4e1687e83ae0f)</span> and <span style="color: rgb(230, 126, 35);">[FeatStd::String::GetCodePointCount()](http://dev.doc.cgistudio.at/APILINK/class_feat_std_1_1_string.html#a3ddbc24da69094a85d8c6ff870284e5a)</span> can be used to get the numbers as explained in the example above. An instance of <span style="color: rgb(230, 126, 35);">[FeatStd::String](http://dev.doc.cgistudio.at/APILINK/class_feat_std_1_1_string.html)</span> class can be constructed with TChar\* by the constructor <span style="color: rgb(230, 126, 35);">[FeatStd::String::String(const TChar \*)](http://dev.doc.cgistudio.at/APILINK/class_feat_std_1_1_string.html#a2b5ab81b2f9de953b42677a508146831)</span>.

<div class="contents" id="bkmrk-char-data-type-must-"><div class="textblock"><dl class="note"><dt></dt><dd><p class="callout info">Char data type must not be used for I18N text and always maps to ASCII.</p>

</dd></dl></div></div>#### **Complex Script Languages**

A complex script is a writing system which requires complex transformation of glyphs like substitution and positioning. Examples of such writing systems are arabic, hebrew and thai. Complex transformations include

<div class="contents" id="bkmrk-bi-directional-order"><div class="contents"><div class="textblock">- bi-directional ordering of characters,
- contextual shaping which means that displayed glyphs depend on the surrounding code points in the text - displayed glyphs can have different shapes depending on their position in a word or can be combined to ligatures,
- combining characters where several characters are combined into one shape

</div></div></div><div drawio-diagram="2191"><img src="https://doc316en.candera.eu/uploads/images/drawio/2023-02/drawing-4-1677033945.png" alt=""/></div>

Above the characters as they are written and below as they are displayed.

#### **Text Rendering - Functional Steps**

Text Rendering involves the following functional steps:

1. Glyph Rendering
2. Shaping
3. Layouting

##### **1. Glyph Rendering**

Takes a single code point and font metrics to render the according glyph. The Freetype font engine for example takes a code point and outputs a 8 bit alpha.

<div class="contents" id="bkmrk--0"><div class="contents"></div></div>##### **2. Shaping**

Shaping is the transformation from logical to display presentation of a text. The Shaping process is responsible for considering complex scripts. The Shaping process is applied on paragraph level.

##### <a class="anchor" id="bkmrk--4"></a>GPOS/GSUB Tables

OpenType fonts may include GSUB (glyph substitution) and GPOS (glyph positioning) tables.

The GSUB table contains (among other things)

<div class="contents" id="bkmrk-ligature-substitutio"><div class="contents"><div class="textblock">- Ligature substitution (replace multiple code points with single code point)
- Contextual substitution (alternative presentation of the glyph depending on his context) If no GSUB table is available, the standard substitutions defined by Unicode apply (eg. mandatory set of Arabic ligatures).

</div></div></div>The GPOS table contains (among other things)

<div class="contents" id="bkmrk-glyph-placement-adju"><div class="contents"><div class="contents"><div class="textblock">- glyph placement
- adjustment of marks
- kerning
- attachment points for combining characters

</div></div></div></div><a class="anchor" id="bkmrk--5" style="font-size: 1.4em; font-weight: 400; background-color: rgb(255, 255, 255);"></a><span style="color: rgb(34, 34, 34); font-size: 1.4em; font-weight: 400;">Shaping Libraries</span>

<div class="contents" id="bkmrk-feat-complexscript-l"><div class="contents"><div class="textblock">- FEAT ComplexScript library does shaping for Arabic language
- FreeBidi - functional equivalent to FEAT ComplexScript
- Harfbuzz - Arabic + many other scripts

</div></div></div>A <span style="color: rgb(230, 126, 35);">[Candera](http://dev.doc.cgistudio.at/APILINK/namespace_candera.html "[DataBinding_RefTypeSample]")</span> feature define is available in CMake to select between the 3rd party software components *ComplexScriptLib* and *HarfBuzz* for text shaping.

#####   


##### **3. Layouting**

Layout text that has been shaped. Typical operations:

<div class="contents" id="bkmrk-line-breaking-word-b"><div class="textblock">- Line breaking
- Word breaking
- Text alignment (horizontal and vertical)

</div></div>

# Fonts and Styles

#### <a class="anchor" id="bkmrk--7"></a>Description

This section contains information about how to use fonts and styles.

#### **Accessing Fonts** 

##### <a class="anchor" id="bkmrk--9"></a>SceneComposer: Import Fonts

For using fonts, first of all the fonts which shall be used need to be imported into the SceneComposer solution.

<div class="contents" id="bkmrk-the-font-will-only-b"><div class="contents"><div class="textblock"><dl class="note"><dt><p class="callout info">The font will only be available in the finally generated asset, if:   
- it is either used in any scene (as part of a style which is used in a widget style property for example)   
- or the "Always include in asset" flag is enabled in the font resource.</p>

</dt></dl></div></div></div>**See also:**

<div class="contents" id="bkmrk-import-fonts-in-scen"><div class="contents"><div class="contents"><div class="textblock">- <span style="color: rgb(230, 126, 35);">[How to Import Resources](https://doc316en.candera.eu/books/import-of-resources/page/how-to-import-resources)</span> in SceneComposer User Manual

</div></div></div></div>##### <a class="anchor" id="bkmrk--10"></a>Initializing FontEngine

Next, the application needs to create a <span style="color: rgb(230, 126, 35);">[Candera::TextRendering::FontEngine](http://dev.doc.cgistudio.at/APILINK/struct_candera_1_1_text_rendering_1_1_font_engine.html)</span> instance and initialize it for using the <span style="color: rgb(230, 126, 35);">[Candera::AssetFontStore](http://dev.doc.cgistudio.at/APILINK/class_candera_1_1_asset_font_store.html "implements a font store for the asset library this is the default font store Candera will use to retr...")</span>. AssetFontStore will access the font part of the loaded asset and provide it to the TextEngine.

```
    static AssetFontStore s_fontStore;

    result = result &
&
<a class="code" href="http://dev.doc.cgistudio.at/APILINK/struct_candera_1_1_text_rendering_1_1_font_engine.html#a9a4b6b6f60139c0a62683ef1f60f55fd">Candera::TextRendering::FontEngine::Instance</a>().Init(&
s_fontStore);

```

<div class="contents" id="bkmrk-"><div class="contents"><div class="textblock"><div class="fragment">  
</div></div></div></div>##### <a class="anchor" id="bkmrk--11"></a>Using a Font

The easiest way to use a font is to setup the font as part of a <span style="color: rgb(230, 126, 35);">[Candera::TextRendering::Style](http://dev.doc.cgistudio.at/APILINK/class_candera_1_1_text_rendering_1_1_style.html "Defines a text style.")</span> and use the style as a widget property within SceneComposer. This allows to specify the FontFamily and the FontSize via SceneComposer GUI. FontSize has to be specified in pixel size (see <span style="color: rgb(230, 126, 35);">[Font Metrics and Text Sizes](https://doc316en.candera.eu/link/480#bkmrk-font-metrics-and-tex)</span>). In case the application needs to switch the font dynamically, at runtime, setup the font and create a style:

```
    Font font;

    font.Setup("openSans", 20);

    m_style = <a class="code" href="http://dev.doc.cgistudio.at/APILINK/group___c_o_u_r_i_e_r___v_i_s_u_a_l_i_z_a_t_i_o_n.html#ggaf0e93dc4242f607c3c8d13dafd036af9aaabfa5309af24986d3111a092449f857">SharedStyle::Create</a>();

    m_style->
SetDefaultFont(font);

```

<div class="contents" id="bkmrk--0"><div class="contents"><div class="textblock"><div class="fragment">  
</div></div></div></div>##### <a class="anchor" id="bkmrk--12"></a>Access to AssetFontStore

Include FontFaceName and FontFaceSize Property in the header file of the widget.

```
// Add Property
            CdaProperty(FontFaceName, const Candera::Char*, GetFontName, SetFontName)
                CdaDescription("Font Face <a class="code" href="http://dev.doc.cgistudio.at/APILINK/group___behaviors_mixed_reality.html#gga70813433b87d1347efaf56d755a186c1aa161dba378f926eef1e116dd38c4b6c6">Name</a> for the text (used only if \"Use <a class="code" href="http://dev.doc.cgistudio.at/APILINK/group___behaviors_control.html#ggae7abc816df647d0ecbc280480fefb788a595c025970839adf97b121009ea58dfc">Text</a> Font Property\" is disabled).")
                CdaCategory("Accessing Fonts from FontEngine")
            <a class="code" href="http://dev.doc.cgistudio.at/APILINK/group___meta_info.html#ga119bef57449bd05d8b3c40d7d514e375">CdaPropertyEnd</a>()

            CdaProperty(FontFaceSize, Candera::UInt16, GetFontSize, SetFontSize)
                CdaDescription("Font Face Size for the text (used only if \"Use <a class="code" href="http://dev.doc.cgistudio.at/APILINK/group___behaviors_control.html#ggae7abc816df647d0ecbc280480fefb788a595c025970839adf97b121009ea58dfc">Text</a> Font Property\" is disabled).")
                CdaCategory("Accessing Fonts from FontEngine")
            <a class="code" href="http://dev.doc.cgistudio.at/APILINK/group___meta_info.html#ga119bef57449bd05d8b3c40d7d514e375">CdaPropertyEnd</a>()
// end add Property
```

<div class="contents" id="bkmrk-the-fontfacename-pro"><div class="contents"><div class="textblock"><dl class="warning"><dd><p class="callout warning">The FontFaceName property must be set with a valid [Candera](http://dev.doc.cgistudio.at/APILINK/namespace_candera.html "[DataBinding_RefTypeSample]") path. Keep in mind that, unlike paths generated by the Font dialog where the; the "/" character, the [Candera](http://dev.doc.cgistudio.at/APILINK/namespace_candera.html "[DataBinding_RefTypeSample]") paths use "#" as delimiter.</p>

</dd></dl></div></div></div>Also, do not forget to initialize member variables in the constructor, otherw; e SceneComposer will not be able to work with the widget.

```
SimpleTextWidget::SimpleTextWidget() :
    m_text(0),
    m_style(SharedStyle::<a class="code" href="http://dev.doc.cgistudio.at/APILINK/group___c_o_u_r_i_e_r___v_i_s_u_a_l_i_z_a_t_i_o_n.html#ggaf0e93dc4242f607c3c8d13dafd036af9aaabfa5309af24986d3111a092449f857">Create</a>()),
    m_color(),
    m_shader(0),
    m_fontName(0),
    m_fontSize(12),
    m_bb(0),
    m_bitmap(0),
    m_bitmapPixels(0),
    m_defautScaleVector(1.0,1.0,1.0),
    m_useTextFont(true),
    m_;
UpdateRequired(true),
    mTextStartPos(0, 0)
{
}
```

Setup the font as described below.

```
        static Font f;
        if (f.Setup(m_fontName, static_cast<Candera::Int16>(m_fontSize))) {
            m_font = f;
        }
```

And update the style used for rendering:

```
    m_style->SetDefaultFont(m_font);
```

##### <a class="anchor" id="bkmrk--13"></a>AssetFontStore Load Strategies

AssetFontStore supports two font load strategies:

<div class="contents" id="bkmrk-preloadstrategy%3A-ent"><div class="contents"><div class="textblock">- <span style="color: rgb(230, 126, 35);">[PreloadStrategy](http://dev.doc.cgistudio.at/APILINK/class_candera_1_1_asset_font_store_1_1_load_strategy_selector.html#a3c06cdd0709312d8b0ac60035c9a3b62aad010b9a2098e4e40ff1f0be8f31ba4b)</span>: entire fonts are loaded into memory once and font data; accessed from there by Text <span style="color: rgb(0, 0, 0);">Engine.</span>
- <span style="color: rgb(230, 126, 35);">[OnRequestLoadStrategy](http://dev.doc.cgistudio.at/APILINK/class_candera_1_1_asset_font_store_1_1_load_strategy_selector.html#a3c06cdd0709312d8b0ac60035c9a3b62abddf5927381d24532b5a902fda7d33f3)</span>: small font portions are streamed directly from the asset repository when Freetype (or indirectly Harfbuzz) needs them.

</div></div></div>Use <span style="color: rgb(230, 126, 35);">[SetDefaultFontLoadStrategy](http://dev.doc.cgistudio.at/APILINK/class_candera_1_1_default_load_strategy_selector.html#a340dda8ac0dfb937a3d77d68817bfd48)</span> to select one of these load strategies.

Use <span style="color: rgb(230, 126, 35);">[SetDefaultFontLoadStrategyExceptionL; t](http://dev.doc.cgistudio.at/APILINK/class_candera_1_1_default_load_strategy_selector.html#ac9e45f0d804d98677032b463b50b3513)</span> to exclude a l; t of fonts from the selected font load strategy.

Example:

```
    // Load fonts with OnRequestLoadStrategy
    selector.SetDefaultFontLoadStrategy(<a class="code" href="http://dev.doc.cgistudio.at/APILINK/class_candera_1_1_asset_font_store_1_1_load_strategy_selector.html#a3c06cdd0709312d8b0ac60035c9a3b62abddf5927381d24532b5a902fda7d33f3" title="Do not load anything in memory, but read/copy data into smaller temporary buffers as requested by Fre...">Candera::AssetFontStore::LoadStrategySelector::OnRequestLoadStrategy</a>);
    // "Bitstream Vera Sans" font shall be loaded with PreloadStrategy:
    const Char* g_fontName[2] = { "ConstructionKit##ConstructionKit#Resources#Fonts#Bitstream Vera Sans", 0 };
    selector.SetDefaultFontLoadStrategyExceptionL;
t(g_fontName);
    fontStore.SetLoadStrategySelector(&selector);
```

<div class="contents" id="bkmrk-courier-applications"><div class="textblock"><dl class="note"><dd><p class="callout info"><span style="color: rgb(230, 126, 35);">[Courier](http://dev.doc.cgistudio.at/APILINK/namespace_courier.html)</span> applications can use <span style="color: rgb(230, 126, 35);">[Courier::ViewHandler::SetFontStoreProviderCallback](http://dev.doc.cgistudio.at/APILINK/class_courier_1_1_view_handler.html#a7747f74f80b57fd376b13f942d927009)</span> to provide specific settings for the <span style="color: rgb(230, 126, 35);">[Candera::AssetFontStore](http://dev.doc.cgistudio.at/APILINK/class_candera_1_1_asset_font_store.html "implements a font store for the asset library this is the default font store Candera will use to retr...")</span> in use.</p>

</dd></dl></div></div>#### **Text Style: A Composition of Fonts** 

##### <a class="anchor" id="bkmrk--14"></a>Text Style: Introduction

A Style can be seen as a composition of fonts.

Basically for a range of glyphs a proper font can be specified (also called *style entry*). Beside the style entries a style also cons; ts of a default font and a base style.

<div class="contents" id="bkmrk-the-style-entries-ar"><div class="contents"><div class="textblock">- The style entries are parsed from the first to the last style entry until a code point range that contains the input code point; found.
- All glyphs which do not match to one of the specified *style entry* range are rendered with the default font.
- The same parsing order; applied to code points which match to a range of a style entry, but the font does not contain a glyph for th; code point
- Each style can use another style as base style, which allows an arbitrary complex composition of fonts.

</div></div></div>The **TextRenderingSolution** provided in the content folder of *cgi\_studio\_player* gives an example how text features can be applied in SceneComposer.

<div class="contents" id="bkmrk-see-also%3A-text-style"><div class="textblock"><dl class="see"><dt>**See also:**</dt><dd>- <span style="color: rgb(230, 126, 35);">[Text Style Palette](https://doc316en.candera.eu/books/solution-handling/page/text-style-palette "Text Style Palette")</span> in SceneComposer User Manual
- [Candera::TextRendering::Style](http://dev.doc.cgistudio.at/APILINK/class_candera_1_1_text_rendering_1_1_style.html "Defines a text style.") in <span style="color: rgb(230, 126, 35);">[Candera](http://dev.doc.cgistudio.at/APILINK/namespace_candera.html "[DataBinding_RefTypeSample]")</span> API

</dd></dl></div></div>#### **Text Style: Example** 

##### <a class="anchor" id="bkmrk--15"></a>Example

Use **TextRenderingSolution** provided in the content folder of *cgi\_studio\_player* to see how text features can be applied in SceneComposer.

<div drawio-diagram="2221"><img src="https://doc316en.candera.eu/uploads/images/drawio/2023-02/drawing-4-1677044019.png" alt=""/></div>

<div class="contents" id="bkmrk--3"><div class="contents"><div class="textblock">  
</div></div></div>  
Select *Scene2D\_StyleExample* of the solution, which gives just a brief overview of text features and how they look like. It cons; ts of

<div class="contents" id="bkmrk-a-candera%3A%3Atextnode2"><div class="contents"><div class="textblock">- a <span style="color: rgb(230, 126, 35);">[Candera::TextNode2D](http://dev.doc.cgistudio.at/APILINK/class_candera_1_1_text_node2_d.html "TextNode2D is a RenderNode that renders text using the attached BitmapBrush effect.")</span>.
- Fonts for the text node are defined in a style *Mystyle*.

</div></div></div>Lets consider the configured style *MyStyle* set in the TextNode2D's style property:

<div class="contents" id="bkmrk-the-default-font-pro"><div class="contents"><div class="textblock">- The **Default Font** property is set with predefined *DefaultFont* (Vera size 20)
- No **Base Style**, therefore for this field *Empty*, is defined

</div></div></div>Expanding the Children panel shows the defined style entries. The example style consists of three style entries.

<div class="contents" id="bkmrk-entry-0-defines-the-"><div class="contents"><div class="textblock">- **Entry 0** defines the font *BigLetter* (Comic size 60) for all glyphs in the code point range from 65 to 90. These upper and lower bounds represent the glyph range 'A' (65) - 'Z' (90) in decimal representation. In the example therefore all upper case letters are rendered with font *BigLetter*.
- **Entry 1** defines font *BigLetter* for numbers '0'(48) - '9'(57).
- **Entry 2** defines font *Korean* (UnBom size 40) for Korean glyphs. Code points for asian glyphs are in range 44032 - 55215 (in decimal representation). So using styles, glyphs from different cultures can be rendered without changing the font/style settings.

</div></div></div>In case of this example all lower case letters do not have a proper style entry and the default font is taken to render.

<div class="contents" id="bkmrk-if-the-code-ranges-o"><div class="textblock"><dl class="note"><dt></dt><dd><p class="callout info">If the code ranges of different style entries overlap, the style entry with the higher number has priority (e.g. font in entry 2 has higher priority than font in entry 1).</p>

</dd></dl></div></div>#### **Bitmap Font Engine**   


##### <a class="anchor" id="bkmrk--17"></a>Overview

A bitmap font is essentially an image file which consists of several characters images and a header that depicts the size and location of each character inside the image. Each bitmap font might contain several fonts - mainly one font face with multiple sizes. One advantage of utilizing bitmap fonts is that the rendering to the screen requires very little resources and since each character is represented as a sub-texture, they can be reused without requiring additional memory on the GPU.

##### <a class="anchor" id="bkmrk--18"></a>CMake configuration

In order to be able to use the bitmap font engine the <span style="color: rgb(230, 126, 35);">[Candera](http://dev.doc.cgistudio.at/APILINK/namespace_candera.html "[DataBinding_RefTypeSample]")</span> CMake project should be configured as follows:

<div class="contents" id="bkmrk-candera_fontengine-s"><div class="contents"><div class="textblock">- CANDERA\_FONTENGINE should be set to *"Bitmap Font"*
- CANDERA\_BITMAPFONT\_FACE\_SIZE\_COUNT\_MAX represents the number of font sizes supported. Default value is set to 6.
- CANDERA\_BITMAPFONT\_GLYPH\_CACHE\_SIZE represents the size of the buffer to cache glyph bitmaps. By default the value is set to 24\*24\*100.

</div></div></div><div class="contents" id="bkmrk-candera_textshaper-s"><div class="contents"><div class="textblock"><dl class="note"><dd><p class="callout info">CANDERA\_TEXTSHAPER should be set to *"NoShaping"* or *"ComplexScriptLib"* because Harbuzz Text Shaper cannot be used with BitmapFont.</p>

</dd></dl></div></div></div>##### <a class="anchor" id="bkmrk--19"></a>Font Setup

This font engine uses a proprietary format to describe glyph bitmaps and glyph meta info. In order to use a bitmap font, provide an implementation for <span style="color: rgb(230, 126, 35);">[Candera::TextRendering::FontStore](http://dev.doc.cgistudio.at/APILINK/class_candera_1_1_text_rendering_1_1_font_store.html "FontStore is an abstract interface to retrieve font data The font store defines unique descriptor id ...")</span>.

Bitmap fonts require memory mapped assets. So, when the faces are loaded in be sure the storageType is set correctly:

```
    TextRendering::FontResourceDescriptor descriptor.storageType = TextRendering::FontResourceDescriptor::MemoryResource;
```

##### <a class="anchor" id="bkmrk--20"></a>Generating Bitmap Fonts

The following steps need to be considered:

1\. Install Bitmap Font Generator from [http://www.angelcode.com/products/bmfont](http://www.angelcode.com/products/bmfont)

2\. Open the application. From the **Options** menu:

<div class="contents" id="bkmrk-choose-font-settings"><div class="contents"><div class="textblock">- Choose **Font Settings**. Set as needed the settings for *"Font"*, *"Add font file"*, *"Size"* etc.

- Configure the **Export Options**. Set *"Font descriptor"* to *"XML"* and Textures to *"png - Portable Network Graphics"*

</div></div></div>3\. From the right panel of the main window select the needed subsets of glyphs.

4\. Export the font by choosing *"Save bitmap font as ..."* from the **Options** menu.

Please see <span style="color: rgb(230, 126, 35);">[Import Fonts](https://doc316en.candera.eu/link/1101#bkmrk-image%2C-font%2C-shader%2C-1)</span> for details about the importing of bitmap fonts in SceneComposer.

<div class="contents" id="bkmrk-a-bitmap-font-should"><div class="textblock"><dl class="note"><dd><p class="callout info">A bitmap font should be used at its native pixel size. However, they are scalable because of the use of bitmaps, but only scaling down is recommended. In case of up scaling, the visual quality will be reduced. Including separate font sizes for bitmap fonts is possible in order to achieve the best looking results.</p>

</dd></dl></div></div>

# Using Candera TextEngine to draw Text

#### <a class="anchor" id="bkmrk--35"></a>Description

The simplest way to draw text with <span style="color: rgb(230, 126, 35);">[Candera](http://dev.doc.cgistudio.at/APILINK/namespace_candera.html "[DataBinding_RefTypeSample]")</span> is using a TextNode2D, a 3D text widget from CGI Studio Widget Library, or the 2D TextBrush effect. Refer to:

<div class="contents" id="bkmrk-candera%3A%3Atextnode2d-"><div class="contents"><div class="textblock">- <span style="color: rgb(230, 126, 35);">[Candera::TextNode2D](http://dev.doc.cgistudio.at/APILINK/class_candera_1_1_text_node2_d.html)</span>
- <span style="color: rgb(230, 126, 35);">[Candera::TextBrush](http://dev.doc.cgistudio.at/APILINK/class_candera_1_1_text_brush.html)</span>

</div></div></div>To learn about how to use <span style="color: rgb(230, 126, 35);">[Candera::TextNode2D](http://dev.doc.cgistudio.at/APILINK/class_candera_1_1_text_node2_d.html)</span>, please refer to the following section:

<div class="contents" id="bkmrk-using-candera%3A%3Atextn"><div class="contents"><div class="textblock">- <span style="color: rgb(230, 126, 35);">[Using Candera::TextNode2D](http://dev.doc.cgistudio.at/APILINK/_p_i_d__a_p_p_d_e_v_t_u_t_chapter_05_01_03_00.html)</span>

</div></div></div>To learn about details, how to use the <span style="color: rgb(230, 126, 35);">[<span style="vertical-align: inherit;"><span style="vertical-align: inherit;">Candera</span></span>](http://dev.doc.cgistudio.at/APILINK/namespace_candera.html "[DataBinding_RefTypeSample]")</span> TextEngine interface directly, refer to the following chapters.

#### Using **Candera::TextNode2D**   


##### <a class="anchor" id="bkmrk--38"></a>Overview

TextNode2D represents a RenderNode specialized for fast text rendering.

Text and style have to be provided. In addition, it requires a BitmapBrush effect for rendering and a <span style="color: rgb(230, 126, 35);">[Candera::TextNodeRenderer](http://dev.doc.cgistudio.at/APILINK/class_candera_1_1_text_node_renderer.html "Base class for text to Image2D generation strategies.")</span> object used for generating the images, which will be then rendered by the associated BitmapBrush effect.

There are four <span style="color: rgb(230, 126, 35);">[Candera::TextNodeRenderer](http://dev.doc.cgistudio.at/APILINK/class_candera_1_1_text_node_renderer.html "Base class for text to Image2D generation strategies.")</span> implementations available, each corresponding to one CacheType option from the existing <span style="color: rgb(230, 126, 35);">[Candera::TextBrush](http://dev.doc.cgistudio.at/APILINK/class_candera_1_1_text_brush.html "Output alpha only glyph data. A color may be specified, which is applied to the color channels...")</span> rendering concept (Bitmap, Surface, Glyph and Glyph Cache).

Text layouting is supported by attaching a <span style="color: rgb(230, 126, 35);">[Candera::TextNode2DLayouter](http://dev.doc.cgistudio.at/APILINK/class_candera_1_1_text_node2_d_layouter.html "Base Layouter for TextNode2D nodes.")</span> to the node. It is responsible for arranging and truncating the associated text of a <span style="color: rgb(230, 126, 35);">[Candera::TextNode2D](http://dev.doc.cgistudio.at/APILINK/class_candera_1_1_text_node2_d.html "TextNode2D is a RenderNode that renders text using the attached BitmapBrush effect.")</span>. The default layouter implements both horizontal and vertical truncation.

**<a class="anchor" id="bkmrk--39"></a>Renderer**

<span style="color: rgb(230, 126, 35);">[Candera::TextNodeRenderer](http://dev.doc.cgistudio.at/APILINK/class_candera_1_1_text_node_renderer.html "Base class for text to Image2D generation strategies.")</span> object is used for generating the correct images from provided text.

The level cache strategies which apply for a <span style="color: rgb(230, 126, 35);">[Candera::TextNode2D](http://dev.doc.cgistudio.at/APILINK/class_candera_1_1_text_node2_d.html "TextNode2D is a RenderNode that renders text using the attached BitmapBrush effect.")</span> are described below:

<div class="contents" id="bkmrk-bitmap%3A-very-large-m"><div class="contents"><div class="textblock">- Bitmap: very large memory footprint, very large update times, small render time
- Surface: large video memory footprint, large update times, small render time
- Glyph (former NoCache): small memory footprint, small update times, very large render time.
- GlyphCache: small memory footprint, small update times, medium render time
- GlyphAtlas: small (but global) video memory footprint, small update times, small render time.

</div></div></div><div class="contents" id="bkmrk-choose-the-appropria"><div class="contents"><div class="textblock"><dl class="note"><dd><p class="callout info">Choose the appropriate cache for a balance in performance. It is recommended to use either Bitmap or Surface rendering type when static texts are used, while for dynamic texts, GlyphCache is recommended.</p>

</dd></dl></div></div></div><a class="anchor" id="bkmrk--40"></a>**Associated Effect**

Please consider that only BitmapBrush type effects apply to a <span style="color: rgb(230, 126, 35);">[Candera::TextNode2D](http://dev.doc.cgistudio.at/APILINK/class_candera_1_1_text_node2_d.html "TextNode2D is a RenderNode that renders text using the attached BitmapBrush effect.")</span>. In case other effects are used nothing will be rendered. The text appearance can be altered by the type of effect chosen, either by modifying the in-place effects (color, mask, HSL transformations, etc.) or by changing blending effects.

List of BitmapBrush effects which can be used are described below:

<div class="contents" id="bkmrk-candera%3A%3Abitmapbrush"><div class="contents"><div class="textblock">- <span style="color: rgb(230, 126, 35);">[Candera::BitmapBrushBlend](http://dev.doc.cgistudio.at/APILINK/class_candera_1_1_bitmap_brush_blend.html "This effect outputs a bitmap image, and blend it with the store buffer. Same as chaining (BitmapBrush...")</span>: Outputs a bitmap image, and blend it with the store buffer.
- <span style="color: rgb(230, 126, 35);">[Candera::BitmapBrushColorBlend](http://dev.doc.cgistudio.at/APILINK/class_candera_1_1_bitmap_brush_color_blend.html "Output a bitmap image, modulate the color, and blend it with the store buffer. Same as chaining (Bitm...")</span>: Output a bitmap image, modulate the color, and blend it with the store buffer.
- <span style="color: rgb(230, 126, 35);">[Candera::BitmapBrushColorMaskBlend](http://dev.doc.cgistudio.at/APILINK/class_candera_1_1_bitmap_brush_color_mask_blend.html "Output a bitmap image, apply an alpha mask, and blend it with the store buffer. Same as chaining (Bit...")</span>: Output a bitmap image, modulate the color, apply an alpha mask, and blend it with the store buffer.
- <span style="color: rgb(230, 126, 35);">[Candera::BitmapBrushHslBlend](http://dev.doc.cgistudio.at/APILINK/class_candera_1_1_bitmap_brush_hsl_blend.html "Output a bitmap image, apply a HSL transformation, and blend it with the store buffer. Same as chaining (BitmapBrush + HslCorrectionEffect + BlendEffect)")</span>: Output a bitmap image, apply a HSL transformation, and blend it with the store buffer.
- <span style="color: rgb(230, 126, 35);">[Candera::BitmapBrushMaskBlend](http://dev.doc.cgistudio.at/APILINK/class_candera_1_1_bitmap_brush_mask_blend.html "Output a bitmap image, apply an alpha mask, and blend it with the store buffer. Same as chaining (Bit...")</span>: Output a bitmap image, apply an alpha mask, and blend it with the store buffer.
- <span style="color: rgb(230, 126, 35);">[Candera::BlurBitmapBrushBlend](http://dev.doc.cgistudio.at/APILINK/class_candera_1_1_blur_bitmap_brush_blend.html "Output a blurred and alpha blended bitmap image. The blur effect is created by applying a gaussean fi...")</span>: Output a blurred and alpha blended bitmap image.
- <span style="color: rgb(230, 126, 35);">[Candera::MirrorBitmapBrushBlend](http://dev.doc.cgistudio.at/APILINK/class_candera_1_1_mirror_bitmap_brush_blend.html "Output includes the bitmap image and it's reflection.")</span>: Output includes the bitmap image and it's reflection.
- <span style="color: rgb(230, 126, 35);">[Candera::ShadowBitmapBrushBlend](http://dev.doc.cgistudio.at/APILINK/class_candera_1_1_shadow_bitmap_brush_blend.html "Output a shadowed or glowing bitmap image, both shadow/glow and image alpha blended.")</span>: Output a shadowed or glowing bitmap image, both shadow/glow and image alpha blended.
- <span style="color: rgb(230, 126, 35);">[Candera::ShearBitmapBrushBlend](http://dev.doc.cgistudio.at/APILINK/class_candera_1_1_shear_bitmap_brush_blend.html "Draws a sheared image. The ShearAngleX and the ShearAngleY can be modified.")</span>: Output a sheared image from the original one.

</div></div></div><div class="contents" id="bkmrk-not-all-bitmapbrush-"><div class="contents"><div class="textblock"><dl class="note"><dd><p class="callout info">Not all BitmapBrush effects have the *Color* property available. Default color for a TextNode2D is white.</p>

</dd></dl></div></div></div>**<a class="anchor" id="bkmrk--41"></a>Layouter**

<span style="color: rgb(230, 126, 35);">[Candera::TextNode2DLayouter](http://dev.doc.cgistudio.at/APILINK/class_candera_1_1_text_node2_d_layouter.html "Base Layouter for TextNode2D nodes.")</span> is responsible for arranging and truncating the text associated to a <span style="color: rgb(230, 126, 35);">[Candera::TextNode2D](http://dev.doc.cgistudio.at/APILINK/class_candera_1_1_text_node2_d.html "TextNode2D is a RenderNode that renders text using the attached BitmapBrush effect.")</span>. Candera::DefaultTextNode2DLayouter, derived from <span style="color: rgb(230, 126, 35);">[Candera::TextNode2DLayouter](http://dev.doc.cgistudio.at/APILINK/class_candera_1_1_text_node2_d_layouter.html "Base Layouter for TextNode2D nodes."),</span> is used for text truncation. More details are provided in the following section.

##### <a class="anchor" id="bkmrk--42"></a>Candera::TextNode2D Guidelines

The minimum necessary steps needed in order to render a TextNode2D are:

<div class="contents" id="bkmrk-create-a-textnode2d-"><div class="contents"><div class="textblock">- Create a TextNode2D instance
- Set a Text: Text to be rendered.
- Set a Style: Style object to be used for rendering.
- Define a TextNodeRenderer: TextNodeRenderer used for generating the correct images from provided text.
- Attach a BitmapBrush effect: The associated BitmapBrush effect is responsible for rendering the generated images.

</div></div></div>**<a class="anchor" id="bkmrk--43"></a>Define node and effect**

Define a <span style="color: rgb(230, 126, 35);">[Candera::TextNode2D](http://dev.doc.cgistudio.at/APILINK/class_candera_1_1_text_node2_d.html "TextNode2D is a RenderNode that renders text using the attached BitmapBrush effect.")</span> and the associated BitmapBrush effect:

```
    TextNode2D* m_textNode;
    BitmapBrushColorBlend::SharedPointer m_textNodeEffect;
```

<a class="anchor" id="bkmrk--44"></a>**Create node and effect**

Create an instance of <span style="color: rgb(230, 126, 35);">[Candera::TextNode2D](http://dev.doc.cgistudio.at/APILINK/class_candera_1_1_text_node2_d.html "TextNode2D is a RenderNode that renders text using the attached BitmapBrush effect.")</span> class by using <span style="color: rgb(230, 126, 35);">[Candera::TextNode2D::Create()](http://dev.doc.cgistudio.at/APILINK/class_candera_1_1_text_node2_d.html#a1cdd55af76829cedf2b997c3b683fba6)</span> method:

```
    m_textNode = <a class="code" href="http://dev.doc.cgistudio.at/APILINK/group___c_o_u_r_i_e_r___v_i_s_u_a_l_i_z_a_t_i_o_n.html#ggaf0e93dc4242f607c3c8d13dafd036af9aaabfa5309af24986d3111a092449f857">TextNode2D::Create</a>();
```

In similar way create the BitmapBrush effect and add this effect to the newly created <span style="color: rgb(230, 126, 35);">[Candera::TextNode2D](http://dev.doc.cgistudio.at/APILINK/class_candera_1_1_text_node2_d.html "TextNode2D is a RenderNode that renders text using the attached BitmapBrush effect.")</span>:

```
    m_textNodeEffect = <a class="code" href="http://dev.doc.cgistudio.at/APILINK/group___c_o_u_r_i_e_r___v_i_s_u_a_l_i_z_a_t_i_o_n.html#ggaf0e93dc4242f607c3c8d13dafd036af9aaabfa5309af24986d3111a092449f857">BitmapBrushColorBlend::Create</a>();
    m_textNode->AddEffect(m_textNodeEffect.GetPointerToSharedInstance());
```

**<a class="anchor" id="bkmrk--45"></a>Set Text**

Use <span style="color: rgb(230, 126, 35);">[Candera::TextNode2D::SetText()](http://dev.doc.cgistudio.at/APILINK/class_candera_1_1_text_node2_d.html#adef00994b263330963370625276321df)</span> to specify the text to be rendered:

```
    m_textNode->SetText("TextNode2D");

```

<a class="anchor" id="bkmrk--46"></a>**Set Style**

Use <span style="color: rgb(230, 126, 35);">[Candera::TextNode2D::SetText()](http://dev.doc.cgistudio.at/APILINK/class_candera_1_1_text_node2_d.html#adef00994b263330963370625276321df)</span> to specify the style object:

```
    m_textNode->SetText("TextNode2D");
```

**<a class="anchor" id="bkmrk--47"></a>Renderer**

Create and set a <span style="color: rgb(230, 126, 35);">[Candera::TextNodeRenderer](http://dev.doc.cgistudio.at/APILINK/class_candera_1_1_text_node_renderer.html "Base class for text to Image2D generation strategies.")</span> to <span style="color: rgb(230, 126, 35);">[Candera::TextNode2D](http://dev.doc.cgistudio.at/APILINK/class_candera_1_1_text_node2_d.html "TextNode2D is a RenderNode that renders text using the attached BitmapBrush effect.")</span> using <span style="color: rgb(230, 126, 35);">[Candera::TextNode2D::SetTextNodeRenderer()](http://dev.doc.cgistudio.at/APILINK/class_candera_1_1_text_node2_d.html#a0ad27fc9e0d2948efb3181b0585357aa)</span> method:

```
    m_textNode->SetTextNodeRenderer(&GlyphCacheTextNodeRenderer::GetInstance());
```

<a class="anchor" id="bkmrk--48"></a>**Add to Scene**

Finally, add the textNode directly to a <span style="color: rgb(230, 126, 35);">[Candera::Scene2D](http://dev.doc.cgistudio.at/APILINK/class_candera_1_1_scene2_d.html "The class Scene2D represents a top level scene graph node. Multiple scenes are allowed. A scene can not be part of any other scene.")</span> or a <span style="color: rgb(230, 126, 35);">[Candera::Group2D](http://dev.doc.cgistudio.at/APILINK/class_candera_1_1_group2_d.html "The class Group2D is a scene graph node that stores a set of nodes as its children. The parent-child relationship between groups and nodes is bidirectional. Whereas a group can hold a group of nodes, a node can at most have one parent at a time. Cycles are prohibited. Changing the groups transformation or alpha value affects the children nodes of the group.")</span>:

```
    m_textNodeGroup->AddChild(m_textNode);
```

##### <a class="anchor" id="bkmrk--49"></a>Candera::TextNode2D Properties

**<a class="anchor" id="bkmrk--50"></a>Text Color**

Changing the color of a <span style="color: rgb(230, 126, 35);">[Candera::TextNode2D](http://dev.doc.cgistudio.at/APILINK/class_candera_1_1_text_node2_d.html "TextNode2D is a RenderNode that renders text using the attached BitmapBrush effect.")</span> is done through the associated BitmapBrush effect. Depending on the effect use, not all BitmapBrush effects expose a color property. In this case, the rendered text will be white.

```
    m_textNodeEffect->GetColorEffect().Color().Set(<a class="code" href="http://dev.doc.cgistudio.at/APILINK/group___behaviors_control.html#ggae7abc816df647d0ecbc280480fefb788a6d1d4da086e381cb2c5a5ce6a2513ebd">Color</a>(0.0f, 0.0f, 0.0f, 1.0f));
```

<a class="anchor" id="bkmrk--51"></a>**Text Alignment**

Text alignment is realized through the layouter properties of the <span style="color: rgb(230, 126, 35);">[Candera::TextNode2D](http://dev.doc.cgistudio.at/APILINK/class_candera_1_1_text_node2_d.html "TextNode2D is a RenderNode that renders text using the attached BitmapBrush effect.")</span>, meaning that the position inside a layouter, as well as text position inside the <span style="color: rgb(230, 126, 35);">[Candera::TextNode2D](http://dev.doc.cgistudio.at/APILINK/class_candera_1_1_text_node2_d.html "TextNode2D is a RenderNode that renders text using the attached BitmapBrush effect.")</span> will now be changed by the same Candera::TextNode2DLayouter::SetHorizontalAlignment() and Candera::TextNode2DLayouter::SetHorizontalAlignment() methods the layouter. In case it in necessary to have a different text position than the provided layouting options, it is possible to nest <span style="color: rgb(230, 126, 35);">[Candera::TextNode2D](http://dev.doc.cgistudio.at/APILINK/class_candera_1_1_text_node2_d.html "TextNode2D is a RenderNode that renders text using the attached BitmapBrush effect.")</span> and set different alignment values for the inner TextNode.

```
    TextNode2DLayouter::SetHorizontalAlignment(*m_textNode, Candera::HLeft);
    TextNode2DLayouter::SetVerticalAlignment(*m_textNode, Candera::VTop);
```

**<a class="anchor" id="bkmrk--52"></a>Truncation**

<span style="color: rgb(230, 126, 35);">[Candera::TextNode2D](http://dev.doc.cgistudio.at/APILINK/class_candera_1_1_text_node2_d.html "TextNode2D is a RenderNode that renders text using the attached BitmapBrush effect.")</span> provides only one truncation type - in case truncation is needed, the text gets cut and trailing ellipsis are added to fit the space. Truncation is not supported by default. For this, the Candera::DefaultTextNode2DLayouter needs to be attached to <span style="color: rgb(230, 126, 35);">[Candera::TextNode2D](http://dev.doc.cgistudio.at/APILINK/class_candera_1_1_text_node2_d.html "TextNode2D is a RenderNode that renders text using the attached BitmapBrush effect.")</span> (see snippet below) and the text will be automatically truncated whenever the size of the text no longer fits in the specified *Layout Size* property of <span style="color: rgb(230, 126, 35);">[Candera::TextNode2D](http://dev.doc.cgistudio.at/APILINK/class_candera_1_1_text_node2_d.html "TextNode2D is a RenderNode that renders text using the attached BitmapBrush effect.")</span>. Bounding rectangle size is not taken in account when performing text truncations.

```
    m_textNode->SetLayouter(&TextNode2DLayouter::GetDefault());
```

**<a class="anchor" id="bkmrk--53"></a>Multiline Support**

Multiline layouting is enabled by default for a TextNode2D. This property can be enabled/disabled using Candera::TextNode2DLayouter::SetMultiLineEnabled() method.

<a class="anchor" id="bkmrk--54"></a>**Wordwrap Support**

Wordwrap is not enabled by default for a TextNode2D. This property can be enabled/disabled using Candera::TextNode2DLayouter::SetWordWrapEnabled() method.

<a class="anchor" id="bkmrk--55"></a>**Text Height**

Glyph based height computation is still done, but it is not used for laying out. The rectangle in which the text is laid out, if Size is (-1;-1), will be the one measured with old TextBrushConstantHeight option. The TextBrushActualHeight is always used for retrieving the bounding rectangle of the node, but it is also possible to retrieve the layout rectangle of the node too (see information about text length calculation below).

**<a class="anchor" id="bkmrk--56"></a>Text Length**

The following methods are provided for retrieving the size of the rendered text:

<div class="contents" id="bkmrk-getting-the-layoutin"><div class="contents"><div class="contents"><div class="textblock">- Getting the layouting text box (measured with constant height, cursor to cursor from left to right): 
    - <span style="color: rgb(230, 126, 35);">[Candera::TextNode2D::GetLayoutTextRectangle()](http://dev.doc.cgistudio.at/APILINK/class_candera_1_1_text_node2_d.html#a08ea9bb95c74eaba7f7ef28132f35384)</span>
- Getting the bounding text box (glyph limits vertically and horizontally): 
    - <span style="color: rgb(230, 126, 35);">[Candera::TextNode2D::GetBoundingTextRectangle()](http://dev.doc.cgistudio.at/APILINK/class_candera_1_1_text_node2_d.html#abddbeaa8f2683469d4a8d117777a2e63)</span>
    - <span style="color: rgb(230, 126, 35);">[Candera::Node2D::GetComputedBoundingRectangle()](http://dev.doc.cgistudio.at/APILINK/class_candera_1_1_node2_d.html#a47334bfe51bb9a7289994087195f3fb4)</span>

</div></div></div></div>##### <a class="anchor" id="bkmrk--57"></a>Candera::TextNode2D in SceneComposer

The new TextNode2D is located in the Toolbox panel. In order to add a text to the scene, drag a TextNode from the panel to a Scene2D node.

<div drawio-diagram="2222"><img src="https://doc316en.candera.eu/uploads/images/drawio/2023-02/drawing-4-1677045059.png" alt=""/></div>

<div class="contents" id="bkmrk--8"><div class="contents"><div class="textblock">  
</div></div></div>From the Properties panel of the TextNode, configure the necessary properties for rendering: *Text*, *Style*.

<div drawio-diagram="2223"><img src="https://doc316en.candera.eu/uploads/images/drawio/2023-02/drawing-4-1677045072.png" alt=""/></div>

<div class="contents" id="bkmrk--10"><div class="contents"><div class="textblock">  
</div></div></div><span style="color: rgb(230, 126, 35);">[Candera::TextNodeRenderer](http://dev.doc.cgistudio.at/APILINK/class_candera_1_1_text_node_renderer.html "Base class for text to Image2D generation strategies.")</span> type of <span style="color: rgb(230, 126, 35);">[Candera::TextNode2D](http://dev.doc.cgistudio.at/APILINK/class_candera_1_1_text_node2_d.html "TextNode2D is a RenderNode that renders text using the attached BitmapBrush effect.")</span> can be changed using the *Renderer* property. Default value in SceneComposer is Bitmap.

<div drawio-diagram="2224"><img src="https://doc316en.candera.eu/uploads/images/drawio/2023-02/drawing-4-1677045090.png" alt=""/></div>

<div class="contents" id="bkmrk--12"><div class="contents"><div class="textblock">  
</div></div></div>Candera::DefaultTextNode2DLayouter is attached by checking *Enable Text Layout*. Additional layouter properties are exposed in the Properties Panel:

<div class="contents" id="bkmrk-multi-line-%28enabled-"><div class="contents"><div class="textblock">- Multi line (enabled by default)
- Word wrap (disabled by default)

</div></div></div><div class="contents" id="bkmrk-for-truncation-to-oc"><div class="contents"><div class="contents"><div class="textblock"><dl class="note"><dd><p class="callout info">For truncation to occur, *Enable Text Layout* property needs to be enabled.</p>

</dd></dl></div></div></div></div><div drawio-diagram="2225"><img src="https://doc316en.candera.eu/uploads/images/drawio/2023-02/drawing-4-1677045120.png" alt=""/></div>

<div class="contents" id="bkmrk--14"><div class="contents"><div class="textblock">  
</div></div></div>When a TextNode2D is created, a <span style="color: rgb(230, 126, 35);">[Candera::BitmapBrushColorBlend](http://dev.doc.cgistudio.at/APILINK/class_candera_1_1_bitmap_brush_color_blend.html "Output a bitmap image, modulate the color, and blend it with the store buffer. Same as chaining (Bitm...")</span> is automatically associated with the node, which is used for changing text color only. Any BitmapBrush effect present in the list of effects from Toolbox Panel can be used for text rendering. The visual appearance of the text will be affected depending on the type of effect chosen.

<div drawio-diagram="2226"><img src="https://doc316en.candera.eu/uploads/images/drawio/2023-02/drawing-4-1677045137.png" alt=""/></div>

<div class="textblock" id="bkmrk--16"></div><div class="contents" id="bkmrk-back-to-the-menu"></div>#### **TextEngine Render Interface** 

##### <a class="anchor" id="bkmrk--63"></a>Overview: Render Interface

The main interface to render text is the method

<div class="contents" id="bkmrk-candera%3A%3Atextrenderi"><div class="contents"><div class="textblock">- <span style="color: rgb(230, 126, 35);">[Candera::TextRendering::TextRenderer::Render(TextRenderContext &amp;context, const LayoutingOptions &amp;layoutingOptions, const ShapingOptions &amp;shapingOptions, const TextProperties &amp;textProperties) const](http://dev.doc.cgistudio.at/APILINK/class_candera_1_1_text_rendering_1_1_text_renderer.html#a6be555dcc044fcaabc261963e8be08af)</span>

</div><div class="textblock"><dl class="note"><dd><p class="callout info">Compare this interface also with the functional steps introduced in chapter <span style="color: rgb(230, 126, 35);">[Fonts and Styles](https://doc316en.candera.eu/books/candera/page/fonts-and-styles)</span>.</p>

</dd></dl></div></div></div>##### <a class="anchor" id="bkmrk--64"></a>Text Render Context

A <span style="color: rgb(230, 126, 35);">[Candera::TextRendering::TextRenderContext](http://dev.doc.cgistudio.at/APILINK/class_candera_1_1_text_rendering_1_1_text_render_context.html "Defines an abstract render context and target for text rendering.")</span> is required to define a target for text rendering i.e. where to render the text to.

##### <a class="anchor" id="bkmrk--65"></a>Configure Bitmap as Target for Text Rendering

A Candera::TextRendering::BitmapTextRenderContext can be used to draw text into a bitmap. So first of all the bitmap which shall be drawn needs to be defined with

<div class="contents" id="bkmrk-the-candera%3A%3Atextren"><div class="contents"><div class="contents"><div class="textblock">- the Candera::TextRendering::BitmapTextRenderContext::SetBitmap() method to assign a bitmap to render to,
- the Candera::TextRendering::BitmapTextRenderContext::SetPenColor() method to define the text color
- the Candera::TextRendering::BitmapTextRenderContext::SetClipRect() method to set a clipping rectangle for the text.

<div class="fragment">  
</div></div></div></div></div>```
    BitmapTextRenderContext bmpRenderContext;
    static_cast<void>(bmpRenderContext.SetBitmap(m_bitmap));
    bmpRenderContext.SetPenColor(m_color);

```

##### <a class="anchor" id="bkmrk--66"></a>Layouting Options

The <span style="color: rgb(230, 126, 35);">[Candera::TextRendering::LayoutingOptions](http://dev.doc.cgistudio.at/APILINK/class_candera_1_1_text_rendering_1_1_layouting_options.html "This class is used for describing the layout of the text.")</span> define the layout of the rendered text with

<div class="contents" id="bkmrk-the-candera%3A%3Atextren-1"><div class="contents"><div class="textblock">- the <span style="color: rgb(230, 126, 35);">[Candera::TextRendering::LayoutingOptions::SetHorizontalAlignment()](http://dev.doc.cgistudio.at/APILINK/class_candera_1_1_text_rendering_1_1_layouting_options.html#aca3a3a56bc40d02a854e92568ab57c73)</span> and <span style="color: rgb(230, 126, 35);">[Candera::TextRendering::LayoutingOptions::SetVerticalAlignment()](http://dev.doc.cgistudio.at/APILINK/class_candera_1_1_text_rendering_1_1_layouting_options.html#a43bb290d70933b2474899028257689fc)</span> methods to specify the text alignment,
- the <span style="color: rgb(230, 126, 35);">[Candera::TextRendering::LayoutingOptions::SetMultilineTextEnabled()](http://dev.doc.cgistudio.at/APILINK/class_candera_1_1_text_rendering_1_1_layouting_options.html#aec9e287bc7225d26991516c177ea89c7)</span> method to toggle multi line and single line layout.
- the <span style="color: rgb(230, 126, 35);">[Candera::TextRendering::LayoutingOptions::SetLineSpacing()](http://dev.doc.cgistudio.at/APILINK/class_candera_1_1_text_rendering_1_1_layouting_options.html#a7336d9c7332603afc9db5e2d06762727)</span> method to modify the space between lines of multi line text.
- the <span style="color: rgb(230, 126, 35);">[Candera::TextRendering::LayoutingOptions::SetWordWrapEnabled()](http://dev.doc.cgistudio.at/APILINK/class_candera_1_1_text_rendering_1_1_layouting_options.html#a5ec96665e072fd3f6afc6cf11ca8f44b)</span> method to enable automatic word wrap for multi line text.

<dl class="see"><dt>**See also:**</dt><dd><span style="color: rgb(230, 126, 35);">[Candera::TextRendering::LayoutingOptions](http://dev.doc.cgistudio.at/APILINK/class_candera_1_1_text_rendering_1_1_layouting_options.html "This class is used for describing the layout of the text.")</span> for further options.</dd></dl></div></div></div>##### <a class="anchor" id="bkmrk--67"></a>Shaping Options

The [Candera::TextRendering::LayoutingOptions](http://dev.doc.cgistudio.at/APILINK/class_candera_1_1_text_rendering_1_1_layouting_options.html "This class is used for describing the layout of the text.") define how the text shall be transformed from logical to display presentation. The usage of one of the constructors is recommended:

<div class="contents" id="bkmrk-candera%3A%3Atextrenderi-0"><div class="contents"><div class="textblock">- Candera::TextRendering::ShapingOptions::ShapingOptions(const StylePtr &amp;style)
- Candera::TextRendering::ShapingOptions::ShapingOptions(const StylePtr &amp;style, const CulturePtr &amp;culture)

</div></div></div>##### <a class="anchor" id="bkmrk--68"></a>Text Properties

The <span style="color: rgb(230, 126, 35);">[Candera::TextRendering::TextProperties](http://dev.doc.cgistudio.at/APILINK/class_candera_1_1_text_rendering_1_1_text_properties.html "Defines the means to retrieve the text for rendering.")</span> simply define the text itself which shall be rendered.

<div class="contents" id="bkmrk-see-also%3A-the-constr"><div class="textblock"><dl class="see"><dt>**See also:**</dt><dd>the constructor <span style="color: rgb(230, 126, 35);">[Candera::TextRendering::TextProperties::TextProperties(const TChar \*text, TextLength length)](http://dev.doc.cgistudio.at/APILINK/class_candera_1_1_text_rendering_1_1_text_properties.html#ae2f8fb01e773ce9f188eb6e82bae0ef9)</span>.</dd></dl></div></div>#### **Font Metrics and Text Sizes** 

##### <a class="anchor" id="bkmrk--69"></a>Font Size

In <span style="color: rgb(230, 126, 35);">[Candera](http://dev.doc.cgistudio.at/APILINK/namespace_candera.html "[DataBinding_RefTypeSample]")</span> the font size (respectively the font height) has to be provided in pixel size. Note that in several word processing programs, like *Microsoft Word*, fonts are defined in point size. The conversion between pixel size and point size is calculated as follows (see [FreeType Glyph Conventions](http://www.freetype.org/freetype2/docs/glyphs/glyphs-2.html)):

<div class="contents" id="bkmrk-pixel_size-%3D-point_s"><div class="contents"><div class="textblock">- pixel\_size = point\_size \* resolution / 72

</div></div></div>*Microsoft Windows* e.g. defines for historical reasons a default resolution of 96 PPI (DPI). A font in *Microsoft Word* with defined point size 18 has the same height as the font defined in <span style="color: rgb(230, 126, 35);">[Candera](http://dev.doc.cgistudio.at/APILINK/namespace_candera.html "[DataBinding_RefTypeSample]")</span> with pixel size 24 (24 = 18 \* 96/72).

##### <a class="anchor" id="bkmrk--70"></a>Font Metrics

For a font, static font metrics are provided describing font ascender, descender values in device pixel, the font line height and the maximum vertical advance of a font character: <span style="color: rgb(230, 126, 35);">[Candera::TextRendering::Font::GetMetrics()](http://dev.doc.cgistudio.at/APILINK/class_candera_1_1_text_rendering_1_1_font.html#a33baf13f579a0a849652c52b0fd97062)</span>

```
    TextRendering::Metrics metrics;
    if (!m_font.GetMetrics(metrics)) {
        return false;
    }

```

##### <a class="anchor" id="bkmrk--71"></a>Text Bounds

Further, the text bounds (width, height, etc.) of a given string can be retrieved by calling *GetTextRectangle* method of <span style="color: rgb(230, 126, 35);">[Candera::TextRendering::GlyphTextMeasureContext](http://dev.doc.cgistudio.at/APILINK/class_candera_1_1_text_rendering_1_1_glyph_text_measure_context.html "GlyphTextMeasureContext is used to measure the glyph bitmaps extents.")</span> or <span style="color: rgb(230, 126, 35);">[Candera::TextRendering::CursorTextMeasureContext](http://dev.doc.cgistudio.at/APILINK/class_candera_1_1_text_rendering_1_1_cursor_text_measure_context.html "CursorTextMeasureContext is used to measure the movement of the text cursor.")</span>.

<span style="color: rgb(230, 126, 35);">[Candera::TextRendering::GlyphTextMeasureContext](http://dev.doc.cgistudio.at/APILINK/class_candera_1_1_text_rendering_1_1_glyph_text_measure_context.html "GlyphTextMeasureContext is used to measure the glyph bitmaps extents.")</span> builds a rectangle corresponding to the smallest surface covered by all the glyph bitmaps. The position of this rectangle( represented by (left, top) coordinates) can be offset from the text position. Therefore, when rendering the text, the Layouting Options should be constructed using the inverse of this offset.

<span style="color: rgb(230, 126, 35);">[Candera::TextRendering::CursorTextMeasureContext](http://dev.doc.cgistudio.at/APILINK/class_candera_1_1_text_rendering_1_1_cursor_text_measure_context.html "CursorTextMeasureContext is used to measure the movement of the text cursor.")</span> builds a rectangle corresponding to the whole surface swept by the cursor when moving while processing the text. The cursor is considered to be a segment of length equal to the style height. This rectangle does not usually have an offset and it contains the final advancement of the cursor.

```
    GlyphTextMeasureContext glyphContext;
    static_cast<void>(textRenderer.Render(glyphContext, LayoutingOptions(), ShapingOptions(m_style), TextProperties(m_text)));
    TextRect textBound = glyphContext.GetTextRectangle();
    mTextStartPos.SetX(-textBound.GetPosition().GetX());
    mTextStartPos.SetY(-textBound.GetPosition().GetY());
    Int16 textWidth = textBound.GetWidth();
    Int16 textHeight = textBound.GetHeight();
```

```
    static_cast<void>(textRenderer.Render(bmpRenderContext, LayoutingOptions(mTextStartPos), ShapingOptions(m_style), TextProperties(m_text)));

```

The Layouting Options describe the layout of the text. The Shaping Options define how the text is shaped (ligatures, text direction, ..) and they also contain the style.

####   
**Simple Text Rendering** 

##### <a class="anchor" id="bkmrk--72"></a>Rendering Simple Text

The <span style="color: rgb(230, 126, 35);">[Candera::TextRendering::TextRenderer](http://dev.doc.cgistudio.at/APILINK/class_candera_1_1_text_rendering_1_1_text_renderer.html "TextRenderer is the core Candera function for rendering text.")</span> provides the core function to render text.

For simple text rendering the <span style="color: rgb(230, 126, 35);">[Candera::TextRendering::TextRenderer::Render()](http://dev.doc.cgistudio.at/APILINK/class_candera_1_1_text_rendering_1_1_text_renderer.html#a6be555dcc044fcaabc261963e8be08af)</span> method is called. Besides the actual text (type TChar\*) and the BitmapTextRenderContext as target, layouting and shaping can be specified.

```
    static_cast<void>(textRenderer.Render(bmpRenderContext, LayoutingOptions(mTextStartPos), ShapingOptions(m_style), TextProperties(m_text)));

```

Finally the image has to be updated to apply the changes.

```
    bool success = m_textureImage->Update();

```

####   
**Character-Glyph Position Mapping** 

##### <a class="anchor" id="bkmrk--73"></a>Overview

<span style="color: rgb(230, 126, 35);">[Candera](http://dev.doc.cgistudio.at/APILINK/namespace_candera.html "[DataBinding_RefTypeSample]")</span> text engine provides an interface which allows to map positions in character string to positions in glyph string. This feature can be useful for applications and widgets in order to perform various operations depending on the character position like, for instance, highlighting text.

##### <a class="anchor" id="bkmrk--74"></a>Example

For the convenience, we choose to improve the TextTextureWidget with this highlighting feature. The widget will highlight the text by rendering in red all the glyphs corresponding to the characters having the index in the interval *m\_start* and *m\_end*.

The character position information is accessible in the Blit method of the <span style="color: rgb(230, 126, 35);">[Candera::BitmapTextRenderContext](http://dev.doc.cgistudio.at/APILINK/class_candera_1_1_bitmap_text_render_context.html "Implements a TextRenderContext for Bitmaps.")</span> class. Consequently, this class should be derived and the Blit method overwritten as follows:

```
class BitmapTextRenderContextSelection : public BitmapTextRenderContext
{      
public:   
    BitmapTextRenderContextSelection(Int selectionStart, Int selectionEnd, <a class="code" href="http://dev.doc.cgistudio.at/APILINK/group___behaviors_control.html#ggae7abc816df647d0ecbc280480fefb788a6d1d4da086e381cb2c5a5ce6a2513ebd">Color</a> color) : m_start(selectionStart), m_end(selectionEnd), m_color(color) {}
    virtual void Blit(Int16 x, Int16 y, const GlyphBitmap& glyph);
private:
    typedef BitmapTextRenderContext Base;

    <a class="code" href="http://dev.doc.cgistudio.at/APILINK/group___behaviors_control.html#ggae7abc816df647d0ecbc280480fefb788a6d1d4da086e381cb2c5a5ce6a2513ebd">Color</a> ComputeColorForCharPosition(<a class="code" href="http://dev.doc.cgistudio.at/APILINK/group___candera_text_engine.html#gae7c07cf8f5b0200e470e2a728895b9de" title="Type used to specify the position of a character within a text buffer.">TextPosition</a> position);
    Int m_start;
    Int m_end;
    <a class="code" href="http://dev.doc.cgistudio.at/APILINK/group___behaviors_control.html#ggae7abc816df647d0ecbc280480fefb788a6d1d4da086e381cb2c5a5ce6a2513ebd">Color</a> m_color;
};

void BitmapTextRenderContextSelection::Blit(Int16 x, Int16 y, const GlyphBitmap& glyph){

    SetPenColor(ComputeColorForCharPosition(glyph.characterPosition));
    Base::Blit(x, y, glyph);
}

<a class="code" href="http://dev.doc.cgistudio.at/APILINK/group___behaviors_control.html#ggae7abc816df647d0ecbc280480fefb788a6d1d4da086e381cb2c5a5ce6a2513ebd">Color</a> BitmapTextRenderContextSelection::ComputeColorForCharPosition(<a class="code" href="http://dev.doc.cgistudio.at/APILINK/group___candera_text_engine.html#gae7c07cf8f5b0200e470e2a728895b9de" title="Type used to specify the position of a character within a text buffer.">TextPosition</a> position){
    if(position >= m_start && position <= m_end){
        return <a class="code" href="http://dev.doc.cgistudio.at/APILINK/group___behaviors_control.html#ggae7abc816df647d0ecbc280480fefb788a6d1d4da086e381cb2c5a5ce6a2513ebd">Color</a>(255,0,0);
    } else {
        return m_color;
    }
}
```

In TextTextureWidget::UpdateTextureImage(), use the newly created class instead of <span style="color: rgb(230, 126, 35);">[Candera::BitmapTextRenderContext](http://dev.doc.cgistudio.at/APILINK/class_candera_1_1_bitmap_text_render_context.html "Implements a TextRenderContext for Bitmaps.")</span>:

```
    BitmapTextRenderContextSelection bmpRenderContext(m_selectionStart, m_selectionEnd, GetTextColorPrv());
```

####   
**Shortening Support For Bidirectional Text** 

##### <a class="anchor" id="bkmrk--75"></a>Feature Overview

This feature ensures that the bidirectional text shall be shortened whenever it does not fit into its designated display area. The algorithm which does the shortening can deal with different levels of embedding of right-to-left text in left-to-right text and vice versa. Depending on the text direction of the last chunk, the shortening string is inserted after the last fitting text segment, on the left or on the right end.

You can take advantage of this feature by using one of the following, depending on the type of scene being rendered:

<div class="contents" id="bkmrk-scene-type-node-name"><div class="contents"><div class="textblock"><table border="1" style="width: 76.5432%;"><tbody><tr align="center"><th style="padding: 5px; width: 34.8762%;">Scene type</th><th style="width: 32.6109%;">Node name</th><th style="width: 32.6206%;">Widget name</th></tr><tr><td align="center" style="width: 34.8762%;">2D</td><td style="padding: 5px; width: 32.6109%;">[<span style="color: rgb(230, 126, 35);">Candera::TextNode2D</span>](http://dev.doc.cgistudio.at/APILINK/class_candera_1_1_text_node2_d.html "TextNode2D is a RenderNode that renders text using the attached BitmapBrush effect.")</td><td class="align-center" style="padding: 5px; width: 32.6206%;">-</td></tr><tr><td align="center" style="width: 34.8762%;">3D</td><td style="padding: 5px; width: 32.6109%;">-</td><td class="align-center" style="padding: 5px; width: 32.6206%;">TextTextureWidget</td></tr></tbody></table>

</div></div></div>##### <a class="anchor" id="bkmrk--76"></a>Truncation using TextNode2D

This feature is active only when the node parameter *Enable Text Layout* is enabled. The text will be automatically truncated whenever its size no longer fits in the specified *Size* property of the node. TextNode2D provides only one truncation method, by cutting text and adding trailing ellipsis to fit the space.

##### <a class="anchor" id="bkmrk--77"></a>Truncation using TextTextureWidget

This feature is active only when the widget parameter *Truncation method* is set to the **Text** value. The character(s) used for visual feedback of text shortening is configurable by setting the *Truncation text* property of the 3D widget.

##### <a class="anchor" id="bkmrk--78"></a>Examples

The image below exemplifies three scenarios :

<div class="contents" id="bkmrk-shortening-of-the-ri"><div class="contents"><div class="textblock">1. Shortening of the right-to-left text (Arabic)
2. Shortening of the left-to-right text (Latin)
3. Shortening of right-to-left text embedded in left-to-right text (left-to-right and right-to-left)

</div></div></div><div drawio-diagram="2227"><img src="https://doc316en.candera.eu/uploads/images/drawio/2023-02/drawing-4-1677045787.png" alt=""/></div>

<div class="contents" id="bkmrk--23"><div class="textblock">  
</div></div>####   
**Font Hinting** 

##### <a class="anchor" id="bkmrk--80"></a>Overview

Font hinting is the use of mathematical instructions to adjust the display of an outline font so that it lines up with a rasterized grid. This is done by interpolating the pixels in order to more clearly render the font. At low screen resolutions, hinting is critical for producing clear, legible text. It can be accompanied by antialiasing and (on liquid crystal displays) subpixel rendering for further clarity.

<div class="contents" id="bkmrk-the-hinting-applies-"><div class="contents"><div class="textblock"><dl class="note"><dt></dt><dd><p class="callout info">The hinting applies only to **outline** fonts so the bitmap fonts and the stroke fonts will not be affected by this feature.</p>

</dd></dl></div></div></div>Hints are usually created in a font editor during the typeface design process and embedded in the font. In general, there are three possible ways to hint a glyph:

<div class="contents" id="bkmrk-the-font-contains-hi"><div class="contents"><div class="textblock">- The font contains hints to guide the rasterizer, telling it which shapes of the glyphs need special consideration. The hinting logic is partly in the font and partly in the rasterizer.
- The font contains exact instructions (also called bytecode) on how to move the points of its outlines, depending on the resolution of the output device, and which intentionally distort the (outline) shape to produce a well-rasterized result. The hinting logic is in the font; ideally, all rasterizers simply process these instructions to get the same result on all platforms.
- The font gets auto-hinted (at run-time). The hinting logic is completely in the rasterizer. No hints in the font are used or needed; instead, the rasterizer scans and analyzes the glyphs to apply corrections by itself.

</div></div></div>##### <a class="anchor" id="bkmrk--81"></a>Enabling Hinting

The hinting can be enabled or disabled by the means of the method <span style="color: rgb(230, 126, 35);">[Candera::TextRendering::Font::SetHintingEnabled()](http://dev.doc.cgistudio.at/APILINK/class_candera_1_1_text_rendering_1_1_font.html#aebfdc5b60e4ddafa35065c5d33bc9ce9)</span>. When hinting is disabled, the glyphs may appear blurred, as you can see below. The text was rendered with a small size font (9px) and then zoomed in:

<div drawio-diagram="2228"><img src="https://doc316en.candera.eu/uploads/images/drawio/2023-02/drawing-4-1677045859.png" alt=""/></div>

<div class="contents" id="bkmrk--27"><div class="contents"><div class="textblock">  
</div></div></div>##### <a class="anchor" id="bkmrk--83"></a>Enabling AutoHint

The usage of the automatic hinter of the font driver can be controlled by calling the method <span style="color: rgb(230, 126, 35);">[Candera::TextRendering::Font::SetAutohintEnabled()](http://dev.doc.cgistudio.at/APILINK/class_candera_1_1_text_rendering_1_1_font.html#ab9e5ba935a28985ec47c1fe290dcbfff)</span>. When the automatic hinter is disabled either the native hinter of the font is used either the hinting is disabled (zoomed in image):

<div drawio-diagram="2229"><img src="https://doc316en.candera.eu/uploads/images/drawio/2023-02/drawing-4-1677045895.png" alt=""/></div>

<div class="contents" id="bkmrk--29"><div class="contents"><div class="textblock">  
</div></div></div>##### <a class="anchor" id="bkmrk--85"></a>Enabling Force AutoHint

If a given font driver doesn't provide its own hinter, the auto-hinter is used by default. If a format-specific hinter is provided, it is still possible to use the auto-hinter by enabling it using the method <span style="color: rgb(230, 126, 35);">[Candera::TextRendering::Font::SetForceAutohintEnabled()](http://dev.doc.cgistudio.at/APILINK/class_candera_1_1_text_rendering_1_1_font.html#af57b8dbdaca17b1bd51c87fcdebfa3da)</span>.

##### <a class="anchor" id="bkmrk--86"></a>Hinting Mode

The driver autohinter can be configured by calling the <span style="color: rgb(230, 126, 35);">[Candera::TextRendering::Font::SetHintingMode()](http://dev.doc.cgistudio.at/APILINK/class_candera_1_1_text_rendering_1_1_font.html#a9a768ce930fff71ed1fc6398e4a15e95)</span> method with one of the following parameters(hinting algorithms):

<div class="contents" id="bkmrk-glyphhinter%3A%3Anormal-"><div class="contents"><div class="textblock">- GlyphHinter::Normal : normal hinting, optimized for standard gray-level rendering  
    <div drawio-diagram="2230"><img src="https://doc316en.candera.eu/uploads/images/drawio/2023-02/drawing-4-1677045933.png" alt=""/></div>

- GlyphHinter::Light : applies less corrections than normal hinting for better performance  
    <div drawio-diagram="2231"><img src="https://doc316en.candera.eu/uploads/images/drawio/2023-02/drawing-4-1677045994.png" alt=""/></div>
- GlyphHinter::Monochrome : appropriate for monochrome rendering  
    <div drawio-diagram="2232"><img src="https://doc316en.candera.eu/uploads/images/drawio/2023-02/drawing-4-1677046010.png" alt=""/></div>

- GlyphHinter::Lcd : appropriate for horizontally decimated LCD displays  
    <div drawio-diagram="2233"><img src="https://doc316en.candera.eu/uploads/images/drawio/2023-02/drawing-4-1677046031.png" alt=""/></div>

- GlyphHinter::VerticalLcd : appropriate for vertically decimated LCD displays  
    <div drawio-diagram="2234"><img src="https://doc316en.candera.eu/uploads/images/drawio/2023-02/drawing-4-1677046060.png" alt=""/></div>

</div></div></div><div class="contents" id="bkmrk-all-modes-except-gly"><div class="contents"><div class="textblock"><dl class="note"><dd><p class="callout info">All modes except GlyphHinter::Monochrome use 256 levels of opacity.</p>

</dd></dl></div></div></div>##### <a class="anchor" id="bkmrk--92"></a>Code Example

```
    m_font1.SetHintingMode(GlyphHinter::Monochrome);
    m_font2.SetHintingMode(GlyphHinter::Light);
```

##### <a class="anchor" id="bkmrk--93"></a>Glyph Bitmap Format

The output type of the glyph rendering process can be configured by calling the method <span style="color: rgb(230, 126, 35);">[Candera::TextRendering::Font::SetRequestedGlyphFormat()](http://dev.doc.cgistudio.at/APILINK/class_candera_1_1_text_rendering_1_1_font.html#a92c945ce5945b332320c3e68dee77e75)</span> with one of the following render modes as parameters:

<div class="contents" id="bkmrk-glyphbitmap%3A%3Aunknown"><div class="contents"><div class="textblock">- GlyphBitmap::Unknown : format is unspecified
- GlyphBitmap::Monochrome : correspond to 1-bit bitmaps (two levels of opacity)
- GlyphBitmap::Lcd : format use with horizontally decimated RGB or BGR sub-pixel LCD displays
- GlyphBitmap::VerticalLcd : format use with vertically decimated LCD displays
- GlyphBitmap::Grayscale : format is grayscale, one byte per pixel; this is the default render mode

</div></div></div>Each of the render modes above correspond to a specific type of scanline conversion performed on the outline.

##### <a class="anchor" id="bkmrk--94"></a>Code Example

```
    m_font1.SetRequestedGlyphFormat(GlyphBitmap::VerticalLcd);
    m_font2.SetRequestedGlyphFormat(GlyphBitmap::Grayscale);
```

##### <a class="anchor" id="bkmrk--95"></a>Monochrome Render Mode

The monochrome render mode removes anti-aliasing because it's using only two levels of opacity and gives clearer appearance for small size fonts (no blurring). Please see below a comparison between monochrome and grayscale render modes:

<div drawio-diagram="2235"><img src="https://doc316en.candera.eu/uploads/images/drawio/2023-02/drawing-4-1677046185.png" alt=""/></div>

<div drawio-diagram="2236"><img src="https://doc316en.candera.eu/uploads/images/drawio/2023-02/drawing-4-1677046236.png" alt=""/></div>

An another advantage of using this render mode is the smaller memory footprint for glyphs because of 1bit format.

# Using asynchronous text rendering

#### <a class="anchor" id="bkmrk--16"></a>Description

The Candera engine provides asynchronous text rendering to improve the handling of time-consuming text processing. The focus is not to improve performance but to improve resource handling.

Asynchronous text rendering requires knowledge of how text nodes work.

General information of how to use <span style="color: rgb(230, 126, 35);">[Candera::TextNode2D](http://dev.doc.cgistudio.at/APILINK/class_candera_1_1_text_node2_d.html "TextNode2D is a RenderNode that renders text using the attached BitmapBrush effect.")</span> can be found in the following section:

<div class="contents" id="bkmrk-using-candera%3A%3Atextn"><div class="contents"><div class="textblock">- <span style="color: rgb(230, 126, 35);">[Using Candera::TextNode2D](https://doc316en.candera.eu/link/480#bkmrk-using-candera%3A%3Atextn-1)</span>

</div></div></div>Asynchronous text rendering requires further knowledge of which steps are necessary to display a text. Please refer to the following section:

<div class="contents" id="bkmrk-text-rendering---use"><div class="contents"><div class="textblock">- <span style="color: rgb(230, 126, 35);">[Text rendering - Useful knowledge](#bkmrk-text-rendering---use-1)</span>

</div></div></div>Based on the knowledge about the TextNode2D and CanvasText, the following chapters describe how asynchronous text rendering works. Further, these chapters explain how to customize the asynchronous text rendering and which restrictions should be considered when using this feature. The documentation focuses mainly on <span style="color: rgb(230, 126, 35);">[Candera::TextNode2D](http://dev.doc.cgistudio.at/APILINK/class_candera_1_1_text_node2_d.html "TextNode2D is a RenderNode that renders text using the attached BitmapBrush effect.")</span>. The concepts described inside these chapters are applicable to <span style="color: rgb(230, 126, 35);">[Candera::CanvasText](http://dev.doc.cgistudio.at/APILINK/class_candera_1_1_canvas_text.html "CanvasText represents a text node within a 3D Canvas object.")</span>, too.


#### **Text rendering - Useful knowledge** 

##### <a class="anchor" id="bkmrk--18"></a>TextNode2D – text render process

A text uses three steps in its render process:

<div class="contents" id="bkmrk-measurement-and-plac"><div class="contents"><div class="textblock">1. Measurement and placement
2. Prerendering – Prepares the render device for the text (if necessary)
3. Render – Actual visible output

</div></div></div>All of these steps have to be fulfilled to come to a visible result. Using a TextNode2D has three different ways to update its text and therefore three different ways to approach the final result. The main difference lies in providing information and handling the three process steps:

<div class="contents" id="bkmrk-first-case%3A-no-layou"><div class="contents"><div class="textblock">- <span style="color: rgb(230, 126, 35);">[First case: No layout usage](https://doc316en.candera.eu/link/482#bkmrk-first-case%3A-no-layou-0)</span>
- <span style="color: rgb(230, 126, 35);">[Second case: Layout process but no TextNode2D layouter](https://doc316en.candera.eu/link/482#bkmrk-second-case%3A-layout-)</span>
- <span style="color: rgb(230, 126, 35);">[Third case: Layout process with TextNode2D layouter](https://doc316en.candera.eu/link/482#bkmrk-third-case%3A-layout-p)</span>

</div></div></div>##### <a class="anchor" id="bkmrk--19"></a>First case: No layout usage

<span style="color: rgb(230, 126, 35);">[Candera::TextNode2D](http://dev.doc.cgistudio.at/APILINK/class_candera_1_1_text_node2_d.html "TextNode2D is a RenderNode that renders text using the attached BitmapBrush effect.")</span> has no real layout information. There is also no layout in which the <span style="color: rgb(230, 126, 35);">[Candera::TextNode2D](http://dev.doc.cgistudio.at/APILINK/class_candera_1_1_text_node2_d.html "TextNode2D is a RenderNode that renders text using the attached BitmapBrush effect.")</span> is integrated. Therefore, trigger the render process for text render process is enough. The text is not bound to an area and has no relationship other than the visible layer to any other node in the scene graph.

Pro:

<div class="contents" id="bkmrk-lightweight-version-"><div class="contents"><div class="textblock">- Lightweight version of text and Candera.
- Simple text can be shown without much effort.

</div></div></div>Contra:

<div class="contents" id="bkmrk-most-of-text-placeme"><div class="contents"><div class="textblock">- Most of text placement features are disabled.
- No arrangement exists.

</div></div></div><div drawio-diagram="2248"><img src="https://doc316en.candera.eu/uploads/images/drawio/2023-02/drawing-4-1677046993.png" alt=""/></div>

<div class="contents" id="bkmrk--0"><div class="contents"><div class="textblock">  
</div></div></div>##### <a class="anchor" id="bkmrk--21"></a>Second case: Layout process but no TextNode2D layouter

<span style="color: rgb(230, 126, 35);">[Candera::TextNode2D](http://dev.doc.cgistudio.at/APILINK/class_candera_1_1_text_node2_d.html "TextNode2D is a RenderNode that renders text using the attached BitmapBrush effect.")</span> has no real layout information. However, it is arranged within a layout (e.g. GridLayout). This implies that <span style="color: rgb(230, 126, 35);">[Candera::TextNode2D](http://dev.doc.cgistudio.at/APILINK/class_candera_1_1_text_node2_d.html "TextNode2D is a RenderNode that renders text using the attached BitmapBrush effect.")</span> has to provide actual layout results to arrange the text within the layout area. Therefore, the layout process has to start the text render process beforehand. The text render process has to complete the first step (measurement and placement) when the layout process evaluates the bounding box of the text. The layout process has no influence on the size of the bounding box. It only receives the information of the bounding box and can place all the other nodes around the text. The actual handling of this information is defined by the used layouter.

Pro:

<div class="contents" id="bkmrk-lightweight-version--0"><div class="contents"><div class="textblock">- Lightweight version of text with advantages of an arrangement of scene graph nodes.
- Switching between first and second case is normally without major issues.

</div></div></div>Contra:

<div class="contents" id="bkmrk-the-text-placement-c"><div class="contents"><div class="contents"><div class="textblock">- The text placement cannot be influenced by the layout process.
- TextNode2D itself cannot distinguish between first case and second case.

</div></div></div></div><div drawio-diagram="2246"><img src="https://doc316en.candera.eu/uploads/images/drawio/2023-02/drawing-4-1677046938.png" alt=""/></div>

<div class="contents" id="bkmrk--2"><div class="contents"><div class="textblock">  
</div></div></div>##### <a class="anchor" id="bkmrk--23"></a>Third case: Layout process with TextNode2D layouter

<span style="color: rgb(230, 126, 35);">[Candera::TextNode2D](http://dev.doc.cgistudio.at/APILINK/class_candera_1_1_text_node2_d.html "TextNode2D is a RenderNode that renders text using the attached BitmapBrush effect.")</span> provides layout information. Additionally, the general layout process can influence the way text is displayed, too. The layout process can propose a maximum area in which the text has to fit. This has a direct impact on the placement. The text itself provides the layout process a bounding box which were actually used by it.

Pro:

<div class="contents" id="bkmrk-full-feature-set-for"><div class="contents"><div class="textblock">- Full feature set for text placement integrated in the scene graph arrangements.

</div></div></div>Contra:

<div class="contents" id="bkmrk-heavyweight-version-"><div class="contents"><div class="textblock">- Heavyweight version of text; more calculations have to be done.
- An attached layouter expects using the layouter.

</div></div></div><div class="contents" id="bkmrk-when-a-layouter-is-a"><div class="contents"><div class="textblock"><dl class="note"><dd><p class="callout info">When a layouter is attached, it has to be used as it replaces the default behavior with a complex one. However, the information has to be provided by triggering the layout process otherwise it misses most of the information. This implies that other usages are wrong and lead to undefined or unwanted behavior.</p>

</dd></dl></div></div></div><div drawio-diagram="2244"><img src="https://doc316en.candera.eu/uploads/images/drawio/2023-02/drawing-4-1677046891.png" alt=""/></div>

<div class="contents" id="bkmrk-transformations-like"><div class="contents"><div class="textblock"><dl class="note"><dd><p class="callout info">Transformations like scale and rotation are applied after the text has been rendered. This means that you cannot use scaling to produce narrow or wide text, because the visual layout would be altered (right-aligned text will not be aligned any more after scaling). In this case, import a scaled font instead.</p>

</dd></dl></div></div></div>##### <a class="anchor" id="bkmrk--25"></a>CanvasText – text render process

<span style="color: rgb(230, 126, 35);">[Candera::CanvasText](http://dev.doc.cgistudio.at/APILINK/class_candera_1_1_canvas_text.html "CanvasText represents a text node within a 3D Canvas object.")</span> uses the third approach of <span style="color: rgb(230, 126, 35);">[Candera::TextNode2D](http://dev.doc.cgistudio.at/APILINK/class_candera_1_1_text_node2_d.html "TextNode2D is a RenderNode that renders text using the attached BitmapBrush effect.")</span>:

<div class="contents" id="bkmrk-third-case%3A-layout-p-0"><div class="contents"><div class="textblock">- <span style="color: rgb(230, 126, 35);">[Third case: Layout process with TextNode2D layouter](#bkmrk-third-case%3A-layout-p)</span>

</div></div></div>All other approaches have been removed from <span style="color: rgb(230, 126, 35);">[<span style="vertical-align: inherit;"><span style="vertical-align: inherit;">Candera::CanvasText</span></span>](http://dev.doc.cgistudio.at/APILINK/class_candera_1_1_canvas_text.html "CanvasText は、3D Canvas オブジェクト内のテキスト ノードを表します。")</span> to reduce the complexity of processing. Another difference to <span style="color: rgb(230, 126, 35);">[Candera::TextNode2D](http://dev.doc.cgistudio.at/APILINK/class_candera_1_1_text_node2_d.html "TextNode2D is a RenderNode that renders text using the attached BitmapBrush effect.")</span> is the actual Render() part. Whilst the <span style="color: rgb(230, 126, 35);">[Candera::TextNode2D](http://dev.doc.cgistudio.at/APILINK/class_candera_1_1_text_node2_d.html "TextNode2D is a RenderNode that renders text using the attached BitmapBrush effect.")</span> calls the Render() on each node, <span style="color: rgb(230, 126, 35);">[<span style="vertical-align: inherit;"><span style="vertical-align: inherit;">Candera::CanvasText</span></span>](http://dev.doc.cgistudio.at/APILINK/class_candera_1_1_canvas_text.html "CanvasText は、3D Canvas オブジェクト内のテキスト ノードを表します。")</span> renders it in a batched form by collecting texts with equal render settings and drawing them with a single draw call. <span style="color: rgb(230, 126, 35);">[<span style="vertical-align: inherit;"><span style="vertical-align: inherit;">Candera::CanvasText</span></span>](http://dev.doc.cgistudio.at/APILINK/class_candera_1_1_canvas_text.html "CanvasText は、3D Canvas オブジェクト内のテキスト ノードを表します。")</span> uses GlyphAtlas.

Please note also the following restriction when using asynchronous text processing:

<div class="contents" id="bkmrk-cache-type-restricti"><div class="textblock">- <span style="color: rgb(230, 126, 35);">[Cache type restrictions](#bkmrk-cache-type-restricti-0)</span>

</div></div>####   
**Asynchronous text rendering** 

Asynchronous text rendering is a feature introduced to move text render steps to an own thread or render slot. To be precise only the first of the three render steps can be handled asynchronously. All the other steps are possibly bound to GPU or has to extend the complexity of how to receive the desired output for both framework and user application.

##### <a class="anchor" id="bkmrk--26"></a>Asynchronous text rendering – Worker thread

The default way of asynchronous text rendering is the usage of a worker thread. The render loop delegates the first step, Measurement and Placement, to a worker thread. Every delegate is placed in a queue and ready for processing. Using a worker thread has its main advantage in not blocking the render loop. The render loop itself will not block until the text has been measured and placed. The disadvantage of this approach is that there is no control over the execution moment and result arrival time. It can happen after a single render cycle but also after an undefined amount of cycles.

The next figure shows in a draft how the measure and placement process has been replaced when asynchronous text rendering is used. For simplicity only the way without a layouter is used. All other ways do replace the measurement and placement process with the same approach in their flow chart.

The function which actually triggers the asynchronous process has to be triggered twice. One time to queue the process and a second time to retrieve the result. In this flow chart sample the Render-method has to be called twice. The second call has to be done when the asynchronous process has actually finished.

<div drawio-diagram="2250"><img src="https://doc316en.candera.eu/uploads/images/drawio/2023-02/drawing-4-1677047084.png" alt=""/></div>

<div class="contents" id="bkmrk--5"><div class="contents"><div class="textblock">  
</div></div></div>##### <a class="anchor" id="bkmrk--28"></a>Asynchronous text rendering - Single threaded

Asynchronous does not mean the work load has to be done by another thread. It can also be done by the same thread at another point in time. The main disadvantage of the single threaded version is that the render loop thread is still handling the text. However, this time it does not have to handle every text in a single render cycle. The amount of texts which will be rendered in a cycle can be determined.

This implies that two factors are given: Text/cycle and text to handle. Based on this information the amount of cycles needed to calculate all texts can be estimated. The duration of each cycle cannot be determined, though.

<div drawio-diagram="2252"><img src="https://doc316en.candera.eu/uploads/images/drawio/2023-02/drawing-4-1677047132.png" alt=""/></div>

<div class="contents" id="bkmrk--7"></div>####   
**Synchronization methods** 

##### <a class="anchor" id="bkmrk--30"></a>Text-Synchronization

With the introduction of asynchronous text rendering a way to synchronize all text nodes have to be provided. The basic idea is to visually update all asynchronous texts at the same render cycle. It should prevent text popping up randomly. Another aspect is to decrease layout processes. When a layouter is attached to a <span style="color: rgb(230, 126, 35);">[Candera::TextNode2D](http://dev.doc.cgistudio.at/APILINK/class_candera_1_1_text_node2_d.html "TextNode2D is a RenderNode that renders text using the attached BitmapBrush effect.")</span>, the layout process will evaluate the size of a <span style="color: rgb(230, 126, 35);">[Candera::TextNode2D](http://dev.doc.cgistudio.at/APILINK/class_candera_1_1_text_node2_d.html "TextNode2D is a RenderNode that renders text using the attached BitmapBrush effect.")</span>. This also means the layout process starts the asynchronous text rendering if necessary. When the layout process starts the process, it should not wait for the result as this results in the same blocking issue as before.

The layouter uses the old information and text which is still valid as long as the asynchronous text rendering is not done yet. Rerunning the layout process will check whether the new text is valid yet or not. If not, it will continue using the old information. If the new text is valid now, it will update the text. The same procedure happens without a layouter attached. However, the part of starting and collecting the results is done by the render call itself. In short an asynchronous text rendering has to be started and the result has to be received in a minimum of two calls. It depends on the usage of layout procedures who the caller really is.

This section describes the possibilities of synchronization:

<div class="contents" id="bkmrk-text-synchronization-0"><div class="contents"><div class="textblock">- <span style="color: rgb(230, 126, 35);">[Text-Synchronization – Default synchronization](https://doc316en.candera.eu/link/482#bkmrk-text-synchronization-1)</span>
    - <span style="color: rgb(52, 73, 94);">Lifecycle</span>
    - <span style="color: rgb(52, 73, 94);">Synchronization - flow</span>
    - <span style="color: rgb(52, 73, 94);">Synchronization - Restrictions</span>

- [<span style="color: rgb(230, 126, 35);">Text-Synchronization – Custom implementation</span>](https://doc316en.candera.eu/link/482#bkmrk-text-synchronization-2)
    - <span style="color: rgb(52, 73, 94);">A new synchronization group</span>
    - <span style="color: rgb(52, 73, 94);">Additional trigger objects</span>
    - <span style="color: rgb(52, 73, 94);">Implementation of an own synchronization</span>

</div></div></div>##### <a class="anchor" id="bkmrk--31"></a>Text-Synchronization – Default synchronization

The default synchronization is kept as simple as possible. This section describes the lifecycle of the validation and how does the synchronization works including its flaws.

##### <a class="anchor" id="bkmrk--32"></a>Lifecycle

Every object which has to be synchronized implements the interface <span style="color: rgb(230, 126, 35);">[Candera::TextRendering::ITextValidationUser](http://dev.doc.cgistudio.at/APILINK/class_candera_1_1_text_rendering_1_1_i_text_validation_user.html "ITextValidationUser is an interface for a user which will be attached to a TextValidator.")</span>, e.g. TextNode2D. In the next step this object has to be attached to a <span style="color: rgb(230, 126, 35);">[Candera::TextRendering::TextValidationGroup](http://dev.doc.cgistudio.at/APILINK/class_candera_1_1_text_rendering_1_1_text_validation_group.html)</span>. The default group is a singleton instance. The <span style="color: rgb(230, 126, 35);">[Candera::TextRendering::TextValidationGroup](http://dev.doc.cgistudio.at/APILINK/class_candera_1_1_text_rendering_1_1_text_validation_group.html)</span> creates a specific validator and attaches it to the object. Detaching the validator is comparable to this process.

<div drawio-diagram="2257"><img src="https://doc316en.candera.eu/uploads/images/drawio/2023-02/drawing-4-1677047325.png" alt=""/></div>

<div class="contents" id="bkmrk--9"><div class="contents"><div class="textblock">  
</div></div></div>##### <a class="anchor" id="bkmrk--34"></a>Synchronization - flow

The object can be invalidated at any time by calling the invalidation method of the <span style="color: rgb(230, 126, 35);">[Candera::TextRendering::TextValidator](http://dev.doc.cgistudio.at/APILINK/class_candera_1_1_text_rendering_1_1_text_validator.html "TextValidator is the actual Validator of an 'ITextValidationUser'.")</span>. Every time an invalidated object changes it state to validate, the <span style="color: rgb(230, 126, 35);">[Candera::TextRendering::TextValidator](http://dev.doc.cgistudio.at/APILINK/class_candera_1_1_text_rendering_1_1_text_validator.html "TextValidator is the actual Validator of an 'ITextValidationUser'.")</span> notifies the group of its validation change. If all objects of the group are valid now, all update methods of these objects will be called.

<div drawio-diagram="2258"><img src="https://doc316en.candera.eu/uploads/images/drawio/2023-02/drawing-4-1677047365.png" alt=""/></div>

<div class="contents" id="bkmrk--11"><div class="contents"><div class="textblock">  
</div></div></div>In case of the <span style="color: rgb(230, 126, 35);">[Candera::TextNode2D](http://dev.doc.cgistudio.at/APILINK/class_candera_1_1_text_node2_d.html "TextNode2D is a RenderNode that renders text using the attached BitmapBrush effect.")</span> with an attached layouter, the layout of the scene in which the <span style="color: rgb(230, 126, 35);">[Candera::TextNode2D](http://dev.doc.cgistudio.at/APILINK/class_candera_1_1_text_node2_d.html "TextNode2D is a RenderNode that renders text using the attached BitmapBrush effect.")</span> lies will be invalidated. If there is layout process used at all (disabled Candera layout functionality) nothing will be done in the update method. However, the render method itself can handle this case when it is newly called. The issue here is that it is not explicitly specified who will trigger the render. Both render and layout mechanisms of will check whether the whole group is valid or not. Only in case that the whole group is valid, the text will be updated. If the layout is triggered by another object despite the fact that the group is not valid, the text will not be updated.

<div class="contents" id="bkmrk-candera%3A%3Atextnode2d--2"><div class="contents"><div class="textblock"><dl class="note"><dt></dt><dd><p class="callout info"><span style="color: rgb(230, 126, 35);">[Candera::TextNode2D](http://dev.doc.cgistudio.at/APILINK/class_candera_1_1_text_node2_d.html "TextNode2D is a RenderNode that renders text using the attached BitmapBrush effect.")</span> attaches itself to the <span style="color: rgb(230, 126, 35);">[Candera::TextRendering::TextValidationGroup](http://dev.doc.cgistudio.at/APILINK/class_candera_1_1_text_rendering_1_1_text_validation_group.html)</span> singleton instance per default. To exclude it from the synchronization group it has to be explicitly detached first.</p>

</dd></dl></div></div></div>##### <a class="anchor" id="bkmrk--36"></a>Synchronization - Restrictions

The default synchronization is as lightweight as possible and still provides the feature that all texts in the group have to be valid until the text can be visibly updated. Due to the variety of combinations a text can be used, it is not a universal solution for synchronization. Therefore in some cases it is not as practical as it should be.

A <span style="color: rgb(230, 126, 35);">[Candera::TextNode2D](http://dev.doc.cgistudio.at/APILINK/class_candera_1_1_text_node2_d.html "TextNode2D is a RenderNode that renders text using the attached BitmapBrush effect.")</span> can be synchronous or asynchronous or switch between both cases at runtime. Therefore it is not advisable per default to attach/detach the TextNode2D to the group when the asynchronous flag changes. Pending requests are one of the major issues here.

A synchronous <span style="color: rgb(230, 126, 35);">[Candera::TextNode2D](http://dev.doc.cgistudio.at/APILINK/class_candera_1_1_text_node2_d.html "TextNode2D is a RenderNode that renders text using the attached BitmapBrush effect.")</span> has to be synchronous. This implies when the text has been changed the text has to be visible in the first render cycle afterwards. So it becomes deterministic that the text is truly displayed. Using the synchronization groups on these nodes is opposing this determinism. The node is attached to the group but it is always in the valid state. The node will be ignored completely by the default synchronization.

Another critical restriction is the update rate of a text. This is an issue that happens even without a synchronization but will be intensified by it. In short, every time a text changes, it invalidates the group. When the invalidation rate is higher than the overall text render process of the whole group needs to render, text which should have been shown will never occur. If two texts are invalidating itself in a higher rate, it can also happen that whole group is always in an invalid state. The group itself has a mechanism to count already finished texts and is therefore able to update the text based on the fact that the group is valid or has pending valid texts which are not displayed yet. Based on this information it can recognize a valid group even if one of the texts already changed back to invalid due to setting a new text. However this is not a guarantee that the texts will be updated correctly.

Because of the simplicity of the synchronization it cannot link text updates to each other. For example changing all texts at once to another language is working. There is only one issue with already pending text changes. It is not possible to generally specify which text changes are related to each other and have to be changed at the same time.

Not every use case of a customer can be satisfied by a single way of synchronization. One way produce other side effects than another.

Therefore, own synchronizations can be implemented or used.

##### <a class="anchor" id="bkmrk--37"></a>Text-Synchronization – Custom implementation

The customization of the synchronization has several levels of complexity and several different goals.

<div class="contents" id="bkmrk-changing-the-way-of-"><div class="contents"><div class="textblock"><dl class="note"><dt></dt><dd><p class="callout info">Changing the way of synchronization during runtime should only be done, when the affected text object (e.g. <span style="color: rgb(230, 126, 35);">[Candera::TextNode2D](http://dev.doc.cgistudio.at/APILINK/class_candera_1_1_text_node2_d.html "TextNode2D is a RenderNode that renders text using the attached BitmapBrush effect.")</span>) has no pending text changes – as this can have unexpected side effects.</p>

</dd></dl></div></div></div>##### <a class="anchor" id="bkmrk--38"></a>A new synchronization group

The simplest customization is an additional synchronization group. As default, all TextNode2Ds are attached to the singleton instance of the <span style="color: rgb(230, 126, 35);">[Candera::TextRendering::TextValidationGroup](http://dev.doc.cgistudio.at/APILINK/class_candera_1_1_text_rendering_1_1_text_validation_group.html)</span>. It is possible to create an additional instance of this class in custom code. Now two steps have to be done to correctly bind a <span style="color: rgb(230, 126, 35);">[Candera::TextNode2D](http://dev.doc.cgistudio.at/APILINK/class_candera_1_1_text_node2_d.html "TextNode2D is a RenderNode that renders text using the attached BitmapBrush effect.")</span> to the new group.   
First, detach the <span style="color: rgb(230, 126, 35);">[Candera::TextNode2D](http://dev.doc.cgistudio.at/APILINK/class_candera_1_1_text_node2_d.html "TextNode2D is a RenderNode that renders text using the attached BitmapBrush effect.")</span> from its old group by using the Detach-method of the old <span style="color: rgb(230, 126, 35);">[Candera::TextRendering::TextValidationGroup](http://dev.doc.cgistudio.at/APILINK/class_candera_1_1_text_rendering_1_1_text_validation_group.html)</span>.   
Second, attach the <span style="color: rgb(230, 126, 35);">[Candera::TextNode2D](http://dev.doc.cgistudio.at/APILINK/class_candera_1_1_text_node2_d.html "TextNode2D is a RenderNode that renders text using the attached BitmapBrush effect.")</span> to the new group by using the Attach-method of the new <span style="color: rgb(230, 126, 35);">[Candera::TextRendering::TextValidationGroup](http://dev.doc.cgistudio.at/APILINK/class_candera_1_1_text_rendering_1_1_text_validation_group.html)</span>.

##### <a class="anchor" id="bkmrk--39"></a>Additional trigger objects

A common issue is that setting the underlying scene layout of a <span style="color: rgb(230, 126, 35);">[Candera::TextNode2D](http://dev.doc.cgistudio.at/APILINK/class_candera_1_1_text_node2_d.html "TextNode2D is a RenderNode that renders text using the attached BitmapBrush effect.") </span>to invalid is not enough to trigger the actual render cycle. For example a render wake-up mechanism needs a trigger to wake up and start the render cycle, too.

The <span style="color: rgb(230, 126, 35);">[Candera::TextNode2D](http://dev.doc.cgistudio.at/APILINK/class_candera_1_1_text_node2_d.html "TextNode2D is a RenderNode that renders text using the attached BitmapBrush effect.")</span> itself does not know which additional trigger are needed because this depends on the given application.

An extension of this would be to update nodes within the scene graph as soon as the group is valid. A simple use case is to set a new scene visible only when all texts in the new scene are valid or a control pops up only when its text in it is valid.

To accomplish this the specified object which is responsible for these calls has to implement the interface <span style="color: rgb(230, 126, 35);">[Candera::TextRendering::ITextValidationUser](http://dev.doc.cgistudio.at/APILINK/class_candera_1_1_text_rendering_1_1_i_text_validation_user.html "ITextValidationUser is an interface for a user which will be attached to a TextValidator.")</span>. The object can be attached to the <span style="color: rgb(230, 126, 35);">[Candera::TextRendering::TextValidationGroup](http://dev.doc.cgistudio.at/APILINK/class_candera_1_1_text_rendering_1_1_text_validation_group.html)</span> equal to the described life cycle of the default synchronization. The <span style="color: rgb(230, 126, 35);">[Candera::TextRendering::ITextValidationUser::TriggerValidUpdate()](http://dev.doc.cgistudio.at/APILINK/class_candera_1_1_text_rendering_1_1_i_text_validation_user.html#a2004739a33469f3d5c579900faecd6aa)</span>-method in it will be called as soon as the whole group is valid and the custom code can be executed. Additionally, the object receives an own <span style="color: rgb(230, 126, 35);">[Candera::TextRendering::TextValidator](http://dev.doc.cgistudio.at/APILINK/class_candera_1_1_text_rendering_1_1_text_validator.html "TextValidator is the actual Validator of an 'ITextValidationUser'.")</span> which can influence the time when a group is valid or when the <span style="color: rgb(230, 126, 35);">[Candera::TextRendering::ITextValidationUser::TriggerValidUpdate()](http://dev.doc.cgistudio.at/APILINK/class_candera_1_1_text_rendering_1_1_i_text_validation_user.html#a2004739a33469f3d5c579900faecd6aa)</span> on all objects in the whole group has to be additionally called.

##### <a class="anchor" id="bkmrk--40"></a>Implementation of an own synchronization

The most customized solution is to write an own synchronization mechanism.

There are two important interfaces for an own implementation:

<div class="contents" id="bkmrk-candera%3A%3Atextrenderi"><div class="contents"><div class="textblock">- <span style="color: rgb(230, 126, 35);">[Candera::TextRendering::ITextValidationUser](http://dev.doc.cgistudio.at/APILINK/class_candera_1_1_text_rendering_1_1_i_text_validation_user.html "ITextValidationUser is an interface for a user which will be attached to a TextValidator.")</span> implemented by <span style="color: rgb(230, 126, 35);">[Candera::TextNode2D](http://dev.doc.cgistudio.at/APILINK/class_candera_1_1_text_node2_d.html "TextNode2D is a RenderNode that renders text using the attached BitmapBrush effect.")</span>,
- <span style="color: rgb(230, 126, 35);">[FeatStd::ValidationHelperBase](http://dev.doc.cgistudio.at/APILINK/class_feat_std_1_1_validation_helper_base.html "ValidationHelperBase is a base class to generate a defined interface for validation handling...")</span> to be implemented

</div></div></div><span style="color: rgb(230, 126, 35);">[Candera::TextRendering::ITextValidationUser](http://dev.doc.cgistudio.at/APILINK/class_candera_1_1_text_rendering_1_1_i_text_validation_user.html "ITextValidationUser is an interface for a user which will be attached to a TextValidator.")</span> is the interface which provides the <span style="color: rgb(230, 126, 35);">[Candera::TextNode2D](http://dev.doc.cgistudio.at/APILINK/class_candera_1_1_text_node2_d.html "TextNode2D is a RenderNode that renders text using the attached BitmapBrush effect.")</span> with any validation method. It correctly attaches and detaches such a validation method. And <span style="color: rgb(230, 126, 35);">[Candera::TextRendering::ITextValidationUser::TriggerValidUpdate()](http://dev.doc.cgistudio.at/APILINK/class_candera_1_1_text_rendering_1_1_i_text_validation_user.html#a2004739a33469f3d5c579900faecd6aa)</span> invalidates the scene layout of the <span style="color: rgb(230, 126, 35);">[Candera::TextNode2D](http://dev.doc.cgistudio.at/APILINK/class_candera_1_1_text_node2_d.html "TextNode2D is a RenderNode that renders text using the attached BitmapBrush effect.")</span>. The interface <span style="color: rgb(230, 126, 35);">[FeatStd::ValidationHelperBase](http://dev.doc.cgistudio.at/APILINK/class_feat_std_1_1_validation_helper_base.html "ValidationHelperBase is a base class to generate a defined interface for validation handling...")</span> provides functionality to validate and invalidate the object. It is a custom implementation how it will work. There is only one restriction here. A synchronously used TextNode2D will always ignore the valid state of the custom implementation. It will call the validate and invalidate methods, though. A <span style="color: rgb(230, 126, 35);">[Candera::TextNode2D](http://dev.doc.cgistudio.at/APILINK/class_candera_1_1_text_node2_d.html "TextNode2D is a RenderNode that renders text using the attached BitmapBrush effect.")</span> calls the functions as following:

<div class="contents" id="bkmrk-candera%3A%3Atextnode2d--3"><div class="textblock">- <span style="color: rgb(230, 126, 35);">[Candera::TextNode2D](http://dev.doc.cgistudio.at/APILINK/class_candera_1_1_text_node2_d.html "TextNode2D is a RenderNode that renders text using the attached BitmapBrush effect.")</span> starts measure and place: SetInvalid()
- <span style="color: rgb(230, 126, 35);">[Candera::TextNode2D](http://dev.doc.cgistudio.at/APILINK/class_candera_1_1_text_node2_d.html "TextNode2D is a RenderNode that renders text using the attached BitmapBrush effect.")</span> finishes measure and place: SetValid()
- <span style="color: rgb(230, 126, 35);">[Candera::TextNode2D](http://dev.doc.cgistudio.at/APILINK/class_candera_1_1_text_node2_d.html "TextNode2D is a RenderNode that renders text using the attached BitmapBrush effect.")</span> checks if it can handle the result: IsValid() (only asynchronous nodes)
- <span style="color: rgb(230, 126, 35);">[Candera::TextNode2D](http://dev.doc.cgistudio.at/APILINK/class_candera_1_1_text_node2_d.html "TextNode2D is a RenderNode that renders text using the attached BitmapBrush effect.")</span> has handled the result (ready for display): ConfirmValidHandled()

</div></div>####   
**Configuration possibilities** 

##### <a class="anchor" id="bkmrk--41"></a>General setup and configuration possibilities

This section describes how to configure the asynchronous text rendering.

##### <a class="anchor" id="bkmrk--42"></a>Asynchronous TextNode2D and CanvasText

Enabling the asynchronous text rendering is something that has to be done on each <span style="color: rgb(230, 126, 35);">[Candera::TextNode2D](http://dev.doc.cgistudio.at/APILINK/class_candera_1_1_text_node2_d.html "TextNode2D is a RenderNode that renders text using the attached BitmapBrush effect.")</span> or <span style="color: rgb(230, 126, 35);">[Candera::CanvasText](http://dev.doc.cgistudio.at/APILINK/class_candera_1_1_canvas_text.html "CanvasText represents a text node within a 3D Canvas object.")</span>. This can be done within the SceneComposer:

<div drawio-diagram="2261"><img src="https://doc316en.candera.eu/uploads/images/drawio/2023-02/drawing-4-1677047433.png" alt=""/></div>

<div class="contents" id="bkmrk--13"><div class="contents"><div class="textblock">  
</div></div></div>Or in code itself:

```
void SetAsyncPreRenderEnabled(bool enabled);
bool IsAsyncPreRenderEnabled() const;
```

Example usage:

```
TextNode2D node; 
node.SetAsyncPreRenderEnabled(true);   //Enables async rendering 
node.IsAsyncPreRenderEnabled();        //returns true
node.SetAsyncPreRenderEnabled(false);  //Disables async rendering 
node.IsAsyncPreRenderEnabled();        //returns false
```

The flag in SceneComposer and code can be equally configured in <span style="color: rgb(230, 126, 35);">[Candera::CanvasText](http://dev.doc.cgistudio.at/APILINK/class_candera_1_1_canvas_text.html "CanvasText represents a text node within a 3D Canvas object.")</span>.

##### <a class="anchor" id="bkmrk--44"></a>Asynchronous dispatching methods

CMake provides a flag to choose between the worker thread solution and the single threaded version. When the flag is enabled a worker thread is used. The flag is enabled by default. If threading is not available or thread safety is disabled, the code will fall back to the single threaded version ignoring this flag. The flag is system wide. It counts for all asynchronous TextNode2D. This can also be defined programmatically, whereas there are no thread safety checks.

<div drawio-diagram="2262"><img src="https://doc316en.candera.eu/uploads/images/drawio/2023-02/drawing-4-1677047461.png" alt=""/></div>

<div class="contents" id="bkmrk--15"><div class="contents"><div class="textblock">  
</div></div></div>##### <a class="anchor" id="bkmrk--46"></a>Dispatcher settings

The TextRenderDispatcher contains a settings object which can be retrieved by calling:

```
class <a class="code" href="http://dev.doc.cgistudio.at/APILINK/class_candera_1_1_text_rendering_1_1_text_render_dispatcher_1_1_text_render_settings.html" title="TextRenderSettings are settings which have direct influence on the textRendering process Current sett...">Candera::TextRendering::TextRenderDispatcher::TextRenderSettings</a>{…};

<a class="code" href="http://dev.doc.cgistudio.at/APILINK/class_candera_1_1_text_rendering_1_1_text_render_dispatcher.html#a827ca0d37f90c634b24e4f6c3188d574">Candera::TextRendering:: TextRenderDispatcher::GetTextRenderSettings</a>();
```

To programmatically change the asynchronous dispatching method use the function of settings:

```
#include <Candera/TextEngine/Async/ AsyncTextRenderDispatcher.h>
#include <Candera/TextEngine/Async/ ThreadingTextRenderDispatcher.h>

void SetDefaultTextRenderer(<a class="code" href="http://dev.doc.cgistudio.at/APILINK/class_candera_1_1_text_rendering_1_1_text_renderer.html" title="TextRenderer is the core Candera function for rendering text.">Candera::TextRendering::TextRenderer</a> * val);
```

If the single threaded version is used, the amount of processed text per DispatchNext can be set:

```
void SetAsyncLoopCount(UInt8 const val);
```

####   
**Restrictions**   


This section describes issues which should be kept in mind when using the asynchronous feature.

##### <a class="anchor" id="bkmrk--47"></a>Performance improvements

The main idea behind asynchronous text rendering is not to improve the performance of text rendering but to improve the performance of the render loop itself. Even if a second cycle through the render loop is necessary to display the results. The second cycle is mandatory as the first cycle only adds the text render call into a queue. The first cycle uses the old result to handle the text.

Using a worker thread and having a minimum of dual core processor is mandatory to gain an actual performance improvement as the worker thread can be handled by the second core.

##### <a class="anchor" id="bkmrk--48"></a>High frequency changes

The most mandatory restriction is the update interval of an asynchronous text. Changing the text faster than the text engine can handle will definitely break the determinism of a system. Three different approaches can be outlined for handling fast updated texts. The first approach is to visibly show every text change. It is deterministic to see every text. Even if they are only visible for a single frame and it is not deterministic when the text is shown. The second approach is overriding the old queued text with the new one. The determinism of seeing every text has been lost. However, rendering a text which is already outdated before the render process started is a performance drop which will not occur. The third solution is to render these texts synchronously.

Currently available are the second and the third approach. This decision is based on the possible use cases.

The first use case is an alternating text, e.g. frame rate, clock time. Basically such a text type has three things in common. First, it changes its content all the time in a specified time interval. The logic behind the text is already broken when the update is visible the first time after a single frame and the second time after six frames. Second, the texts are usually short texts. A high frequency alternation of a long text is most probably an issue in the usability. Third, if the frequency is high enough to outrun itself and the text is alternating all the time, the queue will stack up indefinitely. There is no time to show all queued text until new texts arrive. The visual text itself becomes more and more outdated. The length of the text would increase the change of queuing text even more.

Therefore, it is recommended for cyclic alternation to render them synchronously. Short texts will not affect the render loop itself that much. And long texts should be reconsidered and checked against its reasonableness.

The second use case is to have occasionally a fast switch between texts, e.g. a text will be shown, but a user input already triggered the next text update. In this case the text can have any length. The main difference is that the text update does not queue indefinitely and there is most probably not a hard time interval deadline. In this case asynchronous text rendering can be used but rendering both texts can also impact the user experience. In most cases these will be noticeable in long texts. So there will be a visible delay until the outdated text is displayed and another visible delay until the new text is displayed.

Therefore, the asynchronous approach overrides the old text with the new one as soon as possible. If the old text is already rendering, the old text will be displayed. If the old text have not even started rendering, the old text will be replaced. If the old text and the new text both are already rendered and the render loop had no time to show the old text, the new text will be shown. In this case it would be most likely that the old text has only a visibility time of a single frame.

##### <a class="anchor" id="bkmrk--49"></a>Destruction of a TextNode2D

Destroying a TextNode2D while the attached text is being rendered can lead to undefined behavior.

##### <a class="anchor" id="bkmrk--50"></a>Layout process calls

Using an asynchronous approach means that there a functionality which starts the asynchronous process and another one which handles the result of the process. Based on the synchronization the check for a valid result can be solved by polling until a result is available.

If the synchronization is done properly for a given use case, no polling will be needed.

However, the asynchronous process requires layout information to start. And the layout process requires the result to place the text node and depending nodes. Therefore, it is required to run the layout process twice now. Two calls are the minimum requirement. If the text has not been finished until the second call, more calls are necessary as this is equal to polling for results.

##### <a class="anchor" id="bkmrk--51"></a>Cache type restrictions

Some cache types are GPU context bound. Therefore, the upload of rasterized glyphs has to happen in the correct context. Using a worker thread cannot guarantee the upload at the correct location. This might require an additional rasterization and upload per glyph within the render thread. Expected cache types to have these issues are SurfaceCache and GlyphAtlas. <span style="color: rgb(230, 126, 35);">[Candera::CanvasText](http://dev.doc.cgistudio.at/APILINK/class_candera_1_1_canvas_text.html "CanvasText represents a text node within a 3D Canvas object.")</span> uses primarily GlyphAtlas. A shared context and the non-threading method is preferred in this case.

# Text rendering: Caching/rendering systems

#### <a class="anchor" id="bkmrk-"></a>Description

The rasterization of a glyph is a very costly operation. Paired with shaping and positioning algorithms, it becomes even more expensive. One strategy to counter this is a caching and rendering mechanism. A cache is a storage type which maps a key to a specific representation of a value. The transformation of the rasterization into the value of a cache entry might differ from cache type to cache type. Based on the difference an optimal render strategy has to be internally selected. This is the reason why the text renderer and the caching system are strongly related.

<span style="color: rgb(230, 126, 35);">[Candera](http://dev.doc.cgistudio.at/APILINK/namespace_candera.html "[DataBinding_RefTypeSample]")</span> supports different caching and rendering systems with different backgrounds and goals.

#### <a class="anchor" id="bkmrk--1"></a>No Caching

The easiest form is to cache nothing. This strategy has very little performance but requires the least memory. Its strategy is to retrieve a rasterized glyph, blit it to the display and free all the memory content. This is a strategy which is only advised to use on very low end devices. Otherwise it is not recommended.

#### <a class="anchor" id="bkmrk--2"></a>Bitmap Cache

Bitmap caching is a strategy to store all the glyphs of a single text within a bitmap. When the text or its properties changes, the bitmap has to be generated. This bitmap will be uploaded and stays uploaded. Every time the visual area of the text becomes invalidated but the text has not been changed, it will rerender the bitmap but not generate it newly. The bitmap is generated with a software blit and therefore generates CPU load.

#### <a class="anchor" id="bkmrk--3"></a>Glyph Atlas

The glyph atlas is an uploaded texture which contains all cached glyphs. If a glyph is not available there, the texture will be updated by adding the rasterized glyph. A text change requires only an update of a vertex buffer which references the glyphs within the atlas. Therefore, glyphs do not have to be uploaded anymore as soon as they are in the cache. The glyph atlas has a learning curve to fill up the glyph atlas. This solution is a GPU load solution.

#### <a class="anchor" id="bkmrk--4"></a>Glyph Cache

The glyph cache stores the rasterized glyphs. Which then will be uploaded and rendered in every render call. This is typically a performance bottleneck but useful for very specific use cases. It is not recommended to use glyph cache in common use cases.

#### <a class="anchor" id="bkmrk--5"></a>Surface Cache

The surface cache uses the same glyph storage mechanism as glyph cache but renders it similar to the bitmap cache. However, surface cache does this on GPU side whilst bitmap cache does it on CPU side. A change within a text leads to a draw call for every single glyph. If the new text requires a larger area to display the text, a new FBO will be created. FBO creation is an expensive operation. This cache is made for specific hardware devics. It has more drawbacks than advantages in common use cases.

#### <a class="anchor" id="bkmrk--6"></a>Cache Usages

This section describes where the cache types are available and what are recommended usages.

TextNode2D:

<div class="contents" id="bkmrk-bitmap-glyph-atlas-s"><div class="contents"><div class="textblock">- Bitmap
- Glyph atlas
- Surface cache (Freetype only)
- Glyph/No cache (Freetype only)
- Glyph cache (Freetype only)

</div></div></div>TextBrush:

<div class="contents" id="bkmrk-bitmap-glyph-atlas-n"><div class="contents"><div class="textblock">- Bitmap
- Glyph atlas
- No cache (Freetype only)
- Glyph cache (Freetype only)
- Surface cache (Freetype only)

</div></div></div>CanvasText:

<div class="contents" id="bkmrk-glyph-atlas-1"><div class="contents"><div class="textblock">- Glyph atlas

</div></div></div>The recommended usages are bitmap cache as CPU solution and glyph atlas as GPU solution. The usage depends on the given project. All other cache types are written for specific use cases (e.g. specific devices).

# Tutorial for Globalization Support

# Introduction

#### <a class="anchor" id="bkmrk--3"></a>Multi-Language Support

Preparing an application to perform in multiple locales requires the CGI Studio license "Globalization" and in terms of <span style="color: rgb(230, 126, 35);">[Candera](http://dev.doc.cgistudio.at/APILINK/namespace_candera.html "[DataBinding_RefTypeSample]")</span> build settings to enable the CMake feature switch "CANDERA\_GLOBALIZATION\_ENABLED".

Preparing an application to perform in a specific locale requires the following workflow:

<div class="contents" id="bkmrk-application-developm"><div class="contents"><div class="textblock">- **Application Development**
    - Create Master Language Pack Source (either directly in SceneComposer or by importing from an external tool)
    - Will be automatically added as binary to the asset library on asset export from SceneComposer
- **Production**
    - Remove Master Language Pack Source from asset library
    - Create Language Pack Source for each language
    - Append Language Pack for each language to the asset library

</div></div></div>#### <a class="anchor" id="bkmrk--4"></a>Language Pack Source Format

In general, a Language Pack Source file

<div class="contents" id="bkmrk-has-the-file-extensi"><div class="contents"><div class="textblock">- has the file extension '*.lps*'
- is a proprietary file format: Zipped XML files in a predefined structure
- contains texts associated to a specific culture

</div></div></div>#### <a class="anchor" id="bkmrk--5"></a>Master Language Pack Source

The Master Language Pack Source file is a design-time artifact not to be kept at production time. It defines all available translatable texts in an artificial Master Language (locale 00).

Extracting the content of a Master Language Pack Source .lps file shows following content:

<div class="contents" id="bkmrk-cultures.xml-%3Clps%3Acu"><div class="contents"><div class="textblock">- Cultures.xml ```
      <lps:Culture <a class="code" href="http://dev.doc.cgistudio.at/APILINK/group___behaviors_mixed_reality.html#gga70813433b87d1347efaf56d755a186c1aa161dba378f926eef1e116dd38c4b6c6">Name</a>="Master Language" Locale="00" <a class="code" href="http://dev.doc.cgistudio.at/APILINK/group___candera_globalization_culture.html#ga90fa968dd49d865078ad4b0f1860caf2">TextDirection</a>="LeftToRight" />
    ```
- LanguagePack\_00.xml: Lists all unique Text-IDs with related default text representation, a translation hint and a maximum text length for the Locale="00"
- Partitions.xml
- Preamble.xml

</div></div></div>#### <a class="anchor" id="bkmrk--6"></a>Cultures

SceneComposer cultures are defined in the "Cultures" panel accesible either via *File-&gt;Solution Options* menu:

<div drawio-diagram="2194"><img src="https://doc316en.candera.eu/uploads/images/drawio/2023-02/drawing-4-1677034464.png" alt=""/></div>

<div class="contents" id="bkmrk--0"><div class="contents"><div class="textblock">  
</div></div></div>either via toolbar:

<div drawio-diagram="2196"><img src="https://doc316en.candera.eu/uploads/images/drawio/2023-02/drawing-4-1677034485.png" alt=""/></div>

<div class="contents" id="bkmrk--2"><div class="contents"><div class="textblock">  
</div></div></div>The default culture for a solution is defined in the 'General Configuration' panel as explained <span style="color: rgb(230, 126, 35);">[here](https://doc316en.candera.eu/link/49#bkmrk-culture-setting)</span>.

#### <a class="anchor" id="bkmrk--9"></a>Multi Language Pack Source

A Multi Language Pack Source provides translations for all translatable texts as defined in the Master Language Pack Source. All supported languages can be combined into a single .lps file, or be separated in single .lps files per language.

The culture definitions in language pack source files should syntactically match the culture definitions in SceneComposer to make the default culture setting of a solution work at application runtime. Example matching to the SceneComposer culture definitions above:

```
  <lps:Culture Name="German" Locale="de_DE" <a class="code" href="http://dev.doc.cgistudio.at/APILINK/group___candera_globalization_culture.html#ga90fa968dd49d865078ad4b0f1860caf2">TextDirection</a>="LeftToRight" />
  <lps:Culture Name="French" Locale="fr_FR" <a class="code" href="http://dev.doc.cgistudio.at/APILINK/group___candera_globalization_culture.html#ga90fa968dd49d865078ad4b0f1860caf2">TextDirection</a>="LeftToRight" />  
```

In case the default language is not set or not present in the asset, the first culture available in the asset will be used as fallback.

#### <a class="anchor" id="bkmrk--10"></a>Appending Language Packs to Assets

Language Pack Source files are compiled into a binary format and appended to asset libraries

<div class="contents" id="bkmrk-by-means-of-scenecom"><div class="contents"><div class="textblock">- by means of <span style="color: rgb(230, 126, 35);">[SceneComposer Translator Plugin](https://doc316en.candera.eu/books/scene-design/chapter/scenecomposer-translator-plugin "SceneComposer Translator Plugin")</span> after asset export (Note: Enable "Plugin Notification" to make this work!)
- by means of <span style="color: rgb(230, 126, 35);">[Managing Language Packs using AssetTool](https://doc316en.candera.eu/books/candera/page/managing-language-packs-using-assettool "Managing Language Packs using AssetTool")</span> to remove the master language pack from and to append multi language packs to an asset.

</div></div></div>#### <a class="anchor" id="bkmrk--11"></a>More Details

More details on the globalization workflow are provided here:

<div class="contents" id="bkmrk-scenecomposer-transl"><div class="textblock">- <span style="color: rgb(230, 126, 35);">[SceneComposer Translator Plugin](https://doc316en.candera.eu/books/candera/page/scenecomposer-translator-plugin)</span>
- <span style="color: rgb(230, 126, 35);">[Managing Language Packs using AssetTool](https://doc316en.candera.eu/books/candera/page/managing-language-packs-using-assettool)</span>
- <span style="color: rgb(230, 126, 35);">[Using Globalization in Applications](https://doc316en.candera.eu/books/candera/page/using-globalization-in-applications)</span>

</div></div>

# SceneComposer Translator Plugin

#### <a class="anchor" id="bkmrk--17"></a>Overview

*CGI Studio SceneComposer Translator Plugin* provides the following features:

<div class="contents" id="bkmrk-create%2C-edit-and-del"><div class="contents"><div class="textblock">- Create, edit and delete translatable texts in the *Language Table* dialog
- Set and manage translatable texts in the *Text property editor* of text nodes or controls and behaviors that expose Text properties.
- Alternatively import translatable texts from an existing CGI Language Pack Source or Excel file.
- Export translatable texts to a CGI Language Pack Source or Excel file.
- Append a compiled CGI Language Pack file to an asset after asset export.

</div></div></div>#### **Globalization License**

If the Translator Plugin files are present but no translation features are accessible in Scene Composer, please ensure that the *Globalization* license is acquired. Refer to the menu *Help &gt; Licenses*.

####   
**Create and Manage Cultures and Translatable Texts**

##### <a class="anchor" id="bkmrk--19"></a>Accessing Translator Plugin in SceneComposer

The translator plugin is fully integrated into SceneComposer. The SceneComposer toolbar provides an icon for opening the *Solution Options: Cultures* dialog as well as a drop-down menu for selecting an already created culture.

<div drawio-diagram="2208"><img src="https://doc316en.candera.eu/uploads/images/drawio/2023-02/drawing-4-1677043273.png" alt=""/></div>

<div class="contents" id="bkmrk--0"><div class="contents"><div class="textblock">  
</div></div></div>There are five additional menu entries under *Language*:

<div class="contents" id="bkmrk-culture-solution-opt"><div class="contents"><div class="contents"><div class="textblock">- Culture Solution Option: Open the Culture Solution Option Dialog, where the user can add, edit or remove Culture as the multiple languages setting. By selecting a Culture in SceneComposer, you can switch between the displayed language of the solution. The translated texts displayed when selecting a Culture are configured in the Language Table.
- Export Languages: Opens the *Select Cultures* dialog where you can select the languages you want to export and - after browsing to an export file path - you can export your selected languages in the format you prefer to the location you selected by pressing *Export*.
- Import Languages: Opens the Import Languages Dialog where Languages can be imported into a solution either as Language Pack Source or as Excel file, by going to *Language &gt; Import Languages* and selecting the desired flavor.
- Language Usage: Opens the Language Usage Dialog, where all Text Properties of the solution are listed. For those Text Properties that have a translatable text assigned, the *Text Id* and the *Text* value for the current culture are displayed. It is also possible to assign or unassign a translatable text for a Text Property.
- Language Table: Opens the Language Table Dialog, where the user can add, edit or remove translatable texts. The Id of each translatable text is unique. The Text value for a certain culture can be accessed by selecting the respective culture in the Current Culture drop-down.

</div></div></div></div><div drawio-diagram="2209"><img src="https://doc316en.candera.eu/uploads/images/drawio/2023-02/drawing-4-1677043286.png" alt=""/></div>

<div class="contents" id="bkmrk--2"><div class="contents"><div class="textblock">  
</div></div></div>##### <a class="anchor" id="bkmrk--22"></a>Creating Cultures

In order to have texts in different languages, cultures have to be created. This is done by clicking on the button *Culture Solution Options* in the toolbar.

<div drawio-diagram="2210"><img src="https://doc316en.candera.eu/uploads/images/drawio/2023-02/drawing-4-1677043314.png" alt=""/></div>

<div class="contents" id="bkmrk--4"><div class="contents"><div class="textblock">  
</div></div></div>With the icons on top, cultures can be added (using the green plus sign) and deleted (with the red "x"):

<div class="contents" id="bkmrk-to-add-a-new-culture"><div class="contents"><div class="textblock">- to add a new culture: use the button with the green plus sign
- to delete a culture: use the button with the red "x" For each entry the culture name can be selected from the drop-down and the text direction can be set. Once there are translated texts available for a certain culture, the number of available text for this culture is displayed in the Translated Texts column. In the above example there are two translatable texts for culture *de* and two translatable texts for *en*.

</div></div></div>##### <a class="anchor" id="bkmrk--24"></a>Translate Texts

Texts can be translated in the Language Table Dialog, which is opened via the menu *Language &gt; Language Table...*.

<div drawio-diagram="2211"><img src="https://doc316en.candera.eu/uploads/images/drawio/2023-02/drawing-4-1677043341.png" alt=""/></div>

<div class="contents" id="bkmrk--6"><div class="contents"><div class="textblock">  
</div></div></div>The drop-down on the top right allows the Current Culture selection. The texts of the Master culture or another culture in the solution can be accessed by changing the Current Culture. If the Master culture is selected, the Add and Delete buttons are enabled, otherwise they are disabled.

A search field on top helps to easily find specific texts once the number of texts increases. With the checkbox *Unused only* it is possible to identify texts that have not yet been assigned to any Text Property of the solution.

Clicking on the globe icon on the top right opens the *Solution Options: Cultures* dialog.

##### <a class="anchor" id="bkmrk--26"></a>Translatable Text

A translatable text is a text which supports translation into other languages and which provides information that facilitates its translation to other languages. The translatable text has the following properties:

<div class="contents" id="bkmrk-id%3A-unique-identifie"><div class="contents"><div class="textblock"><table border="0" cellpadding="2"><tbody><tr valign="top"><td>**Id:**</td><td>Unique identifier of the translatable text: - *Computed TextId*: An alphanumerical string, which will be exported into a computed hash value as TextId.
- *Direct Id*: When the format HEX\_VALUE is used, the hex value is directly exported into the asset without computing a hash value.

</td></tr><tr><td>**Text:**</td><td>Text in the master language</td></tr><tr><td>**Translation hint:**</td><td>Hint for the process of translation</td></tr></tbody></table>

</div></div></div>##### <a class="anchor" id="bkmrk--27"></a>Editing Text Properties

For editing the texts' properties, Scene Composer provides the Text Properties Dialog, which can be opened via the menu *Language &gt; Language Usage...*.

<div drawio-diagram="2212"><img src="https://doc316en.candera.eu/uploads/images/drawio/2023-02/drawing-4-1677043361.png" alt=""/></div>

<div class="contents" id="bkmrk--8"><div class="contents"><div class="textblock">  
</div></div></div>This dialog lists all Text Properties of the solution. For those Text Properties that have a translatable text assigned, the *Text Id* and the *Text* value for the current culture are displayed. The current culture can be changed in the drop-down menu on the right. If necessary, the *Solution Options: Cultures* dialog can be opened with the globe icon on the left of the drop-down menu.

When pressing *Save*, the changes made to the Text Properties will be applied to the solution.

##### <a class="anchor" id="bkmrk--29"></a>Assigning Texts to TextNodes

Assigning texts to Text Properties can either be done in the *Language Usage Dialog* or in the *Text Properties Panel*.

##### <a class="anchor" id="bkmrk--30"></a>Assigning Texts using the Language Usage Dialog

In the Language Usage Dialog a Text property can be selected. When pressing the *Assign* button on the bottom of the dialog, the *Language Table Selection* dialog is opened where a text can be chosen from the list.

##### <a class="anchor" id="bkmrk--31"></a>Assigning Texts using the Text Properties Panel

The *Language Table Selection* dialog can also be opened when editing a Text property by clicking on the icon *Select template for item*.

<div drawio-diagram="2213"><img src="https://doc316en.candera.eu/uploads/images/drawio/2023-02/drawing-4-1677043388.png" alt=""/></div>

<div class="contents" id="bkmrk--10"><div class="contents"><div class="textblock">  
</div></div></div>##### <a class="anchor" id="bkmrk--33"></a>Switching Cultures

If cultures and texts have been created and the texts are assigned to Text properties, the culture can be switched using the drop-down in the toolbar. As soon as another culture is chosen, the solution will be displayed in the other language.

<div class="contents" id="bkmrk-if-there-is-no-text-"><div class="textblock"><dl class="note"><dt></dt><dd><p class="callout info">If there is no text configured for a certain language, the *Text Id* will be displayed instead. Using this id, the missing text can easily be identified and found in the Language Table using the search function.  

</p>

<div drawio-diagram="2215"><img src="https://doc316en.candera.eu/uploads/images/drawio/2023-02/drawing-4-1677043434.png" alt=""/></div>

</dd></dl></div></div>####   
**Import and Export of Language Packs**

##### <a class="anchor" id="bkmrk--35"></a>Import of Language Pack Sources

Languages can be imported into a solution either as CGI Language Pack Source or as Excel file, by going to *Language &gt; Import Languages* and selecting the desired flavor.

<div drawio-diagram="2216"><img src="https://doc316en.candera.eu/uploads/images/drawio/2023-02/drawing-4-1677043472.png" alt=""/></div>

<div class="contents" id="bkmrk--12"><div class="contents"><div class="textblock">  
</div></div></div>The final step of the language import process is to show the differences between the texts in the import file and the texts in solution. There are three possible actions:

<div class="contents" id="bkmrk-add-%3A-indicates-that"><div class="contents"><div class="textblock">- **Add** : Indicates that the language does not already exist in the solution and will be imported from the file.
- **Merge**: Means that the language already exists in the solution and only the content differs. New texts will be added and already existing texts will be updated.
- **Drop** : When unchecking a language entry in the Translatable Text Differences dialogue, the Action changes automatically from Add/Merge to Drop. If the initial action was *Add*, this means that the language will not be added to the solution. If the initial action was *Merge*, this means its texts will not be updated and new texts from the import files will not be added to this language in the solution.

</div></div></div><div class="contents" id="bkmrk-the-drop-action-does"><div class="contents"><div class="contents"><div class="textblock"><dl class="note"><dd><p class="callout info">The *Drop* action does not mean that the language will be removed from the solution. The removal of a language can be done from *File &gt; Solution Options* in the *Cultures* tab.</p>

</dd><dd></dd></dl></div></div></div></div><div drawio-diagram="2217"><img src="https://doc316en.candera.eu/uploads/images/drawio/2023-02/drawing-4-1677043519.png" alt=""/></div>

##### <a class="anchor" id="bkmrk--38"></a>Export of Language Pack Sources

The translatable texts of the current solution can be exported by going to *Language &gt; Export Languages...*, which opens the *Select Cultures* dialog.

<div drawio-diagram="2218"><img src="https://doc316en.candera.eu/uploads/images/drawio/2023-02/drawing-4-1677043537.png" alt=""/></div>

<div class="contents" id="bkmrk--15"><div class="contents"><div class="textblock">  
</div></div></div>The *Select Cultures* dialog allows the choice of which cultures to be exported or not. Languages can be exported in Excel or CGI Language Pack Source (.LPS). Click the *Browse* button to select the *Export file path*, choose the format in the *Save as type* drop down and click *Save*. Click the *Export* button to finalize the languages export.

Please note that only the texts that have a correspondent in the master language texts, considering their Id, are included in the export, all the others being ignored. In this case warnings will be added to the Output tab in Scene Composer.

<div class="contents" id="bkmrk-exporting-languages-"><div class="contents"><div class="textblock">- Exporting languages as Language Pack Source file creates a .LPS file that contains the master language and all the other languages available in the solution. The exported .LPS file can be compiled and appended using the CGI Studio Language Appender.
- Exporting languages as Excel document creates an Excel file that contains one sheet for the master language (named Master) and a sheet for each of the other languages in the solution having an identical name with the respective culture (e.g. de-DE, en-US, fr-FR). Each sheet has a header on the first row, with 3 columns: *Id*, *Text*, and *Translation Hint*. The following rows contain the translatable texts.

</div></div></div><div drawio-diagram="2220"><img src="https://doc316en.candera.eu/uploads/images/drawio/2023-02/drawing-4-1677043571.png" alt=""/></div>

# Managing Language Packs using AssetTool

#### <a class="anchor" id="bkmrk-"></a>Overview

*AssetTool* application can be used to manage language packs for a given asset. *AssetTool* application is located in */cgi\_studio\_bin/AssetTool/* folder and provides the following functionality:

<div class="contents" id="bkmrk-appending-a-new-lang"><div class="contents"><div class="textblock">- Appending a new language pack to an asset
- Removing an existing language pack from an asset

</div></div></div>A usage example of *AssetTool* application for managing language packs can be seen in */cgi\_studio\_player/content/Tutorials/05\_Globalization/AppendMultiLanguagePack.bat* script.

#### <a class="anchor" id="bkmrk--0"></a>Appending a New Language Pack to an Asset

For the example solution, the following command can be called for appending language pack *MultiLanguagePack\_Source.lps* to the existing asset *MasterLanguagePack\_Asset\_Host.bin*:

```
AssetTool.exe -append -a MasterLanguagePack_Asset_Host.bin MultiLanguagePack_Asset_Host.bin MultiLanguagePack_Source.lps
```

This will result in a new generated asset called *MultiLanguagePack\_Asset\_Host.bin*, which will contain the translation for all languages available in the language pack.

#### <a class="anchor" id="bkmrk--1"></a>Removing an Existing Language Pack from an Asset

For the example solution, the following command can be called for removing master language, with code "00", from the existing asset *MasterLanguagePack\_Asset\_Host.bin*:

```
AssetTool.exe -append -r MasterLanguagePack_Asset_Host.bin temp.bin 00
```

This will result in a new generated asset called *temp.bin*, which will no longer contain the translation for the master language pack.

For more details on *AssetTool* application, see *Tool Chain/AssetTool* chapter.

# Using Globalization in Applications

#### <a class="anchor" id="bkmrk--2"></a>Requirements for Multi Language Support

<div class="contents" id="bkmrk-cmake-setting-cander"><div class="contents"><div class="textblock">- CMake setting CANDERA\_GLOBALIZATION\_ENABLED is enabled
- Sources of CanderaGlobalization available

</div></div></div>#### <a class="anchor" id="bkmrk--3"></a>Example: Set Culture in the Player

The Player provides, if Globalization is enabled in <span style="color: rgb(230, 126, 35);">[Candera](http://dev.doc.cgistudio.at/APILINK/namespace_candera.html "[DataBinding_RefTypeSample]")</span>, a checkbox to select all cultures, which are available as language packs in the loaded asset.

<div class="contents" id="bkmrk-open-the-asset-conta"><div class="contents"><div class="contents"><div class="textblock">1. Open the asset containing language packs (MultiLanguagePack\_Asset\_Host.bin) and load the scene in the Player.
2. Select the desired language in the drop down list next to the globe icon in the top left corner

</div></div></div></div><div drawio-diagram="2207"><img src="https://doc316en.candera.eu/uploads/images/drawio/2023-02/drawing-4-1677042956.png" alt=""/></div>

<div class="contents" id="bkmrk--0"><div class="contents"><div class="textblock">  
</div></div></div>#### <a class="anchor" id="bkmrk--5"></a>Candera Globalization API

The following table explains the usage of Globalization interfaces and how they are used in application code.

<div class="contents" id="bkmrk-candera%3A%3Aglobalizati"><div class="textblock"><table class="doxtable" style="width: 100%;"><tbody><tr valign="top"><td style="width: 20.6487%;"><span style="color: rgb(230, 126, 35);">[Candera::Globalization::Culture](http://dev.doc.cgistudio.at/APILINK/class_candera_1_1_globalization_1_1_culture.html)</span></td><td style="width: 79.3513%;">Represents a language, region, and text direction - Locale: ASCII encoded character array, e.g. de\_AT. Use <span style="color: rgb(230, 126, 35);">[Candera::Globalization::Culture::GetLocale()](http://dev.doc.cgistudio.at/APILINK/class_candera_1_1_globalization_1_1_culture.html#aea515e01a7afafe67db6282f7e6dfac4)</span>
- Display name: Platform-encoded character array (usually UTF-8), e.g. "German (Austria)". Use <span style="color: rgb(230, 126, 35);">[Candera::Globalization::Culture::GetDisplayName()](http://dev.doc.cgistudio.at/APILINK/class_candera_1_1_globalization_1_1_culture.html#a5381ce8790ea6daca1d6e4e9face34dd)</span>
- Text direction: Enum describing text direction for culture. Use <span style="color: rgb(230, 126, 35);">[Candera::Globalization::Culture::GetTextDirection()](http://dev.doc.cgistudio.at/APILINK/class_candera_1_1_globalization_1_1_culture.html#aa7e32e5200cfec29a063ae55e815d370)</span>

</td></tr><tr valign="top"><td style="width: 20.6487%;"><span style="color: rgb(230, 126, 35);">[Candera::Globalization::CultureManager](http://dev.doc.cgistudio.at/APILINK/class_candera_1_1_globalization_1_1_culture_manager.html)</span></td><td style="width: 79.3513%;">Access to cultures and changing of current culture  
Singleton: <span style="color: rgb(230, 126, 35);">[Candera::Globalization::CultureManager::GetInstance()](http://dev.doc.cgistudio.at/APILINK/class_candera_1_1_globalization_1_1_culture_manager.html#a304b9b82d1ce5e85ce36de1683c87643)</span>

Retrieve available cultures:

```
    return CultureManager::GetInstance().GetCultureCount();
```

Get current culture:

```
    Culture::SharedPointer culture = CultureManager::GetInstance().GetCurrentCulture();
```

Get culture name:

```
    Culture::SharedPointer culture = CultureManager::GetInstance().GetCulture(index);
    return culture->GetDisplayName();
```

Set new culture:

```
    Culture::SharedPointer culture = CultureManager::GetInstance().GetCulture(index);
    FEATSTD_LOG_INFO(" -> Select culture '%s'", culture->GetDisplayName());
    rc = CultureManager::GetInstance().SetCurrentCulture(culture->GetLocale());
```

- <span style="color: rgb(230, 126, 35);">[Candera::Globalization::CultureManager::GetCulture(const Char\* locale) const ](http://dev.doc.cgistudio.at/APILINK/class_candera_1_1_globalization_1_1_culture_manager.html#a11b6e5c19d1d119df057c640cbb6db3a)</span>- Retrieval of specific culture by locale

</td></tr><tr valign="top"><td style="width: 20.6487%;"><span style="color: rgb(230, 126, 35);">[Candera::Globalization::CultureChangeListener](http://dev.doc.cgistudio.at/APILINK/class_candera_1_1_globalization_1_1_culture_change_listener.html)</span></td><td style="width: 79.3513%;">Base class for listeners to culture change events

Notification of CultureChangeEvents

- Listener has to derive from <span style="color: rgb(230, 126, 35);">[Candera::Globalization::CultureChangeListener](http://dev.doc.cgistudio.at/APILINK/class_candera_1_1_globalization_1_1_culture_change_listener.html)</span>
    - override <span style="color: rgb(230, 126, 35);">[Candera::Globalization::CultureChangeListener::OnCultureChanged(const Culture&amp; culture)](http://dev.doc.cgistudio.at/APILINK/class_candera_1_1_globalization_1_1_culture_change_listener.html#ad34d13c0afad927f5448437087da15f5)</span> {...} for handler
- Registration as listener 
    - <span style="color: rgb(230, 126, 35);">[Candera::Globalization::CultureManager::AddCultureChangeListener(CultureChangeListener\* listener)](http://dev.doc.cgistudio.at/APILINK/class_candera_1_1_globalization_1_1_culture_manager.html#ac59956a9a17161a614521bd3e83ec23b)</span>
- Deregistration of listener 
    - Candera::Globalization::CultureManager::RemoveCultureChangeListener(CultureChangeListener\* listener)

</td></tr><tr valign="top"><td style="width: 20.6487%;"><span style="color: rgb(230, 126, 35);">[FeatStd::String](http://dev.doc.cgistudio.at/APILINK/class_feat_std_1_1_string.html)</span> and <span style="color: rgb(230, 126, 35);">[FeatStd::TextId](http://dev.doc.cgistudio.at/APILINK/class_feat_std_1_1_text_id.html)</span></td><td style="width: 79.3513%;">Point of access to a text in currently active language

Non-translatable String

- Will not change with language
- Use constructor <span style="color: rgb(230, 126, 35);">[FeatStd::String::String(const TChar\*)](http://dev.doc.cgistudio.at/APILINK/class_feat_std_1_1_string.html#a2b5ab81b2f9de953b42677a508146831)</span>;

Translatable String

- Changes with language
- Text-Id from string value 
    - Use <span style="color: rgb(230, 126, 35);">[FeatStd::TextId::TextId(const Char\* id)](http://dev.doc.cgistudio.at/APILINK/class_feat_std_1_1_text_id.html#a433e7beda4e766070d0d356044f4a3f2)</span> to get the computed hash id from a given character id
    - Use <span style="color: rgb(230, 126, 35);">[FeatStd::String::String(const TextId&amp; id)](http://dev.doc.cgistudio.at/APILINK/class_feat_std_1_1_string.html#a5533f601ec5f8a72649d61fa9bde65ea)</span> to access the text for a given Text-Id ```
        <a class="code" href="http://dev.doc.cgistudio.at/APILINK/class_feat_std_1_1_string.html">FeatStd::String</a> text(<a class="code" href="http://dev.doc.cgistudio.at/APILINK/class_feat_std_1_1_text_id.html">FeatStd::TextId</a>("textField_1_3"));
        ```
- Direct Text-Id: "#\\&lt;HEX\_HASH\_VALUE\\&gt;" 
    - Use FeatStd::String::String(UInt32 id) to access the text for a given &lt;HEX\_HASH\_VALUE&gt; ```
        <a class="code" href="http://dev.doc.cgistudio.at/APILINK/class_feat_std_1_1_string.html">FeatStd::String</a> text(0x13); // for accessing text referenced by a hex-value-id of 13
        ```

</td></tr></tbody></table>

</div></div>

# Custom Localizer Support

#### <a class="anchor" id="bkmrk-"></a>Requirements for Custom Localizer

In order to use a custom Localizer, a CMake feature switch CANDERA\_CUSTOM\_LOCALIZER\_ENABLED has to be enabled. This flag will disable the usage of DefaultLocalizer which loads LanguagePacks from an asset.

In addition, please ensure that the following are fulfilled:

<div class="contents" id="bkmrk-candera-globalizatio"><div class="contents"><div class="textblock">- <span style="color: rgb(230,126,35);">[Candera](http://dev.doc.cgistudio.at/APILINK/namespace_candera.html "[DataBinding_RefTypeSample]")</span> Globalization sources available
- CMake setting CANDERA\_GLOBALIZATION\_ENABLED is enabled

</div></div></div>#### <a class="anchor" id="bkmrk--0"></a>Defining a Custom Localizer

A custom Localizer class (eg: CustomLocalizer) should derive from abstract class <span style="color: rgb(230,126,35);">[Candera::Globalization::Localizer](http://dev.doc.cgistudio.at/APILINK/class_candera_1_1_globalization_1_1_localizer.html)</span> and provide implementations for the pure virtual functions:

<div class="contents" id="bkmrk-candera%3A%3Aglobalizati"><div class="contents"><div class="textblock">- <span style="color: rgb(230,126,35);">[Candera::Globalization::Localizer::SetCurrentCulture](http://dev.doc.cgistudio.at/APILINK/class_candera_1_1_globalization_1_1_localizer.html#a9bc595d40e6576279113dc52ee5f440e "Will be called by the CultureManager whenever the current culture is changed. This triggers the Defau...")</span>
- <span style="color: rgb(230,126,35);">[Candera::Globalization::Localizer::GetTextBaseString](http://dev.doc.cgistudio.at/APILINK/class_candera_1_1_globalization_1_1_localizer.html#af13307c5801287b4900a974014f46e11 "Retrieves the localized base string for the given string ID.")</span>
- <span style="color: rgb(230,126,35);">[Candera::Globalization::Localizer::GetTextType](http://dev.doc.cgistudio.at/APILINK/class_candera_1_1_globalization_1_1_localizer.html#ac96d52f14265ae9f1b6d1e624bdf130d "Retrieves the TextType for the given string ID.")</span>

</div></div></div>For consistency, use <span style="color: rgb(230,126,35);">[FEATSTD\_TYPEDEF\_SHARED\_POINTER(CLASS)](http://dev.doc.cgistudio.at/APILINK/group___f_e_a_t_s_t_d___m_e_m_o_r_y_m_a_n_a_g_e_m_e_n_t.html#gaf2bcc08fa848e582cf0434c73bc771c3)</span> and <span style="color: rgb(230,126,35);">[FEATSTD\_SHARED\_POINTER\_CREATE\_DECLARATION()](http://dev.doc.cgistudio.at/APILINK/group___f_e_a_t_s_t_d___m_e_m_o_r_y_m_a_n_a_g_e_m_e_n_t.html#gab388090f9bc82928ee1c55ae18e2c1e7)</span> macros to make the class manageable by SharedPointer.

Please note that FEATSTD\_SHARED\_POINTER\_DECLARATION() macro should not be used in this case, because some base class methods will be overwritten and SharedPointer memory management will not work correctly.

Implement corresponding <span style="color: rgb(230,126,35);">[Create()](http://dev.doc.cgistudio.at/APILINK/group___c_o_u_r_i_e_r___v_i_s_u_a_l_i_z_a_t_i_o_n.html#ggaf0e93dc4242f607c3c8d13dafd036af9aaabfa5309af24986d3111a092449f857)</span> method like in the following snippet:

```
/******************************************************************************
  Create
 ******************************************************************************/
CustomLocalizer::SharedPointer <a class="code" href="http://dev.doc.cgistudio.at/APILINK/group___c_o_u_r_i_e_r___v_i_s_u_a_l_i_z_a_t_i_o_n.html#ggaf0e93dc4242f607c3c8d13dafd036af9aaabfa5309af24986d3111a092449f857">CustomLocalizer::Create</a>()
{
    return CustomLocalizer::SharedPointer(<a class="code" href="http://dev.doc.cgistudio.at/APILINK/group___f_e_a_t_s_t_d___m_e_m_o_r_y_m_a_n_a_g_e_m_e_n_t.html#gaf232237bb1f8faa2509fe9aa71a81d53">FEATSTD_NEW</a>(CustomLocalizer));
}
```

#### <a class="anchor" id="bkmrk--1"></a>Example: Using a Custom Localizer in Applications

##### <a class="anchor" id="bkmrk--2"></a>Define cultures

Create new cultures and add them to the list of available cultures of <span style="color: rgb(230,126,35);">[Candera::Globalization::GlobalizationCultureManager](http://dev.doc.cgistudio.at/APILINK/class_candera_1_1_globalization_1_1_globalization_culture_manager.html)</span>:

```
    m_cultureManager.RemoveAllCultures();
    for (UInt16 i = 0; i < cultureListSize; ++i) {
        Candera::Globalization::Culture::SharedPointer culture = <a class="code" href="http://dev.doc.cgistudio.at/APILINK/group___c_o_u_r_i_e_r___v_i_s_u_a_l_i_z_a_t_i_o_n.html#ggaf0e93dc4242f607c3c8d13dafd036af9aaabfa5309af24986d3111a092449f857">Culture::Create</a>();
        culture->SetLocale(cultureList[i].locale);
        culture->SetTextDirection(cultureList[i].textDirection);
        culture->SetDisplayName(cultureList[i].locale);
        m_cultureManager.AddCulture(culture);
        m_cultureVct.Add(culture);
    }
```

Set default culture to be used in case no current culture is set. This step is mandatory since the default culture will be used for initialization.

```
        m_cultureManager.SetDefaultCulture(m_cultureVct[0]);
```

##### <a class="anchor" id="bkmrk--3"></a>Use a custom localizer

Declare a custom localizer:

```
    CustomLocalizer::SharedPointer m_localizer1;
    CustomLocalizer::SharedPointer m_localizer2;
```

Create the custom localizer:

```
    m_localizer1(<a class="code" href="http://dev.doc.cgistudio.at/APILINK/group___c_o_u_r_i_e_r___v_i_s_u_a_l_i_z_a_t_i_o_n.html#ggaf0e93dc4242f607c3c8d13dafd036af9aaabfa5309af24986d3111a092449f857">CustomLocalizer::Create</a>()),
    m_localizer2(<a class="code" href="http://dev.doc.cgistudio.at/APILINK/group___c_o_u_r_i_e_r___v_i_s_u_a_l_i_z_a_t_i_o_n.html#ggaf0e93dc4242f607c3c8d13dafd036af9aaabfa5309af24986d3111a092449f857">CustomLocalizer::Create</a>())
```

After a custom localizer has been created, the new localizer needs to be registered to the CultureManager:

```
    GlobalizationCultureManager::GetInstance().SetLocalizer(m_localizer1);
```

Initialize culture by setting current culture. If current culture is not set, default culture will be used.

```
        m_cultureManager.SetCurrentCulture(m_cultureVct[0]);
```

##### <a class="anchor" id="bkmrk--4"></a>Switching localizer during run-time

Since only one localizer is allowed to be registered, in order to set a new localizer, the previous one has to be unregistered by calling SetLocalizer(0), like in the following snippet.

```
            GlobalizationCultureManager::GetInstance().SetLocalizer(CustomLocalizer::SharedPointer(0));
            GlobalizationCultureManager::GetInstance().SetLocalizer((toggleLocalizer1) ? m_localizer1 : m_localizer2);
```

Corresponding localizer cultures have to be added to the CultureManager and default culture has to be defined if no current culture is available.

# Tutorial for Animation Manipulation

# Configuring and Loading an Animation

#### <a class="anchor" id="bkmrk--1"></a>Candera Animation Concept

The following key concepts are required to run animations in a [Candera](http://dev.doc.cgistudio.at/APILINK/namespace_candera.html "[DataBinding_RefTypeSample]") application:

<div class="contents" id="bkmrk-candera%3A%3Aanimation%3A%3A"><div class="contents"><div class="textblock">- [Candera::Animation::AnimationPlayer](http://dev.doc.cgistudio.at/APILINK/class_candera_1_1_animation_1_1_animation_player.html "AnimationPlayer is an AnimationPlayerBase that animates AnimationBlendedProperties.") provides the control interfaces (use [Candera::Animation::AnimationGroupPlayer](http://dev.doc.cgistudio.at/APILINK/class_candera_1_1_animation_1_1_animation_group_player.html "AnimationGroupPlayer is an AnimationPlayerBase that controls a hierarchy of AnimationPlayerBase compo...") for animation groups)
- [Candera::Animation::AnimationTimeDispatcher](http://dev.doc.cgistudio.at/APILINK/class_candera_1_1_animation_1_1_animation_time_dispatcher.html "Dispatches world time (as received from an application) to a collection of AnmationPlayers.") dispatches the current world time to animations; animations can also query the current world time from the dispatcher
- [Candera::Animation::AnimationKeyframeSequence](http://dev.doc.cgistudio.at/APILINK/class_candera_1_1_animation_1_1_animation_keyframe_sequence.html "A KeyframeSequence that provides interpolation between keyframes.") configures proper animation values for each time point of an animation.
- [Candera::Animation::InterpolationStrategy](http://dev.doc.cgistudio.at/APILINK/class_candera_1_1_animation_1_1_interpolation_strategy.html "InterpolationStrategy provides an interface for calculating the interpolated value of a KeyframeSeque...") specifies for a key frame sequence, how values between several key frames shall be calculated.
- [Candera::Animation::AnimationPropertySetter](http://dev.doc.cgistudio.at/APILINK/class_candera_1_1_animation_1_1_animation_property_setter.html "Base class for all animation property setters.") applies animation values to animated properties

</div></div></div>In SceneComposer, animations can be configured in the AnimationDesign view:

<div class="contents" id="bkmrk-create-a-new-animati"><div class="contents"><div class="textblock">- Create a new animation - <span style="color: rgb(230, 126, 35);">[New Animation](https://doc316en.candera.eu/books/animation-design/page/new-animation)</span> in SceneComposer User Manual
- Select a node property to animate - <span style="color: rgb(230, 126, 35);">[Add Animated Property](https://doc316en.candera.eu/books/animation-design/page/add-animated-property)</span> in SceneComposer User Manual
- Specify the key frame sequence including property values and interpolation strategy - <span style="color: rgb(230, 126, 35);">[Animation Values](https://doc316en.candera.eu/books/animation-design/page/animation-values-keyframes)</span> in SceneComposer User Manual

</div></div></div>It is also possible to import an animation to SceneComposer from a content generation tool via FBX format - <span style="color: rgb(230, 126, 35);">[How to Import Resources](https://doc316en.candera.eu/books/import-of-resources/page/how-to-import-resources)</span> in SceneComposer User Manual

#### <a class="anchor" id="bkmrk--2"></a>

#### <a class="anchor" id="bkmrk--3"></a>Configuring Animation Player

In the Player or in an application, the animation can be retrieved from the generated asset by specifying its [Candera](http://dev.doc.cgistudio.at/APILINK/namespace_candera.html "[DataBinding_RefTypeSample]") name (e.g. *MyModule#Animations#Animation*).

```
    AssetProvider* assetProvider = GetAssetProvider();
    m_animPlayer = assetProvider->GetAnimation(m_animName);
```

<div class="contents" id="bkmrk-in-scenecomposer-the"><div class="contents"><div class="contents"><div class="textblock"><div class="fragment">  
</div><dl class="note"><dt></dt><dd><p class="callout info">In SceneComposer the animation can be retrieved from AssetProvider only if it was previously loaded in the scene. A better way to access it directly is to define it as a widget property.</p>

</dd></dl><div class="fragment">  
</div></div></div></div></div>```
                // Define Animation property
                CdaProperty(Animation,Candera::Animation::AnimationPlayer::SharedPointer, GetAnimation, SetAnimation)
                    CdaDescription("Animation")
                <a class="code" href="http://dev.doc.cgistudio.at/APILINK/group___meta_info.html#ga119bef57449bd05d8b3c40d7d514e375">CdaPropertyEnd</a>()
                // End Define Animation property
```

Next, as already explained in <span style="color: rgb(230, 126, 35);">[Initializing AssetLoader and Animations](https://doc316en.candera.eu/link/418#bkmrk-initializing-assetlo-0)</span>, an instance of [Candera::Animation::AnimationTimeDispatcher](http://dev.doc.cgistudio.at/APILINK/class_candera_1_1_animation_1_1_animation_time_dispatcher.html "Dispatches world time (as received from an application) to a collection of AnmationPlayers.") is needed to provide current world time to animations.

For this, the new animation player must be added to the [Candera::Animation::AnimationTimeDispatcher](http://dev.doc.cgistudio.at/APILINK/class_candera_1_1_animation_1_1_animation_time_dispatcher.html "Dispatches world time (as received from an application) to a collection of AnmationPlayers.") instance maintained by the application.

```
        // Add player to time dispatcher

        Animation::AnimationTimeDispatcher::SharedPointer timeDispatcher = GetAnimationTimeDispatcher();
        if (timeDispatcher == 0) {
            return;
        }
        static_cast<void>(timeDispatcher->AddPlayer(m_animPlayer));

        // End Add player to time dispatcher
```

Now the animation player is ready to be used.

# Controlling Animations

#### <a class="anchor" id="bkmrk-"></a>Controlling Animation Flow

This section describes the control flow interfaces of [Candera::Animation::AnimationPlayer](http://dev.doc.cgistudio.at/APILINK/class_candera_1_1_animation_1_1_animation_player.html "AnimationPlayer is an AnimationPlayerBase that animates AnimationBlendedProperties.").

<div class="contents" id="bkmrk-candera%3A%3Aanimation%3A%3A"><div class="contents"><div class="textblock">- [Candera::Animation::AnimationPlayer::Start](http://dev.doc.cgistudio.at/APILINK/group___animation_base.html#gaf6c1aa4792f932b8816153d67ed1d9cc) starts the animation
- [Candera::Animation::AnimationPlayer::Stop](http://dev.doc.cgistudio.at/APILINK/group___animation_base.html#ga259f65e1d7740d9adbfb09a7812c5423) stops the animation
- [Candera::Animation::AnimationPlayer::Finish](http://dev.doc.cgistudio.at/APILINK/group___animation_base.html#ga1d6f1d3611d64e2d39193d6a0e08e133) finishes the animation within the specified time
- [Candera::Animation::AnimationPlayer::Pause](http://dev.doc.cgistudio.at/APILINK/group___animation_base.html#ga12a9f0d140cc0c2c5e3153d17aa0cf28) pauses the animation
- [Candera::Animation::AnimationPlayer::Resume](http://dev.doc.cgistudio.at/APILINK/group___animation_base.html#gaa458d6b67c60cc33fa87b5f4112653f7) resumes the animation
- [Candera::Animation::AnimationPlayer::SetRepeatMode](http://dev.doc.cgistudio.at/APILINK/group___animation_base.html#gadd1ac5b4292294ae2df6089aca10fbc5) sets the repeat mode, for possible modes see [Candera::Animation::AnimationPlayer::RepeatMode](http://dev.doc.cgistudio.at/APILINK/group___animation_base.html#ga074a17359b4b4a429aac5f4f9478c535)
- [Candera::Animation::AnimationPlayer::SetDirection](http://dev.doc.cgistudio.at/APILINK/group___animation_base.html#gaffbd9a4e36d4d55ddd30f7177ff94b10) sets the direction, for possible directions see [Candera::Animation::AnimationPlayer::PlayDirection](http://dev.doc.cgistudio.at/APILINK/group___animation_base.html#ga29bc1135b9602fedae7f45669c928211)

</div></div></div>#### <a class="anchor" id="bkmrk--0"></a>Animation Speed, Repeats, Time Modulation

This section specifies more interfaces to set animation player properties relevant for timing and execution flow.

<div class="contents" id="bkmrk-candera%3A%3Aanimation%3A%3A-0"><div class="textblock">- [Candera::Animation::AnimationPlayer::SetSpeedFactor](http://dev.doc.cgistudio.at/APILINK/group___animation_base.html#gac9cb929cc2c199830abb28fe48074012) increases / decreases animation speed
- [Candera::Animation::AnimationPlayer::SetRepeatCount](http://dev.doc.cgistudio.at/APILINK/group___animation_base.html#ga5caca783e5ade40bfefb67b74fbdb6da) modifies repeat count
- [Candera::Animation::AnimationPlayer::SetSequenceDurationMs](http://dev.doc.cgistudio.at/APILINK/group___animation_base.html#ga0f0e0e34252b34219601bb3c8aca64cb) modifies animation duration in milliseconds
- [Candera::Animation::AnimationPlayer::SetSequenceStartTimeMs](http://dev.doc.cgistudio.at/APILINK/group___animation_base.html#ga71179ea9ba32db4895bd4d87667a465a) adds a start delay in milliseconds

</div></div>

# Using Animation Callback Functions

#### <a class="anchor" id="bkmrk-"></a>Animation Event Listener

If an application shall be notified about events of the triggered animation, a listener needs to be implemented. The class [Candera::Animation::AnimationPlayerListener](http://dev.doc.cgistudio.at/APILINK/class_candera_1_1_animation_1_1_animation_player_listener.html "An AnimationPlayerListener defines several hooks for the AnimationPlayer. In order to register an Ani...") allows to listen to a versatile set of animation events like:

<div class="contents" id="bkmrk-onstartantimation%2C-o"><div class="contents"><div class="textblock">- OnStartAntimation,
- OnResumeAnimation,
- OnPauseAnimation,
- OnDirectionChange,
- OnStopAnimation,
- OnFinishAnimation,
- OnPastEnd.

</div></div></div>#### <a class="anchor" id="bkmrk--0"></a>Implement AnimationPlayerListener Functions

In order to register an AnimationPlayerListener to an AnimationPlayer simply derive from [Candera::Animation::AnimationPlayerListener](http://dev.doc.cgistudio.at/APILINK/class_candera_1_1_animation_1_1_animation_player_listener.html "An AnimationPlayerListener defines several hooks for the AnimationPlayer. In order to register an Ani...") and override pure virtual functions with custom code.

In the example below the 3D application derives from AnimationPlayerListener and overrides the listener's functions.

```
class AnimationPlayerWidget : public CgiWidget3D, public Candera::Animation::AnimationPlayerListener

```

```
        virtual void OnPastEnd(<a class="code" href="http://dev.doc.cgistudio.at/APILINK/class_candera_1_1_animation_1_1_animation_player_base.html" title="AnimationPlayerBase is a base class for all AnimationPlayers that use an AnimationTimeDispatcher to c...">Candera::Animation::AnimationPlayerBase</a>* animationPlayer, Candera::Int32 completedIterationsCount);
        virtual void OnStartAnimation(<a class="code" href="http://dev.doc.cgistudio.at/APILINK/class_candera_1_1_animation_1_1_animation_player_base.html" title="AnimationPlayerBase is a base class for all AnimationPlayers that use an AnimationTimeDispatcher to c...">Candera::Animation::AnimationPlayerBase</a>* animationPlayer);
        virtual void OnStopAnimation(<a class="code" href="http://dev.doc.cgistudio.at/APILINK/class_candera_1_1_animation_1_1_animation_player_base.html" title="AnimationPlayerBase is a base class for all AnimationPlayers that use an AnimationTimeDispatcher to c...">Candera::Animation::AnimationPlayerBase</a>* animationPlayer);
        virtual void OnFinishAnimation(<a class="code" href="http://dev.doc.cgistudio.at/APILINK/class_candera_1_1_animation_1_1_animation_player_base.html" title="AnimationPlayerBase is a base class for all AnimationPlayers that use an AnimationTimeDispatcher to c...">Candera::Animation::AnimationPlayerBase</a>* animationPlayer);
        virtual void OnResumeAnimation(<a class="code" href="http://dev.doc.cgistudio.at/APILINK/class_candera_1_1_animation_1_1_animation_player_base.html" title="AnimationPlayerBase is a base class for all AnimationPlayers that use an AnimationTimeDispatcher to c...">Candera::Animation::AnimationPlayerBase</a>* animationPlayer);
        virtual void OnPauseAnimation(<a class="code" href="http://dev.doc.cgistudio.at/APILINK/class_candera_1_1_animation_1_1_animation_player_base.html" title="AnimationPlayerBase is a base class for all AnimationPlayers that use an AnimationTimeDispatcher to c...">Candera::Animation::AnimationPlayerBase</a>* animationPlayer);

```

Use [Candera::Animation::AnimationPlayerBase::AddAnimationPlayerListener](http://dev.doc.cgistudio.at/APILINK/group___animation_base.html#ga6ff976e80e9312aa89fe5a9d6a16f033) and [Candera::Animation::AnimationPlayerBase::RemoveAnimationPlayerListener](http://dev.doc.cgistudio.at/APILINK/group___animation_base.html#gacfcf00e1b85c190893a61dbda34761ec) for registering or removing a listener.

```
        static_cast<void>(m_animPlayer->AddAnimationPlayerListener(this));

```

```
        static_cast<void>(m_animPlayer->RemoveAnimationPlayerListener(this));

```

Now the application is notified about all animation listener events it has implemented. For example when implementing the [Candera::Animation::AnimationPlayerListener::OnStartAnimation](http://dev.doc.cgistudio.at/APILINK/group___animation_base.html#ga229c09eb5a45b0ab000d4153543b3d5a), the application is notified about all started animations.

```
void AnimationPlayerWidget::OnStartAnimation(Animation::AnimationPlayerBase* /* animationPlayer */)
{
    // do something when an animation has started
}
```

# Manipulating Animation Keyframe Sequences

This method allows to modify specific keyframes of a previously initialized keyframe sequence.

#### <a class="anchor" id="bkmrk-"></a>Define Keyframe Values

Size of array must be equal with the number of values that are already assigned to each keyframe (numberOfComponents).

```
    Float keyFrameManipulationValues[3] =
    {
        1.0, 1.0, 11.0
    };
```

#### <a class="anchor" id="bkmrk--0"></a>Set Keyframe Values

Values will be attached to one keyframe.

```
    m_keyframeSequence->SetKeyframeValues(1, keyFrameManipulationValues[0]);
```

<div class="contents" id="bkmrk-see-also%3A-candera%3A%3Aa"><div class="textblock"><div class="fragment">  
</div><dl class="see"><dt>**See also:**</dt><dd>[Candera::Animation::AnimationKeyframeSequence::SetKeyframeValues](http://dev.doc.cgistudio.at/APILINK/class_candera_1_1_animation_1_1_keyframe_sequence.html#a3ec0e1bb8dd3aca71a782e0d5b54a6cc)</dd></dl></div></div>

# Tutorial for Graphic Device Interface

# Cameras and Render Targets

#### <a class="anchor" id="bkmrk--12"></a>Description

Content specified in a [Candera](http://dev.doc.cgistudio.at/APILINK/namespace_candera.html "[DataBinding_RefTypeSample]") scene graph is rendered by configuring at least one camera on it. The render result of the camera is projected on a so called render target.

This chapter gives an overview about cameras and render targets in [Candera](http://dev.doc.cgistudio.at/APILINK/namespace_candera.html "[DataBinding_RefTypeSample]").

Go to <span style="color: rgb(230, 126, 35);">[EGL Context Handling](https://doc316en.candera.eu/books/candera/page/egl-context-handling)</span> to skip the introduction and proceed with the first example for this topic.

#### **Camera Orientation** 

<div class="contents" id="bkmrk-modifying-the-%22rotat"><div class="contents"><div class="contents"><div class="textblock">- modifying the "rotation" part of Transformable ([Candera::Transformable::SetRotation](http://dev.doc.cgistudio.at/APILINK/class_candera_1_1_transformable.html#af76f9a446587115fa5cc19b0b37a64f3)),
- setting the two orientation vectors: 
    - the local "LookAt" vector which can be set by the functions [Candera::Camera::SetLookAtVector](http://dev.doc.cgistudio.at/APILINK/class_candera_1_1_camera.html#ae193bdbaf8fc93dbe67b064cae1ab626), [Candera::Camera::LookAtWorldPoint](http://dev.doc.cgistudio.at/APILINK/class_candera_1_1_camera.html#a28bb55827b0002f98a4a2d6b571fee83), [Candera::Camera::RotateAroundWorldAxis](http://dev.doc.cgistudio.at/APILINK/class_candera_1_1_camera.html#a8cd9092d1b05feadfb261cb742380e41)
    - the local "Up" vector, set by the function [Candera::Camera::SetUpVector](http://dev.doc.cgistudio.at/APILINK/class_candera_1_1_camera.html#a2b5d4c468bff0a696e4f857b25774290)

</div></div></div></div><div drawio-diagram="2357"><img src="https://doc316en.candera.eu/uploads/images/drawio/2023-02/drawing-4-1677207143.png" alt=""/></div>

<div class="contents" id="bkmrk--0"><div class="contents"><div class="textblock">  
</div></div></div><div class="contents" id="bkmrk-setting-a-%22lookat-no"><div class="contents"><div class="textblock">- setting a "LookAt-Node." If such a node is set the camera will always look at that node. This behavior overrides other rotation transformations set by the methods mentioned above. The node can be set by the function [Candera::Camera::SetLookAtNode](http://dev.doc.cgistudio.at/APILINK/class_candera_1_1_camera.html#a53b1e4854b4c8b15369b82facb560c07).

</div></div></div>The viewing orientation of the [Candera::Camera2D](http://dev.doc.cgistudio.at/APILINK/class_candera_1_1_camera2_d.html "A camera defines the view to the scene. At least one Camera2D has to be added to a 2D scene graph and...") can be controlled only by modifying the local rotation using the [Candera::Transformable2D::SetRotation](http://dev.doc.cgistudio.at/APILINK/class_candera_1_1_transformable2_d.html#a626aad8263416e87532dd2ffc6c3017f) function.

**See also:**

<div class="contents" id="bkmrk-camera-gizmos-in-sce"><div class="textblock">- <span style="color: rgb(230, 126, 35);">[Camera Gizmos](https://doc316en.candera.eu/link/133#bkmrk-camera-gizmos%C2%A0)</span> in SceneComposer User Manual

</div></div>#### **Camera Projections** 

[Candera::Camera::SetProjection](http://dev.doc.cgistudio.at/APILINK/class_candera_1_1_camera.html#a615b3fcf6ebb7f38c1bfe928a02c596e) is analogous to choosing a lens for the camera.

<div class="contents" id="bkmrk-candera%3A%3Aperspective"><div class="contents"><div class="textblock">- [Candera::PerspectiveProjection](http://dev.doc.cgistudio.at/APILINK/class_candera_1_1_perspective_projection.html "Perspective projection."): This is the most commonly used projection. It provides proper visual effects depending on the distance between 3D objects and the camera projecting them. Specify the field of view (FoV) in degrees and the aspect ratio to adjust the camera lens properly.

</div></div></div><div drawio-diagram="2359"><img src="https://doc316en.candera.eu/uploads/images/drawio/2023-02/drawing-4-1677207320.png" alt=""/></div>

<div class="contents" id="bkmrk-candera%3A%3Aorthographi"><div class="textblock">- [Candera::OrthographicProjection](http://dev.doc.cgistudio.at/APILINK/class_candera_1_1_orthographic_projection.html "The class OrthographicProjection represents a form of parallel projection where the view direction is..."): This tutorial chapter has a use case where an OrthographicProjection is needed instead of a PerspectiveProjection. This projection type provides an orthogonal view on the projection plane.  
    <div drawio-diagram="2360"><img src="https://doc316en.candera.eu/uploads/images/drawio/2023-02/drawing-4-1677207400.png" alt=""/></div>

- [Candera::GenericProjection](http://dev.doc.cgistudio.at/APILINK/class_candera_1_1_generic_projection.html "Projection using an externally supplied matrix.") is an option to specify an arbitrary projection matrix.

</div></div>#### **Camera Viewport** 

Use [Candera::Camera::SetViewport](http://dev.doc.cgistudio.at/APILINK/class_candera_1_1_camera.html#af4497d3203602ee4a2d017c0d13038c7) to specify a rectangular region on the render target for projecting the camera output. The position and size of the viewport should be given as normalized screen coordinates \[0..1\]. If the viewport aspect ratio differs from the aspect ratio of the Camera's projection matrix, the final render result will appear stretched or compressed. The default value for viewport to cover the complete render target area is: left 0, right 0, width 1, height 1.

The example below shows how to set the viewport in case of two cameras connected to the same display render target:

<div drawio-diagram="2361"><img src="https://doc316en.candera.eu/uploads/images/drawio/2023-02/drawing-4-1677207440.png" alt=""/></div>

<div class="contents" id="bkmrk--3"><div class="contents"><div class="textblock">  
</div></div></div>```
    perspectiveProjection->SetAspectRatio(1.3333f)); // (1280/2)/480
    ...
    m_camera1 = <a class="code" href="http://dev.doc.cgistudio.at/APILINK/group___c_o_u_r_i_e_r___v_i_s_u_a_l_i_z_a_t_i_o_n.html#ggaf0e93dc4242f607c3c8d13dafd036af9aaabfa5309af24986d3111a092449f857">Camera::Create</a>();
    m_camera1->SetViewport(<a class="code" href="http://dev.doc.cgistudio.at/APILINK/class_candera_1_1_rectangle.html" title="Represents a rectangle.">Candera::Rectangle</a>(0.0f, 0.0f, 0.5f, 1.0f));
    m_camera1->SetRenderTarget(m_gdu->ToRenderTarget3D());
    m_camera1->SetProjection(perspectiveProjection);
    m_camera1->SetClearMode(m_clearMode1);
    m_camera1->SetClearModeEnabled(true);
    m_camera1->SetSwapEnabled(true);

    m_camera2 = <a class="code" href="http://dev.doc.cgistudio.at/APILINK/group___c_o_u_r_i_e_r___v_i_s_u_a_l_i_z_a_t_i_o_n.html#ggaf0e93dc4242f607c3c8d13dafd036af9aaabfa5309af24986d3111a092449f857">Camera::Create</a>();
    m_camera2->SetViewport(<a class="code" href="http://dev.doc.cgistudio.at/APILINK/class_candera_1_1_rectangle.html" title="Represents a rectangle.">Candera::Rectangle</a>(0.5f, 0.0f, 0.5f, 1.0f));
    m_camera2->SetRenderTarget(m_gdu->ToRenderTarget3D());
    m_camera2->SetProjection(perspectiveProjection);
    m_camera2->SetClearMode(m_clearMode2);
    m_camera2->SetClearModeEnabled(true);
    m_camera2->SetSwapEnabled(false)
```

[Candera::Camera2D::SetViewport](http://dev.doc.cgistudio.at/APILINK/class_candera_1_1_camera2_d.html#ac65c9989bfbcbec524f4d3fb7eed0813 "Assigns a viewport to the camera, where the viewport is specified as a Rectangle in pixels...") works similarly but in 2D context. The default value for a viewport of a 2D camera are:

<div class="contents" id="bkmrk-left%3A-0-right%3A-0-wid"><div class="contents"><div class="textblock">- left: 0
- right: 0
- width: -1
- height: -1

</div></div></div><div class="contents" id="bkmrk-the-viewport-positio"><div class="contents"><div class="textblock"><dl class="note"><dd><p class="callout info">The viewport position and size of a [Candera::Camera2D](http://dev.doc.cgistudio.at/APILINK/class_candera_1_1_camera2_d.html "A camera defines the view to the scene. At least one Camera2D has to be added to a 2D scene graph and...") are given in pixels.</p>

</dd></dl></div></div></div>Below is presented an example similar with the one above but adapted for 2D.

<div drawio-diagram="2362"><img src="https://doc316en.candera.eu/uploads/images/drawio/2023-02/drawing-4-1677207477.png" alt=""/></div>

<div class="contents" id="bkmrk--6"><div class="contents"><div class="textblock">  
</div></div></div>```
    m_camera2D_1 = <a class="code" href="http://dev.doc.cgistudio.at/APILINK/group___c_o_u_r_i_e_r___v_i_s_u_a_l_i_z_a_t_i_o_n.html#ggaf0e93dc4242f607c3c8d13dafd036af9aaabfa5309af24986d3111a092449f857">Camera2D::Create</a>();
    m_camera2D_1->SetViewport(<a class="code" href="http://dev.doc.cgistudio.at/APILINK/class_candera_1_1_rectangle.html" title="Represents a rectangle.">Candera::Rectangle</a>(0.0f, 0.0f, 640.0f, 480.0f));
    m_camera2D_1->SetRenderTarget(m_gdu->ToRenderTarget2D());
    m_camera2D_1->SetClearColor(<a class="code" href="http://dev.doc.cgistudio.at/APILINK/group___behaviors_control.html#ggae7abc816df647d0ecbc280480fefb788a6d1d4da086e381cb2c5a5ce6a2513ebd">Color</a>(0.8f, 0.9f, 0.7f, 0.1f));
    m_camera2D_1->SetClearColorEnabled((true);
    m_camera2D_1->SetSwapEnabled(true);

    m_camera2D_2 = <a class="code" href="http://dev.doc.cgistudio.at/APILINK/group___c_o_u_r_i_e_r___v_i_s_u_a_l_i_z_a_t_i_o_n.html#ggaf0e93dc4242f607c3c8d13dafd036af9aaabfa5309af24986d3111a092449f857">Camera2D::Create</a>();
    m_camera2D_2->SetViewport(<a class="code" href="http://dev.doc.cgistudio.at/APILINK/class_candera_1_1_rectangle.html" title="Represents a rectangle.">Candera::Rectangle</a>(640.0f, 0.0f, 640.0f, 480.0f));
    m_camera2D_2->SetRenderTarget(m_gdu->ToRenderTarget2D());
    m_camera2D_2->SetClearColor(<a class="code" href="http://dev.doc.cgistudio.at/APILINK/group___behaviors_control.html#ggae7abc816df647d0ecbc280480fefb788a6d1d4da086e381cb2c5a5ce6a2513ebd">Color</a>(0.9f, 0.8f, 0.7f, 0.1f));
    m_camera2D_2->SetClearColorEnabled((true);
    m_camera2D_2->SetSwapEnabled(false);
```

#### **Render Targets** 

A render target is a buffer where the video card draws pixels for a scene that is being rendered. Consequently, once a camera is configured, it must be linked to a render target to specify the target for the camera output.

##### <a class="anchor" id="bkmrk--19"></a>Display and Offscreen Render Targets

There are basically two different types of render targets (Candera::GraphicDeviceUnit) available in [Candera](http://dev.doc.cgistudio.at/APILINK/namespace_candera.html "[DataBinding_RefTypeSample]"), which can render only 2D content, only 3D content or mixed 2D/3D content:

<div class="contents" id="bkmrk-display%2Fonscreen-ren"><div class="contents"><div class="textblock">- **Display/Onscreen Render Targets**: A frame buffer is used as render target and directly linked to a Display. 
    - DisplayTarget3D
    - DisplayTarget2D
    - Mixed2D3DDisplayTarget
- **Offscreen Render Targets**: A frame buffer is used as render target and can be used as image source in the same or another scene. 
    - OffscreenTarget3D
    - OffscreenTarget2D
    - OffscreenTarget2Dto3D
    - OffscreenTarget3Dto2D
    - Mixed2D3DOffscreenTarget

</div></div></div>For **iMX6** device there is one more type of render target: [Candera](http://dev.doc.cgistudio.at/APILINK/namespace_candera.html "[DataBinding_RefTypeSample]"):SoftwareLayer. More details about this can be found in <span style="color: rgb(230, 126, 35);">[Software Layers](#bkmrk-software-layers%C2%A0)</span> chapter.

##### <a class="anchor" id="bkmrk--20"></a>Device Capabilities

For an overview about what kind of render targets are supported on which device please refer to: <span style="color: rgb(230, 126, 35);">[Device Specific Documentation](https://doc316en.candera.eu/shelves/7-devices)</span>

Following is an overview about what kind of render targets are supported on which device:

<div class="contents" id="bkmrk-device-number-of-dis"><div class="contents"><div class="textblock"><table border="1" cellpadding="5" cellspacing="0"><tbody><tr bgcolor="#d4d4d4"><th>Device</th><th>Number of Displays Supported</th><th>Types of Layers Supported</th><th>Unit Types</th></tr></tbody></table>

</div></div></div>**See also:**

<div class="contents" id="bkmrk-link-camera-to-rende"><div class="textblock">- <span style="color: rgb(230, 126, 35);">[Link Camera to Render Target](https://doc316en.candera.eu/books/display-configuration/page/link-a-camera-to-a-render-target "Link a Camera to a Render Target")</span> in SceneComposer User Manual

</div></div>#### **Render Target Lifetime** 

<div class="contents" id="bkmrk-create%3A-a-graphic-de"><div class="contents"><div class="textblock">- **Create:** A graphic device unit (GDU) which hosts a render target and/or an image source can be created with function DevicePackageInterface::CreateGraphicDeviceUnit.
- **Upload:** Subsequently, in order to utilize GDU an upload to video memory is required, which is processed by calling function GraphicDeviceUnit::Upload on GDU object.
- **Destroy:** In order to destroy video and system memory resources associated to GDU call functions GraphicDeviceUnit::Unload and DevicePackageInterface::DestroyGraphicDeviceUnit in exactly that order.

</div></div></div>In general, follow the sequence below to upload and unload GDUs:

<div class="contents" id="bkmrk-construction%3A-1.%29-up"><div class="textblock">- Construction: 
    - 1.) Upload all displays
    - 2.) Upload all onscreen framebuffers (WindowSurface)
    - 3.) Upload all offscreen framebuffers (FramebufferBufferObject)

- Destruction: 
    - 1.) Unload all offscreen framebuffers (FramebufferBufferObject)
    - 2.) Unload all onscreen framebuffers (WindowSurface)
    - 3.) Unload all displays

</div></div>#### **Render Buffer Swapping and Clearing** 

##### <a class="anchor" id="bkmrk--21"></a>Render Buffer Swapping

If the draw target operates on multiple buffers after each rendering cycle the presentation buffer is exchanged with the current background buffer, on which was written during the cycle.

For this, three interfaces are available:

<div class="contents" id="bkmrk-candera%3A%3Arendertarge"><div class="contents"><div class="textblock">- Candera::RenderTarget::SetAutoSwapEnabled(bool enabled): if *true*, render target buffers are swapped automatically, when a camera within the render target has been rendered. Default: *false*
- [Candera::Camera::SetSwapEnabled(bool enable)](http://dev.doc.cgistudio.at/APILINK/class_candera_1_1_camera.html#a4d8422ed9703ddb9e0803eae61fe0bc6): if *true*, buffers are swapped automatically after rendering the according camera. Default: *false*
- Candera::RenderTarget::SwapBuffers(): Trigger buffer swapping 'by hand'

</div></div></div>It is very important to control buffer swapping in the application correctly:

<div class="contents" id="bkmrk-if-swapping-is-never"><div class="contents"><div class="textblock">- If swapping is never done, the display will stay black
- If buffers are swapped too often, the display will flicker.

</div></div></div>The application doesn't need to swap its render targets in case:

<div class="contents" id="bkmrk-the-render-target-is"><div class="contents"><div class="textblock">- the render target is set to swap automatically. For this, set the render target property "SetAutoSwapEnabled" to *true*.
- the proper camera is set to swap automatically. For this, set the camera property "SwapEnabled" to *true*.

</div></div></div><div class="contents" id="bkmrk-if-you-use-more-than"><div class="contents"><div class="textblock"><dl class="note"><dd><p class="callout info">If you use more than one camera on a render target, take care to enable swapping only for the last camera (highest sequence number).</p>

</dd></dl></div></div></div>##### <a class="anchor" id="bkmrk--22"></a>Render Buffer Clearing

The render buffer can be cleared by one of the cameras attached to the render target or by the render target itself by the means of a shared clear mode object.

##### <a class="anchor" id="bkmrk--23"></a>Render Buffer Clearing by Camera

[Camera2D](http://dev.doc.cgistudio.at/APILINK/class_candera_1_1_camera2_d.html "A camera defines the view to the scene. At least one Camera2D has to be added to a 2D scene graph and...") interface offers two methods related to render buffer clearing. First one, [Candera::Camera2D::SetClearColor()](http://dev.doc.cgistudio.at/APILINK/class_candera_1_1_camera2_d.html#a2d3d31a572091262dac11dca58050fed), sets the clear color and the other one, [Candera::Camera2D::SetClearColorEnabled()](http://dev.doc.cgistudio.at/APILINK/class_candera_1_1_camera2_d.html#a6b5cc304f150b5a9acc20471362ac121), sets whether the clear is performed or not at each render call.

```
    camera2D->SetClearColor(<a class="code" href="http://dev.doc.cgistudio.at/APILINK/class_candera_1_1_color.html" title="Represents a color by its red-, green-, blue- and alpha-value. Provides color arithmetic functions an...">Candera::Color</a>(0.5f, 0.5f, 1.0f, 1.0f));
    camera2D->SetClearColorEnabled(true);
```

Comparing to the 2D context where only the color buffer needs to be cleared, in 3D, [Camera](http://dev.doc.cgistudio.at/APILINK/class_candera_1_1_camera.html "A Camera provides Modelview and Projection matrices. Camera is a Transformable.* The eye point is set...") has to clear three buffers: color, depth and stencil. [Camera](http://dev.doc.cgistudio.at/APILINK/class_candera_1_1_camera.html "A Camera provides Modelview and Projection matrices. Camera is a Transformable.* The eye point is set...") performs the clearing using a [Candera::ClearMode](http://dev.doc.cgistudio.at/APILINK/class_candera_1_1_clear_mode.html "Describes how a viewport is cleared. The color buffer may be cleared using a given color...") object which is attached to it using the method [Candera::Camera::SetClearMode()](http://dev.doc.cgistudio.at/APILINK/class_candera_1_1_camera.html#a0bc080835de611ca1f15dac9346f6b00).

```
    <a class="code" href="http://dev.doc.cgistudio.at/APILINK/class_candera_1_1_clear_mode.html" title="Describes how a viewport is cleared. The color buffer may be cleared using a given color...">Candera::ClearMode</a> clearmode;
    clearmode.<a class="code" href="http://dev.doc.cgistudio.at/APILINK/class_candera_1_1_clear_mode.html#a0eef53236e257c254368b37f6fda4eaa">SetClearColor</a>(<a class="code" href="http://dev.doc.cgistudio.at/APILINK/class_candera_1_1_color.html" title="Represents a color by its red-, green-, blue- and alpha-value. Provides color arithmetic functions an...">Candera::Color</a>(0.5f, 1.0f, 0.5f, 1.0f));          
    clearmode.<a class="code" href="http://dev.doc.cgistudio.at/APILINK/class_candera_1_1_clear_mode.html#ae9cbd3e6fb56f650b164bc0bfaeed5f5">SetColorClearEnabled</a>(true);
    clearmode.<a class="code" href="http://dev.doc.cgistudio.at/APILINK/class_candera_1_1_clear_mode.html#a2c2ef6ecc91eb18ca264f8799018da19">SetClearDepth</a>(1.0f);
    clearmode.<a class="code" href="http://dev.doc.cgistudio.at/APILINK/class_candera_1_1_clear_mode.html#a2228e43fad15804a5c1ee8ab1fae33de">SetDepthClearEnabled</a>(true);
    
    camera3D->SetClearMode(clearmode);
```

<div class="contents" id="bkmrk-candera%3A%3Acamera-and-"><div class="contents"><div class="textblock"><div class="fragment">  
</div><dl class="note"><dt></dt><dd><p class="callout info">[Candera::Camera](http://dev.doc.cgistudio.at/APILINK/class_candera_1_1_camera.html "A Camera provides Modelview and Projection matrices. Camera is a Transformable.* The eye point is set...") and [Candera::Camera2D](http://dev.doc.cgistudio.at/APILINK/class_candera_1_1_camera2_d.html "A camera defines the view to the scene. At least one Camera2D has to be added to a 2D scene graph and...") clear only the area specified by the viewport.</p>

</dd></dl></div></div></div>##### <a class="anchor" id="bkmrk--24"></a>Render Buffer Clearing by Render Target

The render buffer clearing using the render target is useful especially when the camera viewport is not covering the entire render target. The 2D render target clears the color buffer using a shared clear mode object as shown in the example below:

```
    Candera::SharedClearMode2D::SharedPointer shClearMode2D = <a class="code" href="http://dev.doc.cgistudio.at/APILINK/group___c_o_u_r_i_e_r___v_i_s_u_a_l_i_z_a_t_i_o_n.html#ggaf0e93dc4242f607c3c8d13dafd036af9aaabfa5309af24986d3111a092449f857">SharedClearMode2D::Create</a>();
    shClearModem2D->GetClearColor() = <a class="code" href="http://dev.doc.cgistudio.at/APILINK/group___behaviors_control.html#ggae7abc816df647d0ecbc280480fefb788a6d1d4da086e381cb2c5a5ce6a2513ebd">Candera::Color</a>(0.0f, 0.5f, 0.5f, 1.0f); 
    m_gdu2D->ToRenderTarget2D()->SetAutoClearEnabled(true);
    m_gdu2D->ToRenderTarget2D()->SetClearMode(shClearModem2D);
```

In 3D, the clearing it realized in a similar way but the render target will use a shared clear mode object which has attached a clear mode object.

```
    <a class="code" href="http://dev.doc.cgistudio.at/APILINK/class_candera_1_1_clear_mode.html" title="Describes how a viewport is cleared. The color buffer may be cleared using a given color...">Candera::ClearMode</a> clearmode;
    clearmode.<a class="code" href="http://dev.doc.cgistudio.at/APILINK/class_candera_1_1_clear_mode.html#a0eef53236e257c254368b37f6fda4eaa">SetClearColor</a>(<a class="code" href="http://dev.doc.cgistudio.at/APILINK/class_candera_1_1_color.html" title="Represents a color by its red-, green-, blue- and alpha-value. Provides color arithmetic functions an...">Candera::Color</a>(0.8f, 0.4f, 0.4f, 1.0f));
    clearmode.<a class="code" href="http://dev.doc.cgistudio.at/APILINK/class_candera_1_1_clear_mode.html#ae9cbd3e6fb56f650b164bc0bfaeed5f5">SetColorClearEnabled</a>(true);
    clearmode.<a class="code" href="http://dev.doc.cgistudio.at/APILINK/class_candera_1_1_clear_mode.html#a2c2ef6ecc91eb18ca264f8799018da19">SetClearDepth</a>(1.0f);
    clearmode.<a class="code" href="http://dev.doc.cgistudio.at/APILINK/class_candera_1_1_clear_mode.html#a2228e43fad15804a5c1ee8ab1fae33de">SetDepthClearEnabled</a>(true);

    Candera::SharedClearMode::SharedPointer shClearMode = <a class="code" href="http://dev.doc.cgistudio.at/APILINK/group___c_o_u_r_i_e_r___v_i_s_u_a_l_i_z_a_t_i_o_n.html#ggaf0e93dc4242f607c3c8d13dafd036af9aaabfa5309af24986d3111a092449f857">Candera::SharedClearMode::Create</a>();
    shClearMode->SetClearMode(&clearmode);

    gdu->ToRenderTarget3D()->SetClearMode(shClearMode);
    gdu->ToRenderTarget3D()->SetAutoClearEnabled(true);
```

##### <a class="anchor" id="bkmrk--25"></a>Example

Consider two cameras &amp; render targets, 2D and 3D, connected to a common display (see picture below). The clearing is enabled on both cameras and render targets, while clear colors for the render targets and cameras are all different.

<div class="contents" id="bkmrk-background-color-of-"><div class="contents"><div class="contents"><div class="textblock">- Background color of area (1) is set by the clear color of [Camera2D](http://dev.doc.cgistudio.at/APILINK/class_candera_1_1_camera2_d.html "A camera defines the view to the scene. At least one Camera2D has to be added to a 2D scene graph and...") respectively the 3D [Camera](http://dev.doc.cgistudio.at/APILINK/class_candera_1_1_camera.html "A Camera provides Modelview and Projection matrices. Camera is a Transformable.* The eye point is set...") in the 3D [Scene](http://dev.doc.cgistudio.at/APILINK/class_candera_1_1_scene.html "The class Scene represents a top level scene graph node. Multiple Scenes are allowed. A Scene can not be part of any other Scene. To render a Scene, at least one Camera must be part of this Scene and the Camera must have rendering enabled. A Scene can have more than one Camera. Note: Lights added to a Scene apply for that Scene only and do not affect 3D objects in any other Scene."), since the clearing setting of the camera overrides the one from the render target.
- Since the camera viewport is smaller than the render target size, area (2) is cleared by the render target.
- Area (3) cannot be cleared because it is not covered by any of the two render targets.

</div></div></div></div><div drawio-diagram="2364"><img src="https://doc316en.candera.eu/uploads/images/drawio/2023-02/drawing-4-1677207702.png" alt=""/></div>

<div class="contents" id="bkmrk--9"><div class="contents"><div class="textblock">  
</div></div></div>##### <a class="anchor" id="bkmrk--27"></a>SceneComposer Example Solution

In SceneComposer, the configuration of render target clearing in 2D context is done similarly to the one of a 2D camera: select the Render Target and, in the Properties panel, enable the "Auto Clear Enabled 2D" property and set the clear color by modifying the "Clear Mode 2D" property.

In 3D context, the activation of auto-clearing on a render target implies to create first a [ClearMode](http://dev.doc.cgistudio.at/APILINK/class_candera_1_1_clear_mode.html "Describes how a viewport is cleared. The color buffer may be cleared using a given color..."): in the Solution Explorer, right click on any of the folders from "Solution" and choose "Add-&gt;New Item...-&gt;ClearMode". In the "Add new item" dialog enable and set an appropriate value for the [Color](http://dev.doc.cgistudio.at/APILINK/class_candera_1_1_color.html "Represents a color by its red-, green-, blue- and alpha-value. Provides color arithmetic functions an...") Clear, Depth Clear and Stencil Clear and then press "OK". Now, select the 3D Render Target and, in the Properties panel, set "Auto Clear Enabled" property to "True" and then click on the "Clear Mode" property and select the previously created [ClearMode](http://dev.doc.cgistudio.at/APILINK/class_candera_1_1_clear_mode.html "Describes how a viewport is cleared. The color buffer may be cleared using a given color..."). An example of usage the render target auto-clear feature in SceneComposer is presented in the solution RenderTargetAutoClearSolution example in folder cgi\_studio\_player/content/Tutorials/07\_RenderTargetsCameras.

#### **Software Layers**   


##### <a class="anchor" id="bkmrk--28"></a>Overview

The Candera::SoftwareLayer is a special mixed graphic device unit supported only on specific device packages. This graphic device unit, despite the fact it is a texture render target, it is not meant to be used as Image source in a texture but rather it acts like a display render target by the means of a composition camera (see diagram below).

<div class="contents" id="bkmrk-software-layers-are-"><div class="contents"><div class="textblock"><dl class="note"><dt></dt><dd><p class="callout info">Software Layers are not supported on all devices! Software Layers are supported on iMX6. An example solution for this concept can be seen in *cgi\_studio\_player/content/Tutorials/07\_RenderTargetsCameras* solution.</p>

</dd></dl></div></div></div>##### <a class="anchor" id="bkmrk--29"></a>Configuration

<div class="contents" id="bkmrk-for-a-correct-behavi"><div class="contents"><div class="textblock"><dl class="note"><dt></dt><dd><p class="callout info">For a correct behaviour of the scene editor the composition camera has to be placed in a separate scene.</p>

</dd></dl></div></div></div>The number of software layers which can be blended in one pass is limited by the number of texture units specific for the device.

<div class="contents" id="bkmrk-for-specific-devices"><div class="contents"><div class="textblock">- For specific devices the maximum number of software layers is 8.

</div></div></div>Each of these virtual layers can have a distinct blending mode, buffer settings, size or position, but all have to use the same composition camera, the [Candera::Camera](http://dev.doc.cgistudio.at/APILINK/class_candera_1_1_camera.html "A Camera provides Modelview and Projection matrices. Camera is a Transformable.* The eye point is set...") which is linked to the display render target:

<div drawio-diagram="2365"><img src="https://doc316en.candera.eu/uploads/images/drawio/2023-02/drawing-4-1677207787.png" alt=""/></div>

<div class="contents" id="bkmrk-the-software-layers-"><div class="contents"><div class="textblock"><dl class="note"><dt></dt><dd><p class="callout info">The software layers are delimited by a 1 px border. If needed, this border can be disabled using the "BorderEnabled" property.</p>

</dd></dl></div></div></div>##### <a class="anchor" id="bkmrk--31"></a>Layer Order

The software layers are ordered depending on the value set for the Layer property, bigger values meaning that the layer will be closest to the composition camera rendering the main scene.

##### <a class="anchor" id="bkmrk--32"></a>Blend Modes

Following blend modes are supported for Software Layers:

<div class="contents" id="bkmrk-source-destination-c"><div class="contents"><div class="textblock"><table border="1" cellpadding="5" cellspacing="0"><tbody><tr bgcolor="#d4d4d4"><th>Source</th><th>Destination</th><th>Constant Alpha</th><th>Blend Mode</th><th>Formula</th><th>Output</th></tr><tr><td bgcolor="#ff0000" rowspan="6">  
</td><td bgcolor="#0000ff" rowspan="6">  
</td><td align="center" rowspan="6">0.5</td><td>SoftwareLayerBlendModeStandard</td><td>SRC \* SRC.A + DST \* (1 - SRC.A)</td><td bgcolor="#7f0080">  
</td></tr><tr><td>SoftwareLayerBlendModePreMultiplied</td><td>SRC + DST \* (1 - SRC.A)</td><td bgcolor="#ff0080">  
</td></tr><tr><td>SoftwareLayerBlendModeConstantAlpha</td><td>SRC \* CNS.A + DST \* (1 - CNS.A)</td><td bgcolor="#800080">  
</td></tr><tr><td>SoftwareLayerBlendModeSimultaneousAlpha</td><td>SRC \* SRC.A \* CNS.A + DST \* (1 - SRC.A \* CNS.A)</td><td bgcolor="#3f00bf">  
</td></tr><tr><td>SoftwareLayerBlendModeSimultaneousPreMultiplied</td><td>SRC \* CNS.A + DST \* (1 - SRC.A \* CNS.A)</td><td bgcolor="#8000bf">  
</td></tr><tr><td>SoftwareLayerBlendModeOff</td><td>SRC</td><td bgcolor="#ff0000">  
</td></tr></tbody></table>

</div></div></div>For more information about alpha blending please read also the <span style="color: rgb(230, 126, 35);">[Blending](https://doc316en.candera.eu/books/2d-effects/page/blending)</span> chapther.

##### <a class="anchor" id="bkmrk--33"></a>Insides

As any other graphic device unit the Candera::SoftwareLayer can be created via Candera::DevicePackageInterface::CreateGraphicDeviceUnit.

<div class="contents" id="bkmrk-use-candera%3A%3Adevicep"><div class="textblock">- Use Candera::DevicePackageDescriptor::GetUnitTypes to get its type handle as a second parameter for the offscreen render target categories.
- The SoftwareLayer properties are specified in the Candera::SoftwareLayerProperties class (see Candera::SoftwareLayer::GetSoftwareLayerProperties)
- and the pixel format information is kept in the Candera::GlFrameBufferProperties class (see Candera::SoftwareLayer::GetFrameBufferProperties()).

</div></div>

# EGL Context Handling

#### <a class="anchor" id="bkmrk--2"></a>Description

EGL is an interface between rendering APIs like OpenGL ES and the underlying native platform window system. Rendering APIs like OpenGL (ES) and OpenVG use EGL contexts to manage their states and resources.

#### **EGL Concepts**   


##### <a class="anchor" id="bkmrk--4"></a>EGL Context: WindowSurface

An EGL context typically stores render states, shaders, textures, vertex buffers and framebuffer resources. In [Candera](http://dev.doc.cgistudio.at/APILINK/namespace_candera.html "[DataBinding_RefTypeSample]") each WindowSurface (onscreen framebuffer) creates an EGL context when uploaded. Thus, each WindowSurface owns its separate context to store related render states, like for instance depth buffer, and blend mode settings.

##### <a class="anchor" id="bkmrk--5"></a>EGL Context Sharing: ContextResourcePool

An EGL context can also be shared to store resources like textures, vertex buffer objects, and shaders. This feature avoids redundant video memory uploads of shared resources to multiple EGL contexts and reduces memory footprint. [Candera](http://dev.doc.cgistudio.at/APILINK/namespace_candera.html "[DataBinding_RefTypeSample]") provides context sharing functionality with class ContextResourcePool. Each display is associated to exactly one context resource pool. One context resource pool can be shared accross different displays, if supported by platform. In case context sharing is not supported, for instance as displays are driven by separate display controllers, [Candera](http://dev.doc.cgistudio.at/APILINK/namespace_candera.html "[DataBinding_RefTypeSample]") allows to upload resources of a single scene graph to multiple EGL contexts.

##### <a class="anchor" id="bkmrk--6"></a>Framebuffer Objects using ContextResourcePool

Framebuffer objects (FBOs) are defined in OpenGL ES API and do, different to WindowSurfaces, not own a dedicated EGL context. Instead, FBOs require a context provided from an EGL surface to store related data in video memory. In [Candera](http://dev.doc.cgistudio.at/APILINK/namespace_candera.html "[DataBinding_RefTypeSample]") a WindowSurface is such a context provider, which registers its EGL context to ContextResourcePool to be shared. FBOs

#### **Uploading To Multiple Contexts**   


##### <a class="anchor" id="bkmrk--7"></a>Overview

A device object can be uploaded to multiple context resource pools but there is no association from a device object to its context resource pools, before the uploading. Further, AssetLoader could upload a device object to a context resource pool activated accidentally. In order to prevent such situations, [Candera](http://dev.doc.cgistudio.at/APILINK/namespace_candera.html "[DataBinding_RefTypeSample]") offers a dedicated interface meant to give more control in the process of uploading/unloading device objects in multiple contexts.

##### <a class="anchor" id="bkmrk--8"></a>Multiple Contexts Uploading

The uploading to more then one context at a time can be accomplished by the means of the [Node::UploadAll()](http://dev.doc.cgistudio.at/APILINK/class_candera_1_1_node.html#aadc2503500f1f656444d4570c49ca4f1) method. There is also a method, [Node::UnloadAll()](http://dev.doc.cgistudio.at/APILINK/class_candera_1_1_node.html#aba264547b6d24ff74fe010cb1abebc40), which does the reverse operation, the unloading from video memory.

These methods take two parameters, a scope mask and a multi context flag. The *multiContext* flag controls if the operation is performed strictly on the active context or on all existing context resource pools belonging to the cameras which are in the scope of the upload/unload operations. The *scopeMask* parameter is useful to filter the nodes which are to be uploaded/unloaded from scenes containing multiple nodes. The algorithm of filtering using the scope mask works as follows:

<div class="contents" id="bkmrk-first-it-creates-a-l"><div class="contents"><div class="textblock">- First it creates a list of cameras which are in the scope of the upload/unload operation.
- Then, for each of these cameras, it will iterate over the nodes "seen" by the camera and it will upload/unload only the nodes (and their descendants) which are in the scope of the camera intersected with the scope of the upload/unload operation. The context resource pool targeted by this operation is the one belonging to the camera.

</div></div></div>For a better understanding of the feature, please have a look on the example presented on the next item.

##### <a class="anchor" id="bkmrk--9"></a>Code Example

```
    <a class="code" href="http://dev.doc.cgistudio.at/APILINK/class_candera_1_1_scope_mask.html" title="The class ScopeMask allows scene graph nodes to form conceptual groups independent of the scene graph...">Candera::ScopeMask</a> m_scopeMask;
    m_scopeMask.<a class="code" href="http://dev.doc.cgistudio.at/APILINK/class_candera_1_1_scope_mask.html#a8b271435f48569a23b2060ac7798b1ea">SetAllScopesEnabled</a>(false);
    m_scopeMask.<a class="code" href="http://dev.doc.cgistudio.at/APILINK/class_candera_1_1_scope_mask.html#ae37170a2ff1a6deaffda69a29c6927d2">SetScopeEnabled</a>(2, true);

    m_group->UploadAll(m_scopeMask, true);
    //...
    m_group->UnloadAll(m_scopeMask, true);
```

#### **Uploading To Multiple Contexts Example** 

##### <a class="anchor" id="bkmrk--10"></a>Introduction

The example below tries to offer you a better understanding of the way the method [Candera::Node::UploadAll()](http://dev.doc.cgistudio.at/APILINK/class_candera_1_1_node.html#aadc2503500f1f656444d4570c49ca4f1) / [Candera::Node::UnloadAll()](http://dev.doc.cgistudio.at/APILINK/class_candera_1_1_node.html#aba264547b6d24ff74fe010cb1abebc40) works. In order to do that, we chose a complex configuration in which the nodes to be uploaded, the cameras and the uploading method itself, are set with different values for the scope masks.

##### <a class="anchor" id="bkmrk--11"></a>Scene Setup

The setup consists in a 3D scene which contains three nodes: a sphere, a cube and a pyramid, all three nodes are children of a [Candera::Group](http://dev.doc.cgistudio.at/APILINK/class_candera_1_1_group.html "The class Group is a scene graph node that stores a set of Nodes as its children. The parent-child re..."). The 3D content is rendered by two cameras on two displays.

We assume that the context resource pools associated to the displays are not shared, so each display will have its own context resource pool. Each of these nodes and cameras have assigned a distinct [Candera::ScopeMask](http://dev.doc.cgistudio.at/APILINK/class_candera_1_1_scope_mask.html "The class ScopeMask allows scene graph nodes to form conceptual groups independent of the scene graph...") as follows:

<div class="contents" id="bkmrk-object-scope-mask-sp"><div class="contents"><div class="textblock"><table border="1"><tbody><tr align="center"><th style="padding: 3px;">Object</th><th>Scope Mask</th></tr><tr align="center"><td style="padding: 3px;">Sphere</td><td>1</td></tr><tr align="center"><td style="padding: 3px;">Pyramid</td><td>2</td></tr><tr align="center"><td style="padding: 3px;">Cube</td><td>All</td></tr><tr align="center"><td style="padding: 3px;">Camera 1</td><td>1</td></tr><tr align="center"><td style="padding: 3px;">Camera 2</td><td>All</td></tr></tbody></table>

</div></div></div>The scene setup is shown also in the image below:

<div drawio-diagram="2366"><img src="https://doc316en.candera.eu/uploads/images/drawio/2023-02/drawing-4-1677216099.png" alt=""/></div>

<div class="contents" id="bkmrk--0"><div class="contents"><div class="textblock">  
</div></div></div>The mask scopes are created as follows:

```
    <a class="code" href="http://dev.doc.cgistudio.at/APILINK/class_candera_1_1_scope_mask.html" title="The class ScopeMask allows scene graph nodes to form conceptual groups independent of the scene graph...">Candera::ScopeMask</a> m_scopeMask1;
    m_scopeMask1.<a class="code" href="http://dev.doc.cgistudio.at/APILINK/class_candera_1_1_scope_mask.html#a8b271435f48569a23b2060ac7798b1ea">SetAllScopesEnabled</a>(false);
    m_scopeMask1.<a class="code" href="http://dev.doc.cgistudio.at/APILINK/class_candera_1_1_scope_mask.html#ae37170a2ff1a6deaffda69a29c6927d2">SetScopeEnabled</a>(1, true);

    <a class="code" href="http://dev.doc.cgistudio.at/APILINK/class_candera_1_1_scope_mask.html" title="The class ScopeMask allows scene graph nodes to form conceptual groups independent of the scene graph...">Candera::ScopeMask</a> m_scopeMask2;
    m_scopeMask2.<a class="code" href="http://dev.doc.cgistudio.at/APILINK/class_candera_1_1_scope_mask.html#a8b271435f48569a23b2060ac7798b1ea">SetAllScopesEnabled</a>(false);
    m_scopeMask2.<a class="code" href="http://dev.doc.cgistudio.at/APILINK/class_candera_1_1_scope_mask.html#ae37170a2ff1a6deaffda69a29c6927d2">SetScopeEnabled</a>(2, true);

    <a class="code" href="http://dev.doc.cgistudio.at/APILINK/class_candera_1_1_scope_mask.html" title="The class ScopeMask allows scene graph nodes to form conceptual groups independent of the scene graph...">Candera::ScopeMask</a> m_scopeMaskAll;
    m_scopeMaskAll.<a class="code" href="http://dev.doc.cgistudio.at/APILINK/class_candera_1_1_scope_mask.html#a8b271435f48569a23b2060ac7798b1ea">SetAllScopesEnabled</a>(true);
```

Then they are set as scope masks for the nodes:

```
    m_meshSphere->SetScopeMask(m_scopeMask1);
    m_meshPyramid->SetScopeMask(m_scopeMask2);
    m_meshCube->SetScopeMask(m_scopeMaskAll);
    m_camera1->SetScopeMask(m_scopeMask1);
    m_camera2->SetScopeMask(m_scopeMask2);
```

<div class="contents" id="bkmrk-for-the-convenience%2C"><div class="contents"><div class="textblock"><div class="fragment">  
</div><dl class="note"><dt></dt><dd><p class="callout info">For the convenience, we will assume that the last context activated by the application is Context Resource Pool 1.</p>

</dd></dl></div></div></div>##### <a class="anchor" id="bkmrk--13"></a>Upload Scenarios

The table below shows in yellow the input parameters for the UploadAll method and in blue whether the nodes are uploaded or not and in which context.

For example, the first row in the table data says that the UploadAll method was called with the parameters:

```
    m_group->UploadAll(/*scopeMask=*/m_scopeMask1, /*multiContext=*/true);
```

Fifth row correspond to the following call:

```
    m_group->UploadAll(/*scopeMask=*/m_scopeMask2, /*multiContext=*/false);
```

And so on.

<div class="contents" id="bkmrk-index-multicontext-f"><div class="textblock"><table border="1" style="width: 100%; height: 385.416px;"><tbody><tr align="center" style="height: 29.4583px;"><th rowspan="2" style="width: 5.18946%; height: 58.9166px;">**Index**</th><th rowspan="2" style="width: 11.7381%; height: 58.9166px; background-color: rgb(241, 196, 15);">**MultiContext flag**</th><th colspan="3" style="width: 28.9127%; height: 29.4583px; background-color: rgb(241, 196, 15);">**Upload scope mask**</th><th colspan="3" style="width: 28.9127%; height: 29.4583px; background-color: rgb(53, 152, 219);">**Uploaded in CRP 0**</th><th colspan="3" style="width: 25.2059%; height: 29.4583px; background-color: rgb(53, 152, 219);">**Uploaded in CRP 1**</th></tr><tr align="center" style="height: 29.4583px;"><th style="width: 9.63756%; height: 29.4583px; background-color: rgb(241, 196, 15);">**1**</th><th style="width: 9.63756%; height: 29.4583px; background-color: rgb(241, 196, 15);">**2**</th><th style="width: 9.63756%; height: 29.4583px; background-color: rgb(241, 196, 15);">**All**</th><th style="width: 9.63756%; height: 29.4583px; background-color: rgb(53, 152, 219);">**Cube**</th><th style="width: 9.63756%; height: 29.4583px; background-color: rgb(53, 152, 219);">**Sphere**</th><th style="width: 9.63756%; height: 29.4583px; background-color: rgb(53, 152, 219);">**Pyramid**</th><th style="width: 8.40198%; height: 29.4583px; background-color: rgb(53, 152, 219);">**Cube**</th><th style="width: 8.40198%; height: 29.4583px; background-color: rgb(53, 152, 219);">**Sphere**</th><th style="width: 8.40198%; height: 29.4583px; background-color: rgb(53, 152, 219);">**Pyramid**</th></tr><tr align="center" style="height: 55.3958px;"><td style="width: 5.18946%; height: 55.3958px;">**1**</td><td style="width: 11.7381%; height: 55.3958px;">[![ok.png](https://doc316en.candera.eu/uploads/images/gallery/2023-02/scaled-1680-/jCcok.png)](https://doc316en.candera.eu/uploads/images/gallery/2023-02/jCcok.png)

</td><td style="width: 9.63756%; height: 55.3958px;"><div class="image">![ok.png](https://doc316en.candera.eu/uploads/images/gallery/2023-02/jCcok.png)</div></td><td style="width: 9.63756%; height: 55.3958px;">[![cancel.png](https://doc316en.candera.eu/uploads/images/gallery/2023-02/scaled-1680-/cancel.png)](https://doc316en.candera.eu/uploads/images/gallery/2023-02/cancel.png)

</td><td style="width: 9.63756%; height: 55.3958px;"><div class="image">[![cancel.png](https://doc316en.candera.eu/uploads/images/gallery/2023-02/scaled-1680-/cancel.png)](https://doc316en.candera.eu/uploads/images/gallery/2023-02/cancel.png)</div></td><td style="width: 9.63756%; height: 55.3958px;"><div class="image">![ok.png](https://doc316en.candera.eu/uploads/images/gallery/2023-02/jCcok.png)</div></td><td style="width: 9.63756%; height: 55.3958px;"><div class="image">![ok.png](https://doc316en.candera.eu/uploads/images/gallery/2023-02/jCcok.png)</div></td><td style="width: 9.63756%; height: 55.3958px;"><div class="image">[![cancel.png](https://doc316en.candera.eu/uploads/images/gallery/2023-02/scaled-1680-/cancel.png)](https://doc316en.candera.eu/uploads/images/gallery/2023-02/cancel.png)</div></td><td style="width: 8.40198%; height: 55.3958px;"><div class="image">![ok.png](https://doc316en.candera.eu/uploads/images/gallery/2023-02/jCcok.png)</div></td><td style="width: 8.40198%; height: 55.3958px;"><div class="image">![ok.png](https://doc316en.candera.eu/uploads/images/gallery/2023-02/jCcok.png)</div></td><td style="width: 8.40198%; height: 55.3958px;"><div class="image">[![cancel.png](https://doc316en.candera.eu/uploads/images/gallery/2023-02/scaled-1680-/cancel.png)](https://doc316en.candera.eu/uploads/images/gallery/2023-02/cancel.png)</div></td></tr><tr align="center" style="height: 55.3958px;"><td style="width: 5.18946%; height: 55.3958px;">**2**</td><td style="width: 11.7381%; height: 55.3958px;"><div class="image">![ok.png](https://doc316en.candera.eu/uploads/images/gallery/2023-02/jCcok.png)</div></td><td style="width: 9.63756%; height: 55.3958px;"><div class="image">[![cancel.png](https://doc316en.candera.eu/uploads/images/gallery/2023-02/scaled-1680-/cancel.png)](https://doc316en.candera.eu/uploads/images/gallery/2023-02/cancel.png)</div></td><td style="width: 9.63756%; height: 55.3958px;"><div class="image">![ok.png](https://doc316en.candera.eu/uploads/images/gallery/2023-02/jCcok.png)</div></td><td style="width: 9.63756%; height: 55.3958px;"><div class="image">[![cancel.png](https://doc316en.candera.eu/uploads/images/gallery/2023-02/scaled-1680-/cancel.png)](https://doc316en.candera.eu/uploads/images/gallery/2023-02/cancel.png)</div></td><td style="width: 9.63756%; height: 55.3958px;"><div class="image">[![cancel.png](https://doc316en.candera.eu/uploads/images/gallery/2023-02/scaled-1680-/cancel.png)](https://doc316en.candera.eu/uploads/images/gallery/2023-02/cancel.png)</div></td><td style="width: 9.63756%; height: 55.3958px;"><div class="image">[![cancel.png](https://doc316en.candera.eu/uploads/images/gallery/2023-02/scaled-1680-/cancel.png)](https://doc316en.candera.eu/uploads/images/gallery/2023-02/cancel.png)</div></td><td style="width: 9.63756%; height: 55.3958px;"><div class="image">[![cancel.png](https://doc316en.candera.eu/uploads/images/gallery/2023-02/scaled-1680-/cancel.png)](https://doc316en.candera.eu/uploads/images/gallery/2023-02/cancel.png)</div></td><td style="width: 8.40198%; height: 55.3958px;"><div class="image">![ok.png](https://doc316en.candera.eu/uploads/images/gallery/2023-02/jCcok.png)</div></td><td style="width: 8.40198%; height: 55.3958px;"><div class="image">[![cancel.png](https://doc316en.candera.eu/uploads/images/gallery/2023-02/scaled-1680-/cancel.png)](https://doc316en.candera.eu/uploads/images/gallery/2023-02/cancel.png)</div></td><td style="width: 8.40198%; height: 55.3958px;"><div class="image">![ok.png](https://doc316en.candera.eu/uploads/images/gallery/2023-02/jCcok.png)</div></td></tr><tr align="center" style="height: 55.3958px;"><td style="width: 5.18946%; height: 55.3958px;">**3**</td><td style="width: 11.7381%; height: 55.3958px;"><div class="image">![ok.png](https://doc316en.candera.eu/uploads/images/gallery/2023-02/jCcok.png)</div></td><td style="width: 9.63756%; height: 55.3958px;"><div class="image">[![cancel.png](https://doc316en.candera.eu/uploads/images/gallery/2023-02/scaled-1680-/cancel.png)](https://doc316en.candera.eu/uploads/images/gallery/2023-02/cancel.png)</div></td><td style="width: 9.63756%; height: 55.3958px;"><div class="image">[![cancel.png](https://doc316en.candera.eu/uploads/images/gallery/2023-02/scaled-1680-/cancel.png)](https://doc316en.candera.eu/uploads/images/gallery/2023-02/cancel.png)</div></td><td style="width: 9.63756%; height: 55.3958px;"><div class="image">![ok.png](https://doc316en.candera.eu/uploads/images/gallery/2023-02/jCcok.png)</div></td><td style="width: 9.63756%; height: 55.3958px;"><div class="image">![ok.png](https://doc316en.candera.eu/uploads/images/gallery/2023-02/jCcok.png)</div></td><td style="width: 9.63756%; height: 55.3958px;"><div class="image">![ok.png](https://doc316en.candera.eu/uploads/images/gallery/2023-02/jCcok.png)</div></td><td style="width: 9.63756%; height: 55.3958px;"><div class="image">[![cancel.png](https://doc316en.candera.eu/uploads/images/gallery/2023-02/scaled-1680-/cancel.png)](https://doc316en.candera.eu/uploads/images/gallery/2023-02/cancel.png)</div></td><td style="width: 8.40198%; height: 55.3958px;"><div class="image">![ok.png](https://doc316en.candera.eu/uploads/images/gallery/2023-02/jCcok.png)</div></td><td style="width: 8.40198%; height: 55.3958px;"><div class="image">![ok.png](https://doc316en.candera.eu/uploads/images/gallery/2023-02/jCcok.png)</div></td><td style="width: 8.40198%; height: 55.3958px;"><div class="image">![ok.png](https://doc316en.candera.eu/uploads/images/gallery/2023-02/jCcok.png)</div></td></tr><tr align="center" style="height: 55.3958px;"><td style="width: 5.18946%; height: 55.3958px;">**4**</td><td style="width: 11.7381%; height: 55.3958px;"><div class="image">[![cancel.png](https://doc316en.candera.eu/uploads/images/gallery/2023-02/scaled-1680-/cancel.png)](https://doc316en.candera.eu/uploads/images/gallery/2023-02/cancel.png)</div></td><td style="width: 9.63756%; height: 55.3958px;"><div class="image">![ok.png](https://doc316en.candera.eu/uploads/images/gallery/2023-02/jCcok.png)</div></td><td style="width: 9.63756%; height: 55.3958px;"><div class="image">[![cancel.png](https://doc316en.candera.eu/uploads/images/gallery/2023-02/scaled-1680-/cancel.png)](https://doc316en.candera.eu/uploads/images/gallery/2023-02/cancel.png)</div></td><td style="width: 9.63756%; height: 55.3958px;"><div class="image">[![cancel.png](https://doc316en.candera.eu/uploads/images/gallery/2023-02/scaled-1680-/cancel.png)](https://doc316en.candera.eu/uploads/images/gallery/2023-02/cancel.png)</div></td><td style="width: 9.63756%; height: 55.3958px;"><div class="image">[![cancel.png](https://doc316en.candera.eu/uploads/images/gallery/2023-02/scaled-1680-/cancel.png)](https://doc316en.candera.eu/uploads/images/gallery/2023-02/cancel.png)</div></td><td style="width: 9.63756%; height: 55.3958px;"><div class="image">[![cancel.png](https://doc316en.candera.eu/uploads/images/gallery/2023-02/scaled-1680-/cancel.png)](https://doc316en.candera.eu/uploads/images/gallery/2023-02/cancel.png)</div></td><td style="width: 9.63756%; height: 55.3958px;"><div class="image">[![cancel.png](https://doc316en.candera.eu/uploads/images/gallery/2023-02/scaled-1680-/cancel.png)](https://doc316en.candera.eu/uploads/images/gallery/2023-02/cancel.png)</div></td><td style="width: 8.40198%; height: 55.3958px;"><div class="image">![ok.png](https://doc316en.candera.eu/uploads/images/gallery/2023-02/jCcok.png)</div></td><td style="width: 8.40198%; height: 55.3958px;"><div class="image">![ok.png](https://doc316en.candera.eu/uploads/images/gallery/2023-02/jCcok.png)</div></td><td style="width: 8.40198%; height: 55.3958px;"><div class="image">[![cancel.png](https://doc316en.candera.eu/uploads/images/gallery/2023-02/scaled-1680-/cancel.png)](https://doc316en.candera.eu/uploads/images/gallery/2023-02/cancel.png)</div></td></tr><tr align="center" style="height: 52.4583px;"><td style="width: 5.18946%; height: 52.4583px;">**5**</td><td style="width: 11.7381%; height: 52.4583px;"><div class="image">[![cancel.png](https://doc316en.candera.eu/uploads/images/gallery/2023-02/scaled-1680-/cancel.png)](https://doc316en.candera.eu/uploads/images/gallery/2023-02/cancel.png)</div></td><td style="width: 9.63756%; height: 52.4583px;"><div class="image">[![cancel.png](https://doc316en.candera.eu/uploads/images/gallery/2023-02/scaled-1680-/cancel.png)](https://doc316en.candera.eu/uploads/images/gallery/2023-02/cancel.png)</div></td><td style="width: 9.63756%; height: 52.4583px;"><div class="image">![ok.png](https://doc316en.candera.eu/uploads/images/gallery/2023-02/jCcok.png)</div></td><td style="width: 9.63756%; height: 52.4583px;"><div class="image">[![cancel.png](https://doc316en.candera.eu/uploads/images/gallery/2023-02/scaled-1680-/cancel.png)](https://doc316en.candera.eu/uploads/images/gallery/2023-02/cancel.png)</div></td><td style="width: 9.63756%; height: 52.4583px;"><div class="image">[![cancel.png](https://doc316en.candera.eu/uploads/images/gallery/2023-02/scaled-1680-/cancel.png)](https://doc316en.candera.eu/uploads/images/gallery/2023-02/cancel.png)</div></td><td style="width: 9.63756%; height: 52.4583px;"><div class="image">[![cancel.png](https://doc316en.candera.eu/uploads/images/gallery/2023-02/scaled-1680-/cancel.png)](https://doc316en.candera.eu/uploads/images/gallery/2023-02/cancel.png)</div></td><td style="width: 9.63756%; height: 52.4583px;"><div class="image">[![cancel.png](https://doc316en.candera.eu/uploads/images/gallery/2023-02/scaled-1680-/cancel.png)](https://doc316en.candera.eu/uploads/images/gallery/2023-02/cancel.png)</div></td><td style="width: 8.40198%; height: 52.4583px;"><div class="image">![ok.png](https://doc316en.candera.eu/uploads/images/gallery/2023-02/jCcok.png)</div></td><td style="width: 8.40198%; height: 52.4583px;"><div class="image">[![cancel.png](https://doc316en.candera.eu/uploads/images/gallery/2023-02/scaled-1680-/cancel.png)](https://doc316en.candera.eu/uploads/images/gallery/2023-02/cancel.png)</div></td><td style="width: 8.40198%; height: 52.4583px;"><div class="image">![ok.png](https://doc316en.candera.eu/uploads/images/gallery/2023-02/jCcok.png)</div></td></tr><tr align="center" style="height: 52.4583px;"><td style="width: 5.18946%; height: 52.4583px;">**6**</td><td style="width: 11.7381%; height: 52.4583px;"><div class="image">[![cancel.png](https://doc316en.candera.eu/uploads/images/gallery/2023-02/scaled-1680-/cancel.png)](https://doc316en.candera.eu/uploads/images/gallery/2023-02/cancel.png)</div></td><td style="width: 9.63756%; height: 52.4583px;"><div class="image">[![cancel.png](https://doc316en.candera.eu/uploads/images/gallery/2023-02/scaled-1680-/cancel.png)](https://doc316en.candera.eu/uploads/images/gallery/2023-02/cancel.png)</div></td><td style="width: 9.63756%; height: 52.4583px;"><div class="image">[![cancel.png](https://doc316en.candera.eu/uploads/images/gallery/2023-02/scaled-1680-/cancel.png)](https://doc316en.candera.eu/uploads/images/gallery/2023-02/cancel.png)</div></td><td style="width: 9.63756%; height: 52.4583px;"><div class="image">![ok.png](https://doc316en.candera.eu/uploads/images/gallery/2023-02/jCcok.png)</div></td><td style="width: 9.63756%; height: 52.4583px;"><div class="image">[![cancel.png](https://doc316en.candera.eu/uploads/images/gallery/2023-02/scaled-1680-/cancel.png)](https://doc316en.candera.eu/uploads/images/gallery/2023-02/cancel.png)</div></td><td style="width: 9.63756%; height: 52.4583px;"><div class="image">[![cancel.png](https://doc316en.candera.eu/uploads/images/gallery/2023-02/scaled-1680-/cancel.png)](https://doc316en.candera.eu/uploads/images/gallery/2023-02/cancel.png)</div></td><td style="width: 9.63756%; height: 52.4583px;"><div class="image">[![cancel.png](https://doc316en.candera.eu/uploads/images/gallery/2023-02/scaled-1680-/cancel.png)](https://doc316en.candera.eu/uploads/images/gallery/2023-02/cancel.png)</div></td><td style="width: 8.40198%; height: 52.4583px;"><div class="image">![ok.png](https://doc316en.candera.eu/uploads/images/gallery/2023-02/jCcok.png)</div></td><td style="width: 8.40198%; height: 52.4583px;"><div class="image">![ok.png](https://doc316en.candera.eu/uploads/images/gallery/2023-02/jCcok.png)</div></td><td style="width: 8.40198%; height: 52.4583px;"><div class="image">![ok.png](https://doc316en.candera.eu/uploads/images/gallery/2023-02/jCcok.png)</div></td></tr></tbody></table>

</div></div><div class="contents" id="bkmrk--1"><div class="contents"><div class="textblock">  
</div></div></div>Result explanation:

1\) Because multi context flag is enabled, the application will try to upload device objects in both context resource pools. Both cameras are in the scope of the upload (scope 1). Camera 1, corresponding to the Context Resource Pool 0 has the scope mask 1 so the application will upload the Cube (scope mask all) and the Sphere (scope mask 1) but not the pyramid (scope mask 2). In the Context Resource Pool 1, corresponding to the Camera 2 (scope mask all) the application will upload Cube (scope mask all) and the Sphere (scope mask 1). The pyramid will not be uploaded because it is not in the scope of upload intersected with scope of the camera (1 &amp; "all" = 1).

2\) Because multi context flag is enabled, the application will try to upload device objects in both context resource pools but only Camera 2 is in the scope of the upload (scope mask 2). Consequently, application will not upload anything in the Context Resource Pool 0 corresponding to the Camera 1. In the Context Resource Pool 1, corresponding to the Camera 2 (scope mask all), the application will upload the Cube (scope mask all) and the Pyramid (scope mask 2). The Sphere (scope mask 1) will not be uploaded because it is not in the scope of upload intersected with scope of the camera (2 &amp; "all" = 2).

3\) Because multi context flag is enabled, the application will try to upload device objects in both context resource pools. Both cameras are in the scope of the upload (scope maks all). Camera 1, corresponding to the Context Resource Pool 0 has the scope mask 1 so the application will upload the Cube (scope mask all) and the Sphere (scope mask 1). The pyramid will not be uploaded because it is not in the scope of upload intersected with scope of the camera ("all" &amp; 1 = 1). In the Context Resource Pool 1, corresponding to the Camera 2, all three nodes will be uploaded.

4\) The multi context flag is disabled, so the upload will be performed only in the last activated context (Context Resource Pool 1). Consequently, the application will not upload anything in the Context Resource Pool 0. Camera 2 (scope mask all) is in the scope of the upload (scope mask 1) so it will be taken into account for the upload. In the Context Resource Pool 1, corresponding to the Camera 2 (scope mask all) the application will upload Cube (scope mask all) and the Sphere (scope mask 1). The pyramid will not be uploaded because it is not in the scope of upload intersected with scope of the camera (1 &amp; "all" = 1).

5\) The multi context flag is disabled, so the upload will be performed only in the last activated context (Context Resource Pool 1). Consequently, the application will not upload anything in the Context Resource Pool 0. Camera 2 (scope mask all) is in the scope of the upload (scope mask 2) so it will be taken into account for the upload. In the Context Resource Pool 1, corresponding to the Camera 2 (scope mask all), the application will upload the Cube (scope mask all) and the Pyramid (scope mask 2). The Sphere (scope mask 1) will not be uploaded because it is not in the scope of upload intersected with scope of the camera (2 &amp; "all" = 2).

6\) The multi context flag is disabled, so the upload will be performed only in the last activated context (Context Resource Pool 1). Consequently, the application will not upload anything in the Context Resource Pool 0. Camera 2 (scope mask all) is in the scope of the upload (scope mask 1) so it will be taken into account for the upload. In the Context Resource Pool 1, corresponding to the Camera 2, all three nodes will be uploaded because their scope are in the scope of upload intersected with scope of the camera ("all" &amp; "all" = "all") .

# Multiple Render Targets

#### <a class="anchor" id="bkmrk--7"></a>Description

This section explains how to handle Multiple Render Targets by means of a small ping pong like tutorial solution.

#### <a class="anchor" id="bkmrk--9"></a>Example Solution

<div class="contents" id="bkmrk-rendertargetscameras"><div class="textblock">- RenderTargetsCamerasSolution in folder *cgi\_studio\_player/content/Tutorials/07\_RenderTargetsCameras*

</div></div>#### **Handling Multiple Render Targets** 

The example solution in *cgi\_studio\_player/content/Tutorials/07\_RenderTargetsCameras* consists of the following:

<div class="contents" id="bkmrk-a-main-scene-rendere"><div class="contents"><div class="textblock">- a main scene rendered to Candera::iMX6WindowSurface render target
- three different scenes rendered to three different Candera::SoftwareLayer render targets.

</div></div></div>The three Candera::SoftwareLayer render targets are linked to the Candera::iMX6WindowSurface render target through their **Compostion Camera** property and will be blended against each other.

##### Layer 1: Animated 2D Background

The lowermost layer is a collection of bubbles which are animated to bubble endlessly from the bottom of the 2D screen to the top. It is the lowest layer, because the dreary, transparent bubbles shall be colored by blending with a more colorful layer.

<div drawio-diagram="2371"><img src="https://doc316en.candera.eu/uploads/images/drawio/2023-02/drawing-4-1677216810.png" alt=""/></div>

<div class="contents" id="bkmrk--0"><div class="contents"><div class="textblock">  
</div></div></div>##### Layer 2: Static 2D Background

This is the layer which will give the animated bubbles some colors.

<div drawio-diagram="2372"><img src="https://doc316en.candera.eu/uploads/images/drawio/2023-02/drawing-4-1677216831.png" alt=""/></div>

<div class="contents" id="bkmrk--2"><div class="contents"><div class="textblock">  
</div></div></div>##### Layer 3: Dynamic 3D Top Layer

Finally, the top layer shows a 3D scene with a sphere.

<div drawio-diagram="2373"><img src="https://doc316en.candera.eu/uploads/images/drawio/2023-02/drawing-4-1677216849.png" alt=""/></div>

<div class="contents" id="bkmrk--4"><div class="contents"><div class="textblock">  
</div></div></div>The sphere can be linked with the "BouncingNodeWidget". Once this widget is enabled in the Player, it will send the sphere into several directions like in a Ping Pong game. This is the reason, why the camera of this scene needs an OrthographicProjection: The widget needs to match the sphere position on the x and y axis with the boundaries of the 2D projection plane.

Use the velocity widget property to play with different velocities.

####   
**Layer Order and Layer Blending** 

##### <a class="anchor" id="bkmrk--13"></a>Layer Order from Lowest to Top

The correct layer order must be specified on the property "Layer" on the render targets, the bigger value for the top layer:

<div class="contents" id="bkmrk-lowest-layer%3A-layer-"><div class="contents"><div class="contents"><div class="textblock">- Lowest Layer: Layer-ID 0
- Medium Layer: Layer-ID 1
- Top Layer: Layer-ID 2

</div></div></div></div><div drawio-diagram="2374"><img src="https://doc316en.candera.eu/uploads/images/drawio/2023-02/drawing-4-1677216954.png" alt=""/></div>

<div class="contents" id="bkmrk--6"><div class="contents"><div class="textblock">  
</div></div></div>##### <a class="anchor" id="bkmrk--15"></a>Export Asset and Load with the Player

<div class="contents" id="bkmrk-export-the-example-s"><div class="textblock">- Export the example solution to a simulation asset
- When the asset is loaded in the Player, take care to first activate the main scene (Scene3DOwner from solution) and then the other scenes.

</div></div>####   
**Render Target Manipulation**   


##### <a class="anchor" id="bkmrk--16"></a>Accessing Render Target Properties

The BouncingNodeWidget uses a property to specify the name of a layer. Width and height of this layer is used by the widget to let the node bounce within these boundaries.

Refer to the following code example to access width and height of this layer:

```
        if (m_layer != 0){
            RenderTarget3D* rt3d = m_layer->ToRenderTarget3D();
            if (rt3d != 0){
                m_layerWidth = rt3d->GetWidth();
                m_layerHeight = rt3d->GetHeight();
            }
        }

```

##### <a class="anchor" id="bkmrk--17"></a>Accessing Render Target Properties by MetaInfo

Same properties could be accessed by meta information as follows:

```
    const MetaInfo::GraphicDeviceUnitMetaInfo *meta = DevicePackageDescriptor::GetMetaInformation(gdu->GetUnitType());
    if (meta){
        if (meta->LookupItem("Width") != 0){
            meta->LookupItem("Width")->Get(gdu,m_width,sizeof(m_width));
        }
        if (meta->LookupItem("Height") != 0){
            meta->LookupItem("Height")->Get(gdu,m_height,sizeof(m_height));
        }
        if (meta->LookupItem("BlendMode") != 0){
            meta->LookupItem("BlendMode")->Get(gdu, m_blendMode,sizeof(m_blendMode));
        }
        // ...
    }
```

##### <a class="anchor" id="bkmrk--18"></a>Accessing Software Layer Properties

The code snippet below shows how to set the software layer properties for an iMX6 device.

```
    Candera::GraphicDeviceUnit* m_gdu = Candera::DevicePackageInterface::CreateGraphicDeviceUnit(c_softwareLayerTypeHandle); // c_softwareLayerTypeHandle = 0x1a7e4
    static_cast<Candera::SoftwareLayer*>(m_gdu)->GetSoftwareLayerProperties().CompositionCamera() = m_camera3DiMX6;
    //...
```

# Texture Render Targets

#### <a class="anchor" id="bkmrk--8"></a>Description

This section explains how to handle Texture Render Targets in 2D and 3D.

#### <a class="anchor" id="bkmrk--10"></a>Example Solutions

<div class="contents" id="bkmrk-texturerendertargets"><div class="textblock">- TextureRenderTargetsSolution in folder *cgi\_studio\_player/content/Tutorials/07\_RenderTargetsCameras*
- MixedRenderTargetsSolution in folder *cgi\_studio\_player/content/Tutorials/07\_RenderTargetsCameras*

</div></div>#### **Define Texture Render Targets** 

To illustrate the usage of an OffScreenTarget2D, open the solution cgi\_studio\_player/content/Tutorial/07\_RenderTargetCameras/TextureRenderTargetsSolution.

##### <a class="anchor" id="bkmrk--11"></a>Offscreen Scene Content

First of all, "offscreen" scenes must be defined, which shall later be rendered into textures:

<div class="contents" id="bkmrk-offscreenscene2d%3A-th"><div class="contents"><div class="textblock">- **OffscreenScene2D:** This 2D scene contains a white box with the text "2D" in it.
- **OffscreenScene3D:** This 3D scene contains a Text3DWidget with text "3D" and a light.

</div></div></div>##### <a class="anchor" id="bkmrk--12"></a>Offscreen Scene Cameras

Next, cameras must be defined for rendering the offscreen scenes into textures.

In case of the **OffscreenScene2D**, two different cameras are defined:

<div class="contents" id="bkmrk-2dcam_to_2d%3A-this-ca"><div class="contents"><div class="contents"><div class="textblock">- **2dcam\_to\_2d**: This camera will be linked to a **OffscreenRenderTarget2D**, for rendering into a 2D texture.
- **2dcam\_to\_3d**: This camera will be linked to a **OffscreenRenderTarget2Dto3D**, for rendering into a 3D texture.

</div></div></div></div><div drawio-diagram="2392"><img src="https://doc316en.candera.eu/uploads/images/drawio/2023-02/drawing-4-1677217476.png" alt=""/></div>

<div class="contents" id="bkmrk--0"><div class="contents"><div class="textblock">  
</div></div></div>Similarly, the **OffscreenScene3D** defines following two cameras:

<div class="contents" id="bkmrk-3dcam_to_3d%3A-this-ca"><div class="contents"><div class="contents"><div class="textblock">- **3dcam\_to\_3d**: This camera will be linked to a **OffscreenRenderTarget3D**, for rendering into a 3D texture.
- **3dcam\_to\_2d**: This camera will be linked to a **OffscreenRenderTarget3Dto2D**, for rendering into a 2D texture.

</div></div></div></div><div drawio-diagram="2394"><img src="https://doc316en.candera.eu/uploads/images/drawio/2023-02/drawing-4-1677217501.png" alt=""/></div>

<div class="contents" id="bkmrk--2"><div class="contents"><div class="textblock">  
</div></div></div>##### <a class="anchor" id="bkmrk--15"></a>Define Offscreen Render Targets

Finally, all the cameras from Offscreen scenes must be linked to the related offscreen render targets, for rendering the content of offscreen scenes:

<div class="contents" id="bkmrk-offscreentarget2d%3A-2"><div class="textblock">- **OffscreenTarget2D:** 2D render target for the text "2D"
- **OffscreenTarget2Dto3D:** 3D render target for the text "2D"
- **OffscreenTarget3D:** 3D render target for the text "3D"
- **OffscreenTarget3Dto2D:** 2D render target for the text "3D"

</div></div>#### **Use Texture Render Targets**   


##### <a class="anchor" id="bkmrk--16"></a>Use Texture Render Targets in a 2D Scene

The 2D scene "OnscreenScene2D" is rendered on a DisplayRenderTarget2D and shall include the render outputs from both the 2D and 3D offscreen scenes.

For this, bitmap nodes are defined in this scene which use the following offscreen render targets as textures:

<div class="contents" id="bkmrk-offscreentarget2d-of"><div class="contents"><div class="contents"><div class="textblock">- **OffscreenTarget2D**
- **OffscreenTarget3Dto2D**

</div></div></div></div><div drawio-diagram="2397"><img src="https://doc316en.candera.eu/uploads/images/drawio/2023-02/drawing-4-1677217557.png" alt=""/></div>

<div class="contents" id="bkmrk--4"><div class="contents"><div class="textblock">  
</div></div></div>##### <a class="anchor" id="bkmrk--18"></a>Use Texture Render Targets in a 3D Scene

The 3D scene "OnscreenScene3D" is rendered on a DisplayRenderTarget3D and shall include the render outputs from both the 2D and 3D offscreen scenes.

For this, two cubes are defined in this scene which use the following offscreen render targets as textures:

<div class="contents" id="bkmrk-offscreentarget3d-of"><div class="contents"><div class="contents"><div class="textblock">- **OffscreenTarget3D**
- **OffscreenTarget2Dto3D**

</div></div></div></div><div drawio-diagram="2399"><img src="https://doc316en.candera.eu/uploads/images/drawio/2023-02/drawing-4-1677217572.png" alt=""/></div>

<div class="contents" id="bkmrk--6"><div class="contents"><div class="textblock">  
</div></div></div>##### <a class="anchor" id="bkmrk--20"></a>Composition Camera Property Set

The **Composition Camera** property of the DisplayRenderTarget3D and DisplayRenderTarget2D render targets must be set to the camera linked with RenderTargetOwner. These is mandatory for rendering the composed contend of the two display render targets.

<div class="contents" id="bkmrk-the-layer-property-m"><div class="textblock"><dl class="note"><dt></dt><dd><p class="callout info">The Layer property must be correctly set for Candera::SoftwareLayer render targets (DisplayRenderTarget3D and DisplayRenderTarget2D). The layers must have different values, with the lowest value for the lowest layer.</p>

</dd></dl></div></div>#### **Example Solution** 

Another example of using Texture Render targets can be seen in the tutorial solution *cgi\_studio\_player/content/Tutorials/07\_RenderTargetsCameras/MixedRenderTargetsSolution*.

OffscreenTarget2Dto3D, OffscreenTarget3Dto2D and Mixed2D3DOffscreenTarget render targets are used as texture for 3D meshes or as Image for BitmapBrush effects. The Mixed2D3DDisplayTarget is linked to the display and can be used for 2D and/or 3D content. In the tutorial solution *MixedRenderTargetsSolution* there are two cameras (2D and 3D) attached to the Mixed2D3DDisplayTarget. The resulted image on display shows the content of the both scenes overlapped.

<div drawio-diagram="2401"><img src="https://doc316en.candera.eu/uploads/images/drawio/2023-02/drawing-4-1677217606.png" alt=""/></div>

<div class="contents" id="bkmrk-rules-to-configure-m"><div class="contents"><div class="contents"><div class="textblock"><dl class="note"><dt></dt><dd><p class="callout info">**Rules to configure multiple cameras attached to a render target** - Camera 2D: Clear Color Buffer = false; Enable Swapping = true  
- Camera 3D: Clear Color Buffer = true; Enable Swapping = false</p>

</dd></dl></div></div></div></div>The pictures from this tutorial where obtained from the following sources:

<a class="anchor" id="bkmrk--22"></a>\[1\] www.shutterstock.com/pic-12442312/stock-vector-a-business-man-runs-amp-power-walks-to-success-in-animation-sequence-frame-loops-with.html

# Camera Groups

#### <a class="anchor" id="bkmrk--1"></a>Description

This section explains how to use Camera Groups to handle cameras uniformly across multiple scenes.

#### <a class="anchor" id="bkmrk--3"></a>Example Solution

<div class="contents" id="bkmrk-cameragroupsolution-"><div class="textblock">- CameraGroupSolution example in folder *cgi\_studio\_player/content/Tutorials/07\_RenderTargetsCameras*

</div></div>#### **Camera Group - Interface** 

[Candera::CameraGroup](http://dev.doc.cgistudio.at/APILINK/class_candera_1_1_camera_group.html) is a container that groups an arbitrary number of 2D and/or 3D cameras from different scenes. This feature is especially useful for complex applications because it offers a simpler way to control which cameras are rendering at a certain moment.

The snippet below shows how to add cameras to a [Candera::CameraGroup](http://dev.doc.cgistudio.at/APILINK/class_candera_1_1_camera_group.html) object:

```
    m_cameraGroup[0].AddCamera2D(m_cameraCubeTex1);
    m_cameraGroup[0].AddCamera2D(m_cameraSphereTex1);
    m_cameraGroup[0].AddCamera(m_cameraFront);

    m_cameraGroup[1].AddCamera2D(m_cameraCubeTex2);
    m_cameraGroup[1].AddCamera2D(m_cameraSphereTex1);
    m_cameraGroup[1].AddCamera(m_cameraFront);

    m_cameraGroup[2].AddCamera2D(m_cameraCubeTex2);
    m_cameraGroup[2].AddCamera2D(m_cameraSphereTex2);
    m_cameraGroup[2].AddCamera(m_cameraFront);

    m_cameraGroup[3].AddCamera2D(m_cameraCubeTex2);
    m_cameraGroup[3].AddCamera2D(m_cameraSphereTex2);
    m_cameraGroup[3].AddCamera(m_cameraSide);

    m_cameraGroup[4].AddCamera2D(m_cameraCubeTex1);
    m_cameraGroup[4].AddCamera2D(m_cameraSphereTex2);
    m_cameraGroup[4].AddCamera(m_cameraSide);

    m_cameraGroup[5].AddCamera2D(m_cameraCubeTex1);
    m_cameraGroup[5].AddCamera2D(m_cameraSphereTex1);
    m_cameraGroup[5].AddCamera(m_cameraSide);
```

Then, any group can be enabled for rendering as follows:

```
    m_cameraGroup[idx].SetRenderingEnabled(true);
    if (idx < 3){
        m_cameraFront->SetSwapEnabled(true);
        m_cameraSide->SetSwapEnabled(false);
    }
    else{
        m_cameraFront->SetSwapEnabled(false);
        m_cameraSide->SetSwapEnabled(true);
    }
```

#### **Camera Groups - Example** 

The diagram below presents a brief example of how to dynamically set 3D nodes textures by enabling the rendering of different camera groups.

<div drawio-diagram="2409"><img src="https://doc316en.candera.eu/uploads/images/drawio/2023-02/drawing-4-1677217896.png" alt=""/></div>

<div class="contents" id="bkmrk--0"><div class="contents"><div class="textblock">  
</div></div></div>  
The texture of each of the two nodes from the 3D scene is an offscreen render target linked to a pair of cameras 2D. Each of the 2D cameras is "seeing" a pattern which is "projected" on the node surface when the camera is enabled for rendering. The cameras are added in CameraGroups, each camera group contains three cameras: a camera 3D and two camera 2D corresponding to the cube and sphere textures. By enabling/disabling the rendering of different camera groups the textures on the nodes will change accordingly. For best results enable for rendering only one camera group at a time.

<div class="contents" id="bkmrk-a-camera-can-belong-"><div class="contents"><div class="textblock"><dl class="note"><dt></dt><dd><p class="callout info">A camera can belong to multiple groups, but its state is unique, meaning that enabling the camera in one group will enable it in all groups and also in the Render Target panel where it is associated to a render target. If a group is disabled or enabled, all the cameras inside it will be disabled or enabled. If one or many from those cameras are members of another group, the second group will be enabled or disabled too.</p>

</dd></dl></div></div></div>**See also:**

<div class="contents" id="bkmrk-camera-group-in-scen"><div class="contents"><div class="textblock">- [Camera Group](https://doc316en.candera.eu/link/133#bkmrk-camera-group%C2%A0) in SceneComposer User Manual

</div></div></div>##### <a class="anchor" id="bkmrk--5"></a>Example Solution

<div class="contents" id="bkmrk-cameragroupsolution--0"><div class="textblock">- CameraGroupSolution example in folder *cgi\_studio\_player/content/Tutorials/07\_RenderTargetsCameras* illustrates the scenario presented above. In order to enable/disable camera groups in SceneComposer, select the Render Targets panel and press on the third button showing the tooltip "Go to Camera Group Explorer view".

</div></div>

# Proxy Texture Image

#### <a class="anchor" id="bkmrk--0"></a>Description

This section describes how to use the proxy texture images and how to create custom image sources.

#### **Texture Images** 

[Candera](http://dev.doc.cgistudio.at/APILINK/namespace_candera.html "[DataBinding_RefTypeSample]") offers out of the box usage of 2D and CubeMap textures in 3D scenes, which is sufficient in many cases. These two texture types are directly represented through the classes

<div class="contents" id="bkmrk-candera%3A%3Abitmaptextu"><div class="contents"><div class="textblock">- [Candera::BitmapTextureImage](http://dev.doc.cgistudio.at/APILINK/class_candera_1_1_bitmap_texture_image.html "TextureImage encapsulates a VRAM handle which is retrieved when uploading an image to the vram...") and
- [Candera::CubeMapTextureImage](http://dev.doc.cgistudio.at/APILINK/class_candera_1_1_cube_map_texture_image.html "CubeMapTextureImage encapsulates a VRAM handle which is retrieved when uploading a cube mapping textu...").

</div></div></div>However, these two derivations of [Candera::TextureImage](http://dev.doc.cgistudio.at/APILINK/class_candera_1_1_texture_image.html "Abstract base class for Texture images.A texture image mainly encapsulates a texture handle in VRAM a...") don't represent all use cases that can be realized with textures.

##### <a class="anchor" id="bkmrk--2"></a>ProxyTextureImage

For this reason a third derivation, namely, [Candera::ProxyTextureImage](http://dev.doc.cgistudio.at/APILINK/class_candera_1_1_proxy_texture_image.html "The class ProxyTextureImage provides a TextureImage interface to an externally maintained image sourc...") exists, that simply forwards an external texture handle to the texture activation procedures, in order to display other input than the previously mentioned image data. Detailed description of usage is given in chapter <span style="color: rgb(230, 126, 35);">[Proxy Texture Images](https://doc316en.candera.eu/link/541#bkmrk-proxy-texture-images)</span>.

One use case that can be realized with [Candera::ProxyTextureImage](http://dev.doc.cgistudio.at/APILINK/class_candera_1_1_proxy_texture_image.html "The class ProxyTextureImage provides a TextureImage interface to an externally maintained image sourc...") is the usage of off-screen render targets in order to use arbitrary rendered images of 3D scenes as texture image. Refer to the first example part of this tutorial:

<div class="contents" id="bkmrk-example%3A-offscreen-r"><div class="contents"><div class="textblock">- <span style="color: rgb(230, 126, 35);">[Example: Offscreen Render Targets](https://doc316en.candera.eu/link/541#bkmrk-example%3A-offscreen-r-0)</span>

</div></div></div>Other use cases, such as video textures can only be realized using (often proprietary) OpenGL ES 2.0 extensions. How to create an ImageSource3D that can be used for these use cases is the second part of this tutorial. Refer to:

<div class="contents" id="bkmrk-example%3A-external-im"><div class="textblock">- <span style="color: rgb(230, 126, 35);">[Example: External Image Source](#bkmrk-example%3A-external-im-0)</span>

</div></div>####   
**Proxy Texture Images** 

In [Candera](http://dev.doc.cgistudio.at/APILINK/namespace_candera.html "[DataBinding_RefTypeSample]") [Candera::TextureImage](http://dev.doc.cgistudio.at/APILINK/class_candera_1_1_texture_image.html "Abstract base class for Texture images.A texture image mainly encapsulates a texture handle in VRAM a...") provides an interface to upload and activate a textures VRAM handle. This interface is further used by [Candera::Texture](http://dev.doc.cgistudio.at/APILINK/class_candera_1_1_texture.html "Texture encapsulates a TextureImage and a set of attributes specifying how it is applied to a vertex'...") to separate the common settings of textures and the specialized texture types. This chapter focuses on the use of [Candera::ProxyTextureImage](http://dev.doc.cgistudio.at/APILINK/class_candera_1_1_proxy_texture_image.html "The class ProxyTextureImage provides a TextureImage interface to an externally maintained image sourc..."), for details on texturing itself, please refer to the <span style="color: rgb(230, 126, 35);">[Appearance Tutorial on Textures](https://doc316en.candera.eu/link/448#bkmrk-appearance%3A-texture%C2%A0)</span>.

Knowledge of the following [Candera::TextureImage](http://dev.doc.cgistudio.at/APILINK/class_candera_1_1_texture_image.html "Abstract base class for Texture images.A texture image mainly encapsulates a texture handle in VRAM a...") functions is needed to understand [Candera::ProxyTextureImage](http://dev.doc.cgistudio.at/APILINK/class_candera_1_1_proxy_texture_image.html "The class ProxyTextureImage provides a TextureImage interface to an externally maintained image sourc...").

```
virtual Handle GetVideoMemoryHandle() const = 0;
```

exposes a textures VRAM handle to all clients that use [Candera::TextureImage](http://dev.doc.cgistudio.at/APILINK/class_candera_1_1_texture_image.html "Abstract base class for Texture images.A texture image mainly encapsulates a texture handle in VRAM a..."). This is needed in order to enable texture render states and to activate the texture.

```
virtual bool IsMipMappingEnabled() const = 0;
```

returns if mip mapping is enabled on a texture or not.

These functions are directly implemented and coupled to fixed functionality in the derivations [Candera::BitmapTextureImage](http://dev.doc.cgistudio.at/APILINK/class_candera_1_1_bitmap_texture_image.html "TextureImage encapsulates a VRAM handle which is retrieved when uploading an image to the vram...") and [Candera::CubeMapTextureImage](http://dev.doc.cgistudio.at/APILINK/class_candera_1_1_cube_map_texture_image.html "CubeMapTextureImage encapsulates a VRAM handle which is retrieved when uploading a cube mapping textu...").

[Candera::ProxyTextureImage](http://dev.doc.cgistudio.at/APILINK/class_candera_1_1_proxy_texture_image.html "The class ProxyTextureImage provides a TextureImage interface to an externally maintained image sourc...") also implements the [Candera::TextureImage](http://dev.doc.cgistudio.at/APILINK/class_candera_1_1_texture_image.html "Abstract base class for Texture images.A texture image mainly encapsulates a texture handle in VRAM a...") interface, but in contrast to the other implementations it takes Candera::ImageSource3D objects, and simply forwards their VRAM handles through the GetVideoMemoryHandle function. Setting of the ImageSource can only be done at creation time, use the ProxyTextureImage's factory function for doing this.

```
static MemoryManagement::SharedPointer<ProxyTextureImage> <a class="code" href="http://dev.doc.cgistudio.at/APILINK/group___c_o_u_r_i_e_r___v_i_s_u_a_l_i_z_a_t_i_o_n.html#ggaf0e93dc4242f607c3c8d13dafd036af9aaabfa5309af24986d3111a092449f857">Create</a>(ImageSource3D* imageSource);
```

##### <a class="anchor" id="bkmrk--3"></a>ImageSource3D Interface

As explained in the previous section, [Candera::ProxyTextureImage](http://dev.doc.cgistudio.at/APILINK/class_candera_1_1_proxy_texture_image.html "The class ProxyTextureImage provides a TextureImage interface to an externally maintained image sourc...") takes an Candera::ImageSource3D and forwards its VRAM handle through the [Candera::TextureImage](http://dev.doc.cgistudio.at/APILINK/class_candera_1_1_texture_image.html "Abstract base class for Texture images.A texture image mainly encapsulates a texture handle in VRAM a...") interface. This section explains what the Candera::ImageSource3D interface is, and how it's used.

A Candera::ImageSource3D object in [Candera](http://dev.doc.cgistudio.at/APILINK/namespace_candera.html "[DataBinding_RefTypeSample]") is basically an interface that provides a handle to an OpenGL ES 2.0 texture in VRAM. It is derived from Candera::ImageSource, which inherits from Candera::Surface which itself inherits from Candera::Synchronizable.

Therefore the following interface has to be implemented:

<div class="contents" id="bkmrk-candera%3A%3Asynchroniza"><div class="contents"><div class="textblock">- Candera::Synchronizable Methods ```
    virtual void Sync() = 0;
    ```
    
    If some kind of synchronization needs to be done, implement it inside this method. It will be called every time the [Candera::ProxyTextureImage](http://dev.doc.cgistudio.at/APILINK/class_candera_1_1_proxy_texture_image.html "The class ProxyTextureImage provides a TextureImage interface to an externally maintained image sourc..."), where this ImageSource3D is associated to, gets activated. Prerequisite is that [Candera::ProxyTextureImage::IsSyncEnabled](http://dev.doc.cgistudio.at/APILINK/class_candera_1_1_proxy_texture_image.html#ac99447caf32f5c067d0e393763cb3f91) is set to true. ```
    virtual void WaitSync() = 0;
    ```
    
    Blocks the current thread until the object is in synchronized state. In the context of [Candera::ProxyTextureImage](http://dev.doc.cgistudio.at/APILINK/class_candera_1_1_proxy_texture_image.html "The class ProxyTextureImage provides a TextureImage interface to an externally maintained image sourc...") this is never called, but has to be implemented at least empty.

- Candera::Surface Methods ```
    virtual Int GetHeight() const = 0;
    ```
    
    ```
    virtual Int GetWidth() const = 0;
    ```
    
    These functions have to return the width and the height of the texture in texels.

- Candera::ImageSource Methods

</div></div></div>No special interface to implement.

<div class="contents" id="bkmrk-candera%3A%3Aimagesource"><div class="contents"><div class="textblock">- Candera::ImageSource3D Methods ```
    virtual Handle GetVideoMemoryHandle() const = 0;
    ```
    
    Exposes the video memory handle of the Candera::ImageSource3D implementation. This is the most important function to create ImageSources as this is the handle which gets forwarded from [Candera::ProxyTextureImage::GetVideoMemoryHandle](http://dev.doc.cgistudio.at/APILINK/class_candera_1_1_proxy_texture_image.html#aeea0facf94545b8cec08674f519d0e8c). This handle is further used for setting render states and activation of the texture. Note: This handle has also to be uploaded and eventually updated, which is not done by [Candera](http://dev.doc.cgistudio.at/APILINK/namespace_candera.html "[DataBinding_RefTypeSample]") itself, but has to be done by the application. Imagine e.g. a video texture using an appropriate extension, the handle has to be uploaded before rendering. The content of the VRAM buffer then has to be updated before the [Candera::Renderer::RenderCamera](http://dev.doc.cgistudio.at/APILINK/class_candera_1_1_renderer.html#a10dbe66b15c60f44cce3aaccd38d2ee5) or [Candera::Renderer::RenderAllCameras](http://dev.doc.cgistudio.at/APILINK/class_candera_1_1_renderer.html#aed822ba1d66620f2d1e794973e30f354) is called. ```
    virtual bool IsMipMappingEnabled() const = 0;
    ```
    
    Returns if mip mapping is enabled or not. Set it to your needs or make it configurable.

</div></div></div>This interface is used for multiple purposes:

<div class="contents" id="bkmrk-candera-uses-it-for-"><div class="textblock">- [Candera](http://dev.doc.cgistudio.at/APILINK/namespace_candera.html "[DataBinding_RefTypeSample]") uses it for multiple device objects, such as off-screen render targets. With [Candera::ProxyTextureImage](http://dev.doc.cgistudio.at/APILINK/class_candera_1_1_proxy_texture_image.html "The class ProxyTextureImage provides a TextureImage interface to an externally maintained image sourc...") this is used to realize rendering scenes into textures.

- Existing [Candera::TextureImage](http://dev.doc.cgistudio.at/APILINK/class_candera_1_1_texture_image.html "Abstract base class for Texture images.A texture image mainly encapsulates a texture handle in VRAM a...") derivations like [Candera::BitmapTextureImage](http://dev.doc.cgistudio.at/APILINK/class_candera_1_1_bitmap_texture_image.html "TextureImage encapsulates a VRAM handle which is retrieved when uploading an image to the vram...") and [Candera::CubeMapTextureImage](http://dev.doc.cgistudio.at/APILINK/class_candera_1_1_cube_map_texture_image.html "CubeMapTextureImage encapsulates a VRAM handle which is retrieved when uploading a cube mapping textu...") offer a function ToImageSource3D and can therefore also be used with [Candera::ProxyTextureImage](http://dev.doc.cgistudio.at/APILINK/class_candera_1_1_proxy_texture_image.html "The class ProxyTextureImage provides a TextureImage interface to an externally maintained image sourc...").

- Own ImageSources that use e.g. an OpenGL ES extension for texturing have to implement the ImageSource3D interface and can also be used with [Candera::ProxyTextureImage](http://dev.doc.cgistudio.at/APILINK/class_candera_1_1_proxy_texture_image.html "The class ProxyTextureImage provides a TextureImage interface to an externally maintained image sourc...").

</div></div>####   
**Example: Offscreen Render Targets** 

##### <a class="anchor" id="bkmrk--4"></a>Offscreen Render Targets

The following source code example demonstrates the additional steps that need to be done in order to use offscreen render targets with [Candera::ProxyTextureImage](http://dev.doc.cgistudio.at/APILINK/class_candera_1_1_proxy_texture_image.html "The class ProxyTextureImage provides a TextureImage interface to an externally maintained image sourc...").

<div class="contents" id="bkmrk-for-specific-devices"><div class="contents"><div class="textblock"><dl class="note"><dd><p class="callout info">For specific devices the prefix "Device" is used in the beginning of class identifiers. Simply exchange it with the according device name.</p>

</dd></dl></div></div></div>First, after display creation, create and configure an off-screen render target:

```
DeviceFrameBufferObject* CreateFrameBufferObject() {
    Int count = 0;
    const GraphicDeviceUnitTypeHandle* handle = DevicePackageDescriptor::GetUnitTypes(DevicePackageDescriptor::OffscreenTarget3D, 0, count);
    if (handle == 0 || count < 1){
        return 0; //Handle creation error.
    }
    GraphicDeviceUnit* gdu = DevicePackageInterface::CreateGraphicDeviceUnit(handle[0]);
    if (gdu != 0) {
        gdu->SetDisplay(displayId);
    }

    return (DeviceFrameBufferObject*)gdu;
}

GraphicDeviceUnit* m_gdu;
DeviceFrameBufferObject* m_fbo;


void <a class="code" href="http://dev.doc.cgistudio.at/APILINK/namespace_courier.html#a2e6f80d7ef7c7a120595f3d56e6f4246">Init</a>() {
    ...
    //Display creation
    m_gdu = ...;
    ...
    m_gdu->Upload();
    
    //Create and configure offscreen render target.
    m_fbo = CreateFrameBufferObject();
    m_fbo->SetWidth(m_gdu->ToRenderTarget3D()->GetWidth());   //Offscreen RT now has same dimensions than GDU.
    m_fbo->SetHeight(m_gdu->ToRenderTarget3D()->GetHeight()); //Of course this can vary.
    m_fbo->SetColorFormat(RgbaUnpackedColorFormat);
    m_fbo->SetDepthFormat(Depth32Format);
    m_fbo->Upload();
    ...
    InitCamera();
    InitScene();
    m_scene->UploadAll();
}
```

Further specify a camera which renders the offscreen render target. This is basically the same as normal camera creation, except that the fbo is set as render target.

```
void InitCamera() {
    //Initialize main camera
    m_camera = <a class="code" href="http://dev.doc.cgistudio.at/APILINK/group___c_o_u_r_i_e_r___v_i_s_u_a_l_i_z_a_t_i_o_n.html#ggaf0e93dc4242f607c3c8d13dafd036af9aaabfa5309af24986d3111a092449f857">Camera::Create</a>();
    ...
    
    //Initialize offscreen camera
    m_offscreenCam = <a class="code" href="http://dev.doc.cgistudio.at/APILINK/group___c_o_u_r_i_e_r___v_i_s_u_a_l_i_z_a_t_i_o_n.html#ggaf0e93dc4242f607c3c8d13dafd036af9aaabfa5309af24986d3111a092449f857">Camera::Create</a>();
    m_offscreenCam->SetName("OffScreen Camera");
    m_offscreenCam->SetViewport(<a class="code" href="http://dev.doc.cgistudio.at/APILINK/class_candera_1_1_rectangle.html" title="Represents a rectangle.">Candera::Rectangle</a>(0.0f, 0.0f, 1.0f, 1.0f));
    //Here the offscreen RT is used as camera render target.
    m_offscreenCam->SetRenderTarget(m_fbo->ToRenderTarget3D());

    const Int vpWidth = 1600;//m_width;
    const Int vpHeight = 600;//m_height;

    SharedPointer<PerspectiveProjection> perspectiveProjection = <a class="code" href="http://dev.doc.cgistudio.at/APILINK/group___c_o_u_r_i_e_r___v_i_s_u_a_l_i_z_a_t_i_o_n.html#ggaf0e93dc4242f607c3c8d13dafd036af9aaabfa5309af24986d3111a092449f857">PerspectiveProjection::Create</a>();
    perspectiveProjection->SetNearZ(0.001F);
    perspectiveProjection->SetFarZ(100.0F);
    perspectiveProjection->SetFovYDegrees(45.0F);
    perspectiveProjection->SetAspectRatio(static_cast<Float>(vpWidth) / static_cast<Float>(vpHeight));

    m_offscreenCam->SetProjection(perspectiveProjection);
    m_offscreenCam->SetPosition(Vector3(0.0f, 0.0f, 0.0f));
    m_offscreenCam->SetUpVector(Vector3(0.0f, 1.0f, 0.0f));
    m_offscreenCam->LookAtWorldPoint(Vector3(0.0f, 0.0f, -1.0f));

    m_clearMode.SetClearColor(<a class="code" href="http://dev.doc.cgistudio.at/APILINK/group___behaviors_control.html#ggae7abc816df647d0ecbc280480fefb788a6d1d4da086e381cb2c5a5ce6a2513ebd">Color</a>(0.8f,0.8f,1.0f,1.0f));
    m_clearMode.SetColorClearEnabled(true);
    m_clearMode.SetDepthClearEnabled(true);
    m_clearMode.SetClearDepth(1.0f);
    m_offscreenCam->SetClearMode(m_clearMode);
    m_offscreenCam->SetClearModeEnabled(true);
    m_offscreenCam->SetSwapEnabled(true);

    m_scene->AddChild(m_offscreenCam); //You can off course also render different scenes
                                       //your offscreen camera.
}
```

Finally, set the off-screen render target as image source of the proxy texture.

```
void InitScene() {
    //Init your scenes here
    ...
    //The texture the offscreen RT is rendered into.
    SharedPointer<Texture> proxyTex = <a class="code" href="http://dev.doc.cgistudio.at/APILINK/group___c_o_u_r_i_e_r___v_i_s_u_a_l_i_z_a_t_i_o_n.html#ggaf0e93dc4242f607c3c8d13dafd036af9aaabfa5309af24986d3111a092449f857">Texture::Create</a>();
    //here the fbo is set as the textures image source!
    SharedPointer<ProxyTextureImage> proxyTexImg = <a class="code" href="http://dev.doc.cgistudio.at/APILINK/group___c_o_u_r_i_e_r___v_i_s_u_a_l_i_z_a_t_i_o_n.html#ggaf0e93dc4242f607c3c8d13dafd036af9aaabfa5309af24986d3111a092449f857">ProxyTextureImage::Create</a>(m_fbo->ToImageSource3D());
    //Use the ProxyTextureImage as the textures TextureImage.
    proxyTex->SetTextureImage(proxyTexImg);
    //Set up the texture to fit your needs.
    proxyTex->SetMipMapFilter(Texture::MipMapNone);
    proxyTex->SetMagnificationFilter(Texture::MinMagNearest);
    proxyTex->SetMinificationFilter(Texture::MinMagNearest);
    proxyTex->SetWrapModeU(Texture::ClampToEdge);
    proxyTex->SetWrapModeV(Texture::ClampToEdge);

    ...

}
```

The result is that the content of the off-screen render target is displayed as texture in the display render target. See the screenshot below:

<div drawio-diagram="2413"><img src="https://doc316en.candera.eu/uploads/images/drawio/2023-02/drawing-4-1677218158.png" alt=""/></div>

<div class="contents" id="bkmrk-see-also%3A-multiple-r"><div class="textblock"><dl class="see"><dt>**See also:**</dt><dd><span style="color: rgb(230, 126, 35);">[Multiple Render Targets](https://doc316en.candera.eu/books/candera/page/multiple-render-targets)</span> for how to configure an offscreen render target in SceneComposer.</dd></dl></div></div>####   
**Example: External Image Source** 

##### <a class="anchor" id="bkmrk--6"></a>External Image Source

This section shall be understood more as a proposal on how you might implement your own external image source than as tutorial. Reason is that various OpenGL ES extensions exist, a concrete tutorial therefore would be too extension specific.

Here a proposal is presented on how a class could be realized, that encapsulates a texture handle.

<div class="contents" id="bkmrk-candera%3A%3Aproxytextur-0"><div class="contents"><div class="contents"><div class="textblock"><dl class="note"><dt></dt><dd><p class="callout info">[Candera::ProxyTextureImage](http://dev.doc.cgistudio.at/APILINK/class_candera_1_1_proxy_texture_image.html "The class ProxyTextureImage provides a TextureImage interface to an externally maintained image sourc...") can be used with textures of type GL\_TEXTURE\_2D or GL\_TEXTURE\_CUBE\_MAP. For other types, e.g. 3D textures, activation and other steps have to be done using own implementations along with node listeners.</p>

</dd></dl></div></div></div></div>Following class is a proposal on how an external image source could look like. Have a look at the comments to figure out the details.

```
class ExternalImageSource : public ImageSource3D       //First step is to derive from ImageSource3D.
{

public:
    ExternalImageSource();
    virtual ~ExternalImageSource();

    //Uploads the external image source to VRAM, ensure that the desired OpenGL ES Context is activated.
    //Implementation has to be extension specific. 
    bool Upload();

    //Unloads the external image source from VRAM, ensure that the desired OpenGL ES Context is activated.
    //Implementation has to be extension specific.
    bool <a class="code" href="http://dev.doc.cgistudio.at/APILINK/group___c_o_u_r_i_e_r___v_i_s_u_a_l_i_z_a_t_i_o_n.html#ggaebf7a2d5677fc4e6ddcb367db56e9c15a1b6f59824b91ac64e42a98cf561639d6">Unload</a>();

    /*
 Updates the external image source in VRAM, ensure that the desired OpenGL ES Context is activated.
 Adapt function to your needs.
 Has to be called whenever the image changes.
 Implementation has to be extension specific.
     */
    bool Update();

    //Implement ImageSource3D interface:
    virtual Handle GetVideoMemoryHandle() const;
    virtual bool IsMipMappingEnabled() const { return m_isMipMappingEnabled; }
    virtual Int GetHeight() const { return m_height; }
    virtual Int GetWidth() const { return m_width; }
    virtual void Sync() {}
    virtual void WaitSync() {}

    /*
 Getters and setters as well as members to interact with the external image source, such as a video
 player, have to be added to this header.
     */

#ifndef GL_VIV_direct_texture
    void SetBitmap(const Bitmap::SharedPointer& bitmap) { m_bitmap = bitmap; }
    const Bitmap::SharedPointer& GetBitmap() const { return m_bitmap; }
#endif

private:

    bool m_isMipMappingEnabled;
    Int m_width;
    Int m_height;
    Handle m_videoMemoryHandle[<a class="code" href="http://dev.doc.cgistudio.at/APILINK/group___config.html#gaa0f86f8c24d807ca04a69036482f740c" title="CANDERA_MAX_CONTEXT_COUNT defines how many GPU contexts are supported. Candera supports up to 4 conte...">CANDERA_MAX_CONTEXT_COUNT</a>];

#ifdef GL_VIV_direct_texture
    GLvoid* m_texels;       //Direct pointer to buffer in VRAM!
#else
    Bitmap::SharedPointer m_bitmap;
#endif


    /*
 Getters and setters as well as members to interact with the external image source, such as a video
 player, have to be added to this header.
     */

};
```

```
Handle ExternalImageSource::GetVideoMemoryHandle() const
{
    Handle handle = m_videoMemoryHandle[ContextResourcePool::GetActive().GetIndex()];
    return handle;
}
```

Finally, set the external image source as image source of your proxy texture. Upload should be called manually before or after uploading other nodes, but at least before your render loop starts.

Update should be called any time the external image source changes (e.g. a new frame is grabbed from a video). When calling Update, ensure that it is called before rendering the next camera frame.

```
    //An instance of the external image source (or pointer to) is needed.
    ExternalImageSource m_externalImage;
```

```
void ExternalImageSourceApp::InitScene()
{
    m_scene = <a class="code" href="http://dev.doc.cgistudio.at/APILINK/group___c_o_u_r_i_e_r___v_i_s_u_a_l_i_z_a_t_i_o_n.html#ggaf0e93dc4242f607c3c8d13dafd036af9aaabfa5309af24986d3111a092449f857">Scene::Create</a>();
    m_scene->SetName("Scene");

    m_light = <a class="code" href="http://dev.doc.cgistudio.at/APILINK/group___c_o_u_r_i_e_r___v_i_s_u_a_l_i_z_a_t_i_o_n.html#ggaf0e93dc4242f607c3c8d13dafd036af9aaabfa5309af24986d3111a092449f857">Light::Create</a>();
    m_light->SetType(Light::Directional);
    m_light->SetAmbient(<a class="code" href="http://dev.doc.cgistudio.at/APILINK/group___behaviors_control.html#ggae7abc816df647d0ecbc280480fefb788a6d1d4da086e381cb2c5a5ce6a2513ebd">Color</a>(0.3f, 0.3f, 0.3f));
    m_light->SetDiffuse(<a class="code" href="http://dev.doc.cgistudio.at/APILINK/group___behaviors_control.html#ggae7abc816df647d0ecbc280480fefb788a6d1d4da086e381cb2c5a5ce6a2513ebd">Color</a>(1.0f, 1.0f, 1.0f));
    m_light->SetSpecular(<a class="code" href="http://dev.doc.cgistudio.at/APILINK/group___behaviors_control.html#ggae7abc816df647d0ecbc280480fefb788a6d1d4da086e381cb2c5a5ce6a2513ebd">Color</a>(1.0f,1.0f,1.0f));
    m_light->SetDirection(Vector3(0.0f, -5.0f, 0.0f));
    m_light->SetName("Light");
    m_light->SetRenderingEnabled(true);
    m_light->SetSpotAngle(30.0f);
    m_light->SetSpotExponent(30.0f);
    m_light->SetAttenuationEnabled(true);
    m_light->SetAttenuation(1.0f, 0.0f, 0.0f);
    m_scene->AddChild(m_light);


    //Create External image source, for demonstration with a bitmap.
    m_assetFactory.CreateBitmap(BitmapData_color_map.name, m_colorMapBmp);
    m_externalImage.SetBitmap(m_colorMapBmp);
   
    //Upload external image. Ensure context is active!
    m_gdu->ToRenderTarget3D()->Activate();
    m_externalImage.Upload();

    //Now create ProxyTextureImage.
    m_externalTextureImage = <a class="code" href="http://dev.doc.cgistudio.at/APILINK/group___c_o_u_r_i_e_r___v_i_s_u_a_l_i_z_a_t_i_o_n.html#ggaf0e93dc4242f607c3c8d13dafd036af9aaabfa5309af24986d3111a092449f857">ProxyTextureImage::Create</a>(&m_externalImage);

    //Create texture with proxy image.
    SharedPointer<Texture> texture = <a class="code" href="http://dev.doc.cgistudio.at/APILINK/group___c_o_u_r_i_e_r___v_i_s_u_a_l_i_z_a_t_i_o_n.html#ggaf0e93dc4242f607c3c8d13dafd036af9aaabfa5309af24986d3111a092449f857">Texture::Create</a>();
    texture->SetTextureImage(m_externalTextureImage);

    //Finally create node (billboard) to display proxy image.
    m_billboard = <a class="code" href="http://dev.doc.cgistudio.at/APILINK/group___c_o_u_r_i_e_r___v_i_s_u_a_l_i_z_a_t_i_o_n.html#ggaf0e93dc4242f607c3c8d13dafd036af9aaabfa5309af24986d3111a092449f857">Billboard::Create</a>(1.0f, 1.0f);
    m_billboard->SetAppearance(<a class="code" href="http://dev.doc.cgistudio.at/APILINK/group___c_o_u_r_i_e_r___v_i_s_u_a_l_i_z_a_t_i_o_n.html#ggaf0e93dc4242f607c3c8d13dafd036af9aaabfa5309af24986d3111a092449f857">Appearance::Create</a>());
    m_billboard->GetAppearance()->SetShader(m_refTransRefTexShader);
    m_billboard->GetAppearance()->SetMaterial(<a class="code" href="http://dev.doc.cgistudio.at/APILINK/group___c_o_u_r_i_e_r___v_i_s_u_a_l_i_z_a_t_i_o_n.html#ggaf0e93dc4242f607c3c8d13dafd036af9aaabfa5309af24986d3111a092449f857">Material::Create</a>());
    m_billboard->GetAppearance()->GetMaterial()->SetDiffuse(<a class="code" href="http://dev.doc.cgistudio.at/APILINK/group___behaviors_control.html#ggae7abc816df647d0ecbc280480fefb788a6d1d4da086e381cb2c5a5ce6a2513ebd">Color</a>(1.0f, 1.0f, 1.0f, 1.0f));
    m_billboard->GetAppearance()->SetRenderMode(<a class="code" href="http://dev.doc.cgistudio.at/APILINK/group___c_o_u_r_i_e_r___v_i_s_u_a_l_i_z_a_t_i_o_n.html#ggaf0e93dc4242f607c3c8d13dafd036af9aaabfa5309af24986d3111a092449f857">RenderMode::Create</a>());
    m_billboard->GetAppearance()->SetShaderParamSetter(<a class="code" href="http://dev.doc.cgistudio.at/APILINK/group___c_o_u_r_i_e_r___v_i_s_u_a_l_i_z_a_t_i_o_n.html#ggaf0e93dc4242f607c3c8d13dafd036af9aaabfa5309af24986d3111a092449f857">GenericShaderParamSetter::Create</a>());
    m_billboard->GetAppearance()->SetTexture(texture,0);
    m_billboard->SetPosition(0.0f, 0.0f, -2.5f);
    m_billboard->SetRotation(0.0f, 0.0f, 0.0f);
    m_billboard->SetScale(1.5f, 1.5f, 1.5f);

    m_scene->AddChild(m_billboard);

}
```

```
{
    //You need to update your external image source before rendering.Again make sure that context is activated.
    m_gdu->ToRenderTarget3D()->Activate();
    m_externalImage.Update();
}
```

```
void ExternalImageSourceApp::OnRender()
{
    m_gdu->ToRenderTarget3D()->Activate();
    Renderer::RenderAllCameras();
    m_gdu->ToRenderTarget3D()->SwapBuffers();
}
```

# Multisample Anti-Aliasing Offscreen Render Targets

#### <a class="anchor" id="bkmrk--0"></a>Description

This section describes how to set the multisample anti-aliasing (MSAA) property for offscreen render targets.

#### **Anti-Aliasing and MSAA** 

##### <a class="anchor" id="bkmrk--2"></a>Anti-Aliasing

In computer graphics, anti-aliasing is a technique used for improving image quality by smoothing sharp edges cause by aliasing. This usually occurs when rendering high-resolution signals at a lower resolution.

##### <a class="anchor" id="bkmrk--3"></a>Multisample Anti-Aliasing

Multisample anti-aliasing is a method used for full-screen anti-aliasing by multisampling each pixel at multiple pixel locations. The fragment shader is run only once per pixel no matter the numbers of samples covered by the rendered polygon. Once the color buffer's samples are calculated, these colors are averaged per pixel to produce the final color. Depth and stencil values also make use of the multisample points which means that their buffer size will increase by the amount of samples per pixel.

The higher the number of additional samples per pixel will result in an increase in the amount of anti-aliasing which will generate even smoother edges. The application will noticeably suffer in terms of performance the more samples are used.

There are four modes for MSAA: 2x, 4x, 8x, and 16x, but out of these, 4x MSAA offers a good balance between performance and quality.

<div class="contents" id="bkmrk-msaa-for-offscreen-r"><div class="textblock"><dl class="note"><dt></dt><dd><p class="callout info">MSAA for offscreen render targets is only available on devices that support OpenGL ES 3.0 or higher. Even more, the number of supported samples differs from one device to another, some may not support more than 4x MSAA, which is the minimum defined by the OpenGL ES 3.0 standard. Using sample values higher than supported might lead to undefined behaviours or errors. It is recommended to check the device documentation for the number of supported samples.</p>

</dd></dl></div></div>####   
**MSAA Offscreen Render Targets** 

##### <a class="anchor" id="bkmrk--4"></a>Setting MsaaSamples Property

Enabling of multisample anti-aliasing with a given number of samples is achieved by setting the MsaaSamples property of a framebuffer object to a value larger than 1 (default value).

The MsaaSamples property values is changed either using Candera::GlFrameBufferProperties::SetMsaaSamples method or by meta information.

The following snippets show how to set MsaaSamples using the methods described above:

##### <a class="anchor" id="bkmrk--5"></a>Using Candera::DevicePackageInterface

<div class="contents" id="bkmrk-create-an-offscreen-"><div class="contents"><div class="contents"><div class="textblock">- create an offscreen render target using Candera::DevicePackageInterface

<div class="fragment">  
</div></div></div></div></div>```
    m_offscreenRenderTarget = Base::CreateGraphicDeviceUnit(DevicePackageDescriptor::OffscreenTarget3D);
    if (m_offscreenRenderTarget == 0) {
        return false;
    }
```

<div class="contents" id="bkmrk-access-render-target"><div class="contents"><div class="contents"><div class="textblock"><div class="fragment">  
</div>- access render target properties (including MsaaSamples) via MetaInfo

<div class="fragment">  
</div></div></div></div></div>```
    const MetaInfo::GraphicDeviceUnitMetaInfo *meta = DevicePackageDescriptor::GetMetaInformation(m_offscreenRenderTarget->GetUnitType());
    meta->LookupItem("Width") && meta->LookupItem("Width")->Set(m_offscreenRenderTarget, m_rtProperties.m_width);
    meta->LookupItem("Height") && meta->LookupItem("Height")->Set(m_offscreenRenderTarget, m_rtProperties.m_height);
    meta->LookupItem("ColorFormat") && meta->LookupItem("ColorFormat")->Set(m_offscreenRenderTarget, m_rtProperties.m_colorFormat);
    meta->LookupItem("DepthFormat") && meta->LookupItem("DepthFormat")->Set(m_offscreenRenderTarget, m_rtProperties.m_depthFormat);
    meta->LookupItem("MsaaSamples") && meta->LookupItem("MsaaSamples")->Set(m_offscreenRenderTarget, m_rtProperties.m_msaaSamples);

    if(m_offscreenRenderTarget->Upload() != true){
        FEATSTD_LOG_ERROR("Offscreen render target upload failed\n");
        return false;
    }
```

##### <a class="anchor" id="bkmrk--6"></a>Using Candera::iMX6FrameBufferObject

<div class="contents" id="bkmrk-declare-an-imx6-fram"><div class="contents"><div class="contents"><div class="textblock">- declare an iMX6 framebuffer render target

<div class="fragment">  
</div></div></div></div></div>```
            iMX6FrameBufferObject m_fbo;
            iMX6FrameBufferObject* m_frameBufferRenderTarget;
```

<div class="contents" id="bkmrk-access-render-target-0"><div class="contents"><div class="contents"><div class="textblock"><div class="fragment">  
</div>- access render target properties using their corresponding setter methods

<div class="fragment">  
</div></div></div></div></div>```
    m_frameBufferRenderTarget = &m_fbo;
    m_frameBufferRenderTarget->GetProperties().SetHeight(c_fbHeight);
    m_frameBufferRenderTarget->GetProperties().SetWidth(c_fbWidth);
    m_frameBufferRenderTarget->GetProperties().SetMsaaSamples(c_msaaSamples);
    m_frameBufferRenderTarget->Upload();
```

##### <a class="anchor" id="bkmrk--7"></a>Framebuffer Blit

These multisample renderbuffers cannot be directly bound to textures. A solution is provided by OpenGL ES 3.0 by using the framebuffer blit function, such that these renderbuffers are resolved to single-sample textures with the use of an intermediate framebuffer. The blit function is responsible to transfer a region defined by 4 screen-space coordinates of the read framebuffer to another region in the draw framebuffer, turning the multisample buffer into a 2D texture that could be further used for post-processing in the fragment shader.

####   
**Example: MSAA result for different sample values** 

The results of multisample anti-aliasing for 1x - default, 2x, 4x, 8x and 16x sample rates can be seen in the image below.

<div drawio-diagram="2414"><img src="https://doc316en.candera.eu/uploads/images/drawio/2023-02/drawing-4-1677218858.png" alt=""/></div>

# External Texture Image

#### <a class="anchor" id="bkmrk-"></a>How to use EGLKHRExternalTexture

To use an DMA buffer as an external texture create an array to hold necessary information. This varies with platforms and types of buffers. This example shows using DMS buffers on RCarH3.

```
//Activate appropriate RenderTarget first.

EGLint defaultAttribs[13];
defaultAttribs[0] = EGL_DMA_BUF_PLANE0_FD_EXT;
defaultAttribs[1] = <file descriptor of the buffer>;  //file descriptor 
defaultAttribs[2] = EGL_DMA_BUF_PLANE0_OFFSET_EXT;
defaultAttribs[3] = 0; // depends on platform and requirements
defaultAttribs[4] = EGL_DMA_BUF_PLANE0_PITCH_EXT;
defaultAttribs[5] = <pitch of the buffer>; 
defaultAttribs[6] = EGL_LINUX_DRM_FOURCC_EXT; 
defaultAttribs[7] = DRM_FORMAT_ARGB8888;  // depends on platform and requirements
defaultAttribs[8] = EGL_WIDTH;
defaultAttribs[9] = 255; // width of the image. Also set this to the EglKhrExternalTextureImage 
defaultAttribs[10] = EGL_HEIGHT;
defaultAttribs[11] = 456; // height of the image. Also set this to the EglKhrExternalTextureImage 
defaultAttribs[12] = EGL_NONE; //Terminator
Candera::EglKhrExternalTextureImage::SharedPointer ptr = <a class="code" href="http://dev.doc.cgistudio.at/APILINK/group___c_o_u_r_i_e_r___v_i_s_u_a_l_i_z_a_t_i_o_n.html#ggaf0e93dc4242f607c3c8d13dafd036af9aaabfa5309af24986d3111a092449f857">Candera::EglKhrExternalTextureImage::Create</a>();
ptr->SetRole(<Candera::EglKhrExternalTextureImage::Consumer| Candera::EglKhrExternalTextureImage::Producer>); //Can only be set once on purpose! Use producer to render to this buffer and consumer if it shall be used as texture.
ptr->SetAttributeList(defaultAttribs);  // will be deep copied. 
ptr->SetExternalBufferType(EGL_LINUX_DMA_BUF_EXT); // buffer type
ptr->SetExternalBuffer(static_cast<EGLClientBuffer>(0)); // actual buffer 
ptr->SetWidth(255); 
ptr->SetHeight(456);
ptr->Upload();
```

# Tutorial for Special 3D Render Techniques

# Level of Detail (LOD)

#### <a class="anchor" id="bkmrk--16"></a>Description

This chapter briefly describes Level Of Detail techniques supported by [Candera](http://dev.doc.cgistudio.at/APILINK/namespace_candera.html "[DataBinding_RefTypeSample]").

#### <a class="anchor" id="bkmrk--18"></a>See also:

<div class="contents" id="bkmrk-level-of-detail-in-s"><div class="contents"><div class="textblock">- <span style="color: rgb(230, 126, 35);">[Level of Detail](https://doc316en.candera.eu/link/130#bkmrk-level-of-detail-%28lod-0)</span> in SceneComposer User Manual

</div></div></div>#### <a class="anchor" id="bkmrk--19"></a>Example Solution:

<div class="contents" id="bkmrk-lodsolution-from-fol"><div class="textblock">- LODSolution from folder *cgi\_studio\_player/content/Tutorials/08\_SpecialRenderTechniques/Special3DRenderTechniques*

</div></div>#### **Introduction** 

##### <a class="anchor" id="bkmrk--20"></a>Level of Detail

```
Level of detail (LOD) is a discipline of interactive computer graphics attempts 
to bridge complexity and performance by regulating the amount of detail used 
to represent the virtual world.
```

*(Level of Detail for 3D Graphics, David Luebke, Morgan Kaufmann Publisher, 2003)*

<div drawio-diagram="2415"><img src="https://doc316en.candera.eu/uploads/images/drawio/2023-02/drawing-4-1677219316.png" alt=""/></div>

##### <a class="anchor" id="bkmrk--22"></a>Motivation

Reduce render complexity in order to increase runtime performance with minimal or without visual penalty

##### <a class="anchor" id="bkmrk--23"></a>Detail Simplifications

<div class="contents" id="bkmrk-geometric%3A-meshes%2C-i"><div class="textblock">- Geometric: Meshes, Imposters, Shadow LOD, ...
- Non-geometric: Shader, Lighting, Textures (MipMapping), Material, ...

</div></div>#### **Level of Detail - Geometry Reduction Types**   


##### <a class="anchor" id="bkmrk--24"></a>Discrete LOD

<div class="contents" id="bkmrk-creates-multiple-ver"><div class="contents"><div class="textblock">- Creates multiple versions of an object with different level of details. Often refered to as isotropic or view-independent LOD, as detail reduction is applied uniformly accross the object.

- Widely used in real time environments as LOD levels are generated during an offline preprocess. Supported by Candera.

</div></div></div>##### <a class="anchor" id="bkmrk--25"></a>Continuous or progressive LOD

<div class="contents" id="bkmrk-simplification-syste"><div class="contents"><div class="textblock">- Simplification system creates a data structure encoding a continuous spectrum of detail. The desired LOD is extracted from this structure at run-time. Supports LOD streaming and interruptible loading.

</div></div></div>##### <a class="anchor" id="bkmrk--26"></a>View-dependent LOD

<div class="contents" id="bkmrk-extends-continuous-l"><div class="contents"><div class="textblock"><div class="contents"><div class="textblock">- Extends continuous LOD by using view-dependent simplification criteria to dynamically select the most appropriate LOD for current view. Thus, view-dependent view is anisotropic.

</div></div></div></div></div><div class="contents" id="bkmrk--0"><div class="contents"><div class="textblock">  
</div></div></div><div drawio-diagram="2416"><img src="https://doc316en.candera.eu/uploads/images/drawio/2023-02/drawing-4-1677219426.png" alt=""/></div>

#### **Level of Detail - Chain**   


<div class="contents" id="bkmrk-a-lodnode-accomodate"><div class="contents"><div class="textblock">- A LodNode accomodates a node for each level of detail.
- Candera Nodes are e.g: Mesh, Billboard, Light, Group, etc.

</div></div></div>##### <a class="anchor" id="bkmrk--28"></a>Typical LOD Chain

<div class="contents" id="bkmrk--3"><div class="textblock">  
</div></div>The following figure depicts a typical LOD chain:

- Level 0 .. 2: Meshes.
- Level 3: Billboard.
- Level 4: null-Node

<div drawio-diagram="2417"><img src="https://doc316en.candera.eu/uploads/images/drawio/2023-02/drawing-4-1677219460.png" alt=""/></div>

#### **Candera - Discrete LOD Concept**   


##### <a class="anchor" id="bkmrk--30"></a>Candera::LodNode, LoD Level

The class [Candera::LodNode](http://dev.doc.cgistudio.at/APILINK/class_candera_1_1_lod_node.html "LodNode represents a Node which accommodates multiple nodes, each of them representing a certain...") implements discrete LOD technique. Any Candera class derived from class [Candera::Node](http://dev.doc.cgistudio.at/APILINK/class_candera_1_1_node.html "The class Node is an abstract base class for all scene graph nodes. Each Node defines a local coordin...") is accepted as LOD representation.

Each LOD level in [Candera::LodNode](http://dev.doc.cgistudio.at/APILINK/class_candera_1_1_lod_node.html "LodNode represents a Node which accommodates multiple nodes, each of them representing a certain...") defines:

- LOD level index,
- Node,
- Lower bound of its visibility range,
- Upper bound of its visibility range.

<div drawio-diagram="2418"><img src="https://doc316en.candera.eu/uploads/images/drawio/2023-02/drawing-4-1677219530.png" alt=""/></div>

##### <a class="anchor" id="bkmrk--32"></a>LOD Render Strategy

The LOD render strategy defines the transition between adjacent LOD levels.

<div class="contents" id="bkmrk-candera%3A%3Adiscretelod"><div class="contents"><div class="textblock">- [Candera::DiscreteLodRenderStrategy](http://dev.doc.cgistudio.at/APILINK/class_candera_1_1_discrete_lod_render_strategy.html "The class DiscreteLodRenderStrategy defines an interface to configure the LodNode's visual appearance..."): Stepwise transition.
- [Candera::BlendLodRenderStrategy](http://dev.doc.cgistudio.at/APILINK/class_candera_1_1_blend_lod_render_strategy.html "The class BlendLodRenderStrategy defines an interface to configure the LodNode's visual appearance ac..."): alpha-blended transition.

</div></div></div>##### <a class="anchor" id="bkmrk--33"></a>LOD Criterion

The LOD criterion delivers a source value to map onto the LOD nodes visibility boundaries.

<div class="contents" id="bkmrk-candera%3A%3Adistancetoc"><div class="textblock">- [Candera::DistanceToCameraLodCriterion](http://dev.doc.cgistudio.at/APILINK/class_candera_1_1_distance_to_camera_lod_criterion.html "The class DistanceToCameraLodCriterion returns the distance to camera."): distance from LOD node to camera.
- [Candera::GenericValueLodCriterion](http://dev.doc.cgistudio.at/APILINK/class_candera_1_1_generic_value_lod_criterion.html "The class GenericValueLodCriterion allows to manually set the criterion value for LOD level selection..."): Application defined value.

</div></div>#### **Candera - LOD Render Strategy**   


##### <a class="anchor" id="bkmrk--34"></a>Discrete LOD Render Strategy

- Stepwise transition between LOD levels
- Non-adjacent boundaries between contiguous LOD levels define a Hysteresis.

<div drawio-diagram="2419"><img src="https://doc316en.candera.eu/uploads/images/drawio/2023-02/drawing-4-1677219620.png" alt=""/></div>

##### <a class="anchor" id="bkmrk--36"></a>Blend Transition LOD Render Strategy

<div class="contents" id="bkmrk--9"><div class="textblock">  
</div></div>- Alpha blended transitions between LOD levels
- Non-adjacent boundaries between contiguous LOD levels define transition phase.
- During blend transition one alternating LOD node is always opaque to avoid 'see-through' effects.

<div drawio-diagram="2420"><img src="https://doc316en.candera.eu/uploads/images/drawio/2023-02/drawing-4-1677219649.png" alt=""/></div>

#### **Candera - LOD Architecture Overview** 

<div class="contents" id="bkmrk-a-candera%3A%3Alodnode-h"><div class="contents"><div class="textblock">- A [Candera::LodNode](http://dev.doc.cgistudio.at/APILINK/class_candera_1_1_lod_node.html "LodNode represents a Node which accommodates multiple nodes, each of them representing a certain...") has 0..1 associated LodRenderStrategy objects.
- A [Candera::LodRenderStrategy](http://dev.doc.cgistudio.at/APILINK/class_candera_1_1_lod_render_strategy.html "The abstract class LodRenderStrategy defines an interface to configure the LodNode's visual appearanc...") has 0..1 associated LodCriterion objects.
- According to use case LodRenderStrategy and LodCriterion objects are interchangeable arbitrarily.

</div></div></div><div drawio-diagram="2421"><img src="https://doc316en.candera.eu/uploads/images/drawio/2023-02/drawing-4-1677219708.png" alt=""/></div>

<div class="contents" id="bkmrk--12"><div class="textblock">  
</div></div>#### **Example - LOD in SceneComposer**   


##### <a class="anchor" id="bkmrk--39"></a>Example - Level of Detail in SceneComposer

This chapter shows a typical LOD use case and explains how the transition from two different LODs can be realized with CGI Studio SceneComposer.

To experiment with LOD transition, the following can be used:

<div class="contents" id="bkmrk-lodsolution-from-fol-0"><div class="contents"><div class="textblock">- **LODSolution** from folder *cgi\_studio\_player/content/Tutorials/08\_SpecialRenderTechniques/0801\_Special3DRenderTechniques*

</div></div></div>##### <a class="anchor" id="bkmrk--40"></a>Use Case

The example solution is based on following use case:

<div class="contents" id="bkmrk-the-tire-is-shown-fr"><div class="contents"><div class="textblock">- The tire is shown from a certain distance in sufficient resolution.
- The camera zooms in to the tire (animation).
- As the camera captures the tire from a close distance, the tire model shall be exchanged with a higher resolution model.
- The transition between the low- and the high-resolution tire model shall appear smooth.

</div></div></div>You can experiment with following node properties:

<div class="contents" id="bkmrk-%28lower-and-upper%29-bo"><div class="contents"><div class="textblock">- **(Lower and Upper) Boundary Values**: Modify boundary values of low and high node.
- **Criterion**: Set criterion 0:DistanceToCamera 1:Generic.
- **Strategy**: Set render strategy 0:Blend 1:Discrete.

</div></div></div>##### <a class="anchor" id="bkmrk--41"></a>See also:

<div class="contents" id="bkmrk-level-of-detail-in-s-0"><div class="textblock">- <span style="color: rgb(230, 126, 35);">[Level of Detail](https://doc316en.candera.eu/link/130#bkmrk-level-of-detail-%28lod-0)</span> in SceneComposer User Manual

</div></div>#### **Example - Blended LOD**   


##### <a class="anchor" id="bkmrk--42"></a>Blended LOD

<div class="contents" id="bkmrk-initialize-lod-node-"><div class="contents"><div class="textblock">- Initialize LOD node with 2 LOD objects.
- LOD is automatically changed by distance to camera criterion.
- Desired Behavior: 
    - LOD 0 is exclusively visible at camera distance 0 - 40 (in the LodNode set Lower Bound 0, and Upper Bound 40).
    - LOD 1 is exclusively visible at camera distance 60 - 100 (in the LodNode set Lower Bound 60, and Upper Bound 60).
    - Blend Transition between LOD 0 and LOD 1 is defined at camera distance 40 - 60 (in the LodNode select RenderStrategy 0:Blend).

</div></div></div>Change CameraDistance or start CameraPosition animation to see the smooth transition.

In application code the LodNode is set up as follows:

Initializing the LodNode

```
    // init LodNode bounds
    static_cast<void>(lodNode->SetLodLevel(0, lodNode->GetLodLevel(0).node, m_lowBoundHigh, m_upBoundHigh));
    static_cast<void>(lodNode->SetLodLevel(1, lodNode->GetLodLevel(1).node, m_lowBoundLow, m_upBoundLow));
    // end init
```

Define Criterion and RenderStrategy

```
        // Define DistanceToCameraLodCriterion and BlendLodRenderStrategy

        static DistanceToCameraLodCriterion cameraLodCriterion; // LOD is automatically selected by distance to camera.
        static BlendLodRenderStrategy blendLodStrategy; // LOD is automatically blended between non-adjacent boundaries

        // End Define DistanceToCameraLodCriterion and BlendLodRenderStrategy
```

Link pieces together

```
        // Init BlendLodRenderStrategy and set to LodNode

        blendLodStrategy.SetLodCriterion(&cameraLodCriterion);
        lodNode->SetLodRenderStrategy(&blendLodStrategy);

       // End Init BlendLodRenderStrategy and set to LodNode
```

#### **Example - Step-wise LOD**   


##### <a class="anchor" id="bkmrk--43"></a>Step-wise LOD

<div class="contents" id="bkmrk-initialize-lod-node--0"><div class="contents"><div class="textblock">- Initialize LOD node with 2 LOD objects.
- LOD criterion value can be set by application directly. (in the LodNode set Criterion to 1:Generic).
- Desired Behavior: 
    - LOD 0 is exclusively visible at camera distance 0 - 40 (in the LodNode set Lower Bound 0, and Upper Bound 40).
    - LOD 1 is exclusively visible at camera distance 60 - 100 (in the LodNode set Lower Bound 60, and Upper Bound 60).
    - Hysterese is defined at 40 - 60. Thus, criterion values within that range do not lead to LOD level swaps. (in the LodNode select RenderStrategy 1:DiscreteLodRenderStrategy).

</div></div></div>Change CriterionValue property appropriate to see the transition.

In application code the LodNode is set up as follows:

Initializing the LodNode

```
    // init LodNode bounds
    static_cast<void>(lodNode->SetLodLevel(0, lodNode->GetLodLevel(0).node, m_lowBoundHigh, m_upBoundHigh));
    static_cast<void>(lodNode->SetLodLevel(1, lodNode->GetLodLevel(1).node, m_lowBoundLow, m_upBoundLow));
    // end init
```

Define Criterion and RenderStrategy

```
        // Define GenericLodCriterion and DiscreteLodRenderStrategy

        static GenericValueLodCriterion genericLodCriterion; // Application defined criterion value can be set.
        static DiscreteLodRenderStrategy discreteLodStrategy; // Stepwise LOD switch.

        // End Define GenericLodCriterion and DiscreteLodRenderStrategy
```

Link pieces together

```
        // Init DiscreteLodRenderStrategy and set to LodNode

        genericLodCriterion.SetCriterionValue(m_criterionValue); // Set application defined criterion value.
        discreteLodStrategy.SetLodCriterion(&genericLodCriterion);
        lodNode->SetLodRenderStrategy(&discreteLodStrategy);

        // End Init DiscreteLodRenderStrategy and set to LodNode
```

#### **Example - Set LOD directly** 

##### <a class="anchor" id="bkmrk--45"></a>Set LOD directly

<div class="contents" id="bkmrk-create-lod-node-with"><div class="contents"><div class="textblock">- Create LOD node with 2 LOD objects.
- LOD level index is set by application directly.
- Hint: Direct LOD level initialization is helpful, if first criterion value falls into hysteresis range, and no LOD is set active.

<div class="fragment">  
</div></div></div></div>```
// Create LodNode object with 2 empty LOD levels.
m_lodNode = <a class="code" href="http://dev.doc.cgistudio.at/APILINK/group___c_o_u_r_i_e_r___v_i_s_u_a_l_i_z_a_t_i_o_n.html#ggaf0e93dc4242f607c3c8d13dafd036af9aaabfa5309af24986d3111a092449f857">LodNode::Create</a>(2);
// Set LOD 0 active and deactivate LOD 1. No RenderCriterion is attached.
m_lodNode->GetLodLevel(0).node->SetRenderingEnabled(true);
m_lodNode->GetLodLevel(1).node->SetRenderingEnabled(false);
```

# Morphing

#### <a class="anchor" id="bkmrk--5"></a>Description

This chapter briefly describes the morphing technique supported by [Candera](http://dev.doc.cgistudio.at/APILINK/namespace_candera.html "[DataBinding_RefTypeSample]").

**See also:**

<div class="contents" id="bkmrk-morphing-mesh-in-sce"><div class="contents"><div class="textblock">- <span style="color: rgb(230, 126, 35);">[Morphing Mesh](https://doc316en.candera.eu/link/130#bkmrk-shape-morphing)</span> in SceneComposer User Manual

</div></div></div>#### <a class="anchor" id="bkmrk--7"></a>Example Solutions

Refer to following solutions in folder *cgi\_studio\_player/content/Tutorials/08\_SpecialRenderTechniques/0801\_Special3DRenderTechniques*

<div class="contents" id="bkmrk-morphsolution-multim"><div class="textblock">- MorphSolution
- MultiMorphing\_MultiMorphShader
- MultiMorphing\_AnimationGroup

</div></div>#### **Introduction** 

##### <a class="anchor" id="bkmrk--8"></a>Morphing

Morphing means transforming the 3D geometry of an object smoothly from one shape into another.

Morphing itself (smooth interpolation between vertices) is done in a shader (not on the CPU).

<div drawio-diagram="2422"><img src="https://doc316en.candera.eu/uploads/images/drawio/2023-02/drawing-4-1677221269.png" alt=""/></div>

<div class="contents" id="bkmrk--0"><div class="contents"><div class="textblock"><center></center>  
</div></div></div>##### <a class="anchor" id="bkmrk--10"></a>What you need for Morphing

**Suitable content**: "Morph targets" are different geometric states of the same object. The input vertices must correspond one-to-one between morph targets. This means, to morph between two shapes, you need **two [VertexBuffer](http://dev.doc.cgistudio.at/APILINK/class_candera_1_1_vertex_buffer.html "The VertexBuffer encapsulates the attributes of an uploaded VertexGeometry. It holds the actual handl...")** with exactly the **same number of vertices**.

**An instance of [MorphingMesh](http://dev.doc.cgistudio.at/APILINK/class_candera_1_1_morphing_mesh.html "MorphingMesh is a Mesh that stores weight values for morphing, and activates them as uniforms at rend...")**: This is a [Mesh](http://dev.doc.cgistudio.at/APILINK/class_candera_1_1_mesh.html "The class Mesh represents a three-dimensional rigid body object defined by polygons. The Mesh's polygonal surface is defined by its VertexBuffer. Each Mesh must have exactly one Appearance set, in order to specify how the Mesh geometry is rendered.") that stores

<div class="contents" id="bkmrk-the-spliced-vertex-b"><div class="contents"><div class="textblock">- the spliced vertex buffer created from the vertex buffers to be morphed (see [MorphingMesh::CreateSplicedVertexBuffer](http://dev.doc.cgistudio.at/APILINK/class_candera_1_1_morphing_mesh.html#a0a238d9060703803343a130616afb2c1))
- weight values for each of the shapes, which are activated as shader uniforms at render time (see [MorphingMesh::SetMorphWeight](http://dev.doc.cgistudio.at/APILINK/class_candera_1_1_morphing_mesh.html#a6aaa490ea43613163e9e69a9aa5f94e9))
- The appearance of the [MorphingMesh](http://dev.doc.cgistudio.at/APILINK/class_candera_1_1_morphing_mesh.html "MorphingMesh is a Mesh that stores weight values for morphing, and activates them as uniforms at rend...") must define a suitable morphing shader, which matches the number of shapes to be morphed (see **RefTransLight1Morph** vertex shader for morphing two shapes)

</div></div></div>**Dynamics**: Morphing is about change, so an application will have to set some morphing parameters (often depending on time). Use [Animation::AllMorphWeightsPropertySetter](http://dev.doc.cgistudio.at/APILINK/class_candera_1_1_animation_1_1_all_morph_weights_property_setter.html "A PropertySetter that sets all morph weights of a MorphingMesh.") to animation all the weight values of the [MorphingMesh](http://dev.doc.cgistudio.at/APILINK/class_candera_1_1_morphing_mesh.html "MorphingMesh is a Mesh that stores weight values for morphing, and activates them as uniforms at rend...").

#### **Morphing Examples** 

##### <a class="anchor" id="bkmrk--11"></a>Morphing between 2 Morph Items

In below example solution, the reference shader **RefTransLight1Morph\_RefColor** is used to morph between two morph items, by default having weight value 1,00 on the logo.

<div class="contents" id="bkmrk-morphsolution-from-f"><div class="contents"><div class="contents"><div class="textblock">- *MorphSolution* from folder *cgi\_studio\_player/content/Tutorials/08\_SpecialRenderTechniques/0801\_Special3DRenderTechniques*

</div></div></div></div><div drawio-diagram="2423"><img src="https://doc316en.candera.eu/uploads/images/drawio/2023-02/drawing-4-1677221366.png" alt=""/></div>

<div class="contents" id="bkmrk--2"><div class="contents"><div class="textblock">  
</div></div></div>The animation part of this solution animates both weight values and also adds a rotation animation.

##### <a class="anchor" id="bkmrk--13"></a>Morphing between Multiple Shapes using Shader

Since a MorphingMesh is capable of handling up to 8 different vertex buffers, a special morphing shader must be used for more than 2 shapes. A morphing shader handling 5 shapes is used in the example below:

<div class="contents" id="bkmrk-multimorphing_multim"><div class="contents"><div class="contents"><div class="textblock">- *MultiMorphing\_MultiMorphShader* from folder *cgi\_studio\_player/content/Tutorials/08\_SpecialRenderTechniques/0801\_Special3DRenderTechniques*

</div></div></div></div><div drawio-diagram="2425"><img src="https://doc316en.candera.eu/uploads/images/drawio/2023-02/drawing-4-1677221435.png" alt=""/></div>

<div class="contents" id="bkmrk--4"><div class="contents"><div class="textblock"><center></center>  
</div></div></div>##### <a class="anchor" id="bkmrk--15"></a>Morphing between Multiple Shapes using AnimationGroup

As an alternative to using a multi morph shader, multi-step morphing can also be realized by using an AnimationGroup, chaining separate morphing animations for each morphing shape pair. This approach is useful in case a specific target shader compiler has some restrictions regarding the maximum number of shader parameters.

<div class="contents" id="bkmrk-multimorphing_animat"><div class="textblock">- *MultiMorphing\_AnimationGroup* from folder *cgi\_studio\_player/content/Tutorials/08\_SpecialRenderTechniques/0801\_Special3DRenderTechniques*

</div></div>

# Planar Shadows

#### <a class="anchor" id="bkmrk--5"></a>Description

This chapter describes the planar shadow technique supported by [Candera](http://dev.doc.cgistudio.at/APILINK/namespace_candera.html "[DataBinding_RefTypeSample]").

#### **Introduction** 

##### <a class="anchor" id="bkmrk--7"></a>Planar Shadows

Planar shadows are used to algorithmically simulate flat shadows on planar surfaces.

The shadow effect is obtained using a [Candera::PlanarShadow](http://dev.doc.cgistudio.at/APILINK/class_candera_1_1_planar_shadow.html "PlanarShadow implements a simple technique to simulate shadow casting. Basically a PlanarShadow node ...") object which is drawn using its world transformation matrix multiplied with a projection matrix, that projects its vertices onto a predefined plane with respect to the position of an associated light source.

<div drawio-diagram="2439"><img src="https://doc316en.candera.eu/uploads/images/drawio/2023-02/drawing-4-1677221907.png" alt=""/></div>

<div class="contents" id="bkmrk--0"><div class="textblock">  
</div></div>####   
**Workflow** 

##### <a class="anchor" id="bkmrk--9"></a>Inventory

The figure below shows the basic setup of a scene needed to generate the planar shadow effect.

<div drawio-diagram="2440"><img src="https://doc316en.candera.eu/uploads/images/drawio/2023-02/drawing-4-1677221947.png" alt=""/></div>

<div class="contents" id="bkmrk--2"><div class="contents"><div class="textblock">  
</div></div></div>##### <a class="anchor" id="bkmrk--11"></a>Light

Light should be of type point, spot or directional.

```
    m_light = <a class="code" href="http://dev.doc.cgistudio.at/APILINK/group___c_o_u_r_i_e_r___v_i_s_u_a_l_i_z_a_t_i_o_n.html#ggaf0e93dc4242f607c3c8d13dafd036af9aaabfa5309af24986d3111a092449f857">Light::Create</a>();
    m_light->SetName("Light1");
    m_light->SetType(Light::Point);
    m_light->SetDiffuse(<a class="code" href="http://dev.doc.cgistudio.at/APILINK/group___behaviors_control.html#ggae7abc816df647d0ecbc280480fefb788a6d1d4da086e381cb2c5a5ce6a2513ebd">Color</a>(1.0f, 1.0f, 1.0f));
    m_light->SetSpecular(<a class="code" href="http://dev.doc.cgistudio.at/APILINK/group___behaviors_control.html#ggae7abc816df647d0ecbc280480fefb788a6d1d4da086e381cb2c5a5ce6a2513ebd">Color</a>(0.0f, 0.0f, 0.0f));
    m_light->SetRenderingEnabled(true);
```

##### <a class="anchor" id="bkmrk--12"></a>Shadow Caster

The following objects can be used as shadow caster: [Candera::LineList](http://dev.doc.cgistudio.at/APILINK/class_candera_1_1_line_list.html "The LineList represents a list of lines (segments). It can be used to store a wireframe, a list of connected vertices, or just a list of isolated segments. A generic LineList instance can be created by the static method LineList::Create. A wireframe LineList can be created out of a Mesh by the static helper function Math3D::CreateLineListFromMesh."), [Candera::Billboard](http://dev.doc.cgistudio.at/APILINK/class_candera_1_1_billboard.html "The class Billboard represents a Plane that can align towards camera automatically, according to the alignment type set. Thus, Billboards are quite often used as "imposters" pretending to be a 3D geometry by showing a 2D image that is always facing the camera. In order to relief distinction between Billboard and PointSprite see following comparison: + Billboards support rectangular dimension and non-uniform scale, + Billboards support different rotation techniques (see Alignment), whereas PointSprites are aligned according to CenterEyeAlignment, exclusively. + Billboards take local rotation and scale into account (see class Transformable), whereas PointSprites ignore Transformable parameters others than position. + PointSprites have a performance advantage due to less geometry (one instead of 4 vertices). Overall recommendation: Use PointSprites for spherical shapes like particles, lens flares, sparkles, dust which are screen aligned (see Billboard::CameraUpAlignment). Further, use Billboards for world up oriented clouds, text, or yaw axis aligned trees, and signs, etc. Note: The Billboard - because of absent normals - does not support lighting. Belows sketch depicts the layout of a Billboard. W U:0,V:1 +-----+ U:1,V:1 H | X | Legend: texture coordinates: U,V; Width: W, Height: H, Local Center: X U:0,V:0 +-----+ U:1,V:0.") and [Candera::Mesh](http://dev.doc.cgistudio.at/APILINK/class_candera_1_1_mesh.html "The class Mesh represents a three-dimensional rigid body object defined by polygons. The Mesh's polygonal surface is defined by its VertexBuffer. Each Mesh must have exactly one Appearance set, in order to specify how the Mesh geometry is rendered.").

##### <a class="anchor" id="bkmrk--13"></a>Planar Shadow

The [Candera::PlanarShadow](http://dev.doc.cgistudio.at/APILINK/class_candera_1_1_planar_shadow.html "PlanarShadow implements a simple technique to simulate shadow casting. Basically a PlanarShadow node ...") is the object which actually draws the shadow onto a specified plane. By default, the parent node's vertex buffer is used. Consequently the PlanarShadow node should be attached as child of the shadow caster.

```
    m_shadow = <a class="code" href="http://dev.doc.cgistudio.at/APILINK/group___c_o_u_r_i_e_r___v_i_s_u_a_l_i_z_a_t_i_o_n.html#ggaf0e93dc4242f607c3c8d13dafd036af9aaabfa5309af24986d3111a092449f857">PlanarShadow::Create</a>();
    m_shadow->GetAppearance()->SetShader(m_shaderShadow); // RefTrans_RefUniDiffuseMat
    m_shadow->SetName("Shadow");
    m_shadow->SetPlane(Plane(Vector3(0.0f, 0.0f, 1.0f), 75.0f));
    m_shadow->SetLight(m_light);
    m_current->AddChild(m_shadow); // attach planar shadow to the shadow caster 
```

It's also possible to explicitly provide a dedicated vertex buffer which will be rendered as shadow, see the snippet below:

```
                m_shadow->SetAutoVertexBufferEnabled(false);
                m_shadow->GetVertexBuffer()->Unload();
                m_shadow->SetVertexBuffer(m_meshes[1]->GetVertexBuffer());
                m_shadow->GetVertexBuffer()->Upload();
```

[Candera::PlanarShadow](http://dev.doc.cgistudio.at/APILINK/class_candera_1_1_planar_shadow.html "PlanarShadow implements a simple technique to simulate shadow casting. Basically a PlanarShadow node ...") supports also an optional alignment of the shadow plane to a given node (alignmentNode). If this node it set, the shadow plane's distance and direction are transformed locally according to alignmentNode's transformation matrix. If node is not set, the shadow plane's parameters are not transformed at all. See snipped below to set alignmentNode:

```
                m_shadow->SetAlignmentNode(m_meshes[3]);
```

##### <a class="anchor" id="bkmrk--14"></a>Overlapping Shadows

To avoid double blending of semi transparent shadows stencil buffers can be used. The PlanarShadow's appearance already contains a pre-configured RenderMode with stencil buffers configured to only draw on fragments with a stencil value other than this PlanarShadows unique Id. After drawing, the value gets replaced to the current stencil reference value, such that the stencil test doesn't pass any more on future fragments to write.

<div class="contents" id="bkmrk-to-get-this-mechanis"><div class="contents"><div class="textblock"><dl class="note"><dd><p class="callout info">To get this mechanism running ensure that the camera always clears the stencil buffer to 0 every frame.</p>

<p class="callout info">The GraphicDeviceUnit has to be initialized accordingly to support stencil buffers.</p>

</dd></dl></div></div></div>##### <a class="anchor" id="bkmrk--15"></a>Constraints

<div class="contents" id="bkmrk-only-flat-planar-sur"><div class="textblock">- Only flat planar surfaces are considered as areas to draw the shadow on.
- Every object that intends to cast a shadow, must have a dedicated shadow child node for each light source, as well as for each plane acting as shadow receiver.
- If vertex buffer transformations shall be considered (e.g. morphing meshes or displacement mapping), a dedicated shader has to be implemented for the shadow object.

</div></div>####   
**Example** 

The example shows two planar shadows casts by a cube.

<div drawio-diagram="2441"><img src="https://doc316en.candera.eu/uploads/images/drawio/2023-02/drawing-4-1677222011.png" alt=""/></div>

<div class="contents" id="bkmrk--4"><div class="contents"><div class="textblock">  
</div></div></div>##### <a class="anchor" id="bkmrk--17"></a>Planar Shadow Example in SceneComposer

To experiment with the Planar Shadow in SceneComposer use solution **PlanarShadow** from folder *cgi\_studio\_player/content/Tutorials/08\_SpecialRenderTechniques/Special3DRenderTechniques*.

# Baked Shadows

#### <a class="anchor" id="bkmrk--4"></a>Description

This chapter describes the baked shadow technique supported by [Candera](http://dev.doc.cgistudio.at/APILINK/namespace_candera.html "[DataBinding_RefTypeSample]").

#### **Introduction**   


##### <a class="anchor" id="bkmrk--6"></a>Baked shadows

Baking shadows is a method of generating shadows which can be used for scenes where the lights and the objects which cast shadows are not moved with respect to each other.

Because the shadows are pre-computed and integrated into the textures the polygon count is decreased and the time needed for rendering the scene is significantly reduced. As a drawback, if the textures resulted after the baking are large, the memory can be intensive so the rendering becomes slow. Also, for complex scenes, this way of generating shadows might be too laborious to be considered as an option.<span style="color: rgb(230, 126, 35);"><sup>[\[1\]](https://doc316en.candera.eu/link/547#bkmrk-%5B1%5D-http%3A%2F%2Fapricot.b)</sup></span>

<div class="contents" id="bkmrk-"><div class="textblock">  
</div></div><div drawio-diagram="2442"><img src="https://doc316en.candera.eu/uploads/images/drawio/2023-02/drawing-4-1677222224.png" alt=""/></div>

<div class="contents" id="bkmrk--1"></div>#### **Workflow**   


##### <a class="anchor" id="bkmrk--8"></a>Create Models and Textures

The following steps should be performed in any 3D modeling tool that is able to bake shadows (Blender, Maya, 3D Studio Max ...):

<div class="contents" id="bkmrk-create-a-3d-scene-th"><div class="contents"><div class="textblock">- create a 3D scene that contains some models and at least one source of light  
    <div drawio-diagram="2483"><img src="https://doc316en.candera.eu/uploads/images/drawio/2023-02/drawing-4-1677224453.png" alt=""/></div>
- join the models which casts shadows with the models on which the shadow is projected on
- unwrap the 3D models  
    <div drawio-diagram="2484"><img src="https://doc316en.candera.eu/uploads/images/drawio/2023-02/drawing-4-1677224479.png" alt=""/></div>
- create a new image that will be used then as the texture containing the shadows
- set the image as texture for the models
- render the scene and bake the shadows into the texture  
    <div drawio-diagram="2486"><img src="https://doc316en.candera.eu/uploads/images/drawio/2023-02/drawing-4-1677224537.png" alt=""/></div>
- export the texture in any image format supported by [Candera](http://dev.doc.cgistudio.at/APILINK/namespace_candera.html "[DataBinding_RefTypeSample]") and also export the 3D models in FBX format
- If needed, refine the baked image with an image editor

</div></div></div>##### <a class="anchor" id="bkmrk--12"></a>Asset Library Generation

Use SceneComposer to generate the asset library:

<div class="contents" id="bkmrk-import-the-fbx-and-t"><div class="textblock">- import the FBX and the image texture in SceneComposer
- from the Imports panel add the light and the node in a 3D scene
- set the imported image as texture for the node
- export the asset library

</div></div>#### **Example**   


The example shows a 3D node textured with an image containing baked shadows.

<div drawio-diagram="2487"><img src="https://doc316en.candera.eu/uploads/images/drawio/2023-02/drawing-4-1677224574.png" alt=""/></div>

<div class="contents" id="bkmrk--3"></div>#### **References** 

The pictures and the models from this tutorial where obtained from the following sources:

<a class="anchor" id="bkmrk--14"></a>\[1\] [http://apricot.blender.org/wp-content/uploads/2008/06/sbake1.jpg](http://apricot.blender.org/wp-content/uploads/2008/06/sbake1.jpg)

# Single Pass Effects in Candera > Examples for 3D Effect Shaders

#### <a class="anchor" id="bkmrk--25"></a>Description

This chapter describes special 3D effect shaders techniques supported by [Candera](http://dev.doc.cgistudio.at/APILINK/namespace_candera.html "[DataBinding_RefTypeSample]").

#### **Bump Mapping** 

##### <a class="anchor" id="bkmrk--27"></a>Description

This chapter briefly describes bump mapping techniques supported by [Candera](http://dev.doc.cgistudio.at/APILINK/namespace_candera.html "[DataBinding_RefTypeSample]").

##### **Introduction** 

Bump mapping is a technique in computer graphics for simulating bumps and wrinkles on the surface of an object.

This is achieved by perturbing the surface normals of the object and using the perturbed normal during lighting calculations. The result is an apparently bumpy surface rather than a smooth surface although the surface of the underlying object is not actually changed.

<div drawio-diagram="2488"><img src="https://doc316en.candera.eu/uploads/images/drawio/2023-02/drawing-4-1677227144.png" alt=""/></div>

<div class="contents" id="bkmrk--0"></div>#####   
**Workflow** 

##### <a class="anchor" id="bkmrk--30"></a>Inventory

In order to generate the bump mapping effect on a surface you need:

<div class="contents" id="bkmrk-a-mesh-a-specific-sh"><div class="contents"><div class="textblock">- A mesh
- A specific shader
- A shader parameter setter
- A normal map texture
- A color map texture
- A material

</div></div></div>##### <a class="anchor" id="bkmrk--31"></a>Mesh

Any mesh can be used for this purpose but the mesh vertex buffer has to contain also the tangents and the binormals vertex attributes. This information can be added to the vertex buffer in the 3D content creation tool (3DS Max, Blender, etc.), before exporting the FBX, or, at run time, using the Candera::Math3D::CreateTangentsAndBinormalsFromVertexBuffer function as shown below:

```
    mesh->SetVertexBuffer(Math3D::CreateTangentsAndBinormalsFromVertexBuffer(mesh->GetVertexBuffer()));
```

##### <a class="anchor" id="bkmrk--32"></a>Shader

Use the shader from table below:

<div class="contents" id="bkmrk-vertex-shader-reftra"><div class="contents"><div class="textblock"><table class="doxtable"><tbody><tr><td valign="top">Vertex shader</td><td valign="top">RefTransLight1BumpMap</td></tr><tr><td valign="top">Fragment shader</td><td valign="top">RefLight1BumpMap</td></tr></tbody></table>

</div></div></div>Set the appearance shader for the mesh:

```
    mesh->GetAppearance()->SetShader(bumpmapShader);
```

##### <a class="anchor" id="bkmrk--33"></a>Shader Parameter Setter

The uniform setter will have to be set as follows:

```
    shaderParamSetter->SetModelMatrix4Enabled(true);
    shaderParamSetter->SetNormalModelMatrix3Enabled(true);
    shaderParamSetter->SetModelViewProjectionMatrix4Enabled(true);
    shaderParamSetter->SetLightActivationEnabled(true);
    shaderParamSetter->SetMaterialActivationEnabled(true);
    shaderParamSetter->SetTextureActivationEnabled(true);
    shaderParamSetter->SetLightsCoordinateSpace(Light::World);
    shaderParamSetter->SetCameraPositionEnabled(true);
    mesh->GetAppearance()->SetShaderParamSetter(shaderParamSetter);    
```

##### <a class="anchor" id="bkmrk--34"></a>Color Texture

The color texture applies an image to the surface of a mesh. This texture should be set on the mesh with texture unit 0.

Add the color texture to the appearance:

```
    mesh->GetAppearance()->SetTexture(colorTexture, 0);
```

##### <a class="anchor" id="bkmrk--35"></a>Normal Map Texture

The normal map images store the direction of normals directly in the RGB values of an image. These normals are used for lighting calculation instead of the vertices normals. Normal maps are generated using special graphics software usually from a higher resolution geometry than the geometry you're applying the map to.<span style="color: rgb(230, 126, 35);"><sup>[\[1\]](https://doc316en.candera.eu/link/548#bkmrk-references%C2%A0)</sup></span>

<div drawio-diagram="2489"><img src="https://doc316en.candera.eu/uploads/images/drawio/2023-02/drawing-4-1677227233.png" alt=""/></div>

<div class="contents" id="bkmrk--2"><div class="contents"><div class="textblock">  
</div></div></div>Add the normal map texture to the appearance:

```
    mesh->GetAppearance()->SetTexture(normalMapTexture, 1);
```

##### <a class="anchor" id="bkmrk--37"></a>Material Configuration

```
        mesh->GetAppearance()->GetMaterial()->SetAmbient(<a class="code" href="http://dev.doc.cgistudio.at/APILINK/group___behaviors_control.html#ggae7abc816df647d0ecbc280480fefb788a6d1d4da086e381cb2c5a5ce6a2513ebd">Color</a>(0.3f, 0.3f, 0.3f, 1.0f));
        mesh->GetAppearance()->GetMaterial()->SetEmissive(<a class="code" href="http://dev.doc.cgistudio.at/APILINK/group___behaviors_control.html#ggae7abc816df647d0ecbc280480fefb788a6d1d4da086e381cb2c5a5ce6a2513ebd">Color</a>(0.0f, 0.0f, 0.0f, 1.0f));
        mesh->GetAppearance()->GetMaterial()->SetDiffuse(<a class="code" href="http://dev.doc.cgistudio.at/APILINK/group___behaviors_control.html#ggae7abc816df647d0ecbc280480fefb788a6d1d4da086e381cb2c5a5ce6a2513ebd">Color</a>(1.0f, 1.0f, 1.0f, 1.0f));
        mesh->GetAppearance()->GetMaterial()->SetSpecular(<a class="code" href="http://dev.doc.cgistudio.at/APILINK/group___behaviors_control.html#ggae7abc816df647d0ecbc280480fefb788a6d1d4da086e381cb2c5a5ce6a2513ebd">Color</a>(1.0f, 1.0f, 1.0f, 1.0f));
        mesh->GetAppearance()->GetMaterial()->SetSpecularPower(40.0f);
```

#####   
**Examples** 

Here is exemplified the bump map effect applied on two meshes:

<div drawio-diagram="2514"><img src="https://doc316en.candera.eu/uploads/images/drawio/2023-02/drawing-4-1677228230.png" alt=""/></div>

<div class="contents" id="bkmrk--4"><div class="contents"><div class="textblock">  
</div></div></div>##### <a class="anchor" id="bkmrk--39"></a>Bump Mapping in SceneComposer

To experiment with Bump mapping in Scene Compose use the solution **ShaderExamples** from the folder *cgi\_studio\_player/content/Tutorials/04\_ShaderUsage*.

#####   
**References** 

The pictures from this tutorial where obtained from the following sources:

<a class="anchor" id="bkmrk--40"></a>\[1\] [http://planetpixelemporium.com/tutorialpages/normal3.html](http://planetpixelemporium.com/tutorialpages/normal3.html)

####   
**Procedural Textures** 

##### <a class="anchor" id="bkmrk--42"></a>Description

This chapter briefly describes the procedural wood technique supported by [Candera](http://dev.doc.cgistudio.at/APILINK/namespace_candera.html "[DataBinding_RefTypeSample]").

##### **Introduction** 

##### <a class="anchor" id="bkmrk--44"></a>Procedural Wood

Procedural wood is texturing technique which generates an on-the-fly texture using an algorithm that creates a wood realistic 3D representation. The algorithm will generate concentric rings colored alternatively with two colors which, if chosen rightly, will show a wood-like appearance. The effect can be controlled by setting the uniforms:

<div class="contents" id="bkmrk-u_customwoodcenter--"><div class="contents"><div class="textblock">- u\_CustomWoodCenter - rings center position
- u\_CustomWoodColor1 - even rings color
- u\_CustomWoodColor2 - odd rings color

</div></div></div><div drawio-diagram="2517"><img src="https://doc316en.candera.eu/uploads/images/drawio/2023-02/drawing-4-1677228371.png" alt=""/></div>

<div class="textblock" id="bkmrk--6"></div><div class="textblock" id="bkmrk--7"></div>#####   
**Workflow**

##### <a class="anchor" id="bkmrk--46"></a>Inventory

In order to generate the wood effect on a mesh all you need to do is to configure the material, an appropriate shader and a shader parameter setter for its appearance.

##### <a class="anchor" id="bkmrk--47"></a>Shader

The table below presents the vertex and fragment shader which generates the wood effect:

<div class="contents" id="bkmrk-vertex-shader-reftra-0"><div class="contents"><div class="textblock"><table class="doxtable"><tbody><tr><td valign="top">Vertex shader</td><td valign="top">RefTransLight1ProceduralWood</td></tr><tr><td valign="top">Fragment shader</td><td valign="top">RefProceduralWood</td></tr></tbody></table>

</div></div></div>Set the appearance shader for the mesh:

```
       mesh->GetAppearance()->SetShader(woodShader);
```

##### <a class="anchor" id="bkmrk--48"></a>Shader Parameter Setter

The uniforms setter will have to be configured as follows:

```
        woodShaderParamSetter->SetModelViewProjectionMatrix4Enabled(true);
        woodShaderParamSetter->SetLightActivationEnabled(true);
        woodShaderParamSetter->SetMaterialActivationEnabled(true);
        woodShaderParamSetter->SetTextureActivationEnabled(true);

        mesh->GetAppearance()->SetShaderParamSetter(woodShaderParamSetter);    
```

Prepare the uniforms data:

```
        Float woodCenter[] = { 0.0f, 0.0f, 0.2f};
        Float woodColor1[] = { 0.81f, 0.63f, 0.41f, 1.0f };
        Float woodColor2[] = { 0.56f, 0.27f, 0.12f, 1.0f };
        Float woodMultiplier = 100.0f;
```

Set the uniforms using the shader parameter setter:

```
        woodShaderParamSetter->SetUniform("u_CustomWoodCenter", Shader::FloatVec3, woodCenter);
        woodShaderParamSetter->SetUniform("u_CustomWoodColor1", Shader::FloatVec4, woodColor1);
        woodShaderParamSetter->SetUniform("u_CustomWoodColor2", Shader::FloatVec4, woodColor2);
        woodShaderParamSetter->SetUniform("u_CustomWoodMultiplier", Shader::Float, &woodMultiplier);
```

##### <a class="anchor" id="bkmrk--49"></a>Material Configuration

```
        mesh->GetAppearance()->GetMaterial()->SetAmbient(<a class="code" href="http://dev.doc.cgistudio.at/APILINK/group___behaviors_control.html#ggae7abc816df647d0ecbc280480fefb788a6d1d4da086e381cb2c5a5ce6a2513ebd">Color</a>(0.0f, 0.0f, 0.0f, 1.0f));
        mesh->GetAppearance()->GetMaterial()->SetEmissive(<a class="code" href="http://dev.doc.cgistudio.at/APILINK/group___behaviors_control.html#ggae7abc816df647d0ecbc280480fefb788a6d1d4da086e381cb2c5a5ce6a2513ebd">Color</a>(0.0f, 0.0f, 0.0f, 1.0f));
        mesh->GetAppearance()->GetMaterial()->SetDiffuse(<a class="code" href="http://dev.doc.cgistudio.at/APILINK/group___behaviors_control.html#ggae7abc816df647d0ecbc280480fefb788a6d1d4da086e381cb2c5a5ce6a2513ebd">Color</a>(1.0f, 1.0f, 1.0f, 1.0f));
        mesh->GetAppearance()->GetMaterial()->SetSpecular(<a class="code" href="http://dev.doc.cgistudio.at/APILINK/group___behaviors_control.html#ggae7abc816df647d0ecbc280480fefb788a6d1d4da086e381cb2c5a5ce6a2513ebd">Color</a>(1.0f, 1.0f, 1.0f, 1.0f));
        mesh->GetAppearance()->GetMaterial()->SetSpecularPower(40.0f);
```

#####    
**Examples**   


Here is exemplified the wood effect applied on two meshes:

<div drawio-diagram="2521"><img src="https://doc316en.candera.eu/uploads/images/drawio/2023-02/drawing-4-1677228466.png" alt=""/></div>

<div class="contents" id="bkmrk--9"><div class="contents"><div class="textblock">  
</div></div></div>##### <a class="anchor" id="bkmrk--51"></a>Wood Effect in SceneComposer

To experiment with the procedural wood technique in SceneComposer use solution **ShaderExamples** from folder *cgi\_studio\_player/content/Tutorials/04\_ShaderUsage*.

##### **References** 

<a class="anchor" id="bkmrk--52"></a>\[1\] Image taken from [http://blenderartists.org/forum/showthread.php?246113-A-fine-procedural-wood-material-for-Cycles](http://blenderartists.org/forum/showthread.php?246113-A-fine-procedural-wood-material-for-Cycles)

####   
**Environment Mapping** 

##### <a class="anchor" id="bkmrk--53"></a>Description

This chapter describes the environment mapping techniques supported by [Candera](http://dev.doc.cgistudio.at/APILINK/namespace_candera.html "[DataBinding_RefTypeSample]").

Environment mapping is an image based technique to achieve an appearance of reflecting object surface. A texture is used to show the environment as a reflection.

##### **Sphere Map** 

##### <a class="anchor" id="bkmrk--55"></a>Description

This chapter describes the sphere mapping techniques supported by [Candera](http://dev.doc.cgistudio.at/APILINK/namespace_candera.html "[DataBinding_RefTypeSample]").

Sphere mapping was the first environment mapping technique where the reflective environment is mapped onto a single texture as it would be reflected by a mirror ball. Sphere mapping is suitable on concave surfaces while else Cube mapping achieves better results.

<div drawio-diagram="2524"><img src="https://doc316en.candera.eu/uploads/images/drawio/2023-02/drawing-4-1677228682.png" alt=""/></div>

<div class="contents" id="bkmrk--11"><div class="contents"><div class="textblock">  
</div></div></div>##### <a class="anchor" id="bkmrk--57"></a>SphereMap in SceneComposer

To experiment with the sphere mapping technique in SceneComposer use solution **ShaderExamples** from folder *cgi\_studio\_player/content/Tutorials/04\_ShaderUsage*.

##### **Cube Map**   


##### <a class="anchor" id="bkmrk--58"></a>Description

This chapter describes the cube mapping techniques supported by [Candera](http://dev.doc.cgistudio.at/APILINK/namespace_candera.html "[DataBinding_RefTypeSample]").

Cube mapping is a rendering technique whereby six bitmaps are mapped to the sides of a cube, to produce environment mapping effects, such as reflections, or a skybox background. Unlike the old sphere mapping technique, cube map images do not need to be distorted to match the current view-angle, and is therefore a more efficient and flexible method to achieve reflections. However, in OpenGL ES 2.0, any texture filtering is applied separately to the six individual images, which may cause rendering artifacts along the image borders. This issue was corrected in OpenGL ES 3.0, which provides seamless cubemap filtering. There is nothing you need to do to enable seamless cubemap filtering. All linear filter kernels will automatically use it, when targeting OpenGL ES 3.0.

A special application for cube mapping is the Skybox.

##### <a class="anchor" id="bkmrk--59"></a>CubeMap in SceneComposer

To experiment with CubeMap in SceneComposer, use solution **ShaderExamples** from folder *cgi\_studio\_player/content/Tutorials/04\_ShaderUsage*.

##### **SkyBox**   


##### <a class="anchor" id="bkmrk--60"></a>Description

This chapter describes the skybox technique supported by [Candera](http://dev.doc.cgistudio.at/APILINK/namespace_candera.html "[DataBinding_RefTypeSample]").

SkyBox was implemented to support cubic panorama backgrounds ("SkyBoxes"). A Skybox displays the background environment of a scene, by using a world-space axis-aligned cube, with six images assigned to the faces of the cube. This cube is centered on the active camera's current position, which creates the illusion that the background image is infinitely far away. The skybox is rendered before any other nodes, with depth writing and testing turned off, to ensure that it appears behind all other nodes in the scene.

In OpenGL ES 2.0, linear filtering is applied separately to the six images, which may cause rendering artifacts (seams) along the cube edges. In OpenGL ES 3.0, this minor defect was corrected, by applying filtering across image borders, to create seamless cubemaps. No action is required to enable seamless cubemaps under OpenGL ES 3.0. However, this feature is not available in OpenGL ES 2.0 or its extensions.

<div drawio-diagram="2525"><img src="https://doc316en.candera.eu/uploads/images/drawio/2023-02/drawing-4-1677228752.png" alt=""/></div>

<div class="contents" id="bkmrk--13"><div class="contents">  
</div></div>##### <a class="anchor" id="bkmrk--62"></a>SkyBox in SceneComposer

To experiment with SkyBox in SceneComposer use solution **ShaderExamples** from folder *cgi\_studio\_player/content/Tutorials/04\_ShaderUsage*.

##### **Reflection &amp; Refraction**

##### <a class="anchor" id="bkmrk--65"></a>Description

This chapter describes the reflection and refraction techniques supported by [Candera](http://dev.doc.cgistudio.at/APILINK/namespace_candera.html "[DataBinding_RefTypeSample]").

[Candera](http://dev.doc.cgistudio.at/APILINK/namespace_candera.html "[DataBinding_RefTypeSample]") uses new shaders to achieve reflection and refraction appearances:

<div class="contents" id="bkmrk-reftranscubemaprefle"><div class="contents"><div class="textblock">- RefTransCubeMapReflection.vert
- RefTransCubeMapRefraction.vert
- RefTransCubeMapReflectionRefraction.vert
- RefCubeMapTex.frag
- RefCubeMapTex2.frag

</div></div></div>These shaders demonstrate how environment mapping reflections, refraction and the combination of both can be realized using CubeMap textures. The combined reflection and refraction shading results in a glass effect especially when combined with a skybox using the same cubemap textures

<div drawio-diagram="2526"><img src="https://doc316en.candera.eu/uploads/images/drawio/2023-02/drawing-4-1677228794.png" alt=""/></div>

<div class="contents" id="bkmrk--16"><div class="contents">  
</div></div>##### <a class="anchor" id="bkmrk--67"></a>Reflection and Refraction in SceneComposer

To experiment with Reflection and Refraction in SceneComposer use solution **ShaderExamples** from folder *cgi\_studio\_player/content/Tutorials/04\_ShaderUsage*.

####   
**Anisotropic Lighting**   


##### <a class="anchor" id="bkmrk--70"></a>Description

This chapter briefly describes the anisotropic lighting technique supported by [Candera](http://dev.doc.cgistudio.at/APILINK/namespace_candera.html "[DataBinding_RefTypeSample]").

##### **Introduction** 

##### <a class="anchor" id="bkmrk--72"></a>Anisotropic Lighting

The [Candera](http://dev.doc.cgistudio.at/APILINK/namespace_candera.html "[DataBinding_RefTypeSample]") implementation of the anisotropic lighting model can be used to generate the effect of a surface having grooves or fine directional grain like, for instance, brushed metal, shiny side of a CD, vinyl records etc.

The effect can be configured by setting the uniforms:

<div class="contents" id="bkmrk-u_alphau---distribut"><div class="contents"><div class="textblock">- u\_AlphaU - distribution of specular light component in U direction
- u\_AlphaV - distribution of specular light component in V direction

</div></div></div><div drawio-diagram="2527"><img src="https://doc316en.candera.eu/uploads/images/drawio/2023-02/drawing-4-1677228898.png" alt=""/></div>

<div class="contents" id="bkmrk--19"></div>#####   
**Workflow** 

##### <a class="anchor" id="bkmrk--74"></a>Inventory

In order to generate the brushed metal effect on a mesh you need to configure the material, a texture, an appropriate shader and a shader parameters setter for its appearance.

##### <a class="anchor" id="bkmrk--75"></a>Shader

The table below presents the vertex and fragment shader which generates the brushed metal effect:

<div class="contents" id="bkmrk-vertex-shader-reftra-1"><div class="contents"><div class="textblock"><table class="doxtable"><tbody><tr><td valign="top">Vertex shader</td><td valign="top">RefTransAnisotropicLight1</td></tr><tr><td valign="top">Fragment shader</td><td valign="top">RefAnisotropicLight1SpecularTex</td></tr></tbody></table>

</div></div></div>Set the appearance shader for the mesh:

```
       mesh->GetAppearance()->SetShader(anisotropicLightingShader);
```

##### <a class="anchor" id="bkmrk--76"></a>Shader Parameter Setter

The uniforms setter will have to be configured as follows:

```
       m_anisotropicLightSetter->SetModelMatrix4Enabled(true);
       m_anisotropicLightSetter->SetNormalModelMatrix3Enabled(true);
       m_anisotropicLightSetter->SetModelViewProjectionMatrix4Enabled(true);
       m_anisotropicLightSetter->SetCameraPositionEnabled(true);
       m_anisotropicLightSetter->SetLightActivationEnabled(true);
       m_anisotropicLightSetter->SetMaterialActivationEnabled(true);
       m_anisotropicLightSetter->SetTextureActivationEnabled(true);
       m_anisotropicLightSetter->SetLightsCoordinateSpace(Light::World);

       mesh->GetAppearance()->SetShaderParamSetter(m_anisotropicLightSetter);    
```

Prepare the uniforms data:

```
       Float m_alphaU = 0.28f;
       Float m_alphaV = 0.23f;
```

You can generate other effects like plastic laminate, glossy grey paper, rolled aluminium etc. by simply changing the values for m\_alphaU, m\_alphaV and the diffuse and specular colors for the material.

Set the uniforms using the shader parameters setter:

```
       m_anisotropicLightSetter->SetUniform("u_AlphaU", Shader::Float, &m_alphaU);
       m_anisotropicLightSetter->SetUniform("u_AlphaV", Shader::Float, &m_alphaV);
```

##### <a class="anchor" id="bkmrk--77"></a>Material Configuration

```
       mesh->GetAppearance()->GetMaterial()->SetAmbient(<a class="code" href="http://dev.doc.cgistudio.at/APILINK/group___behaviors_control.html#ggae7abc816df647d0ecbc280480fefb788a6d1d4da086e381cb2c5a5ce6a2513ebd">Color</a>(0.0f, 0.0f, 0.0f, 1.0f));
       mesh->GetAppearance()->GetMaterial()->SetEmissive(<a class="code" href="http://dev.doc.cgistudio.at/APILINK/group___behaviors_control.html#ggae7abc816df647d0ecbc280480fefb788a6d1d4da086e381cb2c5a5ce6a2513ebd">Color</a>(0.0f, 0.0f, 0.0f, 1.0f));
       mesh->GetAppearance()->GetMaterial()->SetDiffuse(<a class="code" href="http://dev.doc.cgistudio.at/APILINK/group___behaviors_control.html#ggae7abc816df647d0ecbc280480fefb788a6d1d4da086e381cb2c5a5ce6a2513ebd">Color</a>(0.4f, 0.4f, 0.4f, 0.4f));
       mesh->GetAppearance()->GetMaterial()->SetSpecular(<a class="code" href="http://dev.doc.cgistudio.at/APILINK/group___behaviors_control.html#ggae7abc816df647d0ecbc280480fefb788a6d1d4da086e381cb2c5a5ce6a2513ebd">Color</a>(1.0f, 1.0f, 1.0f, 1.0f));
       mesh->GetAppearance()->GetMaterial()->SetSpecularPower(40.0f);
```

##### <a class="anchor" id="bkmrk--78"></a>Texture

<div drawio-diagram="2528"><img src="https://doc316en.candera.eu/uploads/images/drawio/2023-02/drawing-4-1677228965.png" alt=""/></div>

<div class="contents" id="bkmrk--21"><div class="contents"><div class="textblock">  
</div></div></div>Set the appearance texture:

```
       mesh->GetAppearance()->SetTexture(texture, 0);   
```

#####   
**Example** 

The picture below shows the final result after setting the mesh appearance as described above:

<div drawio-diagram="2529"><img src="https://doc316en.candera.eu/uploads/images/drawio/2023-02/drawing-4-1677228992.png" alt=""/></div>

<div class="contents" id="bkmrk--23"></div>

# Multi Pass Effects in Candera > Examples for Local 3D Effect Shaders

#### Description

This chapter describes special 3D effect shaders techniques supported by [Candera](http://dev.doc.cgistudio.at/APILINK/namespace_candera.html "[DataBinding_RefTypeSample]").

#### **Fur**

##### Description

This chapter describes how to generate the fur effect using the multipass appearance technique supported by [Candera](http://dev.doc.cgistudio.at/APILINK/namespace_candera.html "[DataBinding_RefTypeSample]").

##### **Introduction** 

The fur effect is produce by rendering the node multiple times with different appearances which are blended together. Each appearance will use the same combination of noise and color map textures but with different and specific render states. For each appearance the following uniforms will have to be set specifically: <span style="color: rgb(230, 126, 35);">[\[1\]](https://doc316en.candera.eu/link/549#bkmrk-references%C2%A0)</span>

<div class="contents" id="bkmrk-u_colorscale---fur-c"><div class="contents"><div class="textblock">- u\_ColorScale - fur color scale.
- u\_Scale - scale factor to manipulate vertices along normals
- u\_PassIndex - render pass index

</div></div></div><div drawio-diagram="2554"><img src="https://doc316en.candera.eu/uploads/images/drawio/2023-02/drawing-4-1677461268.png" alt=""/></div>

<div class="contents" id="bkmrk--0"></div>##### **Workflow** 

##### <a class="anchor" id="bkmrk--19"></a>Appearances

Because the generation of the fur effect implies that the node has to be rendered multiple times, a special appearance needs to be used: [Candera::MultiPassAppearance](http://dev.doc.cgistudio.at/APILINK/class_candera_1_1_multi_pass_appearance.html "A MultiPassAppearance enables a node to be rendered multiple times with different appearance settings..."). The particularity of this appearance is that it keeps a pointer to the next appearance, defining so a sequence of render passes.

<div class="contents" id="bkmrk-a-nice-fur-effect-is"><div class="contents"><div class="contents"><div class="textblock"><dl class="note"><dd><p class="callout info">A nice fur effect is obtained with at least 10 render passes.</p>

</dd></dl><div class="fragment">  
</div></div></div></div></div>```
    for (int i = 0; i<= 15; i++) {
        m_furAppearances[i] = <a class="code" href="http://dev.doc.cgistudio.at/APILINK/group___c_o_u_r_i_e_r___v_i_s_u_a_l_i_z_a_t_i_o_n.html#ggaf0e93dc4242f607c3c8d13dafd036af9aaabfa5309af24986d3111a092449f857">MultiPassAppearance::Create</a>();
        // Configure the appearances
        // ...
        // End of appearances configuration
        if (i > 0) {
            m_furAppearances[i-1]->SetNextPass(m_furAppearances[i]);
        }
    }
    mesh->SetAppearance(m_furAppearances[0]);
```

##### <a class="anchor" id="bkmrk--20"></a>Shader

The table below presents the vertex and fragment shader needed to generate the fur effect:

<div class="contents" id="bkmrk-vertex-shader-reftra"><div class="contents"><div class="textblock"><table class="doxtable"><tbody><tr><td valign="top">Vertex shader</td><td valign="top">RefTransFur</td></tr><tr><td valign="top">Fragment shader</td><td valign="top">RefUniColorTexFur</td></tr></tbody></table>

</div></div></div>Set this shader for all the appearances:

```
    m_furAppearances[i]->SetShader(m_furShader);      
```

<div class="contents" id="bkmrk-lighting-and-materia"><div class="contents"><div class="textblock"><div class="fragment">  
</div><dl class="note"><dt></dt><dd><p class="callout info">Lighting and material has no influence on the fur effect.</p>

</dd></dl></div></div></div>##### <a class="anchor" id="bkmrk--21"></a>Shader Parameters Setter

Configure the uniforms setter as follows:

```
        m_furSetter[i] = <a class="code" href="http://dev.doc.cgistudio.at/APILINK/group___c_o_u_r_i_e_r___v_i_s_u_a_l_i_z_a_t_i_o_n.html#ggaf0e93dc4242f607c3c8d13dafd036af9aaabfa5309af24986d3111a092449f857">GenericShaderParamSetter::Create</a>();
        m_furSetter[i]->SetModelViewProjectionMatrix4Enabled(true);
        m_furSetter[i]->SetLightActivationEnabled(true);
        m_furSetter[i]->SetMaterialActivationEnabled(true);
        m_furSetter[i]->SetTextureActivationEnabled(true);
```

Prepare the uniforms data:

```
        m_furColorScale[0] = 0.2196f;
        m_furColorScale[1] = 0.2202f;
        m_furColorScale[2] = 0.2202f;
        m_furColorScale[3] = 1.0f;        
        
        if ( i == 0 ) {
            m_furScale = 1.0f;
        } 
        else {
            m_furScale = 0.01f;        
        }        
        m_passIndex[i] = ((Float) i);
```

Set the uniforms using the shader parameter setter:

```
        m_furSetter[i]->SetUniform("u_ColorScale",Shader::FloatVec4,m_furColorScale);
        m_furSetter[i]->SetUniform("u_Scale",Shader::Float,&m_furScale);
        m_furSetter[i]->SetUniform("u_PassIndex",Shader::Float,&m_passIndex[i]);
```

##### <a class="anchor" id="bkmrk--22"></a>Material Configuration

```
        if ( i == 0) {
            m_furAppearances[i]->SetMaterial(<a class="code" href="http://dev.doc.cgistudio.at/APILINK/group___c_o_u_r_i_e_r___v_i_s_u_a_l_i_z_a_t_i_o_n.html#ggaf0e93dc4242f607c3c8d13dafd036af9aaabfa5309af24986d3111a092449f857">Material::Create</a>());
        } 
        else {
            m_furAppearances[i]->SetMaterial(m_furAppearances[0]->GetMaterial());
        }
```

##### <a class="anchor" id="bkmrk--23"></a>Noise texture

<div drawio-diagram="2556"><img src="https://doc316en.candera.eu/uploads/images/drawio/2023-02/drawing-4-1677461358.png" alt=""/></div>

<div class="contents" id="bkmrk--2"><div class="contents"><div class="textblock">  
</div></div></div>Set the fur appearance noise texture:

```
    m_furAppearances[i]->SetTexture(m_furNoise, 0);
```

##### <a class="anchor" id="bkmrk--25"></a>Color map texture

The color map texture is meant to provide a color for the fur.

<div drawio-diagram="2557"><img src="https://doc316en.candera.eu/uploads/images/drawio/2023-02/drawing-4-1677461381.png" alt=""/></div>

<div class="contents" id="bkmrk--4"><div class="contents"><div class="textblock">  
</div></div></div>Set the fur appearance color map texture:

```
    m_furAppearances[i]->SetTexture(m_furColor, 1);
```

##### <a class="anchor" id="bkmrk--27"></a>Render Mode

Set and configure a Render Mode for all transparency layers (appearances 1 to 15).

```
    if (i > 0) {
        m_furAppearances[i]->GetRenderMode()->SetBlendingEnabled(true);
        m_furAppearances[i]->GetRenderMode()->SetBlendMode(RenderMode::SourceAlpha, RenderMode::One, RenderMode::Add);
    }
```

##### **Example** 

Here is exemplified the fur effect applied on sphere:

<div drawio-diagram="2558"><img src="https://doc316en.candera.eu/uploads/images/drawio/2023-02/drawing-4-1677461417.png" alt=""/></div>

<div class="contents" id="bkmrk--6"><div class="contents"><div class="textblock">  
</div></div></div>##### <a class="anchor" id="bkmrk--29"></a>Fur Effect in SceneComposer

To experiment with the fur effect in SceneComposer use solution **ShaderExamples** from folder *cgi\_studio\_player/content/Tutorials/04\_ShaderUsage*.

##### **References** 

<a class="anchor" id="bkmrk--30"></a>\[1\] Image taken from [http://www.xbdev.net/directx3dx/specialX/Fur/index.php](http://www.xbdev.net/directx3dx/specialX/Fur/index.php)

---

#### **Gooch Effect** 

##### Description

This chapter describes how to generate the Gooch effect using the multipass appearance technique supported by [Candera](http://dev.doc.cgistudio.at/APILINK/namespace_candera.html "[DataBinding_RefTypeSample]").

##### **Introduction** 

##### Gooch Effect

The Gooch effect is a non photorealistic technique which simulates the appearance of technical illustration.

The effect is generated in two render passes. In the first pass the object is drawn in warm - cool colors: all surfaces that are facing toward the light source are drawn in warm colors (red, yellow etc), all surfaces away from the light source are drawn in cool colors (blue, violet etc.). The second render pass draws the silhouette of the object with a fixed color (e.g. black). <span style="color: rgb(230, 126, 35);">[\[1\]](https://doc316en.candera.eu/link/549#bkmrk-references%C2%A0-0)</span>

<div drawio-diagram="2562"><img src="https://doc316en.candera.eu/uploads/images/drawio/2023-02/drawing-4-1677461536.png" alt=""/></div>

<div class="textblock" id="bkmrk--9"></div><div class="textblock" id="bkmrk--10"></div>##### **Workflow** 

##### <a class="anchor" id="bkmrk--35"></a>Inventory

In order to generate the Gooch effect on a node you need:

<div class="contents" id="bkmrk-two-multipassappeara"><div class="contents"><div class="textblock">- Two MultiPassAppearances
- Specific shader for each appearance
- Specific shader parameters setter for each appearance
- Material
- Render Modes

</div></div></div>##### <a class="anchor" id="bkmrk--36"></a>Appearances

The Gooch effect is generated in two render passes so we need two MultiPassAppearances:

```
    m_goochAppearance1 = <a class="code" href="http://dev.doc.cgistudio.at/APILINK/group___c_o_u_r_i_e_r___v_i_s_u_a_l_i_z_a_t_i_o_n.html#ggaf0e93dc4242f607c3c8d13dafd036af9aaabfa5309af24986d3111a092449f857">MultiPassAppearance::Create</a>();
    m_goochAppearance2 = <a class="code" href="http://dev.doc.cgistudio.at/APILINK/group___c_o_u_r_i_e_r___v_i_s_u_a_l_i_z_a_t_i_o_n.html#ggaf0e93dc4242f607c3c8d13dafd036af9aaabfa5309af24986d3111a092449f857">MultiPassAppearance::Create</a>();
    m_goochAppearance1->SetNextPass(m_goochAppearance2);

    m_mesh->SetAppearance(m_goochAppearance1);
```

##### <a class="anchor" id="bkmrk--37"></a>Shader

Each appearance need a specific shader, see table below:

<div class="contents" id="bkmrk-appearance-vertex-sh"><div class="contents"><div class="textblock"><table border="1" cellpadding="5" cellspacing="0" width="500"><tbody><tr bgcolor="#d4d4d4"><th width="34%">Appearance</th><th width="33%">Vertex shader</th><th width="33%">Fragment shader</th></tr><tr><td>m\_goochAppearance1</td><td>RefTransLight1Gooch</td><td>RefGoochShading</td></tr><tr><td>m\_goochAppearance2</td><td>RefTransScale</td><td>RefUniColor</td></tr></tbody></table>

</div></div></div>Set the shader for each appearance:

```
    m_goochAppearance1->SetShader(m_goochPass1Shader);
    m_goochAppearance2->SetShader(m_goochPass2Shader);
```

##### <a class="anchor" id="bkmrk--38"></a>Shader Parameter Setter

The uniform setter will have to be set as follows:

```
    m_goochUniformSetter1 = <a class="code" href="http://dev.doc.cgistudio.at/APILINK/group___c_o_u_r_i_e_r___v_i_s_u_a_l_i_z_a_t_i_o_n.html#ggaf0e93dc4242f607c3c8d13dafd036af9aaabfa5309af24986d3111a092449f857">GenericShaderParamSetter::Create</a>();
    m_goochUniformSetter1->SetMaterialActivationEnabled(true);
    m_goochUniformSetter1->SetLightActivationEnabled(true);
    m_goochUniformSetter1->SetLightsCoordinateSpace(Light::World);
    m_goochUniformSetter1->SetModelViewProjectionMatrix4Enabled(true);
    m_goochUniformSetter1->SetModelMatrix4Enabled(true);
    m_goochUniformSetter1->SetNormalModelMatrix3Enabled(true);
    m_goochUniformSetter1->SetCameraPositionEnabled(true);
    m_goochAppearance1->SetShaderParamSetter(m_goochUniformSetter1);

    m_goochUniformSetter2 = <a class="code" href="http://dev.doc.cgistudio.at/APILINK/group___c_o_u_r_i_e_r___v_i_s_u_a_l_i_z_a_t_i_o_n.html#ggaf0e93dc4242f607c3c8d13dafd036af9aaabfa5309af24986d3111a092449f857">GenericShaderParamSetter::Create</a>();
    m_goochUniformSetter2->SetModelViewProjectionMatrix4Enabled(true); 
    m_goochAppearance2->SetShaderParamSetter(m_goochUniformSetter2);
```

Prepare uniform data:

```
    m_coolDiffuseWeight= 0.25f;
    m_warmDiffuseWeight = 0.5f;
    m_goochScale = 0.1f;

    m_coolColor[0] = 0.0f;
    m_coolColor[1] = 0.0f;
    m_coolColor[2] = 0.55f;
    m_coolColor[3] = 1.0f;

    m_warmColor[0] = 0.3f;
    m_warmColor[1] = 0.3f;
    m_warmColor[2] = 0.0f;
    m_warmColor[3] = 1.0f;

    m_silhouetteColor[0] = 0.0f;
    m_silhouetteColor[1] = 0.0f;
    m_silhouetteColor[2] = 0.0f;
    m_silhouetteColor[3] = 1.0f;
```

Set the uniforms:

```
    m_goochUniformSetter1->SetUniform("u_CoolDiffuseWeight", Shader::Float, &m_coolDiffuseWeight);
    m_goochUniformSetter1->SetUniform("u_WarmDiffuseWeight", Shader::Float, &m_warmDiffuseWeight);
    m_goochUniformSetter1->SetUniform("u_CoolColor", Shader::FloatVec4, m_coolColor);
    m_goochUniformSetter1->SetUniform("u_WarmColor", Shader::FloatVec4, m_warmColor);

    m_goochUniformSetter2->SetUniform("u_Scale", Shader::Float, &m_goochScale);
    m_goochUniformSetter2->SetUniform("u_Color", Shader::FloatVec4, m_silhouetteColor);
```

##### <a class="anchor" id="bkmrk--39"></a>Material Configuration

```
    m_goochAppearance1->SetMaterial(<a class="code" href="http://dev.doc.cgistudio.at/APILINK/group___c_o_u_r_i_e_r___v_i_s_u_a_l_i_z_a_t_i_o_n.html#ggaf0e93dc4242f607c3c8d13dafd036af9aaabfa5309af24986d3111a092449f857">Material::Create</a>());
    m_goochAppearance1->GetMaterial()->SetDiffuse(<a class="code" href="http://dev.doc.cgistudio.at/APILINK/group___behaviors_control.html#ggae7abc816df647d0ecbc280480fefb788a6d1d4da086e381cb2c5a5ce6a2513ebd">Color</a>(0.75f, 0.75f, 0.75f, 1.0f));
    m_goochAppearance1->GetMaterial()->SetAmbient(<a class="code" href="http://dev.doc.cgistudio.at/APILINK/group___behaviors_control.html#ggae7abc816df647d0ecbc280480fefb788a6d1d4da086e381cb2c5a5ce6a2513ebd">Color</a>(0.0f, 0.0f, 0.0f, 0.0f));
    m_goochAppearance1->GetMaterial()->SetSpecular(<a class="code" href="http://dev.doc.cgistudio.at/APILINK/group___behaviors_control.html#ggae7abc816df647d0ecbc280480fefb788a6d1d4da086e381cb2c5a5ce6a2513ebd">Color</a>(1.0f, 1.0f, 1.0f, 1.0f));
    m_goochAppearance1->GetMaterial()->SetSpecularPower(20.0f);

    m_goochAppearance2->SetMaterial(<a class="code" href="http://dev.doc.cgistudio.at/APILINK/group___c_o_u_r_i_e_r___v_i_s_u_a_l_i_z_a_t_i_o_n.html#ggaf0e93dc4242f607c3c8d13dafd036af9aaabfa5309af24986d3111a092449f857">Material::Create</a>());
```

##### <a class="anchor" id="bkmrk--40"></a>Render Mode

```
    m_goochAppearance1->SetRenderMode(<a class="code" href="http://dev.doc.cgistudio.at/APILINK/group___c_o_u_r_i_e_r___v_i_s_u_a_l_i_z_a_t_i_o_n.html#ggaf0e93dc4242f607c3c8d13dafd036af9aaabfa5309af24986d3111a092449f857">RenderMode::Create</a>());
    m_goochAppearance1->GetRenderMode()->SetCulling(RenderMode::BackFaceCulling);
    
    m_goochAppearance2->SetRenderMode(<a class="code" href="http://dev.doc.cgistudio.at/APILINK/group___c_o_u_r_i_e_r___v_i_s_u_a_l_i_z_a_t_i_o_n.html#ggaf0e93dc4242f607c3c8d13dafd036af9aaabfa5309af24986d3111a092449f857">RenderMode::Create</a>());
    m_goochAppearance2->GetRenderMode()->SetCulling(RenderMode::FrontFaceCulling);
```

##### **Example** 

Here is exemplified the Gooch effect:

<div drawio-diagram="2572"><img src="https://doc316en.candera.eu/uploads/images/drawio/2023-02/drawing-4-1677461853.png" alt=""/></div>

<div class="contents" id="bkmrk--12"><div class="contents"><div class="textblock">  
</div></div></div>##### <a class="anchor" id="bkmrk--42"></a>Gooch Effect in SceneComposer

To experiment with the Gooch effect in SceneComposer use solution **ShaderExamples** from folder *cgi\_studio\_player/content/Tutorials/04\_ShaderUsage*.

# Multi Pass Effects in Candera > Examples for Global 3D Effect Shaders

#### <a class="anchor" id="bkmrk--16"></a>Description

This chapter describes how global multi pass effects in [Candera](http://dev.doc.cgistudio.at/APILINK/namespace_candera.html "[DataBinding_RefTypeSample]") can be achieved and special 3D effect shaders techniques supported by [Candera](http://dev.doc.cgistudio.at/APILINK/namespace_candera.html "[DataBinding_RefTypeSample]").

#### **Depth of Field** 

##### <a class="anchor" id="bkmrk--18"></a>Description

This chapter describes how to generate the **Depth of Field** effect using the global multipass appearance technique supported by [Candera](http://dev.doc.cgistudio.at/APILINK/namespace_candera.html "[DataBinding_RefTypeSample]").

##### **Introduction** 

##### <a class="anchor" id="bkmrk--20"></a>Depth of Field

The Depth-of-Field effect simulates the natural blurring of foreground and background scene elements when viewed through a camera lens. The effect firstly separates the scene in Z order and then blurs the foreground and background images according to the values set in the Depth of Field effect parameters. The final image is composited from the processed originals.

In [Candera](http://dev.doc.cgistudio.at/APILINK/namespace_candera.html "[DataBinding_RefTypeSample]"), the effect is realized using a global multipass technique which implies the rendering in four steps: <span style="color: rgb(230, 126, 35);"><sup>[\[1\]](#bkmrk-references%C2%A0)</sup></span>

<div class="contents" id="bkmrk-render-pass-1---rend"><div class="contents"><div class="textblock">- Render pass 1 - rendering the sharp scene, storing depth values in alpha channel
- Render pass 2 - blurring the result of the first render pass horizontally
- Render pass 3 - blurring the result of the second render pass vertically
- Render pass 4 - combine sharp and blurred picture, using focus-, focus range- and stored depth values, in order to realize the final result

</div></div></div><div drawio-diagram="2573"><img src="https://doc316en.candera.eu/uploads/images/drawio/2023-02/drawing-4-1677462269.png" alt=""/></div>

<div class="contents" id="bkmrk--0"><div class="textblock"></div></div>##### **Workflow** 

##### <a class="anchor" id="bkmrk--22"></a>Scenes

For an easier understanding on how to realize the Depth of Field effect we will use four scenes, each scene will correspond to a rendering step.   
  
First of all, the original main scene is taken and used as a texture on a billboard. The depth values of the images are saved in the alpha value in the offscreen frame buffer. In the second and third steps, the blurring is being done. For reasons of the performance, this step is parted into two steps:  
The resulting billboard of the first workflow step is blurred horizontally using a fragment shader. The resulting image is used as texture input for the next scene, which is subsequently blurred vertically.  
In the final step, the blurred images are combined with the sharp images from the first offscreen render target. The result is rendered as texture on a billboard placed in the final scene. A fourth camera displays the resulting Depth of Field effect applied on the main scene.

<div class="contents" id="bkmrk-the-billboards-shoul"><div class="contents"><div class="textblock"><dl class="note"><dt></dt><dd><p class="callout info">The Billboards should be rendered such that they cover the whole screen</p>

</dd></dl></div></div></div>The technique is also described schematically in the diagram below: <span style="color: rgb(230, 126, 35);"><sup>[\[1\]](#bkmrk-references%C2%A0)</sup></span>

<div drawio-diagram="2574"><img src="https://doc316en.candera.eu/uploads/images/drawio/2023-02/drawing-4-1677462360.png" alt=""/></div>

<div class="contents" id="bkmrk-remember-to-set-a-ca"><div class="contents"><div class="textblock"><dl class="note"><dt></dt><dd><p class="callout info">Remember to set a [Candera::RenderOrder](http://dev.doc.cgistudio.at/APILINK/class_candera_1_1_render_order.html "Defines the order(sequence) in which nodes are rendered. Collaborates with Renderer. Must cover functional correctness (translucent/transparent objects after opaque/solid objects) as well as optimization-related orderings (sorting by state, defining a background bin for rendering without depth checks). Nodes are assigned to bins; all nodes in an "earlier" bin are rendered before all nodes in a "later" bin. Two default bins are defined and must not be deleted. The opaque bin, which is sorted from front to back (DistanceToCameraOrderCriterion), and the transparent bin, which is sorted from back to front (ReverseDistanceToCameraOrderCriterion). If a Node has no specific assignment to a render order bin, it will be automatically assigned by Candera either to opaque or transparent bin, according to its RenderMode::IsAlphaBlendingEnabled setting.") object for each scene.</p>

</dd></dl></div></div></div>The sections below offer you some extra information needed to correctly set up the effect.

##### <a class="anchor" id="bkmrk--24"></a>Offscreen Render Targets

Create and configure all offscreen render targets that shall be used for cameras 1 - 3 as shown below:

```
    m_offscreenRenderTargetDof = Base::CreateGraphicDeviceUnit(DevicePackageDescriptor::OffscreenTarget3D);
    if (m_offscreenRenderTargetDof == 0) {
        return false;
    }

    sprintf(m_rtProperties.m_width, "%d", m_gdu->ToRenderTarget3D()->GetWidth());
    sprintf(m_rtProperties.m_height, "%d", m_gdu->ToRenderTarget3D()->GetHeight());
    sprintf(m_rtProperties.m_colorFormat, "%d", RgbaUnpackedColorFormat);
    sprintf(m_rtProperties.m_depthFormat, "%d", Depth32Format);

    const MetaInfo::GraphicDeviceUnitMetaInfo *meta = DevicePackageDescriptor::GetMetaInformation(m_offscreenRenderTargetDof->GetUnitType());
    meta->LookupItem("Width") && meta->LookupItem("Width")->Set(m_offscreenRenderTargetDof, m_rtProperties.m_width);
    meta->LookupItem("Height") && meta->LookupItem("Height")->Set(m_offscreenRenderTargetDof, m_rtProperties.m_height);
    meta->LookupItem("ColorFormat") && meta->LookupItem("ColorFormat")->Set(m_offscreenRenderTargetDof, m_rtProperties.m_colorFormat);
    meta->LookupItem("DepthFormat") && meta->LookupItem("DepthFormat")->Set(m_offscreenRenderTargetDof, m_rtProperties.m_depthFormat);

#if CANDERA_DEVICE_IMX6
    static_cast<iMX6FrameBufferObject*>(m_offscreenRenderTargetDof)->GetProperties().SetOwner(m_gdu->ToRenderTarget3D());
#endif
    m_offscreenRenderTargetDof->Upload();
```

##### <a class="anchor" id="bkmrk--25"></a>Shader Parameter Setter

The meshes from each scene will use a dedicated shader which will set specific uniforms for each scene. The uniforms needed to be set are:

<div class="contents" id="bkmrk-scaled-depth-value-%28"><div class="contents"><div class="contents"><div class="textblock">- Scaled depth value (u\_depthScale): factor used to scale the depth value
- Circle of confusion (u\_CocScale): factor used to scale the size of circle of confusion
- Focus range (u\_Range): factor used in the computation of the weight of sharpness / blurriness
- Focus (u\_Focus): factor used in the computation of the weight of sharpness / blurriness

<div class="fragment">  
</div></div></div></div></div>```
    // DoF Scene
    m_objectSps = <a class="code" href="http://dev.doc.cgistudio.at/APILINK/group___c_o_u_r_i_e_r___v_i_s_u_a_l_i_z_a_t_i_o_n.html#ggaf0e93dc4242f607c3c8d13dafd036af9aaabfa5309af24986d3111a092449f857">GenericShaderParamSetter::Create</a>();
    m_objectSps->SetLightsCoordinateSpace(Light::Object);
    m_objectSps->SetModelMatrix4Enabled(false);
    m_objectSps->SetNormalModelMatrix3Enabled(false);
    m_objectSps->SetUniform("u_depthScale",Shader::Float, &m_depthScale);

    // Blur Scene vertically
    m_blurXSps = <a class="code" href="http://dev.doc.cgistudio.at/APILINK/group___c_o_u_r_i_e_r___v_i_s_u_a_l_i_z_a_t_i_o_n.html#ggaf0e93dc4242f607c3c8d13dafd036af9aaabfa5309af24986d3111a092449f857">GenericShaderParamSetter::Create</a>();
    m_blurXSps->SetModelViewProjectionMatrix4Enabled(false);
    m_blurXSps->SetUniform("u_blurFactor",Shader::Float, &m_blurFactor);
    m_blurXSps->SetUniform("u_offsetLeft", Shader::Float, &m_viewportLeft);
    m_blurXSps->SetUniform("u_offsetTop", Shader::Float, &m_viewportTop);

    // Blur Scene horizontally
    m_blurYSps = <a class="code" href="http://dev.doc.cgistudio.at/APILINK/group___c_o_u_r_i_e_r___v_i_s_u_a_l_i_z_a_t_i_o_n.html#ggaf0e93dc4242f607c3c8d13dafd036af9aaabfa5309af24986d3111a092449f857">GenericShaderParamSetter::Create</a>();
    m_blurYSps->SetModelViewProjectionMatrix4Enabled(false);
    m_blurYSps->SetUniform("u_blurFactor",Shader::Float, &m_blurFactor);
    m_blurYSps->SetUniform("u_offsetLeft", Shader::Float, &m_viewportLeft);
    m_blurYSps->SetUniform("u_offsetTop", Shader::Float, &m_viewportTop);

    // Combine Scene
    m_dofCombineSps = <a class="code" href="http://dev.doc.cgistudio.at/APILINK/group___c_o_u_r_i_e_r___v_i_s_u_a_l_i_z_a_t_i_o_n.html#ggaf0e93dc4242f607c3c8d13dafd036af9aaabfa5309af24986d3111a092449f857">GenericShaderParamSetter::Create</a>();
    m_dofCombineSps->SetModelViewProjectionMatrix4Enabled(false);
    m_dofCombineSps->SetUniform("u_Range",Shader::Float, &m_range);
    m_dofCombineSps->SetUniform("u_Focus",Shader::Float, &m_focus);
    m_dofCombineSps->SetUniform("u_offsetLeft", Shader::Float, &m_viewportLeft);
    m_dofCombineSps->SetUniform("u_offsetTop", Shader::Float, &m_viewportTop);
```

##### <a class="anchor" id="bkmrk--26"></a>Camera

The cameras from the all three scenes should use perspective projection.

```
    SharedPointer<PerspectiveProjection> perspectiveProjection = <a class="code" href="http://dev.doc.cgistudio.at/APILINK/group___c_o_u_r_i_e_r___v_i_s_u_a_l_i_z_a_t_i_o_n.html#ggaf0e93dc4242f607c3c8d13dafd036af9aaabfa5309af24986d3111a092449f857">PerspectiveProjection::Create</a>();
    perspectiveProjection->SetNearZ(0.001F);
    perspectiveProjection->SetFarZ(100.0F);
    perspectiveProjection->SetFovYDegrees(45.0F);
    perspectiveProjection->SetAspectRatio(static_cast<Float>(dispSettings->width) / static_cast<Float>(dispSettings->height));
```

Set the clear mode for the first two cameras as below:

```
    m_clearMode.SetClearColor(<a class="code" href="http://dev.doc.cgistudio.at/APILINK/group___behaviors_control.html#ggae7abc816df647d0ecbc280480fefb788a6d1d4da086e381cb2c5a5ce6a2513ebd">Color</a>(0.8f,0.8f,0.8f,1.0f));
    m_clearMode.SetColorClearEnabled(true);
    m_clearMode.SetDepthClearEnabled(true);
    m_clearMode.SetClearDepth(1.0f);
```

##### <a class="anchor" id="bkmrk--27"></a>Billboard Textures

This code snippet shows you how to create the textures for the billboards. First create a [Candera::ProxyTextureImage](http://dev.doc.cgistudio.at/APILINK/class_candera_1_1_proxy_texture_image.html "The class ProxyTextureImage provides a TextureImage interface to an externally maintained image sourc..."):

```
    SharedPointer<ProxyTextureImage> proxyTexImgBlurredX = <a class="code" href="http://dev.doc.cgistudio.at/APILINK/group___c_o_u_r_i_e_r___v_i_s_u_a_l_i_z_a_t_i_o_n.html#ggaf0e93dc4242f607c3c8d13dafd036af9aaabfa5309af24986d3111a092449f857">ProxyTextureImage::Create</a>(m_offscreenRenderTargetBlurX->ToImageSource3D());
    SharedPointer<ProxyTextureImage> proxyTexImgBlurredY = <a class="code" href="http://dev.doc.cgistudio.at/APILINK/group___c_o_u_r_i_e_r___v_i_s_u_a_l_i_z_a_t_i_o_n.html#ggaf0e93dc4242f607c3c8d13dafd036af9aaabfa5309af24986d3111a092449f857">ProxyTextureImage::Create</a>(m_offscreenRenderTargetBlurY->ToImageSource3D());
```

Then create and configure the texture:

```
    SharedPointer<Texture> proxyTexBlurredX = <a class="code" href="http://dev.doc.cgistudio.at/APILINK/group___c_o_u_r_i_e_r___v_i_s_u_a_l_i_z_a_t_i_o_n.html#ggaf0e93dc4242f607c3c8d13dafd036af9aaabfa5309af24986d3111a092449f857">Texture::Create</a>();
    proxyTexBlurredX->SetTextureImage(proxyTexImgBlurredX);
    proxyTexBlurredX->SetMipMapFilter(Texture::MipMapNone);
    proxyTexBlurredX->SetMagnificationFilter(Texture::MinMagNearest);
    proxyTexBlurredX->SetMinificationFilter(Texture::MinMagNearest);
    proxyTexBlurredX->SetWrapModeU(Texture::ClampToEdge);
    proxyTexBlurredX->SetWrapModeV(Texture::ClampToEdge);

    SharedPointer<Texture> proxyTexBlurredY = <a class="code" href="http://dev.doc.cgistudio.at/APILINK/group___c_o_u_r_i_e_r___v_i_s_u_a_l_i_z_a_t_i_o_n.html#ggaf0e93dc4242f607c3c8d13dafd036af9aaabfa5309af24986d3111a092449f857">Texture::Create</a>();
    proxyTexBlurredY->SetTextureImage(proxyTexImgBlurredY);
    proxyTexBlurredY->SetMipMapFilter(Texture::MipMapNone);
    proxyTexBlurredY->SetMagnificationFilter(Texture::MinMagNearest);
    proxyTexBlurredY->SetMinificationFilter(Texture::MinMagNearest);
    proxyTexBlurredY->SetWrapModeU(Texture::ClampToEdge);
    proxyTexBlurredY->SetWrapModeV(Texture::ClampToEdge);
```

Repeat these two steps for all textures.

<div class="contents" id="bkmrk-the-billboard-from-t"><div class="contents"><div class="textblock"><dl class="note"><dt></dt><dd><p class="callout info">The billboard from the Combine Scene uses two textures. When you set the textures be sure that the *texture unit* value is set to "0" for the texture corresponding to the camera 1. Analogous, the other texture will have the *texture unit* value set to "1".</p>

</dd></dl></div></div></div>##### <a class="anchor" id="bkmrk--28"></a>Placing Billboards in Scenes

See Shader Usage in [Candera](http://dev.doc.cgistudio.at/APILINK/namespace_candera.html "[DataBinding_RefTypeSample]"): <span style="color: rgb(230, 126, 35);">[Global Multi Pass Effects](https://doc316en.candera.eu/link/476#bkmrk-global-multi-pass-ef)</span>

##### **Example** 

Here is exemplified the **Bloom** effect on a scene.

First image shows the scene without the effect:

<div drawio-diagram="2575"><img src="https://doc316en.candera.eu/uploads/images/drawio/2023-02/drawing-4-1677462432.png" alt=""/></div>

<div class="contents" id="bkmrk--4"><div class="contents"><div class="textblock">  
</div></div></div>Second image shows same scene but with the effect:

<div drawio-diagram="2576"><img src="https://doc316en.candera.eu/uploads/images/drawio/2023-02/drawing-4-1677462450.png" alt=""/></div>

<div class="contents" id="bkmrk--6"></div>##### **References** 

\[1\] [http://www.geeks3d.com/20090710/javascript-depth-of-field-effect](http://www.geeks3d.com/20090710/javascript-depth-of-field-effect)

---

#### **Bloom**   


##### <a class="anchor" id="bkmrk--31"></a>Description

This chapter describes how to generate the **Bloom** effect using the global multipass appearance technique supported by [Candera](http://dev.doc.cgistudio.at/APILINK/namespace_candera.html "[DataBinding_RefTypeSample]").

##### <a class="anchor" id="bkmrk--32"></a>**Introduction** 

##### <a class="anchor" id="bkmrk--33"></a>Bloom

The Bloom-Effect is a shader effect used to simulate the appearance of very bright light. The effect firstly extracts the bright area of an image using a threshold filter. The extracted regions are further blurred in order to realize the simulation of light bleeding over darker regions.

The bloom effect is realized using a global multipass technique which implies the rendering in five steps: <span style="color: rgb(230, 126, 35);"><sup>[\[1\]](#bkmrk-references%C2%A0-0)</sup></span>

<div class="contents" id="bkmrk-render-pass-1---rend-0"><div class="contents"><div class="textblock">- Render pass 1 - rendering the sharp scene
- Render pass 2 - extract bright area using a threshold filter
- Render pass 3 - blurring the result of the second render pass horizontally
- Render pass 4 - blurring the result of the third render pass vertically
- Render pass 5 - combine sharp and blurred picture, using intensity as well as saturation of bloom texture and original scene texture, in order to generate the final result

</div></div></div><div drawio-diagram="2581"><img src="https://doc316en.candera.eu/uploads/images/drawio/2023-02/drawing-4-1677462702.png" alt=""/></div>

<div class="contents" id="bkmrk--9"><div class="textblock">  
</div></div>
##### **Workflow** 

##### <a class="anchor" id="bkmrk--35"></a>Scenes

For an easier understanding on how to realize the Bloom effect we will use five scenes, each scene will correspond to a rendering step.   
  
First of all, the original main scene is taken and used as a texture on a billboard. This billboard is rendered with a special shader that will extract the bright area of the texture using a threshold filter.  
In the second and third steps, the blurring is being done. For reasons of the performance, this step is parted into two steps: The resulting billboard of the first workflow step is rendered with a shader that will blur the images horizontally and these blurred images are rendered as texture on an another billboard placed in the third scene. The billboard of the third scene is then rendered with a shader that will blur the images vertically. This billboard is part of the fourth scene, viewed by a camera which is connected to a fourth offscreen render target.  
In the final step, the images of the blurred, bright area of the scene are combined with the sharp image from the first offscreen render target. The result is rendered as texture on a billboard placed in the final fifth scene. A fifth camera displays the resulting Bloom effect applied on the main scene.

<div class="contents" id="bkmrk-the-billboards-shoul-0"><div class="contents"><div class="textblock"><dl class="note"><dt></dt><dd><p class="callout info">The Billboards should be rendered such that they cover the whole screen</p>

</dd></dl></div></div></div>The technique is also described schematically in the diagram below:

<div drawio-diagram="2585"><img src="https://doc316en.candera.eu/uploads/images/drawio/2023-02/drawing-4-1677462763.png" alt=""/></div>

<div class="contents" id="bkmrk--11"><div class="contents"><div class="textblock">  
</div></div></div><div class="contents" id="bkmrk-remember-to-set-a-ca-0"><div class="contents"><div class="textblock"><dl class="note"><dd><p class="callout info">Remember to set a [Candera::RenderOrder](http://dev.doc.cgistudio.at/APILINK/class_candera_1_1_render_order.html "Defines the order(sequence) in which nodes are rendered. Collaborates with Renderer. Must cover functional correctness (translucent/transparent objects after opaque/solid objects) as well as optimization-related orderings (sorting by state, defining a background bin for rendering without depth checks). Nodes are assigned to bins; all nodes in an "earlier" bin are rendered before all nodes in a "later" bin. Two default bins are defined and must not be deleted. The opaque bin, which is sorted from front to back (DistanceToCameraOrderCriterion), and the transparent bin, which is sorted from back to front (ReverseDistanceToCameraOrderCriterion). If a Node has no specific assignment to a render order bin, it will be automatically assigned by Candera either to opaque or transparent bin, according to its RenderMode::IsAlphaBlendingEnabled setting.") object for each scene.</p>

</dd></dl></div></div></div>The sections below offer you some extra information needed to correctly set up the effect.

##### <a class="anchor" id="bkmrk--37"></a>Shader Parameter Setter

The meshes from each scene will use a dedicated shader which will set specific uniforms for each scene. The uniforms needed to be set are:

<div class="contents" id="bkmrk-bloom-brightness-thr"><div class="contents"><div class="contents"><div class="textblock">- Bloom Brightness Threshold value (u\_brightnessThreshold): brightness threshold value to render the bloom shape. lower = darker parts of the image
- Blur Factor (u\_blurFactor): factor used in the computation of the weight of sharpness / blurriness
- Intensity amount on original scene (u\_originalIntensity): factor used to set the intensity of the original scene texture
- Saturation amount on original scene (u\_originalSaturation): factor used to set the saturation of the original scene texture
- Bloom Intensity (u\_bloomIntensity): bloom intensity factor used in the combining scene
- Bloom Saturation (u\_bloomSaturation): bloom saturation value used in the combining scene

<div class="fragment">  
</div></div></div></div></div>```
    // Sharp Scene
    m_objectSps = <a class="code" href="http://dev.doc.cgistudio.at/APILINK/group___c_o_u_r_i_e_r___v_i_s_u_a_l_i_z_a_t_i_o_n.html#ggaf0e93dc4242f607c3c8d13dafd036af9aaabfa5309af24986d3111a092449f857">GenericShaderParamSetter::Create</a>();
    m_objectSps->SetLightsCoordinateSpace(Light::Object);
    m_objectSps->SetModelMatrix4Enabled(false);
    m_objectSps->SetNormalModelMatrix3Enabled(false);

    // Bloom Threshold Scene
    m_bloomThresholdSps = <a class="code" href="http://dev.doc.cgistudio.at/APILINK/group___c_o_u_r_i_e_r___v_i_s_u_a_l_i_z_a_t_i_o_n.html#ggaf0e93dc4242f607c3c8d13dafd036af9aaabfa5309af24986d3111a092449f857">GenericShaderParamSetter::Create</a>();
    m_bloomThresholdSps->SetModelViewProjectionMatrix4Enabled(false);
    m_bloomThresholdSps->SetUniform("u_brightnessThreshold",Shader::Float, &m_bloomBrightnessThreshold);
    m_bloomThresholdSps->SetUniform("u_offsetLeft", Shader::Float, &m_offsetLeft);
    m_bloomThresholdSps->SetUniform("u_offsetTop", Shader::Float, &m_offsetTop);

    // Blur Scene vertically
    m_bloomBlurXSps = <a class="code" href="http://dev.doc.cgistudio.at/APILINK/group___c_o_u_r_i_e_r___v_i_s_u_a_l_i_z_a_t_i_o_n.html#ggaf0e93dc4242f607c3c8d13dafd036af9aaabfa5309af24986d3111a092449f857">GenericShaderParamSetter::Create</a>();
    m_bloomBlurXSps->SetModelViewProjectionMatrix4Enabled(false);
    m_blurFactor = 1.0F / m_gdu->ToRenderTarget3D()->GetWidth();
    m_bloomBlurXSps->SetUniform("u_blurFactor",Shader::Float, &m_blurFactor);
    m_bloomBlurXSps->SetUniform("u_offsetLeft", Shader::Float, &m_offsetLeft);
    m_bloomBlurXSps->SetUniform("u_offsetTop", Shader::Float, &m_offsetTop);

    // Blur Scene horizontally
    m_bloomBlurYSps = <a class="code" href="http://dev.doc.cgistudio.at/APILINK/group___c_o_u_r_i_e_r___v_i_s_u_a_l_i_z_a_t_i_o_n.html#ggaf0e93dc4242f607c3c8d13dafd036af9aaabfa5309af24986d3111a092449f857">GenericShaderParamSetter::Create</a>();
    m_bloomBlurYSps->SetModelViewProjectionMatrix4Enabled(false);
    m_blurFactor = 1.0F / m_gdu->ToRenderTarget3D()->GetHeight();
    m_bloomBlurYSps->SetUniform("u_blurFactor",Shader::Float, &m_blurFactor);
    m_bloomBlurYSps->SetUniform("u_offsetLeft", Shader::Float, &m_offsetLeft);
    m_bloomBlurYSps->SetUniform("u_offsetTop", Shader::Float, &m_offsetTop);

    // Combine Scene
    m_bloomCombineSps = <a class="code" href="http://dev.doc.cgistudio.at/APILINK/group___c_o_u_r_i_e_r___v_i_s_u_a_l_i_z_a_t_i_o_n.html#ggaf0e93dc4242f607c3c8d13dafd036af9aaabfa5309af24986d3111a092449f857">GenericShaderParamSetter::Create</a>();
    m_bloomCombineSps->SetModelViewProjectionMatrix4Enabled(false);
    m_bloomCombineSps->SetUniform("u_originalIntensity",Shader::Float, &m_originalIntensity);
    m_bloomCombineSps->SetUniform("u_originalSaturation",Shader::Float, &m_originialSaturation);
    m_bloomCombineSps->SetUniform("u_bloomIntensity",Shader::Float, &m_bloomIntensity);
    m_bloomCombineSps->SetUniform("u_bloomSaturation",Shader::Float, &m_bloomSaturation);
    m_bloomCombineSps->SetUniform("u_offsetLeft",Shader::Float, &m_offsetLeft);
    m_bloomCombineSps->SetUniform("u_offsetTop",Shader::Float, &m_offsetTop);
```

##### <a class="anchor" id="bkmrk--38"></a>Camera

The cameras from all the five scenes should use perspective projection.

```
    SharedPointer<PerspectiveProjection> perspectiveProjection = <a class="code" href="http://dev.doc.cgistudio.at/APILINK/group___c_o_u_r_i_e_r___v_i_s_u_a_l_i_z_a_t_i_o_n.html#ggaf0e93dc4242f607c3c8d13dafd036af9aaabfa5309af24986d3111a092449f857">PerspectiveProjection::Create</a>();
    perspectiveProjection->SetNearZ(0.001F);
    perspectiveProjection->SetFarZ(100.0F);
    perspectiveProjection->SetFovYDegrees(45.0F);
    perspectiveProjection->SetAspectRatio(static_cast<Float>(dispSettings->width) / static_cast<Float>(dispSettings->height));
```

Set the clear mode for the cameras as below:

```
    m_clearMode.SetClearColor(<a class="code" href="http://dev.doc.cgistudio.at/APILINK/group___behaviors_control.html#ggae7abc816df647d0ecbc280480fefb788a6d1d4da086e381cb2c5a5ce6a2513ebd">Color</a>(0.8f,0.8f,0.8f,1.0f));
    m_clearMode.SetColorClearEnabled(true);
    m_clearMode.SetDepthClearEnabled(true);
    m_clearMode.SetClearDepth(1.0f);
```

##### <a class="anchor" id="bkmrk--39"></a>Billboard Textures

This code snippet shows you how to create the textures for the billboards. First create a [Candera::ProxyTextureImage](http://dev.doc.cgistudio.at/APILINK/class_candera_1_1_proxy_texture_image.html "The class ProxyTextureImage provides a TextureImage interface to an externally maintained image sourc..."):

```
    SharedPointer<ProxyTextureImage> proxyTexImgBloomThreshold = <a class="code" href="http://dev.doc.cgistudio.at/APILINK/group___c_o_u_r_i_e_r___v_i_s_u_a_l_i_z_a_t_i_o_n.html#ggaf0e93dc4242f607c3c8d13dafd036af9aaabfa5309af24986d3111a092449f857">ProxyTextureImage::Create</a>(m_offscreenRenderTargetThreshold->ToImageSource3D());
    SharedPointer<ProxyTextureImage> proxyTexImgBlurredX = <a class="code" href="http://dev.doc.cgistudio.at/APILINK/group___c_o_u_r_i_e_r___v_i_s_u_a_l_i_z_a_t_i_o_n.html#ggaf0e93dc4242f607c3c8d13dafd036af9aaabfa5309af24986d3111a092449f857">ProxyTextureImage::Create</a>(m_offscreenRenderTargetBlurX->ToImageSource3D());
    SharedPointer<ProxyTextureImage> proxyTexImgBlurredY = <a class="code" href="http://dev.doc.cgistudio.at/APILINK/group___c_o_u_r_i_e_r___v_i_s_u_a_l_i_z_a_t_i_o_n.html#ggaf0e93dc4242f607c3c8d13dafd036af9aaabfa5309af24986d3111a092449f857">ProxyTextureImage::Create</a>(m_offscreenRenderTargetBlurY->ToImageSource3D());
```

Then create and configure the texture:

```
    SharedPointer<Texture> proxyTexBloomThreshold = <a class="code" href="http://dev.doc.cgistudio.at/APILINK/group___c_o_u_r_i_e_r___v_i_s_u_a_l_i_z_a_t_i_o_n.html#ggaf0e93dc4242f607c3c8d13dafd036af9aaabfa5309af24986d3111a092449f857">Texture::Create</a>();
    proxyTexBloomThreshold->SetTextureImage(proxyTexImgBloomThreshold);
    proxyTexBloomThreshold->SetMipMapFilter(Texture::MipMapNone);
    proxyTexBloomThreshold->SetMagnificationFilter(Texture::MinMagNearest);
    proxyTexBloomThreshold->SetMinificationFilter(Texture::MinMagNearest);
    proxyTexBloomThreshold->SetWrapModeU(Texture::ClampToEdge);
    proxyTexBloomThreshold->SetWrapModeV(Texture::ClampToEdge);

    SharedPointer<Texture> proxyTexBlurredX = <a class="code" href="http://dev.doc.cgistudio.at/APILINK/group___c_o_u_r_i_e_r___v_i_s_u_a_l_i_z_a_t_i_o_n.html#ggaf0e93dc4242f607c3c8d13dafd036af9aaabfa5309af24986d3111a092449f857">Texture::Create</a>();
    proxyTexBlurredX->SetTextureImage(proxyTexImgBlurredX);
    proxyTexBlurredX->SetMipMapFilter(Texture::MipMapNone);
    proxyTexBlurredX->SetMagnificationFilter(Texture::MinMagNearest);
    proxyTexBlurredX->SetMinificationFilter(Texture::MinMagNearest);
    proxyTexBlurredX->SetWrapModeU(Texture::ClampToEdge);
    proxyTexBlurredX->SetWrapModeV(Texture::ClampToEdge);

    SharedPointer<Texture> proxyTexBlurredY = <a class="code" href="http://dev.doc.cgistudio.at/APILINK/group___c_o_u_r_i_e_r___v_i_s_u_a_l_i_z_a_t_i_o_n.html#ggaf0e93dc4242f607c3c8d13dafd036af9aaabfa5309af24986d3111a092449f857">Texture::Create</a>();
    proxyTexBlurredY->SetTextureImage(proxyTexImgBlurredY);
    proxyTexBlurredY->SetMipMapFilter(Texture::MipMapNone);
    proxyTexBlurredY->SetMagnificationFilter(Texture::MinMagNearest);
    proxyTexBlurredY->SetMinificationFilter(Texture::MinMagNearest);
    proxyTexBlurredY->SetWrapModeU(Texture::ClampToEdge);
    proxyTexBlurredY->SetWrapModeV(Texture::ClampToEdge);
```

<div class="contents" id="bkmrk-the-billboard-from-t-0"><div class="contents"><div class="textblock"><div class="fragment">  
</div><dl class="note"><dt></dt><dd><p class="callout info">The billboard from the Combine Scene uses two textures. When you set the textures be sure that the *texture unit* value is set to "0" for the texture corresponding to the camera 1. Analogous, the other texture will have the *texture unit* value set to "1".</p>

</dd></dl></div></div></div>##### <a class="anchor" id="bkmrk--40"></a>Placing Billboards in Scenes

See Shader Usage in [Candera](http://dev.doc.cgistudio.at/APILINK/namespace_candera.html "[DataBinding_RefTypeSample]"): [Global Multi Pass Effects](https://doc316en.candera.eu/link/476#bkmrk-global-multi-pass-ef)

##### **Example** 

Here is exemplified the **Bloom** effect on a scene.

First image shows the scene without the effect:

<div drawio-diagram="2587"><img src="https://doc316en.candera.eu/uploads/images/drawio/2023-02/drawing-4-1677462810.png" alt=""/></div>

<div class="contents" id="bkmrk--13"><div class="contents"><div class="textblock">  
</div></div></div>Second image shows same scene but with the effect:

<div drawio-diagram="2589"><img src="https://doc316en.candera.eu/uploads/images/drawio/2023-02/drawing-4-1677462819.png" alt=""/></div>

<div class="contents" id="bkmrk--15"><div class="contents"><div class="textblock">  
</div></div></div>

# Transform Feedback

Transform Feedback is the process of capturing primitives generated by the vertex processing step(s), recording data from those primitives into a vertex buffer. This allows one to preserve the post-transform rendering state of an object and resubmit this data multiple times.

#### <a class="anchor" id="bkmrk--1"></a>Use Cases

This feature enables the user to utilize the vertex processing unit of the GPU to perform calculations and reuse the results. This is especially useful for debugging vertex transformations. Applications can also use it for use cases like speeding up particle systems.

<div drawio-diagram="2312"><img src="https://doc316en.candera.eu/uploads/images/drawio/2023-02/drawing-4-1677055208.png" alt=""/></div>

<div class="contents" id="bkmrk--0"><div class="contents"><div class="textblock"></div></div></div>#### <a class="anchor" id="bkmrk--3"></a>Usage in Candera:

<div class="contents" id="bkmrk-before-uploading-you"><div class="textblock">1. Before uploading your vertex shader that processes your data, use Shader::SetTransformVaryings to tell the engine which shader varying(s) need to be recorded into the feedback buffer.
2. Upload the shader, activate the shader’s appearance, and source vertex buffer as usual. If you want to disable the output of the pixel pipeline stage, use RenderMode::SetRasterizerDiscardEnabled.
3. Bind the source vertex buffer using Shader::BindAttributes.
4. Call Renderer::BindTransformFeedbackBuffer, and Renderer::BeginTransformFeedbackBuffer using the destination vertex buffer that the processed primitives will be recorded into.
5. Render the source vertex buffer as usual.
6. Call Renderer::EndTransformFeedbackBuffer
7. Call Renderer::MapTransformFeedbackBuffer to get a pointer to the processed, and recorded data.
8. Before using that pointer for your own purposes, call Renderer::UnmapTransformFeedbackBuffer.
9. The lifetime of that pointer’s data is tied to the lifetime of your destination vertex buffer.

</div></div>

# Tutorial for Special 2D Render Techniques

# 2D Shadow Effect

#### <a class="anchor" id="bkmrk--5"></a>Description

This chapter briefly describes how to use the 2D shadow effect.

<div class="contents" id="bkmrk-ensure-that-this-eff"><div class="contents"><div class="textblock"><dl class="note"><dt></dt><dd><p class="callout info">Ensure that this effect is supported by the device platform in use.</p>

</dd></dl></div></div></div>#### **2D Configure a Shadow Effect** 

##### <a class="anchor" id="bkmrk--7"></a>Shadow Effect

By using [Candera::ShadowBitmapBrushBlend](http://dev.doc.cgistudio.at/APILINK/class_candera_1_1_shadow_bitmap_brush_blend.html "Output a shadowed or glowing bitmap image, both shadow/glow and image alpha blended."), a colored shadow can be applied to a bitmap.

Following properties of the shadow can be configured:

<div class="contents" id="bkmrk-color-%28including-alp"><div class="contents"><div class="textblock">- Color (including alpha value)
- Scale (the shadow size related to the bitmap)
- Position Offset (related to the bitmap)

</div></div></div>Following is an example of a grey colored shadow, with a scale of 70% and an offset of 80/80 related to the bitmap:

<div drawio-diagram="2657"><img src="https://doc316en.candera.eu/uploads/images/drawio/2023-02/drawing-4-1677466312.png" alt=""/></div>

<div class="contents" id="bkmrk--1"><div class="contents"><div class="textblock"><div class="image">  
</div></div></div></div>Refer to <span style="color: rgb(230, 126, 35);">[SceneComposer User Manual](https://doc316en.candera.eu/books/scene-design/page/effects)</span> about how to configure a ShadowBitmapBrushBlend effect in a 2D scene.

#### **Modify 2D Shadow Effect Properties** 

##### <a class="anchor" id="bkmrk--9"></a>Access Shadow Effect

To modify the shadow effect properties, first the shadow effect needs to be retrieved from its render node:

```
    // Get and cast first effect of render node
    Effect2D* effect2D = renderNode->GetEffect(0);
    ShadowBitmapBrushBlend* shadow = 0;
    if (effect2D != 0){
        shadow = (ShadowBitmapBrushBlend*) effect2D;
    }
    // End Get and cast first effect of render node
```

##### <a class="anchor" id="bkmrk--10"></a>Set Shadow Color

Specify a color with a red, a blue, a green and an alpha component and apply the color to the Shadow Effect.

Example:

```
Color::Data c;
c.alpha = 0.5f;
c.blue = 0.0f;
c.green = 0.0f;
c.red = 1.0f;
shadow->ShadowColor().Set(c);
```

##### <a class="anchor" id="bkmrk--11"></a>Set Shadow Scale

For the shadow's scale you need the scale X and Y value. Add the two values to a Vector2 and set the shadow's scale.

Example:

```
Float shadowScaleX = 0.7f;
Float shadowScaleY = 0.7f;
shadow->ShadowScale().Set(Vector2(shadowScaleX, shadowScaleY));
```

##### <a class="anchor" id="bkmrk--12"></a>Set Shadow Position Offset

It is possible to change the position of the shadow by changing its offset to the node. Therefore you need a Vector2 with the X and Y offset values again.

Example:

```
Float shadowPosOffX = 5.0f;
Float shadowPosOffY = 7.0f;
shadow->ShadowPositionOffset().Set(Vector2(shadowPosOffX, shadowPosOffY));
```

# 2D Mirror Effect

#### <a class="anchor" id="bkmrk--2"></a>Description

This chapter briefly describes how to use the 2D mirror effect.

<div class="contents" id="bkmrk-ensure-that-this-eff"><div class="contents"><div class="textblock"><dl class="note"><dt></dt><dd><p class="callout info">Ensure that this effect is supported by the device platform in use.</p>

</dd></dl></div></div></div>#### **Configure a 2D Mirror Effect** 

##### <a class="anchor" id="bkmrk--4"></a>Mirror Effect

By using [Candera::MirrorBitmapBrushBlend](http://dev.doc.cgistudio.at/APILINK/class_candera_1_1_mirror_bitmap_brush_blend.html "Output includes the bitmap image and it's reflection."), a mirror reflection can be applied to a bitmap node.

Following properties of a mirror effect can be configured:

<div class="contents" id="bkmrk-mirror-axis-modifica"><div class="contents"><div class="textblock">- Mirror Axis Modifications
- Alpha Value

</div></div></div>Following is an example of a mirror effect with a diagonal mirror axis and an alpha value of 1.0f:

<div drawio-diagram="2667"><img src="https://doc316en.candera.eu/uploads/images/drawio/2023-02/drawing-4-1677466536.png" alt=""/></div>

<div class="contents" id="bkmrk--0"><div class="contents"><div class="textblock"><div class="image">  
</div></div></div></div>Refer to <span style="color: rgb(230, 126, 35);">[SceneComposer User Manual](https://doc316en.candera.eu/books/scene-design/page/effects)</span> about how to configure a MirrorBitmapBrushBlend effect in a 2D scene.

#### **Modify 2D Mirror Effect Properties** 

##### <a class="anchor" id="bkmrk--6"></a>Set Mirror Axis

To set the Mirror Axis you need to set two vectors.

<div class="contents" id="bkmrk-the-first-vector-def"><div class="contents"><div class="textblock">- The first vector defines the start point of the mirror axis (the startpoint's X and Y value),
- and the second vector defines the end of the axis.

</div></div></div>The following example shows how to implement a mirror axis from the startpoint (0, 400) to the endpoint (700, 400).

```
Float fromX = 0.0f;
Float fromY = 400.0f;
Float toX = 700.0f;
Float toY = 400.0f;

mirror->MirrorAxisFrom().Set(Vector2(fromX, fromY));
mirror->MirrorAxisTo().Set(Vector2(toX, toY));
```

##### <a class="anchor" id="bkmrk--7"></a>Set Mirror Alpha Value

It is possible to set the mirrors alpha value, so that the mirror looks more or less intensive.

```
Float mirrorAlpha = 0.7f;
mirror->Alpha()= mirrorAlpha;
```

<div drawio-diagram="2668"><img src="https://doc316en.candera.eu/uploads/images/drawio/2023-02/drawing-4-1677466579.png" alt=""/></div>

# 2D Blur Effect

#### <a class="anchor" id="bkmrk--1"></a>Description

This chapter briefly describes how to use the 2D blur effect.

<div class="contents" id="bkmrk-ensure-that-this-eff"><div class="contents"><div class="textblock"><dl class="note"><dt></dt><dd><p class="callout info">Ensure that this effect is supported by the device platform in use.</p>

</dd></dl></div></div></div>#### <a class="anchor" id="bkmrk--2"></a>**Configure a 2D Blur Effect** 

##### <a class="anchor" id="bkmrk--3"></a>Blur Effect

By using [Candera::BlurBitmapBrushBlend](http://dev.doc.cgistudio.at/APILINK/class_candera_1_1_blur_bitmap_brush_blend.html "Output a blurred and alpha blended bitmap image. The blur effect is created by applying a gaussean fi..."), a bitmap node can be blurred, applying a gaussean filter convolution.

Blur Effect supports the following property:

<div class="contents" id="bkmrk-filtersize-%28number-o"><div class="contents"><div class="textblock">- Filtersize (Number of neighbour pixels)

</div></div></div>In this example, the upper two pictures are the original ones, the lower two are blurred with a filter size of 15.

<div drawio-diagram="2674"><img src="https://doc316en.candera.eu/uploads/images/drawio/2023-02/drawing-4-1677466738.png" alt=""/></div>

<div class="contents" id="bkmrk--0"><div class="contents"><div class="textblock"><div class="image">  
</div></div></div></div>Refer to <span style="color: rgb(230, 126, 35);">[SceneComposer User Manual](https://doc316en.candera.eu/books/scene-design/page/effects)</span> about how to configure a BlurBitmapBrushBlend effect in a 2D scene.

#### **Modify 2D Blur Effect Property** 

##### <a class="anchor" id="bkmrk--5"></a>Set Blur Filtersize

When using this effect you only have to set the filtersize. This value defines the blur factor of, for example, an image. The bigger the value, the more the image is blurred. The following example shows how to set the filtersize.

```
UInt8 factor = 5;
blur->FilterSize() = factor;
```

# 2D Shear Effect

#### <a class="anchor" id="bkmrk--1"></a>Description

This chapter briefly describes how to use the 2D shear effect.

<div class="contents" id="bkmrk-ensure-that-this-eff"><div class="contents"><div class="textblock"><dl class="note"><dt></dt><dd><p class="callout info">Ensure that this effect is supported by the device platform in use.</p>

</dd></dl></div></div></div>#### <a class="anchor" id="bkmrk--2"></a>**2D Configure a Shear Effect** 

##### <a class="anchor" id="bkmrk--3"></a>Shear Effect

By using [Candera::ShearBitmapBrushBlend](http://dev.doc.cgistudio.at/APILINK/class_candera_1_1_shear_bitmap_brush_blend.html "Draws a sheared image. The ShearAngleX and the ShearAngleY can be modified."), the effect shears the incoming surface horizontally and vertically using the given angles.

Following properties for shearing can be configured:

<div class="contents" id="bkmrk-shear-angle-x-shear-"><div class="contents"><div class="textblock">- Shear Angle X
- Shear Angle Y

</div></div></div>Following is an example of a skewed bitmap, with the angles (in degree): X = 20 and Y = 30.

<div drawio-diagram="2679"><img src="https://doc316en.candera.eu/uploads/images/drawio/2023-02/drawing-4-1677466983.png" alt=""/></div>

<div class="contents" id="bkmrk--0"><div class="contents"><div class="textblock">  
</div></div></div>Refer to <span style="color: rgb(230, 126, 35);">[SceneComposer User Manual](https://doc316en.candera.eu/books/scene-design/page/effects)</span> about how to configure a ShearBitmapBrushBlend effect in a 2D scene.

#### **Modify 2D Shear Effect Properties** 

##### <a class="anchor" id="bkmrk--5"></a>Set Shear Angles

Horizontal and a vertical skew can be modified by setting the ShearAngle to proper values. You can set both, horizontal and vertical skew, to values from -180 to 180.

Example:

```
    // Set Shear Angles X and Y
    shear.ShearAngleX().Set(30.0f);
    shear.ShearAngleY().Set(20.0f);
    // End Set Shear Angles X and Y
```

# 2D HSL Effect

#### <a class="anchor" id="bkmrk--6"></a>Description

This chapter briefly describes how to use the 2D HSL effect.

<div class="contents" id="bkmrk-ensure-that-this-eff"><div class="contents"><div class="textblock"><dl class="note"><dt></dt><dd><p class="callout info">Ensure that this effect is supported by the device platform in use.</p>

</dd></dl></div></div></div>#### **Configure a 2D HSL Effect** 

##### <a class="anchor" id="bkmrk--8"></a>HSL Effect

The [BitmapBrushHslBlend](http://dev.doc.cgistudio.at/APILINK/class_candera_1_1_bitmap_brush_hsl_blend.html "Output a bitmap image, apply a HSL transformation, and blend it with the store buffer. Same as chaining (BitmapBrush + HslCorrectionEffect + BlendEffect)") effect outputs an bitmap image having applied hue, saturation and lightness correction and blended with the store buffer.

Following properties of a HSL effect can be configured:

##### <a class="anchor" id="bkmrk--9"></a>Hue

Hue is one of the main properties of a color, defined, technically, as the degree to which a stimulus can be described as similar to or different from stimuli that are described as red, green, blue, yellow, orange and violet. The image below shows the circle of hues for the color red (R=255, G=0, B=0).

<div drawio-diagram="2680"><img src="https://doc316en.candera.eu/uploads/images/drawio/2023-02/drawing-4-1677467179.png" alt=""/></div>

 On the HSL effect, the hue is expressed as degrees in the interval \[-180 .. 180\]; the original color is at a hue value of 0.

##### <a class="anchor" id="bkmrk--11"></a>Saturation

Saturation describes the intensity of a color, defined as a range from pure color to gray.

<div drawio-diagram="2681"><img src="https://doc316en.candera.eu/uploads/images/drawio/2023-02/drawing-4-1677467197.png" alt=""/></div>

<div class="contents" id="bkmrk--1"><div class="contents"><div class="textblock">  
</div></div></div>On the HSL effect, "0" means grayscale, "1" means color unchanged and "-1" means color inverted.

##### <a class="anchor" id="bkmrk--13"></a>Lightness

Lightness measures the relative degree of black or white that's been mixed with a given hue.

<div drawio-diagram="2682"><img src="https://doc316en.candera.eu/uploads/images/drawio/2023-02/drawing-4-1677467220.png" alt=""/></div>

<div class="contents" id="bkmrk--3"><div class="contents"><div class="textblock">  
</div></div></div>On the HSL effect "0" means black, "1" means the color unchanged.

##### <a class="anchor" id="bkmrk--15"></a>Example

Following is an example of a HSL effect configured with hue = 120, saturation = -1 and lightness = 1.3:

<div drawio-diagram="2683"><img src="https://doc316en.candera.eu/uploads/images/drawio/2023-02/drawing-4-1677467235.png" alt=""/></div>

<div class="contents" id="bkmrk--5"><div class="contents"><div class="textblock">  
</div></div></div>Refer to <span style="color: rgb(230, 126, 35);">[SceneComposer User Manual](https://doc316en.candera.eu/books/scene-design/page/effects)</span> about how to configure a [BitmapBrushHslBlend](http://dev.doc.cgistudio.at/APILINK/class_candera_1_1_bitmap_brush_hsl_blend.html "Output a bitmap image, apply a HSL transformation, and blend it with the store buffer. Same as chaining (BitmapBrush + HslCorrectionEffect + BlendEffect)") effect in a 2D scene.

#### **Modify 2D HSL Effect Properties**

##### <a class="anchor" id="bkmrk--17"></a>Set Hue, Saturation and Lightness

In order to change the BitmapBrushHslBlend effect properties, call the corresponding method on the HslCorrectionEffect as shown bellow:

```
            m_bitmap_hslBlend = <a class="code" href="http://dev.doc.cgistudio.at/APILINK/group___c_o_u_r_i_e_r___v_i_s_u_a_l_i_z_a_t_i_o_n.html#ggaf0e93dc4242f607c3c8d13dafd036af9aaabfa5309af24986d3111a092449f857">BitmapBrushHslBlend::Create</a>();
            m_bitmap_hslBlend->GetBitmapBrush().Image().Set(m_image.GetPointerToSharedInstance());

            HslCorrectionEffect& hslCorrection = m_bitmap_hslBlend->GetHslCorrectionEffect();
            hslCorrection.Hue() = 17.0F;
            hslCorrection.Saturation() = -0.5F;
            hslCorrection.Lightness() = 1.2F;
```

# 2D Alpha Mask Effect

#### <a class="anchor" id="bkmrk--2"></a>Description

This chapter briefly describes how to use the 2D alpha mask effect.

<div class="contents" id="bkmrk-ensure-that-this-eff"><div class="contents"><div class="textblock"><dl class="note"><dt></dt><dd><p class="callout info">Ensure that this effect is supported by the device platform in use.</p>

</dd></dl></div></div></div>#### **Configure a 2D Alpha Mask Effect** 

##### <a class="anchor" id="bkmrk--4"></a>Alpha Mask Effect

The alpha mask effect creates the appearance of partial or full transparency of an image by using the information from the alpha channel of a mask.

This appearance can be applied to a node by using one of the following effects:

<div class="contents" id="bkmrk-glbitmapbrushmaskble"><div class="contents"><div class="textblock">- [GlBitmapBrushMaskBlend](http://dev.doc.cgistudio.at/APILINK/class_candera_1_1_gl_bitmap_brush_mask_blend.html "Output a bitmap image, apply an alpha mask, and blend it with the store buffer. Same as chaining (Bit...")
- [GlBitmapBrushColorMaskBlend](http://dev.doc.cgistudio.at/APILINK/class_candera_1_1_gl_bitmap_brush_color_mask_blend.html "Output a bitmap image, apply an alpha mask, and blend it with the store buffer. Same as chaining (Bit...")

</div></div></div>##### <a class="anchor" id="bkmrk--5"></a>Configuration

Following properties can be configured:

##### <a class="anchor" id="bkmrk--6"></a>Image

Represents the image attached to the effect.

##### <a class="anchor" id="bkmrk--7"></a>Mask

It's the image used as mask. Only the alpha channel of the mask is used.

##### <a class="anchor" id="bkmrk--8"></a>Mask Node

It's the node used to control the transformation of the mask (position, rotation and scaling). If set to 0 the transformation of the current node is used.

##### <a class="anchor" id="bkmrk--9"></a>Effect Example

The image below presents an alpha mask effect example. The mask node is rotated 45 degrees, the pivot offset is set to (-50;-50) and scaled to (1.5;1.5).

<div drawio-diagram="2684"><img src="https://doc316en.candera.eu/uploads/images/drawio/2023-02/drawing-4-1677467438.png" alt=""/></div>

<div class="contents" id="bkmrk--0"><div class="contents"><div class="textblock">  
</div></div></div>Refer to <span style="color: rgb(230, 126, 35);">[SceneComposer User Manual](https://doc316en.candera.eu/books/scene-design/page/effects)</span> about how to configure an alpha mask effect in a 2D scene.

#### **Modify 2D Alpha Mask Effect Properties** 

##### <a class="anchor" id="bkmrk--11"></a>Set Effect Properties

```
//create effect
bitmap_maskBlend = <a class="code" href="http://dev.doc.cgistudio.at/APILINK/group___c_o_u_r_i_e_r___v_i_s_u_a_l_i_z_a_t_i_o_n.html#ggaf0e93dc4242f607c3c8d13dafd036af9aaabfa5309af24986d3111a092449f857">GlBitmapBrushMaskBlend::Create</a>();

//set image property
bitmap_maskBlend->GetBitmapBrush().Image().Set(m_image.GetPointerToSharedInstance());

//set mask property
SharedPointer<BitmapImage2D> maskBitImage = <a class="code" href="http://dev.doc.cgistudio.at/APILINK/class_candera_1_1_bitmap_image2_d.html#af16cef9df35df365f94fe89a810197c6">BitmapImage2D::Create</a>();
maskBitImage->SetBitmap(mask_bitmap);
maskBitImage->Upload();
GlMaskEffect& maskEffect = bitmap_maskBlend->GetMaskEffect();
maskEffect.Mask() = maskBitImage.GetPointerToSharedInstance();

//set mask node
RenderNode* maskNode = <a class="code" href="http://dev.doc.cgistudio.at/APILINK/class_candera_1_1_render_node.html#a86b21db92fab0635be7bdfcaf423ca4b">RenderNode::Create</a>();
maskNode->SetPosition(400.f, 30.f);
maskNode->SetScale(0.2f, 0.2f);
maskNode->SetPosition(m_bitmapNode5->GetPosition() + Vector2(8, 8));
maskEffect.MaskNode() = maskNode;

bitmap_maskBlend->Update();

//attach effect to the node
node = <a class="code" href="http://dev.doc.cgistudio.at/APILINK/class_candera_1_1_render_node.html#a86b21db92fab0635be7bdfcaf423ca4b">RenderNode::Create</a>();
node->AddEffect(bitmap_maskBlend.GetPointerToSharedInstance());
```

# Tutorial for Diagnostics

# Assertions

Refer to <span style="color: rgb(230, 126, 35);">[FeatStd Assertions](https://doc316en.candera.eu/books/featstd/page/diagnostics)</span> how to use and configure assertions.

# Logging

Refer to <span style="color: rgb(230, 126, 35);">[FeatStd Logging](https://doc316en.candera.eu/link/586#bkmrk-logging%C2%A0)</span> how to use and configure FeatStd logging feature.

#### <a class="anchor" id="bkmrk-"></a>Candera Log Output

For a list of all LogRealms supported by [Candera](http://dev.doc.cgistudio.at/APILINK/namespace_candera.html "[DataBinding_RefTypeSample]"), refer to *Candera/System/Diagnostics/LogRealm.h*:

```
FEATSTD_LOG_DECLARE_REALM(CanderaEngine2D);
FEATSTD_LOG_DECLARE_REALM(CanderaEngine3D);
FEATSTD_LOG_DECLARE_REALM(CanderaEngineBase);
FEATSTD_LOG_DECLARE_REALM(CanderaAnimation);
FEATSTD_LOG_DECLARE_REALM(CanderaSystem);
FEATSTD_LOG_DECLARE_REALM(CanderaTextEngine);
FEATSTD_LOG_DECLARE_REALM(CanderaTransitions);

FEATSTD_LOG_DECLARE_REALM(CanderaPlatformDevice);
FEATSTD_LOG_DECLARE_REALM(CanderaPlatformOs);

FEATSTD_LOG_DECLARE_REALM(CanderaAssetLoader);

FEATSTD_LOG_DECLARE_REALM(CanderaGlobalization);

FEATSTD_LOG_DECLARE_REALM(CanderaMonitor);

FEATSTD_LOG_DECLARE_REALM(CanderaScripting);

FEATSTD_LOG_DECLARE_REALM(CanderaEntityComponentSystem);

FEATSTD_LOG_DECLARE_REALM(CanderaBehavior);

```

#### <a class="anchor" id="bkmrk--0"></a>Player Logging Support

The Player supports logging output displayed in a seperate window that can be controlled from the CGI-Panel.

#### <a class="anchor" id="bkmrk--1"></a>Starting Player with Log Output

To show the log output window of the Player, the CGIPanel.exe has to be started with option **-l**. This will open a console window in addition to the Panel and display windows to show log output. In the default configuration this window will only show the log output of the CgiApplication and default [Candera](http://dev.doc.cgistudio.at/APILINK/namespace_candera.html "[DataBinding_RefTypeSample]") level.

<div class="contents" id="bkmrk-if-the-player-is-sta"><div class="contents"><div class="textblock"><dl class="note"><dt></dt><dd><p class="callout info">If the Player is started via SceneComposer plugin notification, it will be automatically started with the -l option.</p>

</dd></dl></div></div></div>#### <a class="anchor" id="bkmrk--2"></a>Logging Menu Controls

After loading the asset the logging menu controls will appear on the panel. You have two options:

<div class="contents" id="bkmrk-enable-log-checkbox%3A"><div class="contents"><div class="textblock">- Enable log checkbox: Will enable/disable the log output via the CgiAppLogAppender
- [Candera](http://dev.doc.cgistudio.at/APILINK/namespace_candera.html "[DataBinding_RefTypeSample]") log level dropdown: Will set all [Candera](http://dev.doc.cgistudio.at/APILINK/namespace_candera.html "[DataBinding_RefTypeSample]") realms to the specified log level

</div></div></div><div class="contents" id="bkmrk-menu-controls-will-o"><div class="contents"><div class="textblock"><dl class="note"><dd><p class="callout info">Menu controls will only appear if your DLL was built with FEATSTD\_LOG\_ENABLED option</p>

</dd></dl></div></div></div>#### <a class="anchor" id="bkmrk--3"></a>Log Control via SceneComposer

If the Player is started via SceneComposer plugin notification during asset generation, it is possible to use the SceneComposer logging menu options. The changed settings will be sent to the Player.

# Performance Analysis > Introduction

#### <a class="anchor" id="bkmrk--1"></a>Performance Analysis with CGI Analyzer

By enabling the [Candera](http://dev.doc.cgistudio.at/APILINK/namespace_candera.html "[DataBinding_RefTypeSample]") Monitor component (CMake: *FEATSTD\_MONITOR\_ENABLED*), [Candera](http://dev.doc.cgistudio.at/APILINK/namespace_candera.html "[DataBinding_RefTypeSample]") code is instrumented with performance traces, which are evaluated by the CGI Analyzer tool. In addition, also custom instrumentations can be added to applications, which will be visible in CGI Analyzer.

<div drawio-diagram="2317"><img src="https://doc316en.candera.eu/uploads/images/drawio/2023-02/drawing-4-1677055717.png" alt=""/></div>

<div class="contents" id="bkmrk--0"><div class="contents"><div class="textblock"><div class="image">  
</div></div></div></div>#### <a class="anchor" id="bkmrk--3"></a>Offline Analysis

Performance logs are recorded with [Candera](http://dev.doc.cgistudio.at/APILINK/namespace_candera.html "[DataBinding_RefTypeSample]") Monitor and can be evaluated in CGI Analyzer regarding:

<div class="contents" id="bkmrk-frame-rates-cpu%2Fgpu-"><div class="contents"><div class="textblock">- frame rates
- CPU/GPU load
- CPU/GPU memory usage

</div></div></div>#### <a class="anchor" id="bkmrk--4"></a>Online Analysis

With online experiments, performance bottlenecks can be discovered: If framerate goes up after deactivating a dedicated part of the [Candera](http://dev.doc.cgistudio.at/APILINK/namespace_candera.html "[DataBinding_RefTypeSample]") Engine or the rendering pipeline, the bottleneck is located.

Following online experiments are supported:

<div class="contents" id="bkmrk-replace-textures-by-"><div class="contents"><div class="textblock">- Replace textures by 2x2 texture
- Replace fragment shader with a very simple one
- Ignore draw calls

</div></div></div>Besides online experiments, CGI Analyzer Online Analysis supports:

<div class="contents" id="bkmrk-live-display-of-key-"><div class="contents"><div class="textblock">- Live display of key performance indicators (frame rate, CPU load, GPU load), where available
- Computation and transfer of Render Benchmarks from target to host (for multi frequency rendering)
- Online determination of scene graph characteristics (number of vertices, texture sizes, render order)
- Online measurement of render times (for each node on a per-camera base)
- Guards (FPS, unconditional)

</div></div></div>For more information about CGI Analyzer, refer to <span style="color: rgb(230, 126, 35);">[CGI Analyzer User Manual](https://doc316en.candera.eu/books/analyzer)</span>.

# Performance Analysis > Howto Instrument for Performance Measurement

#### <a class="anchor" id="bkmrk--17"></a>Performance Measurement with Analyzer

This document shall convey the basics of performance measurement instrumentation.

#### **General Setup**

##### **Project Setup** 

Copy your own project folder to your CGI Studio root folder (containing for example the [Candera](http://dev.doc.cgistudio.at/APILINK/namespace_candera.html "[DataBinding_RefTypeSample]") folder named cgi\_studio\_candera) named &lt;CGI-STUDIO-ROOT&gt;.

Point CMake GUI "Where is the source code" to the location of your source code.

Select an arbitrary folder for "Where to build the binaries".   
After pressing "configure", following [Candera](http://dev.doc.cgistudio.at/APILINK/namespace_candera.html "[DataBinding_RefTypeSample]") Performance Measurement specific CMake flags can be configured:

<div class="contents" id="bkmrk-featstd_monitor_type"><div class="contents"><div class="textblock"><table class="doxtable" style="width: 100%; height: 434.749px;"><tbody><tr style="height: 102.562px;"><td style="width: 21.5991%; height: 102.562px;" valign="top">FEATSTD\_MONITOR\_TYPE</td><td style="width: 64.1435%; height: 102.562px;" valign="top">Enables or disables [Candera](http://dev.doc.cgistudio.at/APILINK/namespace_candera.html "[DataBinding_RefTypeSample]") Monitor component and [Candera](http://dev.doc.cgistudio.at/APILINK/namespace_candera.html "[DataBinding_RefTypeSample]") performance monitoring instrumentation macros.

By default, [Candera](http://dev.doc.cgistudio.at/APILINK/namespace_candera.html "[DataBinding_RefTypeSample]") is configured to not include instrumentation on graphics engine level.

</td><td style="width: 14.1338%; height: 102.562px;" valign="top">On / Off</td></tr><tr style="height: 137.203px;"><td style="width: 21.5991%; height: 137.203px;" valign="top">FEATSTD\_MONITOR\_TCPIP\_ADDRESS

FEATSTD\_MONITOR\_TCPIP\_PORT

</td><td style="width: 64.1435%; height: 137.203px;" valign="top">If FEATSTD\_MONITOR\_TYPE is set to FEATSTD\_COM\_TYPE\_TCPIP , TCP/IP online connection to be established with Analyzer can be configured.

Default:

- localhost (127.0.0.1)
- 13047

</td><td style="width: 14.1338%; height: 137.203px;" valign="top">TCP/IP Address and Port

</td></tr><tr style="height: 137.203px;"><td style="width: 21.5991%; height: 137.203px;" valign="top">FEATSTD\_MONITOR\_SERIALPORT\_ADDRESS

FEATSTD\_MONITOR\_SERIALPORT\_BAUDRATE

</td><td style="width: 64.1435%; height: 137.203px;" valign="top">If FEATSTD\_MONITOR\_TYPE is set to FEATSTD\_COM\_TYPE\_SERIALPORT , Serial port online connection to be established with Analyzer can be configured.

Default:

- empty
- Baud: 9600

</td><td style="width: 14.1338%; height: 137.203px;" valign="top">Serial COM Port and Baudrate</td></tr><tr style="height: 57.7812px;"><td style="width: 21.5991%; height: 57.7812px;" valign="top">CANDERA\_PERFORMANCE\_RECORDER\_DISABLED</td><td style="width: 64.1435%; height: 57.7812px;" valign="top">Enables or disables [Candera](http://dev.doc.cgistudio.at/APILINK/namespace_candera.html "[DataBinding_RefTypeSample]") performance instrumentations.

Default: Off

</td><td style="width: 14.1338%; height: 57.7812px;" valign="top">On / Off</td></tr></tbody></table>

</div></div></div>Performance recording functionality is exposed by macros; hence no performance recording code will be included in [Candera](http://dev.doc.cgistudio.at/APILINK/namespace_candera.html "[DataBinding_RefTypeSample]") and [Candera](http://dev.doc.cgistudio.at/APILINK/namespace_candera.html "[DataBinding_RefTypeSample]") application builds, if performance recording is disabled.

In this tutorial, instead of using a TCP/IP online connection, performance log data is being written to a local file. In this case, performance log data needs to be transferred to Analyzer tool manually, i.e. via TFTP from target to host.

And the following cmake setting were chosen:

```
FEATSTD_MONITOR_TYPE = FEATSTD_COM_TYPE_FILE_DUMP
```

#####   
**Program Skeleton (Recording to File)** 

For this tutorial, the following program skeleton is used:

```
#include <stdio.h>
#include <time.h>
#include <Candera/System/Monitor/PerfMonPublicIF.h>
#include <FeatStd/Monitor/PerformanceRecording/FileDumper.h>

using namespace Candera;
using namespace FeatStd::PerfMon;

int main(int argc, char *argv[])
{
    // activate recording
    CANDERA_PERF_SET_ENABLED(true);
   
    FileDumper::Open("c:\\temp\\tutorial.perflog");

    // BEGIN do the recording here

    // END do the recording here

    // Flush recording buffer at regular, small intervals to prevent buffer overflow
    FileDumper::Flush();
    // Close file and open new file in order to keep performance log files small
    FileDumper::FlushAndClose();

    fgetc(stdin);

    return 0;
}
```

Important is the activation of recording. Without this line, no performance recording will be written to the recording buffer.

The call to `FeatStd::PerfMon::FileDumper::Open` opens the file to write to. `FeatStd::PerfMon::FileDumper::Flush` writes the data recorded in the buffer to the file, if possible. `FeatStd::PerfMon::FileDumper::FlushAndClose` calls `DumpFile::Flush`, just in case, and closes the file.

The performance log API was designed with different storage media and transport mechanisms in mind. As you can see from the following code snippet, the function `FeatStd::PerfMon::FileDumper::Flush` calls the function `FeatStd::PerfMon::Controller::DumpPerfData` and passes a pointer to a member function to it. This function is called in return to actually write data to the provided mechanism, in this case, to a file.

```
static void Flush()
{
    FEATSTD_PERF_DUMP_DATA(FlushLog, false, 0);
}
```

#####   
**Program Skeleton (Recording to Memory)** 

The following code snippet shows the program skeleton for recording to memory:

```
#include <stdio.h>
#include <time.h>
#include <Candera/System/Monitor/PerfMonPublicIF.h>
#include <FeatStd/Monitor/PerformanceRecording/MemoryDumper.h>

using namespace Candera;
using namespace FeatStd::PerfMon;

int main(int argc, char *argv[])
{
    const UInt32 perflogLength = 256;
    UInt8 perflog[perflogLength];

    // set destination for recording
    MemoryDumper::Initialize(perflog, perflogLength);

    // activate recording
    CANDERA_PERF_SET_ENABLED(true);
   
    // BEGIN do the recording here

    // END do the recording here

    // Flush recording buffer at regular, small intervals to prevent buffer overflow
    MemoryDumper::Flush();

    // Print performance log location and size to provided stream 
    // (default: std::cout) and disable performance log recording
    // A breakpoint has to be set here to prevent recorded data from being overwritten
    MemoryDumper::Dump();

    // Reset the dumper to restart recording
    <a class="code" href="http://dev.doc.cgistudio.at/APILINK/group___c_o_u_r_i_e_r___v_i_s_u_a_l_i_z_a_t_i_o_n.html#ggaf0e93dc4242f607c3c8d13dafd036af9a0755a8454bc3924584f1f0cddc65f7b6">MemoryDumper::Clear</a>();

    // re-activate recording; 
    CANDERA_PERF_SET_ENABLED(true);

    fgetc(stdin);

    return 0;
}
```

Recording to memory is done similar to recording to file. Instead of closing the old file and opening a new one, the storage location along with the length of the performance log is dumped (written) to a specified stream (defaulting to `std::cout`) using the function `FeatStd::PerfMon::MemoryDumper::Dump()`. Performance log recording is automatically disabled at this point. A breakpoint has to be set here to stop the application and copy the performance log from memory to a file for opening with Analyzer. To continue recording, the performance log dumper has to be reset using the function `<a class="el" href="http://dev.doc.cgistudio.at/APILINK/group___c_o_u_r_i_e_r___v_i_s_u_a_l_i_z_a_t_i_o_n.html#ggaf0e93dc4242f607c3c8d13dafd036af9a0755a8454bc3924584f1f0cddc65f7b6">FeatStd::PerfMon::MemoryDumper::Clear()</a>` to re-start recording at the beginning of the user-provided buffer.

####    
**Recording of Performance Values** 

##### **Using Event Recorders** 

Event Recorders are the simplest recorders. They just record events at given points in time.   
Their usage is straight forward:

```
...
CANDERA_PERF_RECORD_EVENT(EventRecId::Application0);
...
```

Here, an event with event id Application0 is recorded. The namespace EventRecId is defined in the file Recorder.h. If we compile and run our application, a performance log file is created with just this one recording.

We can now open this file in Analyzer. In the Flat / Hierarchical Grid View (Figure 1), as well as in the Time Bars View, the recording can be inspected. It is possible to change the predefined recorder name for display using the Configuration Dialog from the View Ribbon Bar. You have to reopen the performance log for the changes to take effect.

<div drawio-diagram="2730"><img src="https://doc316en.candera.eu/uploads/images/drawio/2023-02/drawing-4-1677474167.png" alt=""/></div>

<div class="contents" id="bkmrk--0"><div class="textblock"><div class="image">  
</div></div></div>##### **Using Value Recorders** 

Value recorders can record integral numbers (positive and negative). The example below shows a succession of value recordings.

```
...
CANDERA_PERF_RECORD_VALUE(ValueRecId::Application0, 10);
busywait();
CANDERA_PERF_RECORD_VALUE(ValueRecId::Application0, 10);
busywait();
CANDERA_PERF_RECORD_VALUE(ValueRecId::Application0, 10);
busywait();s
CANDERA_PERF_RECORD_VALUE(ValueRecId::Application0, 10);
busywait();
...
```

As with event recorders, value recorders are identified by their id. The namespace ValueRecId is again defined in the file Recorder.h. In addition to the id, the value to record is passed to the recording function. The function busywait() waits in a loop for some time to pass, just to make things more interesting.

Opening the new performance log in Analyzer now shows five recordings (one event and four values). The "Value" column shows the value 10 for each value recorder (Figure below).

<div drawio-diagram="2731"><img src="https://doc316en.candera.eu/uploads/images/drawio/2023-02/drawing-4-1677474210.png" alt=""/></div>

<div class="contents" id="bkmrk--2"><div class="contents"><div class="textblock"><div class="image">  
</div></div></div></div>"The Absolute Value" column shows also the values 10. This is the case, because as a default, Analyzer assumes as relationship between recorded values "Unrelated". To regard the values of a value recorder as related, the value relationship "Differential" has to be set. This can be accomplished again via the Configuration Dialog from the View Ribbon Bar. Remember to close and reopen the performance log after changing settings. Figure 3 shows the value recordings of recorder Application0, interpreted as having the relationship "Differential". The "Value" column is still the same, but the "Absolute" column shows, that each recording has its recorded value added to the value of its predecessor.

<div drawio-diagram="2732"><img src="https://doc316en.candera.eu/uploads/images/drawio/2023-02/drawing-4-1677474227.png" alt=""/></div>

<div class="contents" id="bkmrk--4"><div class="contents"><div class="textblock"><div class="image">  
</div></div></div></div>Let's add another value recorder:

```
...
CANDERA_PERF_RECORD_VALUE(ValueRecId::Application1, -50);
busywait();
...
```

If we run our program again and view the new performance log in Analyzer, we see the following:

<div drawio-diagram="2733"><img src="https://doc316en.candera.eu/uploads/images/drawio/2023-02/drawing-4-1677474248.png" alt=""/></div>

<div class="contents" id="bkmrk--6"><div class="contents"><div class="textblock"><div class="image">  
</div></div></div></div>What happened? The problem here is, that Analyzer interprets a recorded value by default as positive long value. In order to interpret it correctly, we have to help Analyzer by using the Configuration Dialog from the View Ribbon Bar. By checking the checkbox labeled "Data values are signed" for the value recorder Application1, the values will from now on be interpreted correctly. Remember to reopen the performance log for the changes to take effect (Figure below).

<div drawio-diagram="2734"><img src="https://doc316en.candera.eu/uploads/images/drawio/2023-02/drawing-4-1677474261.png" alt=""/></div>

<div class="contents" id="bkmrk--8"><div class="textblock"><div class="image">  
</div></div></div>#####   
**Using Cumulative Value Recorders** 

The listing below shows the usage of a Cumulative Value Recorder with an annotation. An annotation is a way to differentiate between different flavors of the same recorder.

```
...
{
    CANDERA_PERF_RECORDER(CumulativeValue, (ValueRecId::Application2, "cumval"));
    busywait();
    CANDERA_PERF_RECORD_VALUE(ValueRecId::Application2, 10);
    busywait();
    CANDERA_PERF_RECORD_VALUE(ValueRecId::Application2, 20);
    busywait();
    CANDERA_PERF_RECORD_VALUE(ValueRecId::Application2, 30);
    busywait();
    CANDERA_PERF_RECORD_VALUE(ValueRecId::Application2, 40);
    busywait();
}
...
```

A Cumulative Value Recorder has to be instantiated. This is done with the first statement. All further references to this recorder add the respective values to the existing recording entry and do not instantiate new recording entries. In order for this to work, the references to the Cumulative Value Recorder have to be in the same block, or a sub-block. The image below shows the new result of the recording in Analyzer.

<div drawio-diagram="2735"><img src="https://doc316en.candera.eu/uploads/images/drawio/2023-02/drawing-4-1677474296.png" alt=""/></div>

<div class="contents" id="bkmrk--10"><div class="contents"><div class="textblock"><div class="image">  
</div></div></div></div>We see, that the values are summed-up and the value of "Call Count" is 4, the number of recordings.

#####   
**Using Timing Recorders** 

Timing Recorders are, as the name implies, used to measure time. The time is measured in relation to the execution block where they are used. The life of a Timing Recorder ends with its execution block, as does the time measurement. Listing 8 shows the usage of a Timing Recorder.

```
...
{
    CANDERA_PERF_RECORDER(Timing, (TimingRecId::Application0));
    busywait();

    CANDERA_PERF_RECORD_EVENT(EventRecId::Application0);
    busywait();
}
...
```

Timing Recorders have to be instantiated. Everything (direct or called) in the same execution block contributes to the measured time. Also, all recordings in this execution block are regarded as being nested, being child recordings of the timing recording. The figure below shows the Hierarchical Grid View in Analyzer.

<div drawio-diagram="2736"><img src="https://doc316en.candera.eu/uploads/images/drawio/2023-02/drawing-4-1677474328.png" alt=""/></div>

<div class="contents" id="bkmrk--12"><div class="contents"><div class="textblock"><div class="image">  
</div></div></div></div>A Timing Recorder can have further Timing Recorders in its execution block. What we gain here is a call stack-like hierarchy of recordings. The listing below shows the code snippet and the next figure shows the performance log opened in Analyzer.

<div drawio-diagram="2737"><img src="https://doc316en.candera.eu/uploads/images/drawio/2023-02/drawing-4-1677474408.png" alt=""/></div>

<div class="contents" id="bkmrk--14"><div class="textblock"><div class="image">  
</div></div></div>#####   
**Using Cumulative Timing Recorders** 

Cumulative Timing Recorder, as Cumulative Value Recorder, store one value per left execution block only. The listing below shows the usage and the next figure shows the result of this instrumentation in Analyzer. Cumulative Timing Recorders have to be instantiated.

```
...
{
    CANDERA_PERF_RECORDER(Timing, (TimingRecId::Application3, true));
    busywait();

    {
        {
            CANDERA_PERF_RECORDER(Timing, (TimingRecId:: Application3));
            busywait();
        }
        {
            CANDERA_PERF_RECORDER(Timing, (TimingRecId:: Application3));
            busywait();
        }
    }
}    
...
```

<div drawio-diagram="2738"><img src="https://doc316en.candera.eu/uploads/images/drawio/2023-02/drawing-4-1677474494.png" alt=""/></div>

<div class="contents" id="bkmrk--16"><div class="textblock"><div class="image">  
</div></div></div>##### **Using Asynchronous Timing Recorders** 

Asynchronous Timing Recorders are the only timing recorders whose recordings can outlive them. An Asynchronous Timing Recorder has to be instantiated and the end of the recording operation has to signaled explicitely (Listing below).

```
...

{
    // Start recording of ansychronous timing.
    CANDERA_PERF_RECORDER(AsyncTiming, (AsyncTimingRecId::Application0));
    busywait();
}

...

// End of asynchronous recording, outside of creation scope
CANDERA_PERF_ASYNCREC_FINISHED(AsyncTimingRecId::Application0);

...
```

# Tutorial for Lua-Scripting

Description  
  
This tutorial gives an overview of what Lua-Scripting is and shows how to create and use your own scripts.  
See Introduction to Candera Lua Scripts and Candera Lua Reference Manual for in-depth information.

# Overview

This chapter gives and overview of Lua-Scripting.

#### <a class="anchor" id="bkmrk--1"></a>What is Lua-Scripting?

Lua-Scripting is an extension of the base scripting system binding Lua to [Candera](http://dev.doc.cgistudio.at/APILINK/namespace_candera.html "[DataBinding_RefTypeSample]"). It gives you the opportunity to manipulate graphical objects using the [Candera](http://dev.doc.cgistudio.at/APILINK/namespace_candera.html "[DataBinding_RefTypeSample]") engine API.

Compared to Behaviors there are no predefined Lua-Scripts but however they offer an easy and fast way to define your own mechanics and functions. Although there are many advantages you nearly have to write them from the scratch. To learn the basics follow this step by step tutorial to see how to create, write and use them. Furthermore there is a Sample Solution called Lua-Scripting where you can click through several sample scripts for reading, learning or copying useful snippets of the code. You can find them in the Toolbox under the category called Scripts:

<div drawio-diagram="2074"><img src="https://doc316en.candera.eu/uploads/images/drawio/2023-02/drawing-4-1676957493.png" alt=""/></div>

<div class="contents" id="bkmrk--0"><div class="textblock">  
</div></div>

# Create an own Script

This chapter provides an explanation of how a new Lua-Script can be created to make it ready to be usable in the SceneComposer.

#### <a class="anchor" id="bkmrk--3"></a>How to create a new Script.

In difference to a Widget or a Behavior Lua-Scripts are completely generated in the SceneComposer by one simple step:

Click "Script" in the menu...

<div drawio-diagram="2075"><img src="https://doc316en.candera.eu/uploads/images/drawio/2023-02/drawing-4-1676957601.png" alt=""/></div>

<div class="contents" id="bkmrk--0"><div class="contents"><div class="textblock"></div></div></div>... and chose "New Script". Browse for the desired folder and define where to save the new script. Name the script "CarRootController". This will be our root node script which controls other scripts. For the code template we recommend to choose "Full" to see all the predefined Callback-Functions.

<div drawio-diagram="2076"><img src="https://doc316en.candera.eu/uploads/images/drawio/2023-02/drawing-4-1676957619.png" alt=""/></div>

<div class="contents" id="bkmrk--2"><div class="contents"><div class="textblock"></div></div></div>Now you will find your new script in the Toolbox under Scripts. To apply it to the desired node just drag and drop the script from the Toolbox to your node. (For the tutorial example apply it to the root node of the car)

# Lua Introduction

#### <a class="anchor" id="bkmrk--12"></a>Callback Functions

If you open your script in the Script Editor you can see that there are already the most important lines of code. These are the so called callback functions which are called by [Candera](http://dev.doc.cgistudio.at/APILINK/namespace_candera.html "[DataBinding_RefTypeSample]").

<div drawio-diagram="2077"><img src="https://doc316en.candera.eu/uploads/images/drawio/2023-02/drawing-4-1676957696.png" alt=""/></div>

<div class="contents" id="bkmrk--0"><div class="contents"><div class="textblock">  
</div></div></div>#### <a class="anchor" id="bkmrk--14"></a>Init(self, id)

The Init function gets called before the first Update call or when a script component is enabled for the first time. At this point all script instances have been created and optionally initialized via Awake, so scripts are ready to interact with each other to perform final initializations before the Update loop starts.

#### <a class="anchor" id="bkmrk--15"></a>Update(self, id)

Called every render frame if the script component is enabled. Update is the commonly used function to implement application behavior.

**Note:** if you use one of the callback functions or if you want to make an own function public then don't forget to add them to the public table! (see next paragraph)

#### <a class="anchor" id="bkmrk--16"></a>return{}

It returns the public interface as table. Variables that have been exposed via the public interface table, and are either of type integer, float, string, or boolean, are automatically displayed in SceneComposer's GUI. In the SceneComposer this variables can be edited and are saved/loaded with the scene. Functions in the return section are not displayed in SceneComposer's GUI but they are public and can get called by another script or by [Candera](http://dev.doc.cgistudio.at/APILINK/namespace_candera.html "[DataBinding_RefTypeSample]") (see "Callback Functions").

<div drawio-diagram="2078"><img src="https://doc316en.candera.eu/uploads/images/drawio/2023-02/drawing-4-1676957709.png" alt=""/></div>

<div class="contents" id="bkmrk--5"><div class="contents"><div class="textblock">  
</div></div></div>To provide access to variables of the public table of the instance, the table is passed in the function parameter 'self' in all functions that are being called by Candera's script system. So if you define a variable in the public table you can use it in any functions of this script via "self.yourVariable".

#### <a class="anchor" id="bkmrk--18"></a>Save and Start a Script

To validate your script press %&lt;F8%&gt; or choose "Script" - "Validate Script" from the menu.

When the script has been validated and there are no errors, you can press the start button to start the execution of the script system and stop it with the second button.

<div drawio-diagram="2079"><img src="https://doc316en.candera.eu/uploads/images/drawio/2023-02/drawing-4-1676957751.png" alt=""/></div>

<div class="contents" id="bkmrk--8"><div class="contents"><div class="textblock">  
</div></div></div>#### <a class="anchor" id="bkmrk--20"></a>Candera Logging

<div drawio-diagram="2080"><img src="https://doc316en.candera.eu/uploads/images/drawio/2023-02/drawing-4-1676957810.png" alt=""/></div>

<div class="contents" id="bkmrk--11"><div class="contents"><div class="textblock">  
</div></div></div>  
To check whether your script crashes during runtime or not you can see errors or further information in the [Candera](http://dev.doc.cgistudio.at/APILINK/namespace_candera.html "[DataBinding_RefTypeSample]") Logging panel. If this panel is not activated go to View -&gt; Output -&gt; and check [Candera](http://dev.doc.cgistudio.at/APILINK/namespace_candera.html "[DataBinding_RefTypeSample]") Logging

<p class="callout info">**Tip:** [Candera](http://dev.doc.cgistudio.at/APILINK/namespace_candera.html "[DataBinding_RefTypeSample]") Logging is also very useful to test individual parts of your code like if-cases or loops via:</p>

```
Candera.LogInfo(message)
```

# Id Handling

This chapter explains how to get access to other nodes via the id of their attached script. Therefore, create a new Scene Composer solution using the "3D Getting started" template, which includes a 3D model of a car.

To start it's important to know that there are two functions that are fundamental to get access to other nodes:
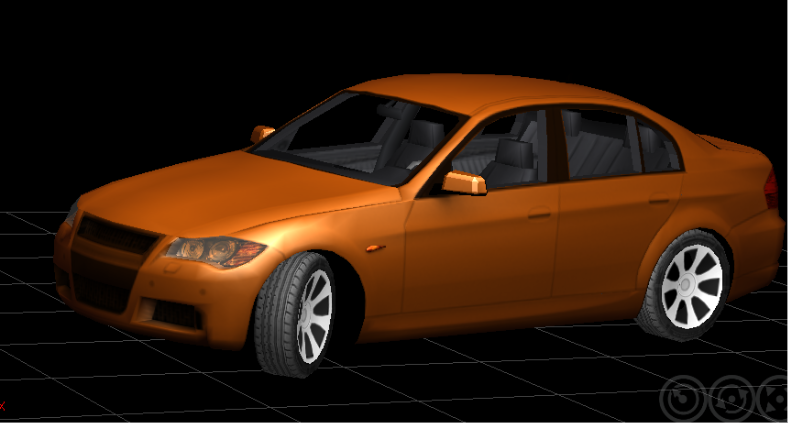
<div class="contents" id="bkmrk-candera.getscriptids"><div class="contents"><div class="textblock">- **Candera.GetScriptIds(id)** returns all ids of script components that are attached to the same node as 'id'.
- **Candera.GetChildScriptIds(id)** returns all ids of script components that are attached to any node in the subtree of the node identified by 'id'.

</div></div></div>Once you have the id of the child nodes you can get the script itself with:

<div class="contents" id="bkmrk-candera.idtoscriptco"><div class="contents"><div class="textblock">- **Candera.IdToScriptComponent(scriptId)** returns the public table of the script identified by 'scriptId'

</div></div></div>The first goal is to rotate all four wheels in the same speed and to rotate the front wheels according to the steering lock.

<div drawio-diagram="2081"><img src="https://doc316en.candera.eu/uploads/images/drawio/2023-02/drawing-4-1676958053.png" alt=""/></div>

<div class="contents" id="bkmrk--0"><div class="contents"><div class="textblock">  
</div></div></div>Therefore it is necessary that a script from the root node of the car communicates with all four wheels. But as we have already learned it's absolutely necessary that each node we want to find also has a script component. So before we start to get access to the child nodes we equip all four wheels with a script. As front wheels and back wheels have different behaviors (steering lock) create two different scripts called "Wheel\_back" and "Wheel\_front":

#### <a class="anchor" id="bkmrk--5"></a>Wheel\_back Script:

Get the current rotation of the wheel and set the new rotation with a modified x-value. In this case we add the 'rotationSpeed' value from the public table to the current x-rotation. Afterwards the public value 'rotationSpeed' will get set by the root script.

```
    local function Update(self, id)
        local pitch, yaw, roll =Candera.GetRotation(id)                                
        Candera.SetRotation(id,  pitch+self.rotationSpeed, yaw, roll) 
    end
    
    return { 
      <a class="code" href="http://dev.doc.cgistudio.at/APILINK/namespace_courier.html#a2e6f80d7ef7c7a120595f3d56e6f4246">Init</a> = <a class="code" href="http://dev.doc.cgistudio.at/APILINK/namespace_courier.html#a2e6f80d7ef7c7a120595f3d56e6f4246">Init</a>,
      Update = Update,
      GetName = GetName, 
      rotationSpeed =0.0
    }
```

To enable the root script to identify the wheel scripts it's also important that the wheel scripts get a value which contains a proper name. This value must not get changed by SceneComposer's GUI so we enable the access with a public function called GetName():

```
    local scriptName = "Wheel_back"
    local function GetName()
        return scriptName
    end
```

(don't forget to add the function to the public table: GetName = GetName, )

#### <a class="anchor" id="bkmrk--6"></a>Wheel\_front Script:

Just repeat the same steps for the front wheel with a modification in the update concerning the z-rotation which gets set to the steering lock angle.

```
    local function Update(self, id)
        local pitch, yaw, roll =Candera.GetRotation(id) 
        Candera.SetRotation(id,  pitch+self.rotationSpeed, yaw, self.steerLock) 
    end
    
    return { 
      <a class="code" href="http://dev.doc.cgistudio.at/APILINK/namespace_courier.html#a2e6f80d7ef7c7a120595f3d56e6f4246">Init</a> = <a class="code" href="http://dev.doc.cgistudio.at/APILINK/namespace_courier.html#a2e6f80d7ef7c7a120595f3d56e6f4246">Init</a>,
      Update = Update,
      GetName = GetName, 
      rotationSpeed =0.0,
      steerLock =0.0
    }
```

The GetName functions is nearly the same except a different value for the name (Wheel\_front).

The next step is to drag and drop the scripts to the proper nodes.

Now we can concentrate on the root node:

#### <a class="anchor" id="bkmrk--7"></a>CarRootController Script:

Switch back to the root script called "CarRootController". The first thing we have to do is to get the id of every script component which is attached to any child of the root and store it to a local variable which we will need later:

```
    local frontWheelScripts={}
    local backWheelsScripts={}
    local childIds = {}
    local function <a class="code" href="http://dev.doc.cgistudio.at/APILINK/namespace_courier.html#a2e6f80d7ef7c7a120595f3d56e6f4246">Init</a>(self, id)
        childIds = Candera.GetChildScriptIds(id)
    end
```

Now it's possible to iterate through the array "childIds" (also in the **Init-Function**) to get their scripts and to look for a special script via its name. But to be able to call their GetName function and to use the scripts afterwards in the Update-Function we first have to get access to the scripts public table via Candera.IdToScriptComponent\[childId\]. Now as you have the script you can call the GetName function to search for the desired script name. Then insert each of them to a local array which got defined above the Init-Function (shown in the previous paragraph).

```
    for i, childId in ipairs(childIds) do
        local script = Candera.IdToScriptComponent[childId]
        
        if script and script.GetName() == "Wheel_front"  then
                      
            table.insert(frontWheelScripts, script)
            --table.insert(value, array) inserts the element in the last position of the array
            
        elseif script and script.GetName() == "Wheel_back" then
            table.insert(backWheelsScripts, script)
            
        end    
        
    end
```

Now we have access to each wheel script so we can also change their public values. Therefore scroll down to the **Update-Function** where you can iterate through the scripts and change the rotationSpeed and for the front wheels also the steer lock.

```
    local function Update(self, id)
        for i, frontWheelScript in ipairs(frontWheelScripts) do
            frontWheelScript.rotationSpeed = self.rotationSpeed
            frontWheelScript.steerLock = self.steerLock
        end
         
        for i, backWheelScript in ipairs(backWheelsScripts) do
            backWheelScript.rotationSpeed = self.rotationSpeed
        end
    
    end 
```

Be sure that every node has its proper script and set the rotationSpeed and the steerLock of the root node to a proper value (20;30). If you start the execution of the script system the wheels will rotate.

<p class="callout info">**Tip:** Also check the Sample Solution for further information and scripts.</p>

# Communication between Children

#### <a class="anchor" id="bkmrk--6"></a>How to find siblings

This chapter explains how to get access to sibling nodes via the id of their attached script. Because there is yet no direct way to get the ids of sibling nodes you have to use a workaround. The recommended way is to use a script on a root node which tells its child nodes the ids or even the scripts of their siblings. The diagram beneath shows the car node in the center. Its script "CarRootController" finds the door scripts of its childnodes and pass them in form of an array to the scripts of its child nodes. Now each door node has access to the other door nodes.
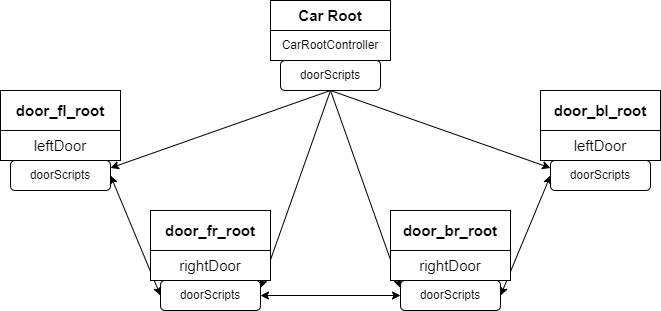
<div drawio-diagram="2083"><img src="https://doc316en.candera.eu/uploads/images/drawio/2023-02/drawing-4-1676958460.png" alt=""/></div>

<div class="contents" id="bkmrk--0"><div class="contents"><div class="textblock">  
</div></div></div>The following example is for the doors of the car. If one of them gets opened the other doors should get opened too.

<div drawio-diagram="2084"><img src="https://doc316en.candera.eu/uploads/images/drawio/2023-02/drawing-4-1676958488.png" alt=""/></div>

<div class="contents" id="bkmrk--2"><div class="contents"><div class="textblock">  
</div></div></div>#### <a class="anchor" id="bkmrk--9"></a>Door Scripts

Therefore each door script has to know the other door scripts. So first attach a new script called "leftDoor" to the left doors and a new script called "rightDoor" to the right doors. The scripts will be nearly the same except the rotation value (a left door has to rotate in the opposite direction of a right door). As in the other example "Id Handling" the first step is to implement a name variable and a GetName() function so the parent node can identify them:

```
    local scriptName = "door"
    local function GetName()
        return scriptName
    end
```

<p class="callout info">**Tip:** Don't forget to add the new function to the public table! (see next step)</p>

Next we need a public boolean which tells the script that the door should get opened. Afterwards this public value 'openDoor' will get modified by another door script.

```
    return { 

        <a class="code" href="http://dev.doc.cgistudio.at/APILINK/namespace_courier.html#a2e6f80d7ef7c7a120595f3d56e6f4246">Init</a> = <a class="code" href="http://dev.doc.cgistudio.at/APILINK/namespace_courier.html#a2e6f80d7ef7c7a120595f3d56e6f4246">Init</a>,
        Update = Update,        
        GetName = GetName,      
        openDoor = false,       
    }
```

Now switch to the **Update-Function** to add following lines of code:

```
local function Update(self, id)
    if self.openDoor == true then
        -- get the current x- and z-rotation of the door and change the y-rotation to a proper value
        local pitch, yaw, roll = Candera.GetRotation(id)                                
        Candera.SetRotation(id,  pitch, yaw, -30)
            
        -- now iterate over the array with the other door scripts stored in the public variable doorScripts 
        --and change their openDoor boolean to true so they can get opened
        for i, otherDoorScript in ipairs(self.doorScripts) do
            
            otherDoorScript.openDoor = true 
                             
        end
                    
      end
end
```

However yet the public array doorScripts will be nil as a root node has to find all door scripts and save them to the public array of each script. Therefore add a new array called doorScripts to the public table...

```
    return { 

        <a class="code" href="http://dev.doc.cgistudio.at/APILINK/namespace_courier.html#a2e6f80d7ef7c7a120595f3d56e6f4246">Init</a> = <a class="code" href="http://dev.doc.cgistudio.at/APILINK/namespace_courier.html#a2e6f80d7ef7c7a120595f3d56e6f4246">Init</a>,
        Update = Update,        
        GetName = GetName,      
        openDoor = false,
        doorScripts ={}
    }
```

<p class="callout info">Lua uses 'nil' as a kind non-value, to represent the absence of a useful value.</p>

#### <a class="anchor" id="bkmrk--10"></a>Root Script

... and switch to the CarRootController script to the **Init-Function** . To find the door scripts iterate over the array childIds, get the script of each id and store it to a array. Therefore add a local array called "doorScripts" to your CarRootController script.

When all the door scripts are found iterate over the doorScripts array and store the local array of door scripts to the doorScripts array of each script:

```
    for i, childId in ipairs(childIds) do
        local script = Candera.IdToScriptComponent[childId]
                  
        if script and script.GetName() == "door"  then
                      
            table.insert(doorScripts, script)
            
        end    
    end
       
    for i, doorScript in ipairs(doorScripts) do      
        doorScript.doorScripts = doorScripts              
    end
```

<p class="callout info">Don't forget to set the openDoor value in the properties panel to true at least for one door script to test if the other doors will get opened.</p>

<div class="contents" id="bkmrk--4"><div class="contents"><div class="textblock"><div drawio-diagram="2082"><img src="https://doc316en.candera.eu/uploads/images/drawio/2023-02/drawing-4-1676958413.png" alt=""/></div>

</div></div></div>#### <a class="anchor" id="bkmrk--12"></a>Global Variables

Another way to communicate between two sibling scripts is to use global variables. In Lua variables are automatically global if you declare them without an access modifier. But we would recommend you to set variables with a root script as explained above.

# OnEnable() and OnDisable()

#### <a class="anchor" id="bkmrk-"></a>How to use OnEnable() and OnDisable()

As in this example the root node script "CarRootController" controls nearly all of the other scripts it would be advisable to disable all the child scripts in case of a disabled root script. Therefore use the OnDisable() function of the "CarRootController" script:

You already stored all child ids to the local array childIds so you just need to iterate over this array to disable all other scripts. Therefore we use the callback function OnDisable() which gets called by [Candera](http://dev.doc.cgistudio.at/APILINK/namespace_candera.html "[DataBinding_RefTypeSample]") automatically when disabling this script.

```
    local function OnDisable(self, id) 

        for i, scriptId in ipairs(childIds) do 
            Candera.SetEnabled(scriptId, false)     
        end
    end
```

If the root script gets enabled the child scripts have to get enabled too. Therefore use the OnEnable() function:

```
    local function OnEnable(self, id)
   
        for i, scriptId in ipairs(childIds) do
            Candera.SetEnabled(scriptId, true)
        end
   
        -- toggle the rotation angle of the wheels each time it got enabled
        self.steerLock= self.steerLock*-1
   
    end
```

<p class="callout info">**Tip:** don't forget to add the callback functions **OnDisable()** and **OnEnable()** to the public table so they can get called by [Candera](http://dev.doc.cgistudio.at/APILINK/namespace_candera.html "[DataBinding_RefTypeSample]").</p>

If you start the execution of the script system and disable the CarRootController script during runtime also the wheels should stop rotating. Furthermore if you enable the CarRootController again, the wheels start rotating and the steering lock switches.

# Set Priority of Lua-Scripts

#### <a class="anchor" id="bkmrk--3"></a>Script Priority

Another useful feature of Lua-Scripting is the priority. It defines in which order the scripts get called (f.e. the Update or the Init). To test this feature in its simplest way create four cubes and equip them with the same script called "SimpleLogInfo".

```
    local function <a class="code" href="http://dev.doc.cgistudio.at/APILINK/namespace_courier.html#a2e6f80d7ef7c7a120595f3d56e6f4246">Init</a>(self, id)
        Candera.LogInfo(self.logString)
    end

    return { 
        <a class="code" href="http://dev.doc.cgistudio.at/APILINK/namespace_courier.html#a2e6f80d7ef7c7a120595f3d56e6f4246">Init</a> = <a class="code" href="http://dev.doc.cgistudio.at/APILINK/namespace_courier.html#a2e6f80d7ef7c7a120595f3d56e6f4246">Init</a>,    
        logString = "logString"
    }
```

This script allows to enter an output string in the public table which will get written in the CanderaLogging panel. Now apply the script to each of the cubes and enter a proper log info to the public value "logString" in the Properties panel. The next step is to assign a priority value to each instance of the script:
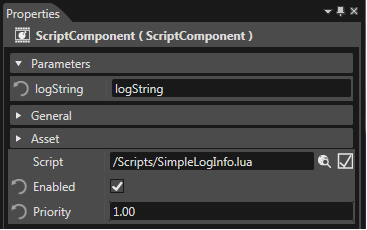
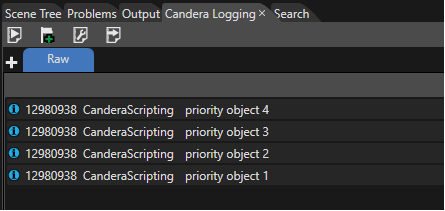
<div drawio-diagram="2085"><img src="https://doc316en.candera.eu/uploads/images/drawio/2023-02/drawing-4-1676958567.png" alt=""/></div>

<div class="contents" id="bkmrk--0"><div class="contents"><div class="textblock">  
</div></div></div>Now if you start the execution of the script system you can read the log strings in the order according to their priority. (open the CanderaLogging as explained in "Lua Introduction")

<div drawio-diagram="2086"><img src="https://doc316en.candera.eu/uploads/images/drawio/2023-02/drawing-4-1676958585.png" alt=""/></div>

<div class="contents" id="bkmrk--2"><div class="contents"><div class="textblock">  
</div></div></div><p class="callout info">**Tip:** for ordering script execution you can also use call-back functions. F.e. LateUpdate(self, id) is called every render frame after all Update callbacks.</p>

# Tutorial for Asynchronous Asset-Loading

# Asynchronous Asset-Loading

#### <a class="anchor" id="bkmrk-"></a>Description

This tutorial describes Asynchronous Asset-Loading and provides short examples on how to load a bitmap.

#### <a class="anchor" id="bkmrk--0"></a>Asynchronous Asset-Loading

Asset Loading, especially reading from the asset repositories, can be a time consuming task, which blocks the CPU from further processing. This can even slow down rendering in certain cases. To improve this, asset loading requests can now be submitted as asynchronous jobs. These jobs can be done either in parallel on a separate thread, or interleaved with the rendering in smaller chunks. Whenever an asset is available, the main thread can retrieve it and add it to the render loop.

#### <a class="anchor" id="bkmrk--1"></a>How to activate this in the application

For a [Courier](http://dev.doc.cgistudio.at/APILINK/namespace_courier.html) based application, the AsyncLoadReqMsg message can be used to load Views. For a [Candera](http://dev.doc.cgistudio.at/APILINK/namespace_candera.html "[DataBinding_RefTypeSample]") based application, Async version of the asset loader methods can be used (see AsyncAssetProviderProxy and new ContentLoader methods).

#### <a class="anchor" id="bkmrk--2"></a>Number of threads for asynchronous asset loading

To load the assets asynchronously in one single thread, the interface "AsyncAssetProviderProxy" can be used. It is available from any AssetProvider implementation via the AssetProvider::AsyncProxy() method. Using a second thread for async loading can be achieved by checking the CANDERA\_ASSETLOADER\_WORKER\_THREAD\_ENABLED in Cmake. AsyncRequests will be dispatched on the worker thread as soon as possible. For multithreaded async asset loading, the CMake flag CANDERA\_ASSETLOADER\_WORKER\_THREAD\_ENABLED specifies if the asynchronous asset load requests are handled on a dedicated thread or on the caller one.

#### <a class="anchor" id="bkmrk--3"></a>Upload

Upload can be done asynchronously too, as ContentLoader::BuildSceneContextAsync can also upload to VRAM (depending on a parameter value). In this case, the single threaded variant must be used.

#### <a class="anchor" id="bkmrk--4"></a>Examples

In the AsyncAssetProviderProxy, each Get\* (GetScene) function schedules a Get\* (GetSceneById) call on the AssetProvider that created the Proxy. In the case that CANDERA\_ASSETLOADER\_WROKER\_THREAD\_ENABLED flag is enabled in CMAKE, the AssetProvider::Get\* call will be dispatched on a separate thread and the result will be available as soon as the worker thread completes the dispatch. In the case that the above mentioned CMake option is disabled, one or more calls to DispatchNext() need to be performed on the current thread to assure that the request is dispatched. It is advised to call the DispatchNext() routine periodically during the Update part of the render loop of the application to ensure all asynchronous asset load requests are dispatched in a controlled and limited time. One option to call DispatchNext would be to introduce it in the LateUpdate part of the UpdateSystem provided by [Candera](http://dev.doc.cgistudio.at/APILINK/namespace_candera.html "[DataBinding_RefTypeSample]").

```
       AssetProvider* assetProvider = ContentLoader::GetInstance().GetAssetProvider();
       if (assetProvider != 0) {
         UpdateSystem* updateSystem = EntityComponentSystem::EntitySystem::Get<UpdateSystem>();
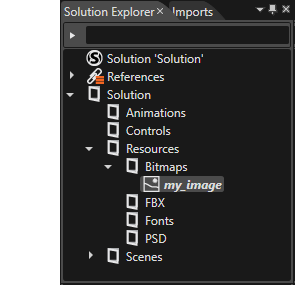
         if (updateSystem != 0) {
           UpdateSystem::Handle updateHandle = updateSystem->CreateComponent();
           UpdateSystem::Delegate delegate = UpdateSystem::Delegate::Update<AsyncAssetProviderProxy, &AsyncAssetProviderProxy::DispatchNext>();
           updateSystem->SetComponentLateUpdateDelegate(updateHandle, delegate);
           updateSystem->AttachComponent(updateHandle, &assetProvider->AsyncProxy());
         }
       }
```

Samples to retrieve a Bitmap Asynchronously:

<div class="contents" id="bkmrk-if-candera_assetload"><div class="textblock">- If CANDERA\_ASSETLOADER\_WORKER\_THREAD\_ENABLED is enabled (processing is done on a separate thread)
    
    ```
    BitmapAsyncRequestSharedPointer request = assetProvider->AsyncProxy()->GetBitmap();
      <a class="code" href="http://dev.doc.cgistudio.at/APILINK/class_candera_1_1_asset_provider.html" title="Abstract class providing methods for retrieving objects.">Candera::AssetProvider</a>* provider;
      <a class="code" href="http://dev.doc.cgistudio.at/APILINK/class_candera_1_1_async_asset_provider_proxy.html">Candera::AsyncAssetProviderProxy</a>& proxy = provider-><a class="code" href="http://dev.doc.cgistudio.at/APILINK/class_candera_1_1_asset_provider.html#a9c5264e99d06a295542bf31809aa737b">AsyncProxy</a>();
      <a class="code" href="http://dev.doc.cgistudio.at/APILINK/class_feat_std_1_1_memory_management_1_1_shared_pointer.html" title="An intrusive reference-counting smart pointer. If you want your class to be managed by SharedPointer ...">Candera::AsyncAssetProviderProxy::BitmapAsyncRequestSharedPointer</a> asyncRequest = proxy.<a class="code" href="http://dev.doc.cgistudio.at/APILINK/class_candera_1_1_async_asset_provider_proxy.html#a25d3620ee6fc846d9882a216cd5079a1">GetBitmap</a>(0x123);
      //do other stuff
      Candera::Bitmap::SharedPointer bitmap;
      if (asyncRequest->IsCompleted()) {
          //bitmap was asynchronously loaded
          bitmap = asyncRequest->GetResult();
    }
    ```
- If CANDERA\_ASSETLOADER\_WORKER\_THREAD\_ENABLED is disabled (processing is done later on the same thread, by calling DispatchNext) ```
    BitmapAsyncRequestSharedPointer request = assetProvider->AsyncProxy()->GetBitmap();
      <a class="code" href="http://dev.doc.cgistudio.at/APILINK/class_candera_1_1_asset_provider.html" title="Abstract class providing methods for retrieving objects.">Candera::AssetProvider</a>* provider;
      <a class="code" href="http://dev.doc.cgistudio.at/APILINK/class_candera_1_1_async_asset_provider_proxy.html">Candera::AsyncAssetProviderProxy</a>& proxy = provider-><a class="code" href="http://dev.doc.cgistudio.at/APILINK/class_candera_1_1_asset_provider.html#a9c5264e99d06a295542bf31809aa737b">AsyncProxy</a>();
      <a class="code" href="http://dev.doc.cgistudio.at/APILINK/class_feat_std_1_1_memory_management_1_1_shared_pointer.html" title="An intrusive reference-counting smart pointer. If you want your class to be managed by SharedPointer ...">Candera::AsyncAssetProviderProxy::BitmapAsyncRequestSharedPointer</a> asyncRequest = proxy.<a class="code" href="http://dev.doc.cgistudio.at/APILINK/class_candera_1_1_async_asset_provider_proxy.html#a25d3620ee6fc846d9882a216cd5079a1">GetBitmap</a>(0x123);
      //do other stuff
      proxy.<a class="code" href="http://dev.doc.cgistudio.at/APILINK/class_candera_1_1_async_asset_provider_proxy.html#ac823745938c26082ad68aeccff5e950c">DispatchNext</a>();
      //do other stuff
      Candera::Bitmap::SharedPointer bitmap;
      if (asyncRequest->IsCompleted()) {
          //bitmap was asynchronously loaded
          bitmap = asyncRequest->GetResult();
    }
    ```

</div></div>

# Tutorial for 9-patch image

# 9-patch image

For full description of the 9-patch check <span style="color: rgb(230, 126, 35);">[9-patch image](https://doc316en.candera.eu/books/general-concepts/page/9-patch-image)</span> chapter.

#### <a class="anchor" id="bkmrk-"></a>BitmapNode sample

1. Import an image in Solution Explorer window.   
    <div drawio-diagram="2063"><img src="https://doc316en.candera.eu/uploads/images/drawio/2023-02/drawing-4-1676956678.png" alt=""/></div>
2. To configure the image as a 9patch image, click on my\_image from the Solution Explorer window and change in the Properties window Bitmap -&gt; Bitmap Layout from Stretch to NinePatch. 4 additional properties are available Bitmap -&gt; 9-patch Stretchable Area: Left, Top, Right and Bottom. These properties define the distance in pixel from the border.   
    <div drawio-diagram="2064"><img src="https://doc316en.candera.eu/uploads/images/drawio/2023-02/drawing-4-1676956701.png" alt=""/></div>
3. Drag the image from the Solution Explorer window in the Scene Tree window into Scene2D.   
    <div drawio-diagram="2065"><img src="https://doc316en.candera.eu/uploads/images/drawio/2023-02/drawing-4-1676956729.png" alt=""/></div>
4. In order to have sharp borders, click on my\_image from the Scene Tree window, then click on BitmapBrushBlend and change in the Properties window Filter from BilinearFilter to NereastFilter.   
    <div drawio-diagram="2066"><img src="https://doc316en.candera.eu/uploads/images/drawio/2023-02/drawing-4-1676956745.png" alt=""/></div>
5. To resize a 9patch image, click on my\_image from the Scene Tree window and change in the Properties window Layout -&gt; Size X and Y values.  
      
    
    - Default X, Y values <div class="image"><div class="image"><div drawio-diagram="2073"><img src="https://doc316en.candera.eu/uploads/images/drawio/2023-02/drawing-4-1676957037.png" alt=""/></div>
        
        </div></div>

<div class="contents" id="bkmrk-changed-x%2C-y-values"><div class="contents"><div class="textblock">- Changed X, Y values

<div drawio-diagram="2072"><img src="https://doc316en.candera.eu/uploads/images/drawio/2023-02/drawing-4-1676957014.png" alt=""/></div>

<div class="image">  
</div></div></div></div><div class="contents" id="bkmrk-if-%28x-%3C-left-%2B-right"><div class="textblock">- If (X &lt; Left + Right) or (Y &lt; Top + Bottom) where Left, Top, Right and Bottom are the 9-patch Stretchable Area, then the borders themselves will also start scaling down.  
    <div drawio-diagram="2071"><img src="https://doc316en.candera.eu/uploads/images/drawio/2023-02/drawing-4-1676956973.png" alt=""/></div>

</div></div>