
# Asset Library Generation

# Generate Asset Library

#### Asset Library  


An asset library is a binary compact format containing all user defined artifacts part of a solution.

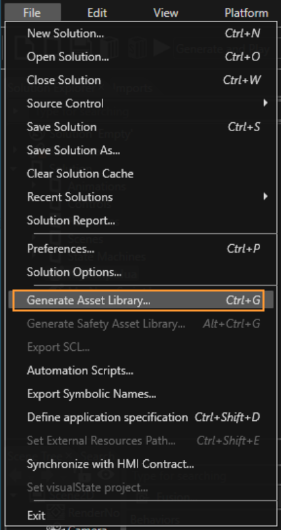
Open "Generate Asset Library" dialog via menu or toolbar item.

<div drawio-diagram="5197"><img src="https://doc316en.candera.eu/uploads/images/drawio/2024-02/drawing-5-1706889277.png" alt="drawing-5-1706889277.png"/></div>

<div drawio-diagram="6467"><img src="https://doc316en.candera.eu/uploads/images/drawio/2024-07/drawing-5-1721984136.png" alt="drawing-5-1721984136.png"/></div>

The "Generate Asset Library" dialog lists following items part of the solution for asset generation:

- All items having the property "Export Always" enabled.
- All items which are referred by exported items.

#### Dialog UI

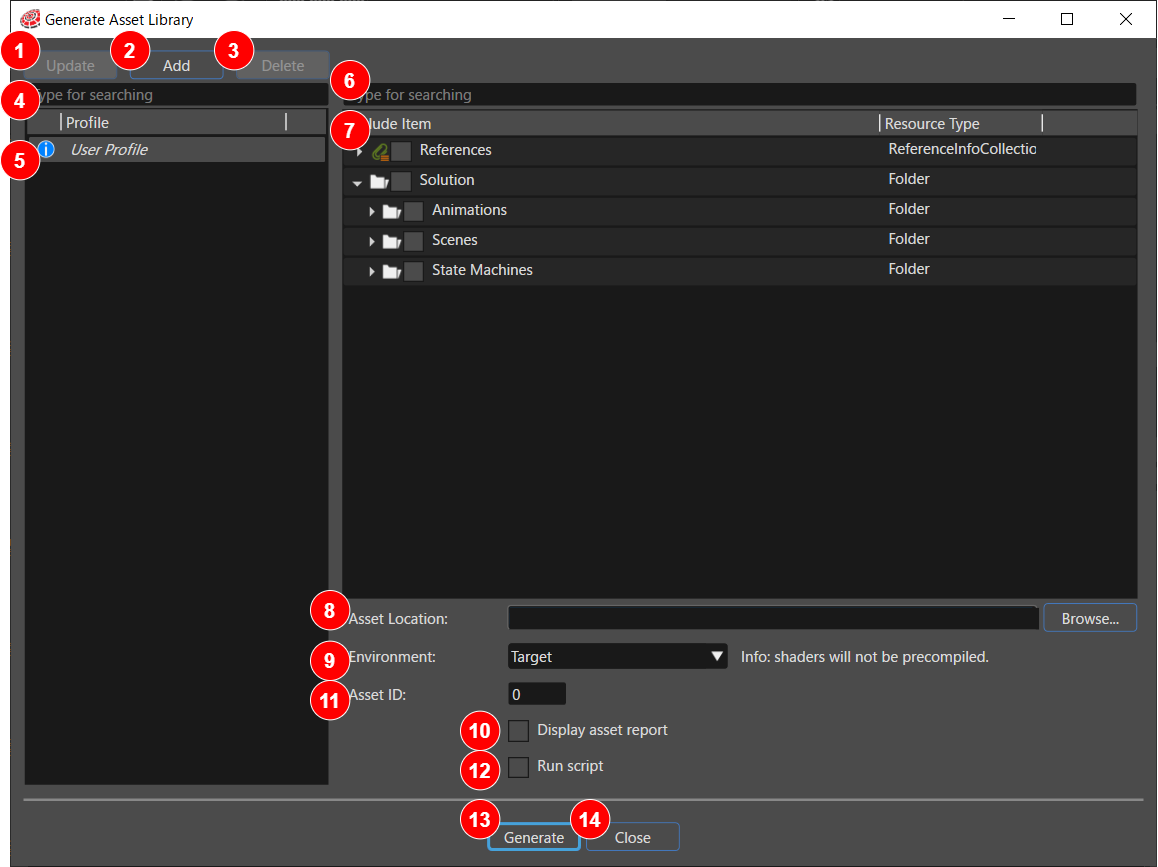
<div drawio-diagram="8357"><img src="https://doc316en.candera.eu/uploads/images/drawio/2025-04/drawing-4-1745384830.png" alt="drawing-4-1745384830.png"/></div>

<table id="bkmrk-1-uddate-button-when" style="border-collapse:collapse;width:100%;height:460.8px;"><colgroup><col style="width:5.48141%;"></col><col style="width:25.9747%;"></col><col style="width:68.52%;"></col></colgroup><tbody><tr style="height:29.6px;"><td class="align-center" style="height:29.6px;">1</td><td style="height:29.6px;">Uddate button</td><td style="height:29.6px;">When you change the settings of a profile selected in the profile list, press this button to save the changes. If you do not press this button, the changes will not be saved to the target profile.</td></tr><tr style="height:46.4px;"><td class="align-center" style="height:46.4px;">2</td><td style="height:46.4px;">Add button</td><td style="height:46.4px;">Creates a new asset profile. Clicking the button displays the \[Add New Asset Profile\] dialog. The created profile will be displayed in the profile list in the \[Generate Asset Library\] dialog. It will also be added to the Solution Explorer.

</td></tr><tr style="height:29.6px;"><td class="align-center" style="height:29.6px;">3</td><td style="height:29.6px;">Delete button</td><td style="height:29.6px;">Select a profile from the profile list and click this button to delete it.</td></tr><tr style="height:29.6px;"><td class="align-center" style="height:29.6px;">4</td><td style="height:29.6px;">Profile search field</td><td style="height:29.6px;">Enter a string in this field to search for the corresponding profile in the profile list.</td></tr><tr style="height:29.6px;"><td class="align-center" style="height:29.6px;">5</td><td style="height:29.6px;">Profile list</td><td style="height:29.6px;"> Asset profiles are listed.</td></tr><tr style="height:29.6px;"><td class="align-center" style="height:29.6px;">6</td><td style="height:29.6px;">Item search field</td><td style="height:29.6px;"> Enter a string in this field to search for the corresponding profile in the item list.</td></tr><tr style="height:29.6px;"><td class="align-center" style="height:29.6px;">7</td><td style="height:29.6px;">Item List</td><td style="height:29.6px;">The items to be output as assets are listed in a tree structure.  
Items with a check mark in the checkbox will be excluded from the asset library generation. However, if other items in the asset require them, the checked items will not be excluded.  
Also, if a folder is checked, all the items in that folder that can be excluded will also be checked. If you right-click while a folder is selected, you can use the \[ Select/Expand All/  
Collapse All \] options.

<div drawio-diagram="7406"></div>

</td></tr><tr style="height:29.6px;"><td class="align-center" style="height:29.6px;">8</td><td style="height:29.6px;">Asset Location</td><td style="height:29.6px;">Specify the location where the generated asset files will be saved. You can specify the location by clicking the \[Browse\] button.</td></tr><tr style="height:29.6px;"><td class="align-center" style="height:29.6px;">9</td><td style="height:29.6px;">Environment</td><td style="height:29.6px;"><span style="vertical-align:inherit;">Select either Simulation or Target. Note that all shaders used in the solution and any additional shaders with the “Export Always” property enabled will be added to the asset file.</span></td></tr><tr style="height:29.6px;"><td class="align-center" style="height:29.6px;">10</td><td style="height:29.6px;">Asett ID</td><td style="height:29.6px;"> Specify the asset ID.</td></tr><tr style="height:29.6px;"><td class="align-center" style="height:29.6px;">11</td><td style="height:29.6px;">Display asset report</td><td style="height:29.6px;">Display a report containing the serialized items after asset generation. For details, see[ ](https://doc316en.candera.eu/link/87#bkmrk-asset-generation-rep)[<span style="color:rgb(230,126,35);">here</span>](https://doc316en.candera.eu/link/87#bkmrk-asset-generation-rep).

</td></tr><tr style="height:29.6px;"><td class="align-center" style="height:29.6px;">12</td><td style="height:29.6px;">Run script</td><td style="height:29.6px;">Executes the specified script after the asset is generated. For details, see [<span style="color:rgb(230,126,35);">here</span>](https://doc316en.candera.eu/link/87#bkmrk-run-script).

</td></tr><tr style="height:29.6px;"><td class="align-center" style="height:29.6px;">13</td><td style="height:29.6px;">Generate button</td><td style="height:29.6px;">Pressing this button executes the generation of the asset library.  
</td></tr><tr style="height:29.6px;"><td class="align-center" style="height:29.6px;">14</td><td style="height:29.6px;">Close button</td><td style="height:29.6px;">Close Button Pressing this button closes the dialog.</td></tr></tbody></table>

While Scene Composer is open, the saved asset profile is not automatically selected. To use it, select it manually.

#### Generate the Asset  


Generate the asset file by pressing the "Generate" button. If the generation operation will end successfully, in the location where the asset is generated three different files will become available.

- A binary (.bin) file containing all user defined artefacts that are part of a solution
- A C++ header (.h) with all the symbolic names from the solution
- An Extensible Markup Language (.xml) document that contains information about the asset items which accessed strings from the name table (offset, value, item name, etc.)

#### Asset Generation Report  


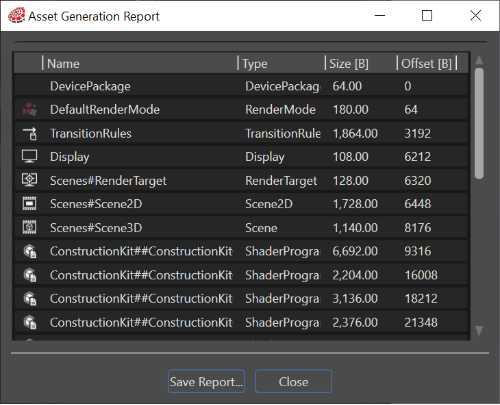
If the generating was done successfully and the checkbox "Display asset report" is checked, the "Asset Generation Report" dialog will appear. The report contains a list of all serialized items and the output of the script if the "Run script" checkbox was enabled.

<div drawio-diagram="6471"><img src="https://doc316en.candera.eu/uploads/images/drawio/2024-07/drawing-5-1721985854.png" alt="drawing-5-1721985854.png"/></div>

<p class="callout info">The total sum of the items displayed in the "Asset Generation Report" is different than all the items summed up. This is the consequence of the fact that the "Total" size should match the size of the asset file which contains more data than the list of "regular" items. The asset header, the name table, AutoUniforms, ShaderAttributes and the index table of each sub lib (scenes, animations, etc.) contain additional information.  
</p>

The content of this dialog can be saved in CSV (Comma Separated Values) format by clicking the "Save..." button.

#### Run Script  


If enabled this option allows to run a script after the asset is generated. The syntax of the command is the following:

> Script\_path \[arg1\] \[arg2\] \[arg3\] ...

- Script\_path is absolute or relative to the solution
- Arguments are optional
- Arguments containing white spaces should be put between double quotes (e.g. "this is one argument")
- The following macro variables can be used as arguments:  
    
    - $AssetFileName: the path to the asset file
    - $AssetProfileName: the name of the selected asset profile
    - $CustomId: The Asset Id of the selected asset profile

Example:

> c:\\scripts\\my\_script.cmd $AssetProfileName "another param"

#### Missing Dependencies  


In case of missing dependencies, no asset generation is possible. In this case, the "Missing Dependencies" dialog lists all items with missing dependencies:
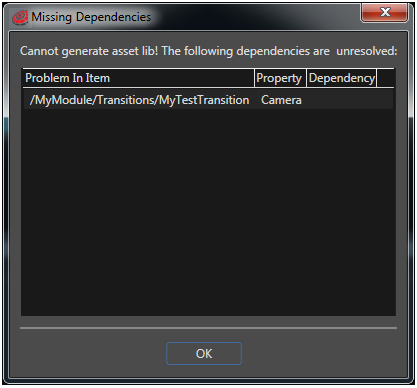
<div drawio-diagram="492"><img src="https://doc316en.candera.eu/uploads/images/drawio/2023-02/drawing-7-1676356444.png" alt="drawing-7-1676356444.png"/></div>

---

# Color Depth Configuration

#### Color Depth Configuration  


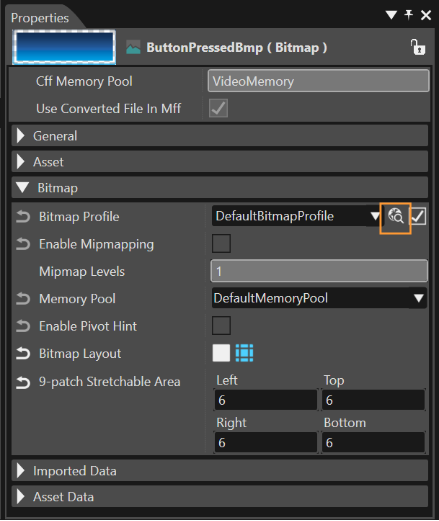
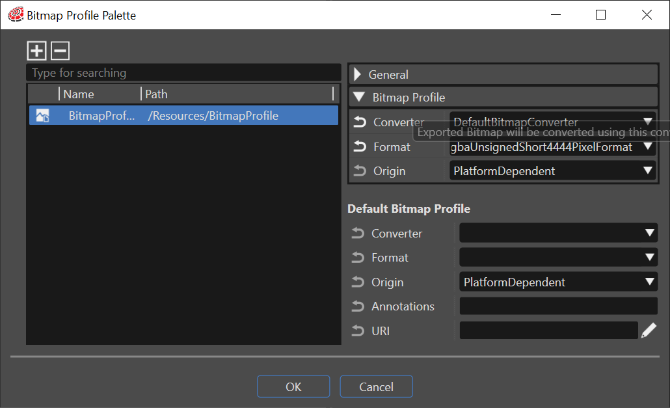
Color Depth Configuration allows choosing among several supported color formats for generating bitmaps into target asset files. This is required to cover specific needs or constraints on several platforms.

When an image is imported, SceneComposer stores the best quality possible for that image (32bit ARGB).

In the Properties panel, the desired value for the property **Bitmap Profile** can be selected, and the format can be set in a specific panel.

<div drawio-diagram="6472"><img src="https://doc316en.candera.eu/uploads/images/drawio/2024-07/drawing-5-1721990239.png" alt="drawing-5-1721990239.png"/></div>

<div drawio-diagram="6473"><img src="https://doc316en.candera.eu/uploads/images/drawio/2024-07/drawing-5-1721990303.png" alt="drawing-5-1721990303.png"/></div>

If "Target Format" property is not explicitly set by user the bitmap will be exported using the default bitmap type according to the type of the imported image.

After a re-import of the bitmap, the user-defined target format will remain valid as selected in the Properties panel.

---

# Plugin Notification after Generation

#### Enable Plugin Notification  


With the option "Enable Plugin Notification" in the Asset Library Generation dialog, a hook into the generation process is available. This might be useful for any kind of post-processing of the generated asset.

Following plugins using this hook are available:

- Command Line Plugin
- Translator Plugin (Optional)

---

#### Command Line Plugin  


An arbitrary batch job can be started after asset generation by means of the Command Line Plugin CommandLinePlugin.dll, available in the cgi\_studio\_root/bin/SceneComposer/Plugins folder.

1. Enter the command line call in the "File -&gt; Preferences -&gt; Plugins -&gt; Command Line" text box.
2. Enable option "Enable Plugin Notification" before generating the asset.

#### Translator Plugin (Optional)  


The Translator plugin is only available as a part of the optional Globalization add-on package for CGI Studio.   
It will be invoked after asset generation to append the master language pack to the previously generated asset.

Please refer to section Globalization Support for more details regarding Translator Plugin.

---