# Animation Design
# New Animation
#### Create a new empty Animation
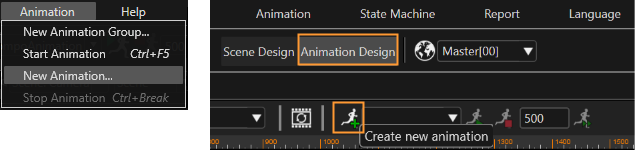
An empty animation can be created via "New Animation" menu item.
"New Animation" Menu "New Animation" Toolbar Item (only available if "Animation Design" is active)
If toolbar does not have the animation toolbar, to display them please select \[ View > Toolbars > Animation \] from the menu bar.
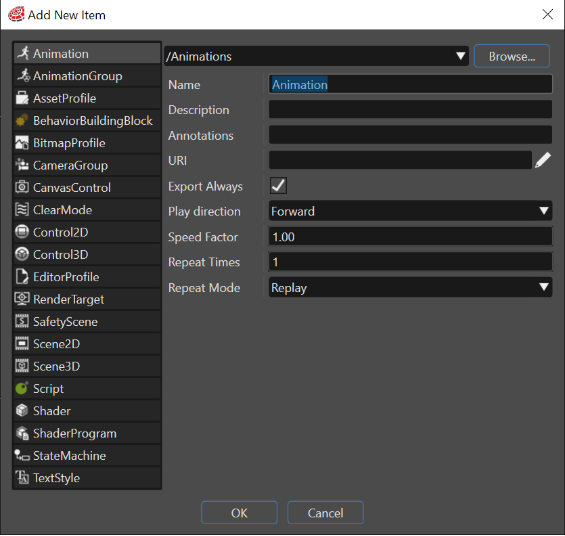
Alternatively use the Scene Explorer context menu to create a new animation via "Add" > "New item" option and select "Animation" item type.
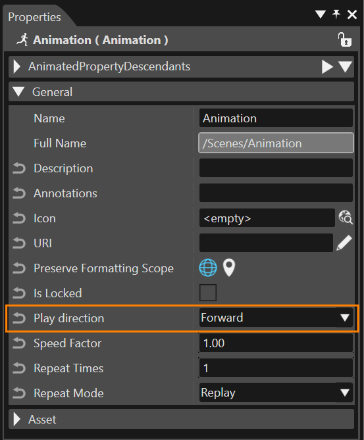
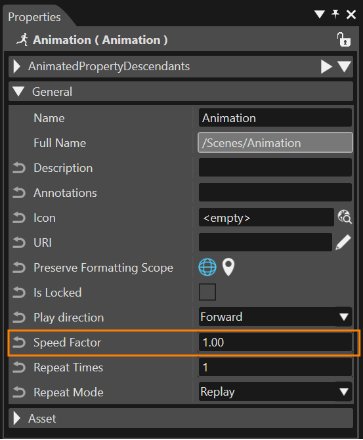
The SpeedFactor (indicates the speed of running animation) and PlayDirection (indicates whether the animation will be played Forward - from first to last keyframes - or Reverse - from the last to first keyframes) properties can be set when the animation is created or later from the Properties panel.
"Add New Item" Animation
For information about how to create an animation from a template, please refer to section [Create Animation From Template](https://doc316en.candera.eu/link/27#bkmrk-page-title).
---
#### Create an Animation on a Specific Node
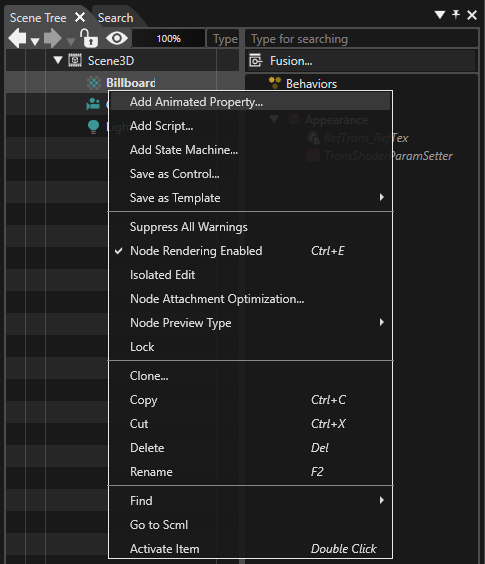
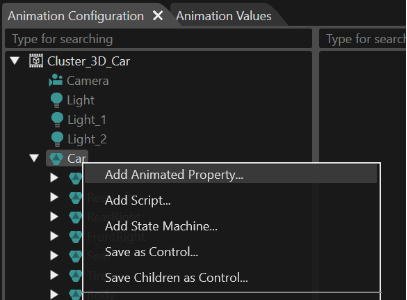
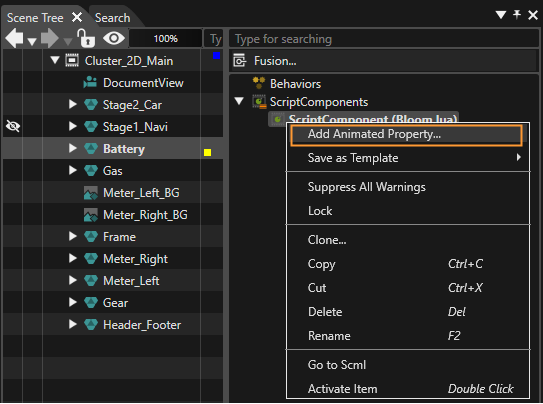
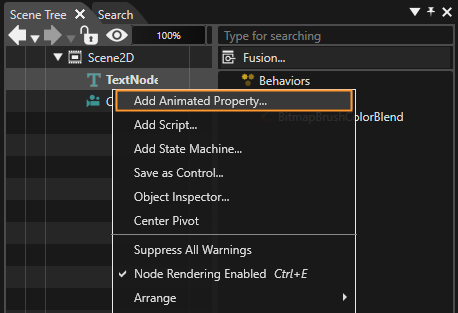
A new animation can also be created on a specific node in the Scene Tree panel: Use "Add Animated Property" context menu item to open the Property Animation Configuration dialog:
"Add Animated Property..." Context Menu Option
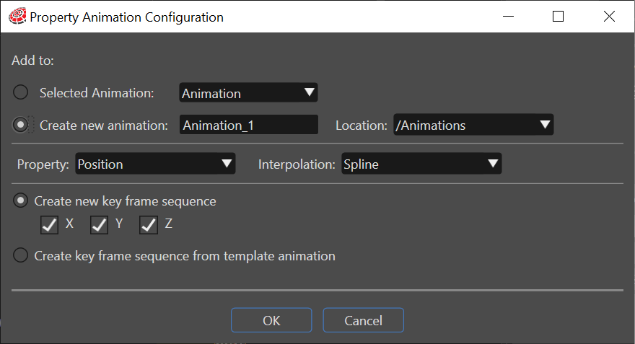
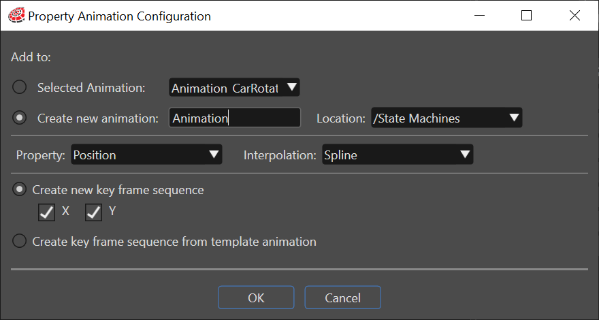
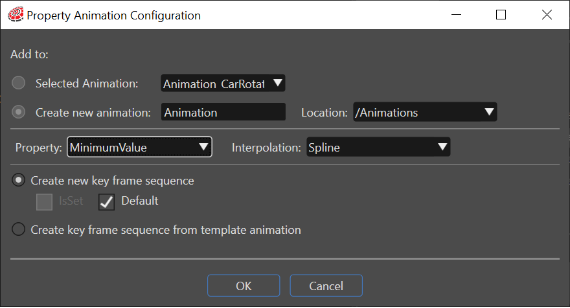
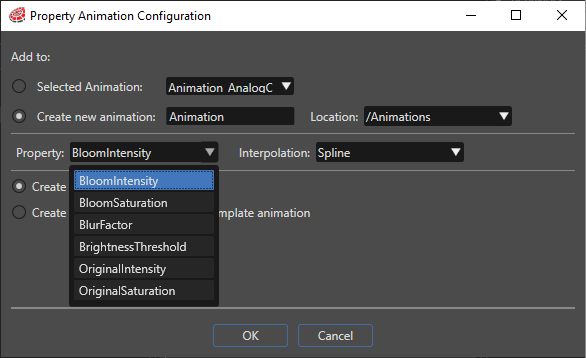
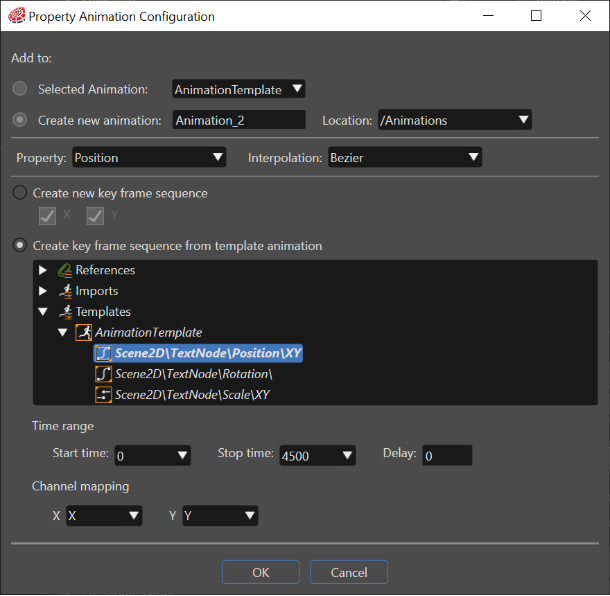
The "Property Animation Configuration" dialog allows to create either a new animation as a user-defined animation or from a template, or to simply add another animated property to an existing animation:
- Tick "Create new animation" to create a new animation for the selected node
- Untick "Create new animation" to add a new animation property to an existing animation.
Property Animation Configuration
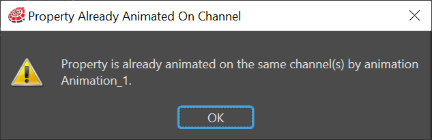
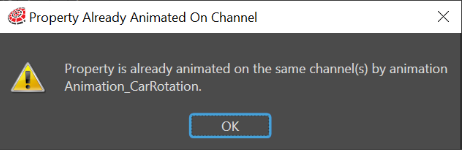
The same animated property is not allowed to be added for the same object in an animation more than one time, on the same channel. If such an addition is tried, the next message will appear: "Property is already animated on the same channel/channels by animation (name)."
"Property Already Animated On Channel" Message
---
#### Active Scene
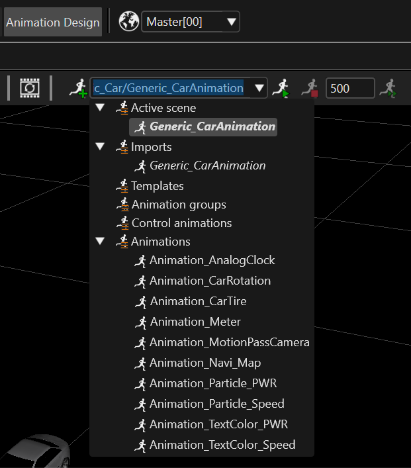
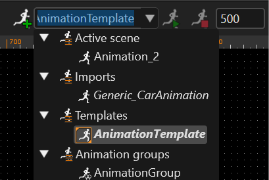
For every scene displayed in the Scene Editor, all the associated animations can be seen in the "Toolbar Animations Combobox" under the category "Active Scene".
"Active Scene" Category - Toolbar
# Manage Animations
#### Animation List
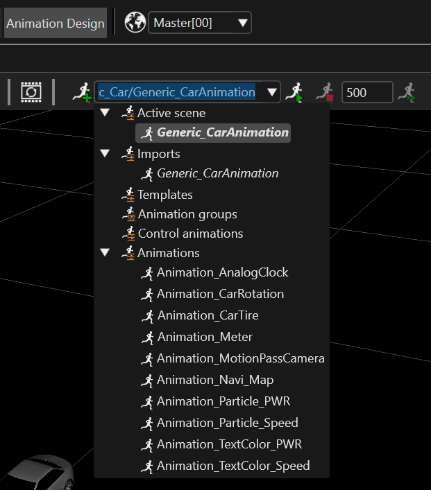
All the animations from the solution are listed in the Animation List. Selecting an animation from the list displays it in the "Scene Render" panel of the main view of the application, when it is started.
If toolbar does not have the animation icons described below, to display them please select the "Animation Design" from the menu bar.
"Animation List" in Toolbar
Different types of animations:
- **User-defined animations** can be created either as empty animations or based on an imported or template animation.
- **Imported animations** are imported from FBX files. They are read-only and listed in italic in the "Imports" section of the Animation List.
- **Template animations** are animations saved as a template. They are listed in the "Templates" section of the Animation List.
- **Local animations** are animations inside a control.
---
#### Delete or Rename an Animation
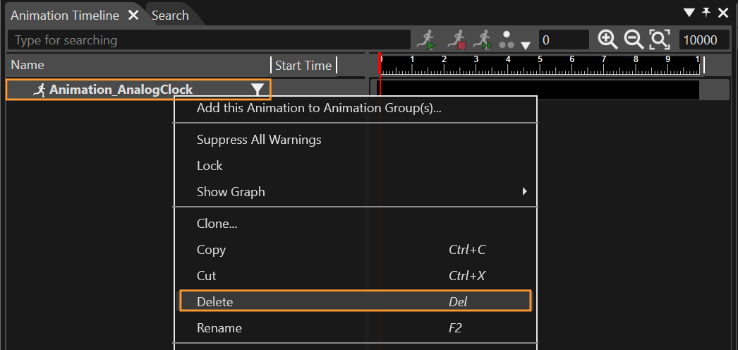
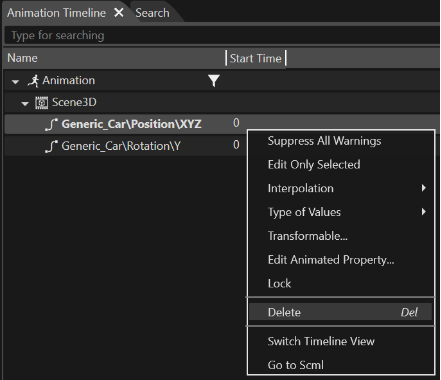
**Delete** an animation via context menu in the "Animation Timeline", "Animation Values" or "Solution explorer" panel.
Context Menu "Delete" in Animation Timeline
**Rename** the currently selected animation via context menu in the "Animation Timeline", "Animation Values" or "Solution explorer" panel.
---
# Configure Animations
# Add Animated Property
#### Configure an Animated Property
Design an animation by going to the in Animation Design perspective in SceneComposer. The perspective can be chosen by pressing the "Animation Design" button on the toolbar.
Each animation is composed of one or more animated properties. The animated properties can be:
- user defined animated properties, when the user configures all the key frames manually,
- template animated properties, which are based on an animated property from an Animation Template.
##### Animation Configuration Panel
The "Animation Configuration" panel allows the configuration of each animated property of both user defined and template animations.
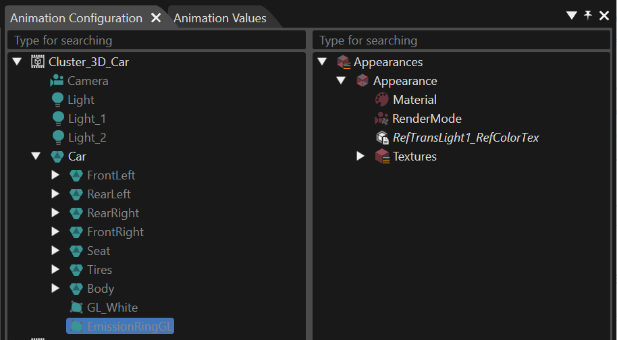
The left side of the "Animation Configuration" panel contains all the user defined scenes from the solution with nodes with properties which can be animated.
The right side of the "Animation Configuration" panel contains all the widgets of the scene highlighted in the left side of the panel. Each widget type has specific properties that can be animated.
---
#### Animation Configuration
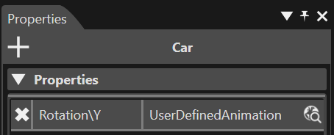
To animate a property from a node or a widget, select it in the "Animation Configuration" panel, and in the property grid its already animated properties will appear. If the item has no animated properties yet, the text "Click '+' to animate a property for the selected node" will appear in the property grid.
By clicking the '+' button on the property grid, the "Property Animation Configuration" dialog will appear.
The "Property Animation Configuration" dialog can also be reached by choosing the context menu option "Add Animated Property" after selecting the item which the user wants to animate. This will add a new animated property to the current animation or create a new animation.
The same animated property is not allowed to be added for the same object in an animation more than one time, on the same channel. If such an addition is tried, the next message will appear: "Property is already animated on the same channel/channels by animation (name)."
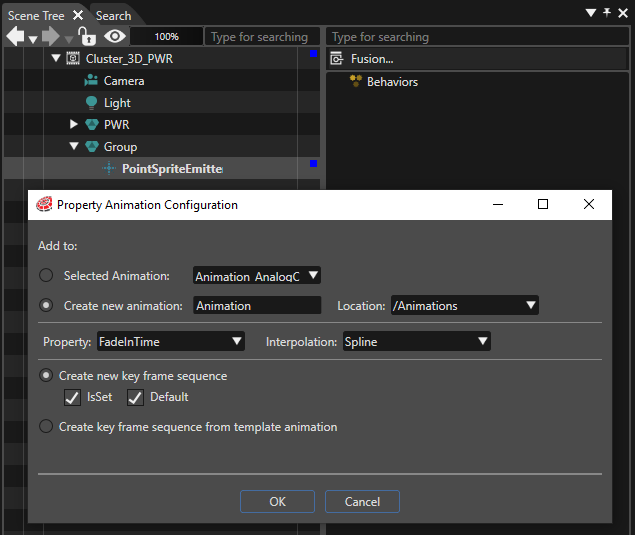
The "Property Animation Configuration" dialog is divided into three sections.
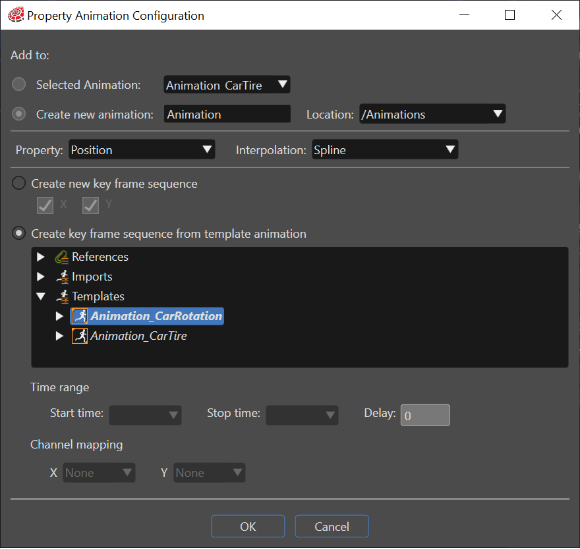
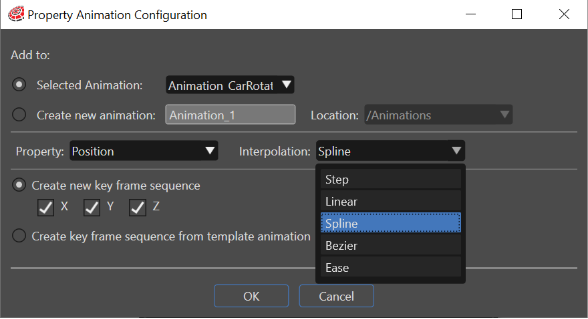
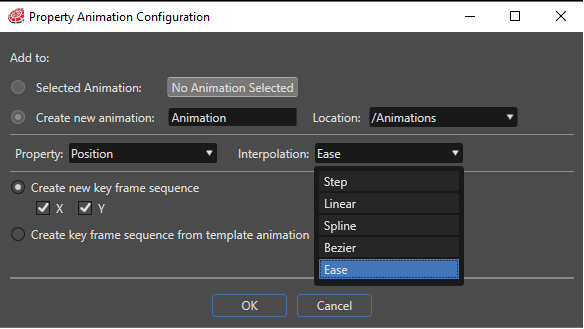
The first section contains two combo boxes. Via the Property combo box the user can choose which property to animate and the Interpolation combo box allows choosing between the provided interpolation strategies.
Ticking one of the radio buttons for the second and the third section the user decides to create a new user defined animation or to use an available animation from import or template.
The Create new key frame sequence section only allows selecting the channels on which the animated property will change the values.
When using available animation, all imported and template animations of the solution are listed in a tree, allowing the selection of an animated property that will be the template for the animated property.
Furthermore it is possible to choose the first and last key frame and a delay which can be a negative or positive integer that will be added to the sequence times of all the key frames of the animated property.
A mapping between the channels of the animated property and the channels of the template animated property can be made using the combo boxes that allow associating to each channel of the animated property one (or None) channel of the template animated property that appears in the combo boxes.
---
#### Animation of all Items
Properties of widgets, effects and shader parameters can also be animated. This chapter briefly describes the approach in SceneComposer.
An animation can now contain animated properties for controls and scenes (they can also be mixed).
##### Animate Widget Properties
Add a widget to your scene and configure it. Right click on the widget (in the widget panel) and select "Add Animated Property...". Now you can choose the property and the values you want to animate.
##### Animate Effect Properties
Add an Effect to your 2D scene and configure it. Right click on the Effect and select "Add Animated Property...". Choose the property and value you want to animate.
##### Animate Shader Parameters
Import an parameterized shader and assign it to a node of your scene. Right click on the node and select "Add Animated Property...". The shader parameters will appear in the properties drop down list.
##### Animate Control properties
Starting with version 3.8 it is possible to animate control properties. Previously it was only possible to animate properties of Behaviors, Widgets and Effects.
In the composition part, control properties can be exposed as public properties.
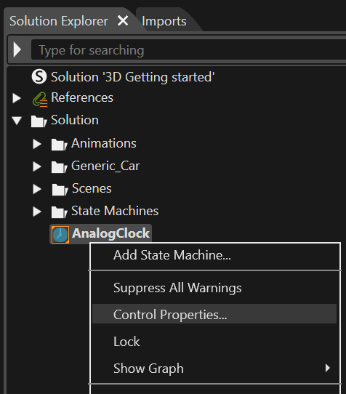
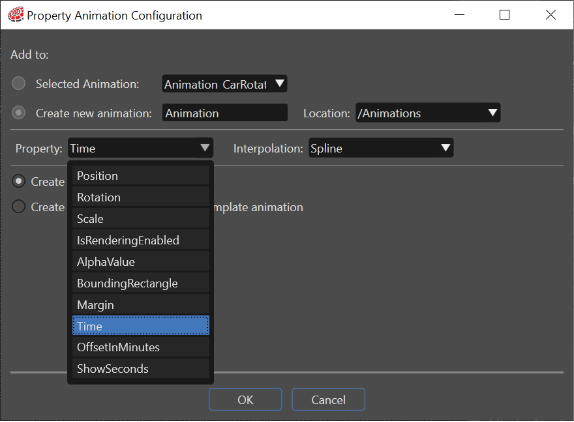
It is possible to animate those control properties which are animatable properties of behaviors. The animatable properties of a control are listed in the drop down box in the Property animation edit dialog. For example for the AnalogClock control it is now possible to animate the Time value.
It is not possible to animate Reference types. For instance, it is not possible to animate the items in the Images property of the FlipBook.
##### Animate Variants and Optionals
As there are many control properties that are Variants and Optionals, support was added for animating them as well.
##### Animate Optionals
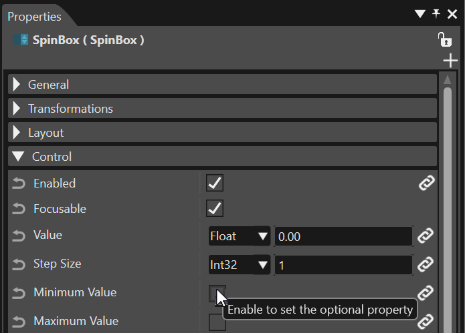
As many behaviors and controls rely on optional properties for exchanging data such as value properties, range properties, etc., support was added to animate such properties. In Scene Composer an optional property has a check box that allows to enable or disable the property. When checked (enabled), the editor of the property appears and a value can be entered for it.
Specifying whether the property has a value or not is also animatable. This flag is called IsSet. It is connected to the check box from the property panel. So an animation can be created to set and unset an optional value on a control or on a behavior.
##### Animate Variants
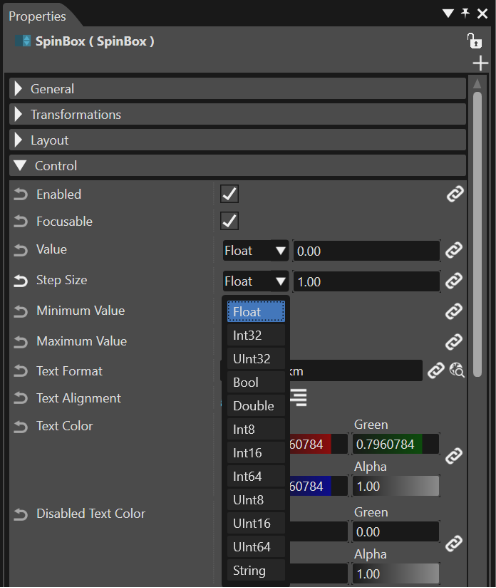
Animating Variants is also supported. A variant is an object which can store a value of potentially different types. So to a variant you can assign an integer, a double, 64-bit integer and so forth.
It is currently not possible to add keyframes of 8-bit integer, unsigned 8-bit interger and double types. Although it is possible to add an animated property for a property of type Variant with one of these types, the keyframes will have float values in the Animation Values tab.
Except for the 8-bit integer, unsigned 8-bit integer and double types, in Scene Composer the keyframes have dedicated value editors and validation for each type. So in Scene Composer in the Animation Values tab only values of the currently specified type for the variant property can be added for its animated property. However the Candera animations framework relies on float keyframes, so these values will be internally handled as float values. If a control or behavior already has a Variant value set, the animation framework will keep its type. Therefore the interpolated value computed by the Candera framework as float will be converted back to the type that the variant already has.
For an Optional of type Variant (Eg. SpinBox Minimum Value), the IsSet channel cannot be selected for animating because the variant type cannot be preserved. This is currently a limitation of the Candera framework and is planned for improvement in upcoming versions.
##### Animate script components properties
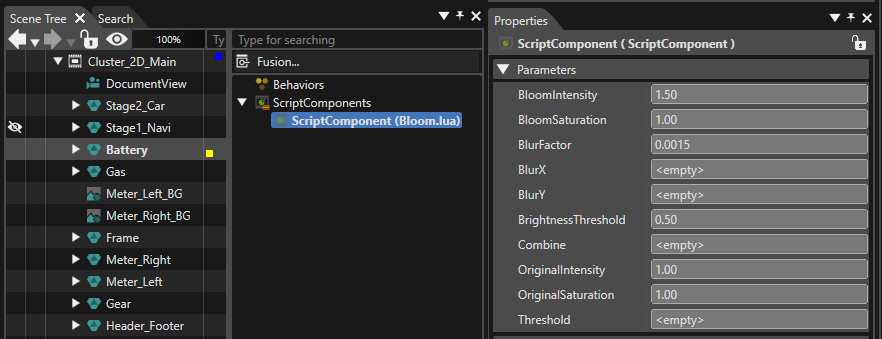
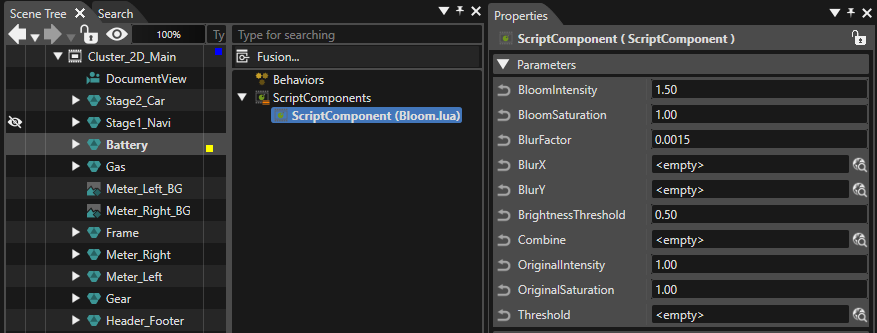
Script components are basically a connection between a script and a node. Scripts can be edited, they can be defined to act in the Scene tree. For example they can be configured to: move nodes, change colors, activate/deactivate Render Targets, run animations, etc. When a script is attached to a node, the parametrization of that script is called script component. Once there is a script component visible in Scene Composer, its properties which are the parameters can be edited and now they can also be animated.
There is a limited support for script components. Only boolean, integer and float types can be animated. Double can also be animated, but it is internally handled as float.
Reference parameters cannot be animated.
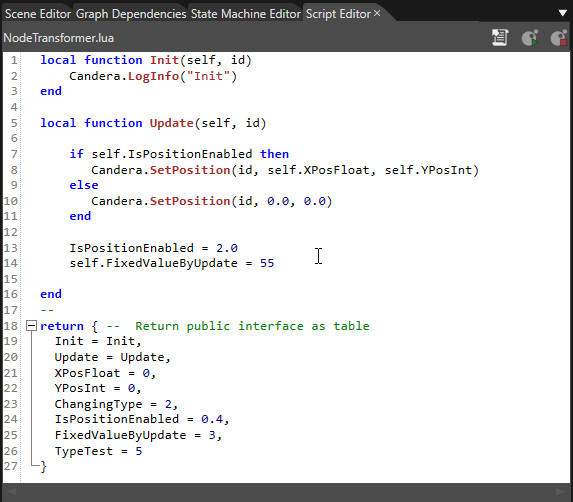
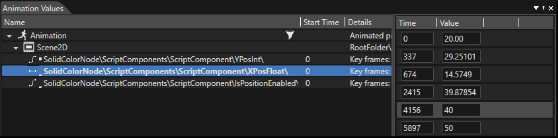
This is a very simple script that only moves the attached node around. There are two parameters that control the X and Y position: XPosFloat and YPosInt. By chaging the values of those parameters the script changes the node position.
When the script system is running, the script component parameters are read only.
The script system can be stopped or paused and the values can be edited.
Then, when the script system is restarted or resumed, the nodes will change relatively to the new parameter values.
Now it is possible to animate the properties (parameters) of script components.
The script system needs to be running in order to see the visual changes in the Scene editor when sliding the animation timeline marker. This is because the script cannot update the node unless the script system is running.
The animation can be run using the menu bar button in the Animation Timeline panel or by pressing Ctrl+F5:
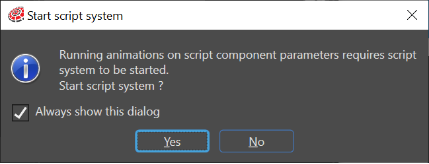
If the script system is not running, the following message appears:
If the type of a parameter is changed, for example by changing in the script code XPosFloat = 0.0 (float) with XPosFloat = 0 (integer), the properties panel will then accept only integer values. If a value with decimal point is entered for XPosFloat in the property grid it will not be accepted. In Animation Design, if a new keyframe is added for the script component parameter animation, the new keyframe will inherit the new type from the parameter (integer in this example. This will lead to a mixture of float and integer values for this animation.
This is possible because the animation framework internally converts all the keyframe values to floats.
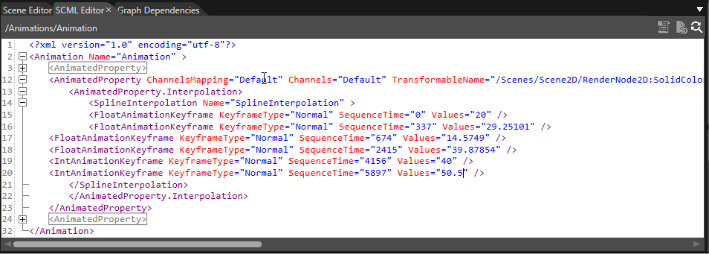
It is also possible to change the keyframe types and values from SCML. The Animation Values tab will be automatically updated in this case.
In the SCML the following types are allowed:
| Property type | Keyframe type |
| Int32 | IntAnimationKeyframe |
| UInt32 | UIntAnimationKeyframe |
| Int16 | Int16AnimationKeyframe |
| UInt16 | UInt16AnimationKeyframe |
| Bool | BoolAnimationKeyframe |
| Float | FloatAnimationKeyframe |
---
# Type of Values
#### Types of Values: Absolute or Relative
Animation values can have two different types:
- Absolute: Configured animation values are absolute to the current value of the animated property.
- Relative: Configured animation values are relative to the current value of the animated property.
The main benefit of relative animations is that they can be saved as templates and reused for other properties very easily.
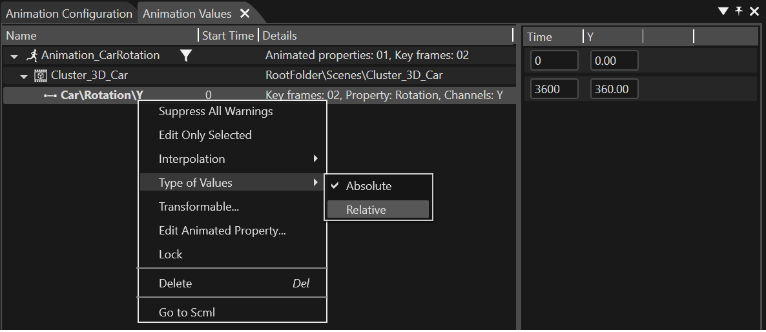
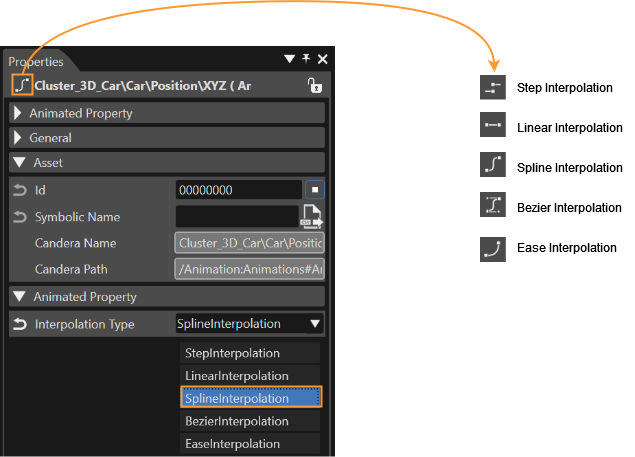
By default animation values are considered absolute. To change to relative values, use the context menu "Types of Values" on an animated property in Animation Timeline or Animation Values panel and switch to "Relative":


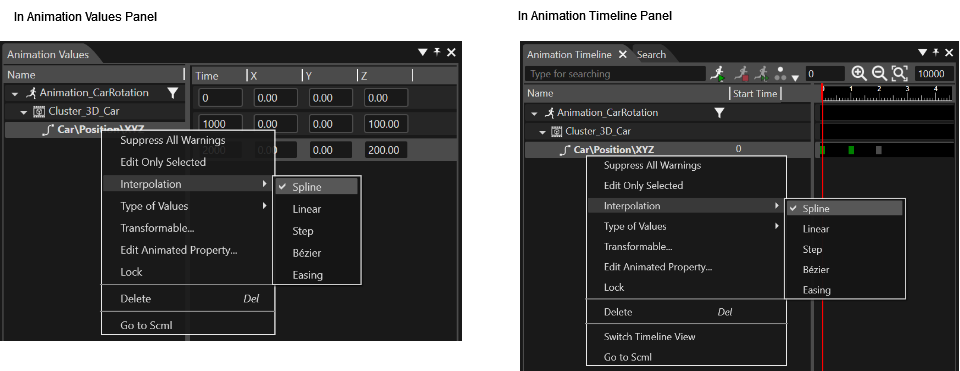
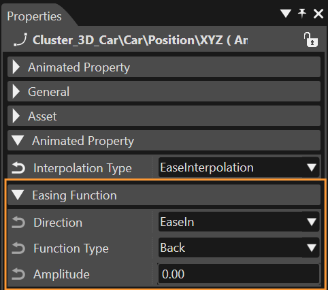
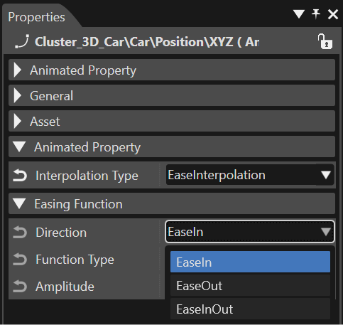
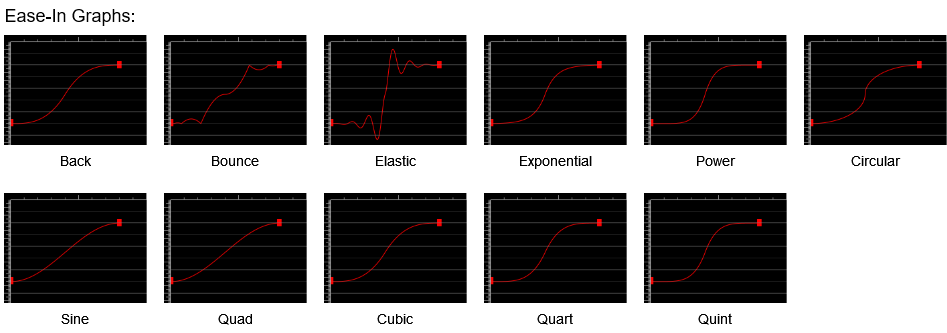
| **Function Type** | **Behavior** | **Available Properties** |
| Back | Retracts the motion of an animation slightly before it begins to animate in the path indicated. | The "Amplitude" of this function represents retraction amplitude; |
| Bounce | Creates a bouncing effect | The "Restitution Coefficient" represents the ratio of speeds after and before each bounce.
The "Bounce Count" sets the number of bounces that will be mapped in the \[0...1\] input interval.
|
| Elastic | Creates an animation that resembles a spring oscillating back and forth until it comes to rest. | The "Oscillation Count" sets the number of oscillations that will be mapped in the \[0...1\] input interval.
The "Exponent" sets the exponential power of oscillation.
|
| Exponential | Creates an animation that accelerates and/or decelerates using an exponential formula | The "Exponent". |
| Power | Creates an animation that accelerates and/or decelerates using the formula f(t) = t^p where p is equal to the Power property. | The "Power" sets the exponential power of interpolation. |
| Circular | Creates an animation that accelerates from zero or decelerates to zero using the formula f(t)=1 - sqrt(1 - t^2). | None |
| Sine | Creates an animation that accelerates from zero or decelerates to zero using the formula f(t) = 1 - sin((1 - t) \* PI/2) | None |
| Quad | Creates an animation that accelerates from zero or decelerates to zero using the formula f(t) = t^2 | None |
| Cubic | Creates an animation that accelerates from zero or decelerates to zero using the formula f(t) = t^3 | None |
| Quart | Creates an animation that accelerates from zero or decelerates to zero using the formula f(t) = t^4 | None |
| Quint | Creates an animation that accelerates from zero or decelerates to zero using the formula f(t) = t^5 | None |
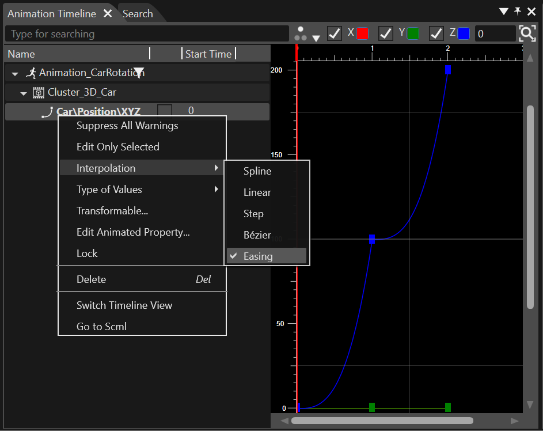
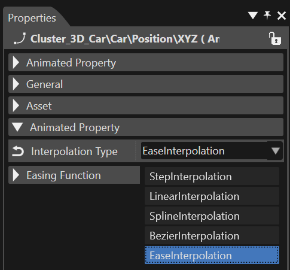
A visual graphic representation of an animatable property with Ease interpolation is accessible in the Curve Editor.
To select the Curve Editor double click on an animated property or right click on the animated property and select "Show Curve Editor" from the context menu.
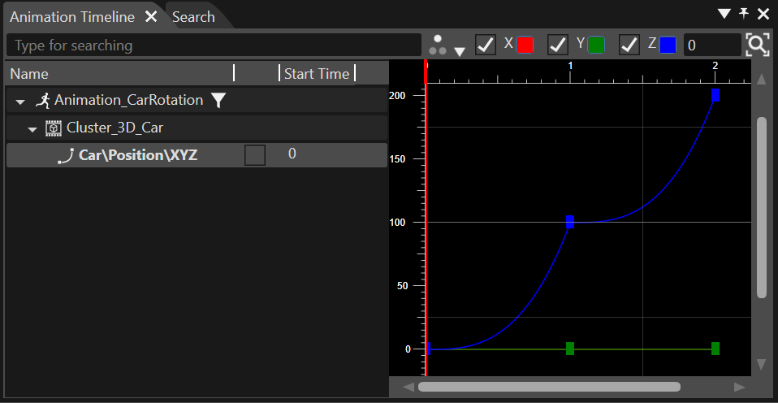
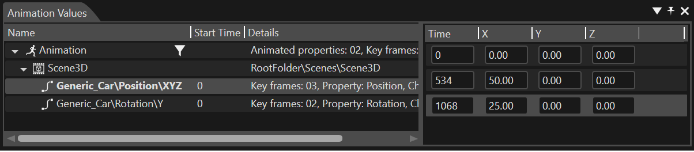
The timeslider can be moved by using "Move marker to selected keyframe" option from the context menu of any keyframe available in "Animation Timeline" or "Animation Values" panels.
##### Delete a Keyframe
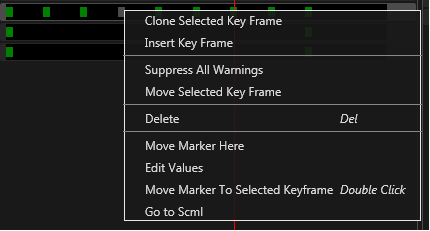
To delete a key frame, select and hit the "Delete Keyframe" context menu item.
---
#### Copy and Paste Keyframes from and to Excel
Selecting one or multiple key frames in the table and hitting "Ctrl+C" copies the sequence times and values of the key frames to the clipboard, for later pasting in Excel. Copying the key frames can also be done via the "Copy" context menu item.
Also a table with the same number of columns can be copied from Excel and pasted by hitting "Ctrl+V" to form the key frames of the animated property. Pasting the key frames can also be done via the "Paste" context menu item.
---
# Timeline Editor
#### Animation Timeline Editor
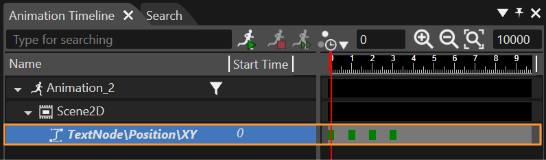
The "Animation Timeline" panel is used to graphically view and edit the properties' values and the key frames' sequence times of an animated property. The editing can only be done on the user defined animated properties. The template animated properties can only be viewed.
The left column of the "Animation Timeline" panel of the main view of the application contains the selected animation and its animated properties.
---
#### Timeline
In the Timeline section of Animation Timeline panel,
- user defined animated properties are depicted on a black background, and
- template defined animated properties are depicted on a gray background.
A key frame is represented by
- a green rectangle which is positioned depending on its sequence time.
- A selected frame is represented by a red rectangle.
Time is displayed in the header of the table in the form of a ruler.
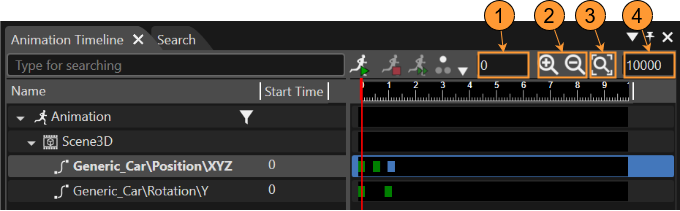
- The red bar represents graphically the current time of the animation
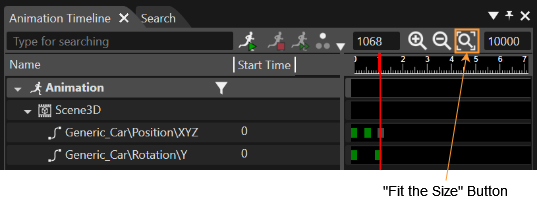
- First text box on the upper right of the panel represents the current time textually. Changing the value of this text box will move the red bar at the specified time, while animated properties will be updated according to the configured animation values for that point in time.
| 1
| Current Time of Animation |
| 2
| Buttons to Increase or Decrease the Time Scale |
| 3
| "Fit to Size" Button |
| 4
| Maximum Time |
- To **increase the scale** of the time ruler, press the "+" button on the upper right of the panel.
- To **decrease the scale** of the time ruler, press the "-" button on the upper right of the panel.
- To make the time ruler **fit to the size** of the panel, press the "magnifying glass" button on the upper right of the panel.
- The **maximum time** of the time ruler can be edited in the last text box on the upper right of the panel.
---
#### Edit Key Frame Values
There are following options to edit a key frame value:
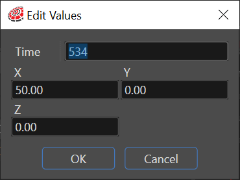
Double click on the red or green rectangle representing the key frame to open the "Edit Values" dialog:
On a selected key frame, use the gizmos available in the Scene Editor to modify the animated property graphically.
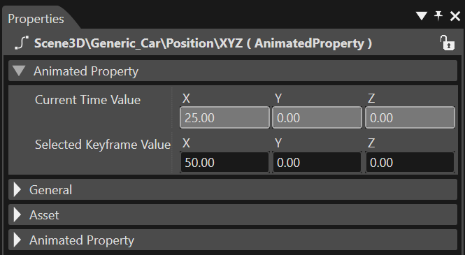
For a selected key frame, all animated properties are displayed in the "Properties" panel and animation values can be modified there:
Alternatively, switch to the Curve Editor by double-clicking on the animated property in the Animation Timeline panel to manipulate key frames by editing the animation value curve. Curve Editor can also be activated by using the context menu item "Show Curve Editor" on a selected animated property.
##### Add, Clone, Move, or Delete Key Frames
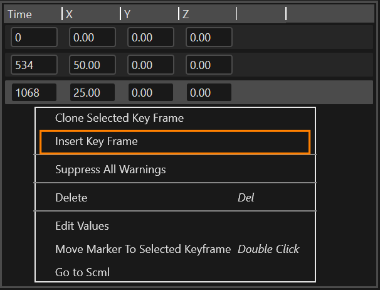
To insert, clone, or delete a key frame at the current time position, use the context menu of the selected key frame in the Timeline Editor:
Key frames can be moved by dragging them along the timeline. Alternatively, the context menu can be used. At the right click, the context menu "Move Selected Keyframe" will give the possibility to choose the desired time value. When double clicking a key frame in both "Animation Timeline" and "Animation Value", the marker will be instantly moved to this key. At the same time, the timeslider can be moved by using "Move marker to selected keyframe" option from the context menu of any keyframe available in "Animation Timeline" or "Animation Values" panels.
Refer to section [Animation Editing Modes](https://doc316en.candera.eu/books/animation-design/page/animation-editing-modes) for a descriptions of helpers available for modifying key frame sequences.
---
#### Change an Animated Transformable
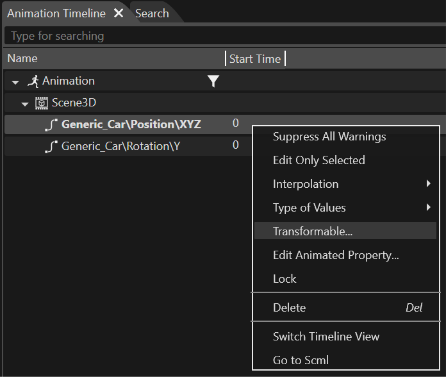
If it is required to apply the configured animated property to another transformable, use the context menu "Transformable..." on the selected animated property. A "Choose Item" dialog will appear which allows to select another transformable from the scene tree.
##### Delete an Animated Property
To delete an animated property of the currently selected animation, select it in the left tree and hit the "Delete" menu item of its context menu.
##### Rename or Delete an Animation
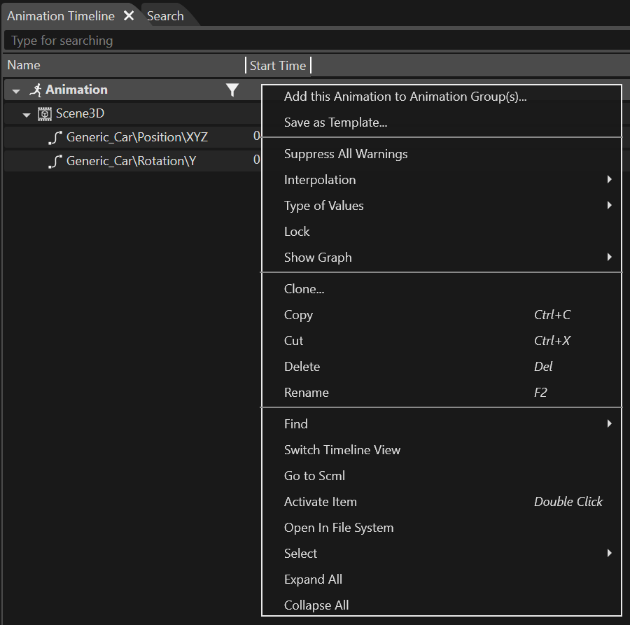
Rename or delete an animation in Timeline Editor by using the context menu of the selected animation:
##### Filter the Visibility of Animated Properties
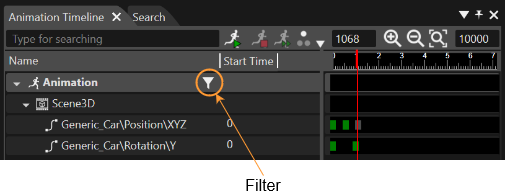
The user has the possibility to select certain animated properties and enter a special editing mode in which only those animated properties are visible in the Animation Timeline, Animation Values and Curve Editor panels.
By pressing the button near the animation name in the Animation Timeline panel, only the animated properties that were previously selected are visible.
---
# Curve Editor
#### Curve Editor
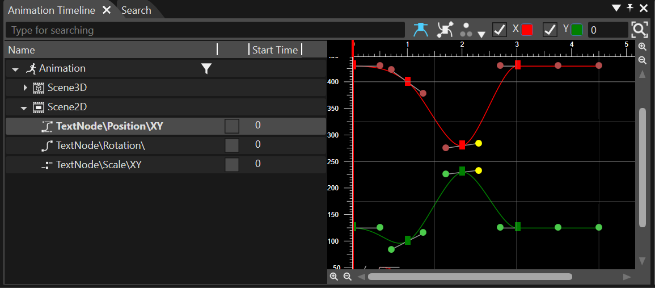
The Curve Editor is a special editing mode in the "Animation Timeline" panel, which allows graphical editing of the animation values on the interpolation curve.
- Double click on an animated property in Animation Timeline panel to open the Curve Editor of the animated property. It is possible to Use ctrl-scroll to zoom-in/out in the Curve Editor.
- Double clicking again switches back to the default editing view in the Timeline Editor.
These two editing modes can also be selected from the context menu of the animated property in Animation Timeline panel.
---
#### Modify Key Frame Values
In "Curve Editor" the vertical ax represents the range of values for the property and the horizontal one the Timeline. The key frame values can be modified by moving them with the mouse.
Depending on the animated property each channel is represented (highlighted with different colors) and can be modified.
On the top right side of the panel following options are available:
- Select the channel which shall be visible in the curve by enabling or disabling the checkbox for the channel.
- Select the color which shall be used to highlight a given channel in the Curve Editor.
- Set the current time by editing the text box in the upper right corner of the panel.
Almost on the top right side of the panel the "Fit the size" button allows the user to set the time ruler to fit the size of the panel.
Refer to Animation editing modes for a description of helpers available for modifying key frame sequences.
---
#### Bézier Animations in Curve Editor
Note that for Bézier Animations, more control points are available to manipulate key frame values.
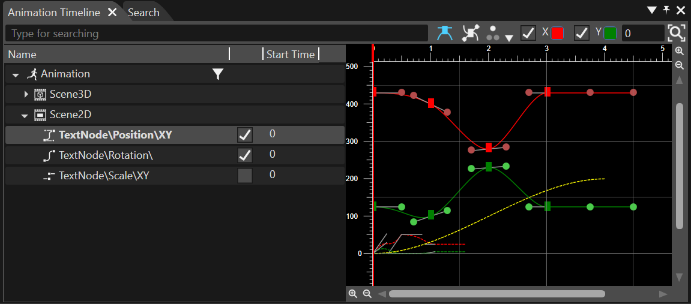
When in curve mode you can see a checkbox next to each animated property in the Animation Timeline panel. This checkbox can be used to configure the visibility of the animation curves. The curve of the currently selected animated property is displayed as continuous line, the remaining curves are displayed as dotted lines.
- In the image above, the first animated Property (Position\\XY) is selected - therefore, the red and green lines are displayed continuously.
- The second animated Property (Rotation) is configured to be visible but is not selected - therefore it is displayed as dotted line (in yellow).
- The last animated Property (Scale) is neither configured to be visible nor is it selected - therefore it is not displayed at all.
##### Enable/Disable control point pairing
Two control points (left and right, on the timeline) can be "paired" when:
- only a keyframe exists between them
- the predecessor of the left control point is also a control point
- the control point following the right control point is also a control point
When Pairing will be disabled, SceneComposer will behave like it does usual - Controls points will be adjusted freely, independently one of another. When Pairing is enabled the user drags the selected control point, the paired control point will automatically be adjusted so that the control points and the keyframe are colinear (are on the same line) and the keyframe lines in the middle of the segment determined by the two control points.
##### Show/Hide tangents
The Bézier tangents can be shown or hidden. This feature is applied to Bézier interpolation and is available through a toggle button "Show tangents".
The button will become available when at least one animated property within the selected ones has Bézier interpolation. The tangents will be drawn by connecting each keyframe to the nearest control point(s) (one control point - on one side - or two control points - on both sides). A control point surrounded by two keyframes is excluded from this rule. Also, all control points before the first keyframe and the control points after the last keyframe are excluded from this rule.
---
# Animation Editing Modes
Both in Animation Timeline Editor and in Curve Editor, following animation editing modes are available:
- Move key frame without restriction
- Move only between neighbors
- Scale earlier, move later key frames
- Scale key frames
- Shift all key frames
- Move later key frames of all animated properties
If multiple animated properties are selected (by using the CTRL + left click), the related operation will affect all selected animated properties.
For "Move key frame without restrictions" and "Move only between neighbors", the operation can only be applied to a single selected key frame.
---
#### Move key frame without restriction
The key frame is moved without affecting in any way its neighbors.
***Example:*** Consider following key frame sequence with an animation duration of 200 msec.
- KF1: 70,
- KF2: 120,
- KF3: 130
Moving KF2 to 90 ms means -25 % for KF2 without affecting any of its neighbors.
---
#### Move only between neighbors
The selected key frame can only and exclusively be moved between neighbors.
***Example:*** Consider following key frame sequence with an animation duration of 2000 msec.
- KF1: 500,
- KF2: 1000,
- KF3: 1500
Moving KF2 means that it can be moved just between 500 and 1500.
---
#### Scale earlier, move later key frames
The earlier key frames are scaled, while the later are shifted.
***Example:*** Consider following key frame sequence with an animation duration of 300 msec.
- KF1: 50,
- KF2: 100,
- KF3: 150,
- KF4: 200
Moving KF2 to 90 ms means -10 % for earlier key frame and -5 % for later key frames.
- Applying -10 % to KF1: 45,
- Applying -5 % to KF3: 142,5, to KF4: 190.
---
#### Scale key frames
All key frames are moved in such a way as to keep the relative distance between key frames the same.
***Example:*** Consider following key frame sequence with an animation duration of 300 msec.
- KF1: 200,
- KF2: 700,
- KF3: 1700
Moving the key frames means to keep the relative distance between key frames the same.
- Applying 612 ms to KF1: 812,
- Applying 867 ms to KF2: 1567,
- Applying 1400 ms to KF3: 3100.
---
#### Shift all key frames
All the key frames are moved by the same absolute amount as the key frame that is being edited.
***Example:*** Consider following key frame sequence with an animation duration of 300 msec.
- KF1: 50,
- KF2: 100,
- KF3: 150,
- KF4: 200
Moving KF4 to 700 ms means to move +500 ms all the key frames.
- Applying +500 ms to KF1: 550,
- Applying +500 ms to KF2: 600,
- Applying +500 ms to KF3: 650
---
#### Move later key frames of all animated properties
Those key frames placed after a selected one are moved by the same absolute amount.
***Example:*** Consider following key frame sequence with an animation duration of 300 msec.
- KF1: 50,
- KF2: 100,
- KF3: 150,
- KF4: 200
Moving KF2 to 150 ms means to move +50 ms for later key frames.
- Applying +50 ms to KF3: 200,
- Applying +50 ms to KF4: 250
---
# Play Animation
#### Start/Stop Animation
##### Start Animation
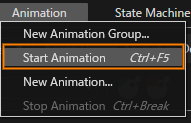
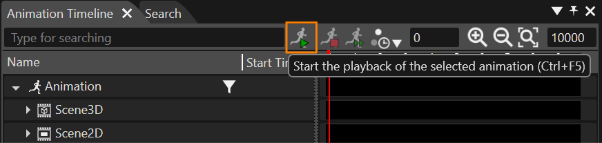
You can start an animation in one of the following three ways,
- Select \[ Animation \] > \[ Start Animation \] from the Menu Bar.
- Click the \[ Start the playback of the selected animation \] icon in the Scene Editor (you can also pause the animation by clicking this icon during playback).
- Click the \[ Start the playback of the selected animation \] icon in the Animation Timeline panel (you can also pause the animation by clicking this icon during playback).
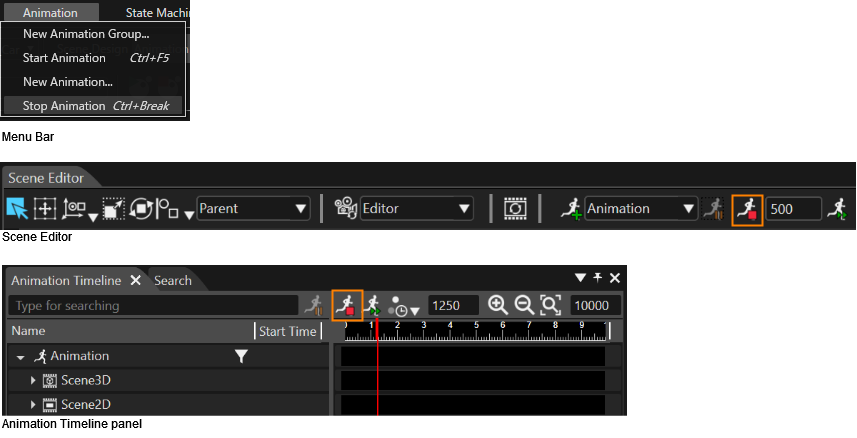
##### Stop Animation
As with the start the animation operation, the animation can be stopped in three ways that are Menu Bar/Scene Editor/Animation Timeline panel.
---
#### Play from Animation List
##### Play Direction
Play directions "Forward" and "Reverse" are available in the Properties Panel of the animation.
##### Speed Factor
Configure the Speed Factor in the Properties panel of the animation.
---
#### Animation Fast Finish
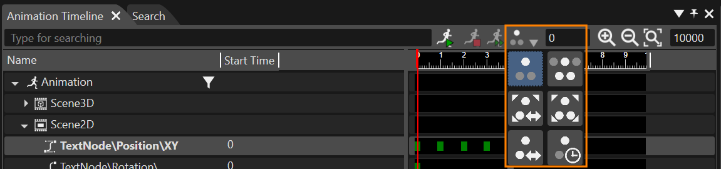
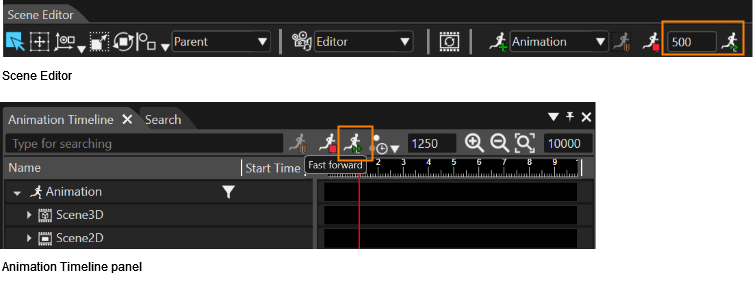
To play the animation faster, you can press the "Fast Forward" icon on the Scene Editor or Animation Timeline panel. The field near "Fast Forward" button allows the user to set the the value of forwarding (in milliseconds).
---
# Animation Groups
#### Create an Animation Group
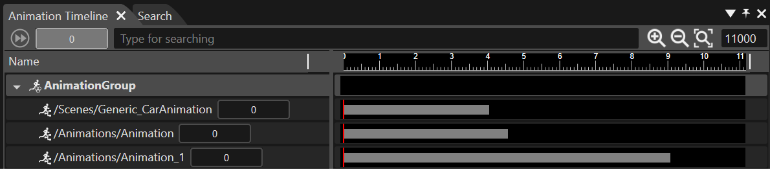
Create a more complex animated sequence in a scene with Animation Groups. Multiple animations are grouped and can run simultaneously.
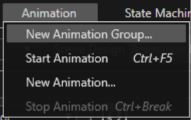
Create a new animation group using the menu item "New Animation Group" from the Animation menu.
Created animation groups are displayed in the Solution Explorer panel like that:
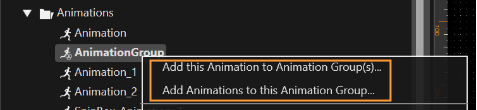
An animation group can be edited in the Animation Design view, with the Animation Timeline Editor. Drag animations from the Solution Explorer and drop them to the AnimationGroup in the Animation Timeline Editor. Another possibility is to use the "Add this Animation to Animation Group(s)..." option which is available in the context menu of every existing animation.
It is possible to select and drag simultaneously many animations into an animation group. When doing this operation, the user will be asked through the "Drop Animations" dialog if an animation chain has to be created.
You can also add both animations and animation groups to a specific animation group.
The main animation group is considered as the "root" and the group included inside as the "node".
It is not possible to include an animation group into another group, if it contains same animations as the root group.
---
#### Control Animations
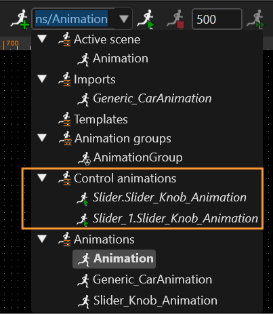
Control animations are displayed in "Control animations" category in the Animation combo box (in the toolbar).
If the Animation combo-box is not visible, it can be activated through the menu "View > Toolbar > Animation".
In the Solution Explorer there are two available commands to add items to an animation group. Right-click on an animation group offers the following possibilities in the context menu. The name of these command are self-explanatory:
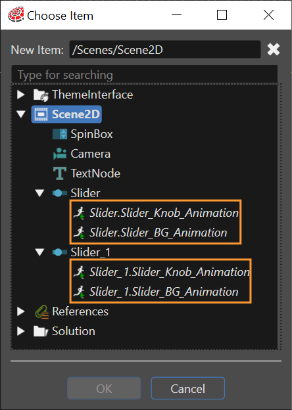
When adding animations to the selected Animation Group, "Choose Item" dialog also displays control animations, for each control. It may display also nested control animations that are made available.
The following types of animations can be included in an Animation Group:
- animations on nodes included in solution scenes;
- animations from folders;
- animations of controls which belong to at least one scene (if the control contains other controls, then the animations of the child control are also available).
It does not allow selection of : FBX animations, animations already included, groups containing already included animations, animations of controls which do not belong to any scene.
The functionality of adding animations to an animation group allows multiple selection of: animations & animation groups
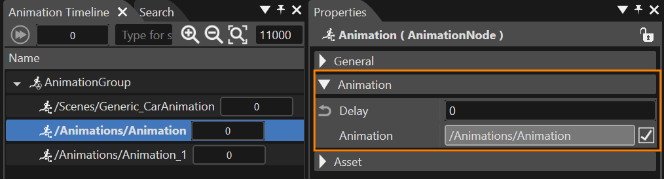
After a control animation is added, it behaves like any animation node. It inherits the "Delay" property and the "StartType" property if applicable.
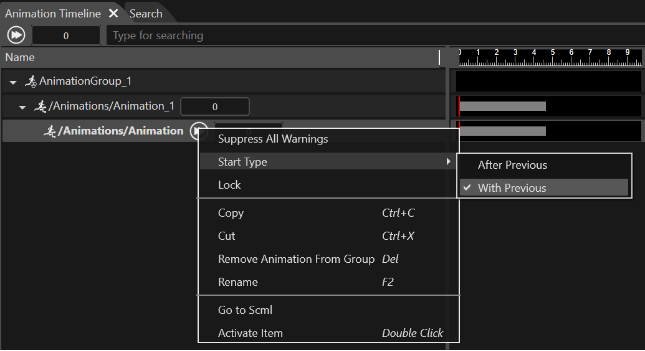
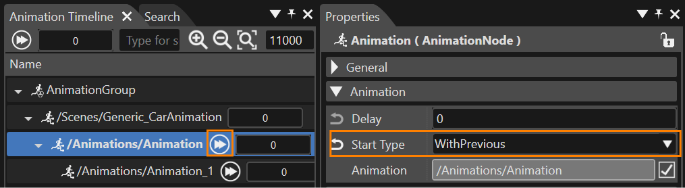
The StartType property is only available if the animation has a predecessor, that means, if the animation is a child of another animation.
- *Delay*: If a component has a delay defined and its predecessor is started/finished, it will not be automatically started, but prepared for start.
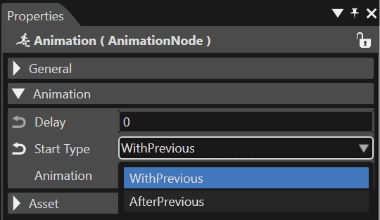
- *StartType*: A component with a predecessor can be configured to start with its predecessor or after it is finished. This property is only available if a predecessor (parent animation) is defined (this means, if the animation is a child animation).
- *Animation*: displays the name of the node animation (read-only property).
- *WithPrevious*: The animation will start simultaneously with the predecessing animation.
- *AfterPrevious*: The animation will start after the predecessing animation is done.
If the Animation combo-box is not visible, it can be activated through the menu "View > Toolbar > Animation".
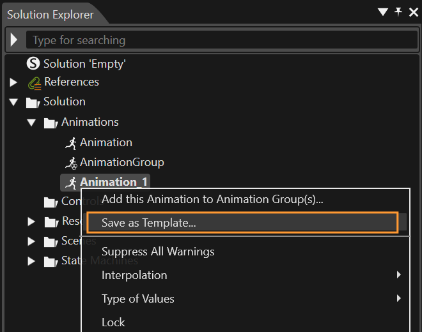
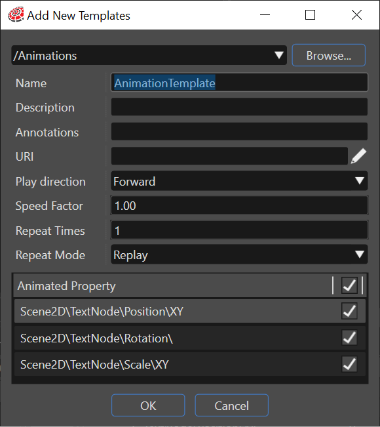
By using a template, instead of creating a new animation, the user has the possibility to use an existing template animation if it fits the developing project.
---
#### Edit a Template
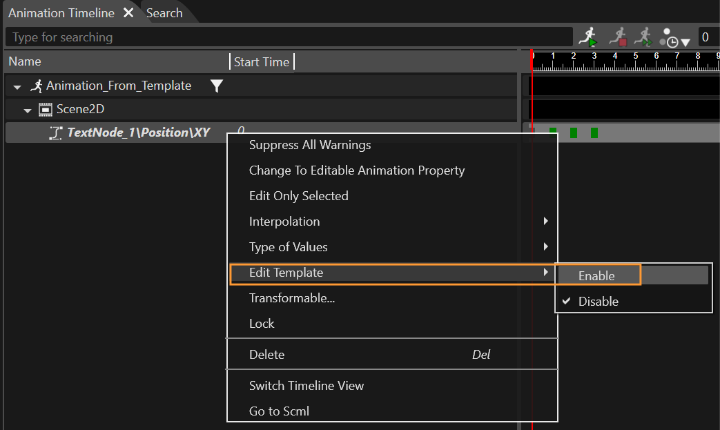
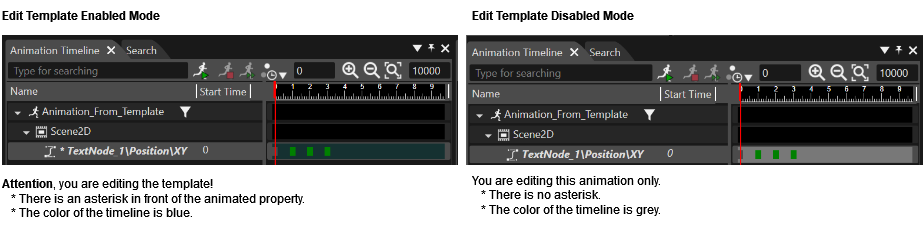
Editing an animation template is possible using a special editing mode from Animation Timeline panel. After a new animation has been created from a template, the user can select an animated property and choose from the context menu the option "Edit template" > "Enable".
While being in this special editing mode, all the modifications performed by the user will affect the current animation, the original animation template and all the animations created based on that template.
After the desired modifications have been performed, the user can exit from the special editing mode by choosing the "Edit Template" > "Disable" context menu option.
---
##### Run a Template Animation
Because animation templates are not linked to any scene it is not possible to run them. So when a template animation is selected, the \[ Start the playback of the animation \] button will be disabled.
---
# Create Animation From Template
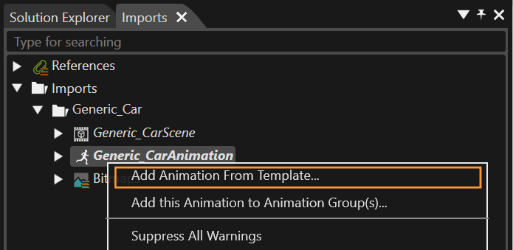
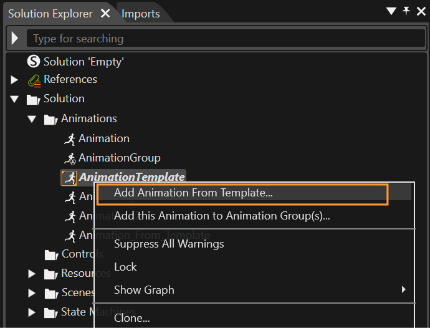
To create a new animation from template the "Add Animation From Template" context menu option should be used. This is possible on following types of animations: Imported animations and Template Animations.
---
#### Imported Animations
If an object which has its own animation gets imported, that animation will be available in two different panels: "Imports" and "Solution Explorer". When righting click on the imported animation in any of the two mentioned panels, the "Add Animation from Template" context menu option will become available.
By using it, an "Add New Animation" dialog will pop up in order to give the user all the available options regarding the creation of a new animation. (See the continuation below, under the "Template Animations" section)
---
#### Template Animations
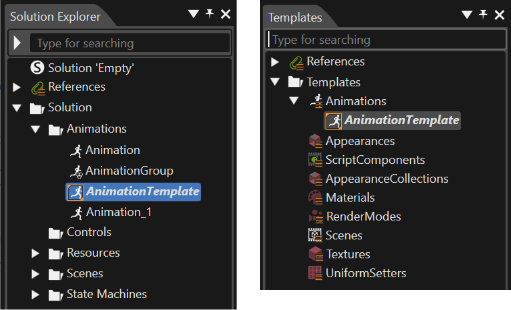
Template animations (animations saved as a template) are available in both the "Templates" or "Solution Explorer" panels. A specific context menu option named "Add Animation From Template" should be used to create a new animation.
##### Add New Animation Dialog
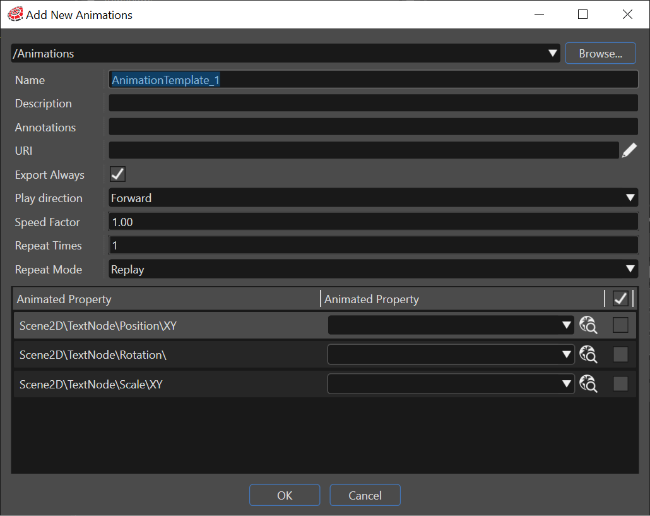
So, if the user would like to create a new animation from an Imported animation or a Template Animation, it will have this possibility via the "Add New Animation" dialog. The mentioned dialog lists all animated properties part of the template animation together with the path to the transformable, on which the property animation will be applied:
The check box beside each row means that the property will be animated in the newly created animation. If the second column is empty, the item corresponding to the path from the first column was not found in the current scene.
Choose the destination folder of the new animation, fill its name and enable the property "Export Always" if you would rather prefer the animation to be part of the asset.
---
# Partial Animation
You can use the Partial Animation feature by Configure And Play Animation and/or Jump To Animation Keyframe behaviors. For this porpose, you need to set up two properties, SequenceStartTime (the start point of the animation) and SequenceDurationTime (the duration of the animation). For more information on SequenceStartTime and SequenceDurationTime, refer to [Configure and Play Animation](https://doc316en.candera.eu/link/582#bkmrk-configure-and-play-a-1) and [Jump to Animation Keyframe](https://doc316en.candera.eu/link/647#bkmrk-jump-to-anmation-key).
---